Model CD5001/CD5001OSE User Guide CD Player CLASS 1 LASER PRODUCT LUOKAN 1 LASERLAITE KLASS 1 LASERAPPARAT TEXT Downloaded from www.Manualslib.
ENGLISH WARRANTY For warranty information, contact your local Marantz distributor. RETAIN YOUR PURCHASE RECEIPT Your purchase receipt is your permanent record of a valuable purchase. It should be kept in a safe place to be referred to as necessary for insurance purposes or when corresponding with Marantz. IMPORTANT When seeking warranty service, it is the responsibility of the consumer to establish proof and date of purchase. Your purchase receipt or invoice is adequate for such proof. FOR U.K.
CE MARKING English The CD5001/CD5001OSE is in conformity with the EMC directive and low-voltage directive. Français Le CD5001/CD5001OSE est conforme à la directive EMC et à la directive sur les basses tensions. Deutsch Das Modell CD5001/CD5001OSE entspricht den EMC-Richtlinien und den Richtlinien für Niederspannungsgeräte. Nederlands De CD5001/CD5001OSE voldoet aan de EMC eisen en de vereisten voor laag-voltage.
Español ADVERTENCIAS - No exponga el equipo a la lluvia ni a la humedad. - No extraiga la tapa del equipo. - No introduzca nada en el interior del equipo a través de los orificios de ventilación. - No maneje el cable de la alimentación con las manos mojadas. - No cubra la ventilación con objetos como manteles, periódicos, cortinas, etc. - No deben colocarse sobre el equipo elementos con fuego, por ejemplo velas encendidas.
INTRODUCTION This section must be read before any connection is made to the mains supply. Thank you for selecting the Marantz CD5001 CD Player for your A / V system. This Compact Disc Player incorporates a number of features designed to enhance the listening of your favorite audio sources. Please read these operating instructions carefully. We recommend that you read the entire user guide before you attempt to connect or operate the player.
CONTENTS ENGLISH 1. BEFORE USING.................................................................................................... 3 2. ACCESSORIES ..................................................................................................... 5 3. FEATURES ............................................................................................................ 6 4. CONNECTIONS .................................................................................................... 7 5.
Notes about the discs * Handle the discs carefully so as not to scratch their surfaces. * Keep the surfaces of the discs clean at all times. When cleaning the surfaces of discs, always be sure to use the special cleaner and wipe the surfaces in the directions shown in the figure below. Inappropriate places for installation To keep your player in perfect working order for the longest possible time, avoid installing the player in the following locations.
BEFORE USING ENGLISH Do not place objects on top • Refrain from placing any objects on top of the player. Cautions on handling mains cord • Do not touch the mains cord with wet hands. • When disconnecting the mains cord, always make sure that you take hold of the plug. Yanking out or bending the cord can damage it and/or cause electric shocks or a fire. • Get into the habit of disconnecting the power plug before leaving home.
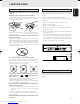
Checking the accessories • Operational range As shown in the figure below, the player can be operated by the remote control unit in a range which of about 5 meters from the player’s remote sensor and over an angle up to 30 degrees to the left and 30 degrees to the right of the position directly in front. After opening the cover of the packing box, check that the following accessories are included.
3. FEATURES ENGLISH • CS4392 high-performance D/A converter made by Cirrus Logic used The CS4392 D/A converter whose CD playback circuitry has the same design as the CS4396 D/A converter, which was also made by Cirrus Logic and which has proved to be a valuable asset for the Marantz CD player, has been adopted.
This CD player is connected to an amplifier, CD recorder and other components for use. To ensure that the components are connected properly, refer to the instruction manuals that come with the components to be connected. Before connecting the components, be absolutely sure to turn off their power. • Connecting the optical output connector Use an optical digital connecting cable available on the market. Insert the plug firmly in until it clicks into place.
5. NAMES AND FUNCTIONS ENGLISH Front panel b z x n m DISC TTL RNDM TRK PROG A– B TEXT 1 2 3 4 5 6 7 8 9 10 11 12 13 14 15 16 17 18 19 20 , z POWER ON/STANDBY switch and Standby indicator This is used to turn the player’s power ON and STANDBY. When it is pressed, the display lights and the power is turned on; when it is pressed again, the power is turned off and STANDBY indicator lights. x Disc tray RPT 1 PITCH EDIT PEAK . TTL v c ⁄1 ⁄2 ⁄3 TIME ⁄0 ⁄4 ⁄5 ⁄6 ⁄7 .
NAMES AND FUNCTIONS ENGLISH Display c d e f g h i j kl m n o p q DISC TTL RNDM TRK PROG A– B EDIT TEXT 1 2 3 4 5 6 7 8 9 10 11 12 13 14 15 16 17 18 19 20 a b a Main display This displays the time information and text information of the disc played, the setting menus, etc. RPT 1 PITCH PEAK TTL TIME r k RPT (repeat) indicator This lights during repeat play. l 1 (1-track repeat) indicator b TEXT indicator This lights when a disc supporting CD-TEXT has been loaded.
NAMES AND FUNCTIONS ENGLISH i 1, ¡ (search) buttons Remote control unit 1 : This button is used to search backward when it is held down during play. ¡ : This button is used to search forward when it is held down during play. DISPLAY POWER q w !2 1 2 3 4 5 6 7 8 PROGRAM r t y These are used to adjust the play speed (pitch) with a ± 12 step.
NAMES AND FUNCTIONS F ENGLISH Rear panel A B C A ANALOG OUT (analog output) connectors The music signals during play are output from these connectors. B DIGITAL OUT COAX. (digital coaxial output) connector The music signals during play are output digitally from this coaxial output connector. * Digital signals are not output during pitch control play. C DIGITAL OUT OPT. (digital optical output) connector The music signals during play are output digitally from this optical output connector.
6. BASIC OPERATIONS ENGLISH Playing CDs • Stopping play DISC TTL RNDM TRK PROG A– B TEXT 1 2 3 4 5 6 7 8 9 10 11 12 13 14 15 16 17 18 19 20 RPT 1 PITCH EDIT PEAK TTL TIME 2 3, 4 5 DISPLAY POWER 1 2 3 4 5 6 7 8 PROGRAM 9 CANCEL 0 QUICK REPLAY RANDOM 5 Press the 7 button on the player or remote control unit during play. • Pausing play PITCH RESET AMS A-B REPEAT TEXT SCROLL/ RECALL TIME RANDOM QUICK REPLAY REMOTE CONTROLLER RC5400CD 1.
Playing a specific track • Specifying the number of a track to be played (direct search) Select the number of the track to be played directly by pressing the numeric buttons (0 to 9) on the remote control unit. To select track number 10 or above, use the numeric buttons to select the higher digit first and then select the lower digit. Once the number of the track is selected, play will start automatically.
BASIC OPERATIONS ENGLISH Playing a specific part of a specific track • Searching a specific part of a track (search) While listening to a track being played, it is possible to search a specific part of that track by a forward or backward search.
Repeat play (playing the same tracks repeatedly) • Playing all tracks repeatedly (all-track repeat) • Playing a specific part repeatedly (A-B repeat) This function repeatedly plays all the tracks. Repeat play is possible even during random play or program play. This function repeatedly plays a specific part of a track that you want to hear. Press the REPEAT button on the remote control unit. 1. During play, press the A-B button on the remote control unit at the start point of the part to be repeated.
ADVANCED OPERATIONS ENGLISH Random play (playing tracks in a random sequence) This function rearranges the tracks into a random sequence and it then plays all the tracks in this random sequence. If it is used together with repeat play, the same tracks can be repeatedly played but in a different sequence every time. AMS play (searching for a specific track) This function comes in handy when searching for a specific track that you want to hear.
Program play (playing tracks in the preferred sequence) The order in which the CD tracks are played can be rearranged into the sequence desired. Up to 30 tracks can be programmed. 1 2 3 4 5 6 7 8 PROGRAM ENGLISH ADVANCED OPERATIONS 9 CANCEL 0 • Program play in the time display mode In the case of a CD-TEXT disc, first press the TIME button on the remote control unit to set the main display to the time display mode.
ADVANCED OPERATIONS ENGLISH • Program play in the text display mode The title of each selected track is scrolled, and once it has been scrolled, it is programmed automatically. If you do not want to program the track, select another track before the scrolling is completed. In the case of a CD-TEXT disc, tracks can be selected by title for program play. If the main display is set to the time display mode, press the TEXT button on the remote control unit to establish the text display mode.
Delete program play (play with undesired tracks skipped) This function makes it possible to skip those tracks that you do not want to hear during CD play. Up to 30 tracks can be deleted from the program. 2. Press the numeric buttons on the remote control unit that you do not want to hear (the track can also be selected using the 4 and ¢ buttons on the remote control unit or 4/1 and ¡/¢ buttons on the player).
ADVANCED OPERATIONS ENGLISH • Delete program play in the text display mode In the case of a CD-TEXT disc, the tracks that are not desired can be selected by title for delete program play. 2. If the main display is set to the time display mode, press the TEXT button on the remote control unit to establish the text display mode.
• Checking the program or delete program contents AMS A-B REPEAT TEXT SCROLL/ RECALL TIME During programming operation or program play, press the SCROLL/RECALL button on the remote control unit. With program play, the programmed tracks are displayed one after the other in sequence on the main display. With delete program play, the deleted tracks are displayed one after the other in sequence on the main display.
ADVANCED OPERATIONS ENGLISH This example shows that, when the tape recording time is 90 minutes, track 15 is the last track on tape side A and track 28 the last track on tape side B. In other words, by using a 90-minute tape, all of the 28 disc tracks can be accommodated by assigning tracks 1 to 15 on tape side A and tracks 16 to 28 on tape side B.
• Program edit 3. This procedure allows you to record tracks in any desired order while fitting the tracks into a specified tape length. 1. Program tracks according to the programming procedure in section “PROGRAM PLAY” (page 17). 2. The rest of the program edit procedure is the same as step 1 to 3 in the simple edit procedure. After A side program complete, player turns to the pause state at the beginning of B side program.
ADVANCED OPERATIONS ENGLISH - Synchro recording with Marantz one-way cassette deck, or Marantz auto reverse cassette deck set to one side ( ) mode. - Recording with Marantz cassette deck without remote cable connection, and recording with the cassette deck other than Marantz. 1. After setting up Edit program, setup the cassette deck to rec pause state. 1. After setting up Edit program, start recording of cassette deck first. 2. Press 3 or 8 buttons of the player to start A side program.
ADVANCED OPERATIONS ENGLISH Pitch control (changing the play speed) The play speed (pitch) can be changed across a ± 12 step. • Returning play to the normal speed ∗ Press the PITCH RESET button on the remote control unit. Digital signals are not output during pitch control. • Increasing the play speed Press the PITCH+ button on the remote control unit. PITCH RESET PITCH RESET The “PITCH” indicator on the display lights.
8. OTHER FUNCTIONS ENGLISH CD-TEXT “CD-TEXT” refers to a new kind of music disc which differs from a conventional music disc in that album titles, track titles and other text information are recorded on it. CDs with the following logos support this function.
9. SPECIFICATIONS AND DIMENSIONS ENGLISH Specifications Audio characteristics Channels .............................................................. 2 channels Frequency response .................................... 20 Hz to 20 kHz Dynamic range ........................................................... 100 dB Signal-to-noise ratio ................................................... 110 dB Channel separation ....................................... 100 dB (1 kHz) Harmonic distortion ......................
10. TROUBLESHOOTING ENGLISH If you think that something is wrong with your player, first check the points listed below. Incorrect operations can sometimes be taken for trouble and malfunctions. If the trouble persists even after the following points have been checked, consult your dealer or nearest Marantz sales office or service center. Disc fails to turn.
www.marantz.com You can find your nearest authorized distributor or dealer on our website. U.S.A. Marantz America, Inc. 1100 Maplewood Drive, Itasca, IL 60143, U.S.A. EUROPE Marantz Europe B.V. P.O. Box 8744, 5605 LS Eindhoven, The Netherlands is a registered trademark. Printed in China Downloaded from www.Manualslib.