R Model VP-12S3 / VP-12S3L User Guide DLPTM Projector
CAUTION RISK OF ELECTRIC SHOCK DO NOT OPEN CAUTION: TO REDUCE THE RISK OF ELECTRIC SHOCK, DO NOT REMOVE COVER (OR BACK) NO USER-SERVICEABLE PARTS INSIDE REFER SERVICING TO QUALIFIED SERVICE PERSONNEL The lightning flash with arrowhead symbol within an equilateral triangle is intended to alert the user to the presence of uninsulated “dangerous voltage” within the product’s enclosure that may be of sufficient magnitude to constitute a risk of electric shock to persons.
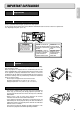
IMPORTANT SAFETY INSTRUCTIONS READ BEFORE OPERATING EQUIPMENT This product was designed and manufactured to meet strict quality and safety standards. There are, however, some installation and operation precautions which you should be particularly aware of. 1. Read these instructions - All the safety and operating instructions should be read before the product is operated. 2. Keep these instructions - The safety and operating instructions should be kept for future reference. 3.
ENGLISH Lamp Handing Precautions DANGER This SHP uses a high voltage glass mercury vapor lamp. The lamp can break or fail to light if handled wrongly during replacement or because of the projector’s surrounding temperature. Lamp life also varies according to the lamp with some even breaking or failing to light as soon as they are used the first time.
ESPAÑOL PORTUGUÊS Precauciones para la manipulación de la lámpara Precauções para o manuseio da lâmpada PELIGRO CUIDADO Esta lámpara SHP de vidrio y de alto voltaje contiene vapor de mercurio. La lámpara puede romperse o no encenderse si es manipulada incorrectamente durante el recambio o debido a la temperatura ambiente del proyector. La vida útil también varía según las lámparas, algunas de las cuales se rompen o no se encienden al cabo del primer uso.
TABLE OF CONTENTS ENGLISH IMPORTANT SAFEGUARDS ....................................................................................................1 Caution:Concerning the Lamp Replacement ........................................................................................1 Caution:Concerning the Lamp Unit .......................................................................................................1 Caution:Concerning the Setup of the Projector ................................................
Caution ENGLISH IMPORTANT SAFEGUARDS Concerning the Lamp Replacement There is potential glass particle hazard if the lamp ruptures. Caution Concerning the Lamp Unit There is a potential hazard of glass particle if the lamp ruptures. In case of lamp rupture,contact your nearest Marantz Authorized Dealer or Service Center for a replacement. See “Replacing Lamp Unit”. (☞ P.34) WARNING THIS COVER IS PROVIDED WITH INTERLOCK TO REDUCE THE RISK OF EXCESSIVE ULTRAVIOLET RADIATION.
FEATURES ENGLISH - High Picture Quality Technology ❖ DLPTM technology to deliver the highest contrast ratio (3800:1) in the industry • Incorporates the latest DMDTM element -- HD2+ (1280 x 720 pixel, 16:9 wide panel). Using an optimized system for movie viewing with specially designed image circuits and optical parts, the VP-12S3/VP-12S3L bring high color reproduction with the pitch black of movie films that reproduces images in rich tones and crisp black.
Note: Lamp SHP lamp is one of the most advanced technologies for consumer products. The lamp made by high precision technology, however some lamps might be failing before it reaches its life. And projector’s brightness is getting darker along with accumulated lamp usage hours. We are trying our best to control the quality in order to reduce lamp failures. It is almost impossible to have zero failure, even using the most advanced technology.
PROJECTOR LAYOUT AND FUNCTIONAL OVERVIEW ENGLISH Front and Top View 3 9 7 6 5 10 4 11 12 8 2 1 Projection Lens 13 q Focus ring (☞ P.10) Adjust the picture focus. w Zoom ring (☞ P.10) Adjust the size of the projected image. e Lens Shift knob (☞ P.10) Manually adjust the position of the image vertically. r POWER button (☞ P.10) Press to turn the projector ON or STANDBY mode. t MENU button (☞ P.23) Display the on-screen menu. y ENTER button Press to enter the selected menu item.
Rear and Terminals View ENGLISH 13 IR sensor Terminals 1 2 3 4 5 6 13 Lamp cover Lamp cover securing screw 14 11 !4 AC IN (☞ P.8) Connect the supplied AC power code. ❖ Terminals 10 9 8 7 , TRIG.2(TRIGGER 2) Select ON or OFF at each aspect mode, such as Full, Normal, Zoom, and Through to control screen aspect ratio with powered up/down dual aspect ratio screen. Connect the analog RGB output from an IBM VGA or compatible equipment. Notes: • Do not use TRIG.1 and TRIG.
k VIDEO button (☞ P.18) Remote Controller Select the VIDEO IN signal. ENGLISH l RGB button (☞ P.18) Select the RGB IN signal. a STANDBY POWER ON PATTERN PATT. s MENU V-MUTE ¡2 ¡3 ¡4 d ¡0 AUX button (☞ P.18) Select the DVI-D IN signal. ¡1 LIGHT button Lights up backlit buttons (POWER ON, STANDBY, MENU, VMUTE, INPUT, ASPECT, PATTERN) for about 7 sec. ¡2 POWER ON button (☞ P.10) ENTER Turn the projector on. ¡3 PATT. (Pattern) button (☞ P.11) Projects a focus pattern on the screen.
Selects the user mode. The user mode is for enjoying images at a user-selected gamma curve. Every time the button is pressed, the selection rotates in the order of User A1 ➔ User A2 ➔ User A3 ➔ User B1 ➔ User B2 ➔ User B3 ➔ User C1 ➔ User C2 ➔ User C3. For more information on how to select gamma curve ➔ (☞ P.32) Preparing the Remote Controller 1. Take the cover off the battery case on the remote control backside. ENGLISH ™4 USER button (☞ P.32) Battery case cover ™5 DYNA. button (☞ P.
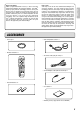
CONNECTION ENGLISH ❖ When making connections be sure to: • Turn off all equipment before making any connections. • Use the proper cables for each connection. • Securely insert the plug into the port to connect cables. Loose cables can lead to trouble and damage. ❖ When pulling out a cable: • Be sure to grab the plug, not the cable itself. Connection with AC Power Supply Connect the supplied AC power cord into the AC IN socket of the projector.
Connection with a HD-Video, Satellite, Cable Tuner or PC ENGLISH You can connect this projector to HD-Video /PC using RGB IN port, or Satellite /Cable Tuner /PC using DVI-D IN port. 1. Connect one end of the RGB cable to the RGB IN port, or one end of the DVI-D cable to the DVI-D IN port on the projector. 2. Connect the other end to the corresponding port on a HD-Video, Satellite, Cable Tuner or personal computer.
INITIAL SETTING ENGLISH Turning on the Power 1. Connect the supplied AC power cord. (☞ P.8) 2. Press the POWER ON button on the remote controller or the POWER button on the projector. The POWER ON indicator lights up. STANDBY POWER ON PATTERN PATT. MENU V-MUTE ENTER Zooming and Focusing Project an image on the screen roughly at first. 1. Turn the Zoom ring and adjust to the desired size within the zoom range. 2. Turn the Focus ring until the image on the screen becomes clear. 2. 1.
❖ Turn the Lens Shift knob to counterclockwise : The image goes down. ENGLISH Counterclockwise Down Adjusting the Height You can position the projected image by changing the height of the projector’s adjusters. 1. Move the adjuster lever to the left or right to enable adjuster changing. Carefully lift the projector. 2. Once having positioned the projector, return the adjuster lever as before to lock in place. Check the adjusters are securely locked before releasing your hands from the projector. 3.
2. Turn the Focus ring to make an adjustment. Adjust the focus for the sharpest image possible to obtain, using focus pattern. ENGLISH See “Zooming and Focusing”. (☞ P.10) 3. Press the PATTERN button again to hide the focus pattern. This completes fine focusing. Keystone Correction When the projecting image is a trapezoid, correct it in Keystone-V and/or Keystone-H in the Display Menu. See “Display”. (☞ P.
ENGLISH INSTALLATION Recommended Setting ❖ Installing on a tabletop Screen Lens shift range Screen size (vertical) Screen upper end Range from light axis to upper end Light axis (center) Installing level Screen lower end Height from installing level to light axis Projection distance lens head ❖ Mounting on the ceiling EXT-81 Approx. 24 7/16 to 46 14/16 inch 1 3/16 inch (Approx. 62 to 119 cm) (3 cm) [When the pole of EXT-81 is cut : Approx. 12 10/16 to 24 7/16 inch (Approx.
Screen Size and Projection Distance (inch) VP-12S3 ENGLISH Screen Screen size (Diagonal) VP-12S1 Projection distance ❖ 16 : 9 Screen In case of displaying the 16:9 picture on the whole of the 16:9 screen. Height Width : Image size = Screen size 16:9 Screen Size (1.
ENGLISH Screen Size and Projection Distance (m) VP-12S3 Screen Screen size (Diagonal) VP-12S1 Projection distance ❖ 16 : 9 Screen In case of displaying the 16:9 picture on the whole of the 16:9 screen. Height Width : Image size = Screen size 16:9 Screen Size (1.77:1 Aspect Ration) Projection Distance Diagonal Width Height Minimum inch mm mm m m 1.28 1.95 2.28 2.34 2.61 2.68 2.74 2.94 3.01 3.27 3.47 3.61 3.94 4.04 4.37 4.44 4.93 5.60 6.59 8.25 1.49 2.26 2.64 2.72 3.03 3.11 3.18 3.41 3.
Screen Size and Projection Distance (inch) VP-12S3L ENGLISH Screen Screen size (Diagonal) VP-12S1 Projection distance ❖ 16 : 9 Screen In case of displaying the 16:9 picture on the whole of the 16:9 screen. Height Width : Image size = Screen size 16:9 Screen Size (1.
ENGLISH Screen Size and Projection Distance (mm) VP-12S3L Screen Screen size (Diagonal) VP-12S1 Projection distance ❖ 16 : 9 Screen In case of displaying the 16:9 picture on the whole of the 16:9 screen. Height Width : Image size = Screen size 16:9 Screen Size (1.
BASIC OPERATIONS ENGLISH Turning on the Power Press the POWER ON button on the remote controller or the POWER button on the projector. The POWER ON indicator lights up. STANDBY POWER ON PATTERN PATT. MENU V-MUTE ENTER Selecting the Input Signal Source Switch to the equipment connected to the projector. Pressing the INPUT button on the projector or remote control rotates the input signal in the order of COMPONENT1 ➔ COMPONENT2 ➔ S-VIDEO ➔ VIDEO ➔ RGB ➔ AUX, allowing you to select an input signal.
• Press the ZOOM button, the NORMAL button or the FULL button on the remote controller for the 4:3 aspect ratio video source. • Press the FULL button on the remote controller for 16:9 aspect ratio video source, such as 1080i, 1035i, and 720p video systems. • Press the FULL button on the remote controller for the squeezed video source. See “Setting”. (☞ P.27) ❖ Original Source Image 16 : 9 video source 4 : 3 video source ❖ Full mode The 16:9 squeezed image is displayed with the correct aspect.
The Screen Images in a 4:3 screen ENGLISH • Press the ZOOM button, the NORMAL button or the FULL button on the remote controller for the 4:3 aspect ratio video source. • Press the FULL button on the remote controller for 16:9 aspect ratio video source, such as 1080i, 1035i, and 720p video systems. • Press the FULL button on the remote controller for the squeezed video source. See “Setting”. (☞ P.
1. Press the STANDBY button on the remote controller or the POWER button on the projector. 2. The fan continues running for about 1 minute to internally cool the projector. In the meantime, the POWER ON indicator on the projector flashes a blue color and buttons on the projector and remote control are irresponsive to touch. Once the fan stops, the POWER ON indicator goes out and the STANDBY indicator lights up a red color to indicate the projector is on standby.
OPERATIONS ENGLISH Menu Structure Main Menu * Item Picture Adjust P.24 * * * * * Contrast 0 100 Brightness 0 63 Color 0 100 Sharpness 0 31 R50 G50 Noise Reduction 0 63 Color Temp. (Temperature) 1 5 Tint Fine Menu * Luminance Fine Menu Setting Lamp mode P.27 High Bright Aspect High / Low * On / Off Chrominance Full Normal * Through VCR Mode Cinema Iris * Black Setup On / Off Sub Control Auto / Off F5.0 / F3.0 0IRE / 7.
How to Operate Menus Menu ENGLISH This projector has menus that make setting and adjustment easy. 1. Press the MENU button. The MENU screen appears on the screen. Standard1 Picture Adjust Contrast 50 Setting Brightness 44 System Color 58 Display Sharpness Config Tint 7 0 Trigger 2 Noise Reduction 0 Preset Color Temp. 3 Fine Menu Setting or adjustment level Main menu Menu item 2.
Picture Adjust ENGLISH Picture quality in each of the picture modes can be adjusted to your liking and those adjustments can be saved in memory. This projector makes 3 memory indexes available for each of the picture modes. ❖ For a video signal input, the following adjustments can be made: Adjustments 0 100 Weak Strong 0 63 Dark Bright 0 100 Light Deep 0 31 Soft Sharp R50 G50 Purple Green 0 63 Weak Strong 1 2 3 4 5 Red Blue Item Contrast Brightness Color Sharpness Tint Noise Reduction Color Temp.
Fine Menu ENGLISH By adjusting this Fine Menu, you can make fine picture adjustment. Note : There are some parameters can not adjust according to input signal.
❖ Sub Control FineMenu User A1 ENGLISH Luminance Contrast Red 0 Chrominance Contrast Green 0 Sub Control Contrast Blue 0 Miscellaneous Brightness Red 0 Brightness Green 0 Brightness Blue 0 Clamp Position 0 Clamp Width 0 Item Contrast Red Contrast Green Contrast Blue Brightness Red Brightness Green Brightness Blue Clamp Position Clamp Width 0 0 0 0 0 0 -128 -128 Adjustments Item DCDi FRC CCS Sharpness Filter On Auto On 0 255 255 255 255 255 255 127 127 Contrast Red : This menu al
Setting Menu User A1 Picture Adjust Lamp Mode High Setting High Bright Off System Aspect Normal Display VCR Mode Config Cinema Off Auto Trigger 2 Iris F5.0 Preset Black Setup 0 IRE Lamp Mode High Bright Aspect VCR Mode Cinema Iris Black Setup ENGLISH The following settings can be made: High, Low On, Off High Bright On : Display brightest image. Full, Normal, Zoom, Through On, Off Auto, Off Cinema mode : The 3-2 pull down for NTSC and the 2-2 pull down for PAL F5.0, F3.
System The following settings can be made: ENGLISH Menu User A1 Picture Adjust Component 1 Auto Setting Component 2 Auto System S-Video Auto Display Video Auto Config RGB Auto Trigger 2 DVI RGB Preset Component1 Auto, NTSC, PAL, 480p, 540p, 576p, 720p, 1035i, 1080i Component2 Auto, NTSC, PAL, 480p, 540p, 576p, 720p, 1035i, 1080i S-Video System Auto, NTSC, PAL, SECAM Video System Auto, NTSC, PAL, SECAM RGB System Auto, NTSC, PAL, 480p, 540p, 576p, 720p, 1035i, 1080i DVI System RGB, YP
Display Menu Item User A1 Picture Adjust Keystone V 0 Setting Keystone H 0 System Auto Adjust Display Picture Shift V Config Size V 0 0 Trigger 2 Picture Shift H 0 Preset Size H 0 Phase 16 Keystone-V (Electronic vertical keystone correction) Keystone-H (Electronic horizontal keystone correction) Auto Adjust Picture Shift V Size V Picture Shift H Size H Phase ENGLISH The following adjustments can be made: Adjustments Yes / No Down Small Left Small Backward Up Large Right Large F
Configuration The following adjustments can be made: ENGLISH Menu Auto Power Off Enable, Disable OSD Position 16:9, 4:3, Through Language English, German, French, Spanish, Portuguese, Italian Ceiling On, Off On: The picture is reversed horizontally and vertically. Rear On, Off On: The picture is reversed horizontally. Color Temp.
ENGLISH – Reset All All settings are reset to the factory default settings except the lamp life. When the user selects “Yes”, the following message appears: Reset All ? Yes No Again, select “Yes”, and press the ENTER button. ❖ Setting the Config Menu 1. Select the desired menu item and press the 2 button. Setting items appears on the screen. 2. Press the 3 and 4 buttons to select a setting. 3. Press the 1 button to enter the setting and return to menu item selection. MENU 2 V-MUTE 2.
Preset ENGLISH The picture mode can also be selected from the MENU screen. This projector offers 6 picture modes: Theater, Standard, Dynamic, User A, User B and User C. Moreover, each of these picture modes has 3 indexes for memorizing picture quality adjustments. • Theater : Reproduces the black suited for movie software. • Standard : Suited for normal movie software. • Dynamic : Suited for visually dynamic image software. • User A,B,C: Enable the user to adjust the gamma curve as preferred.
ENGLISH MAINTENANCE Lamp Life and Replace Lamp ❖ Lamp Life Display the remaining lamp life by pressing the INFO. button on the remote controller. Information Video Input Preset Gamma Component-1080i User A1 A Cinema Mode Auto Aspect Normal Trigger 2 Lamp Life Total Hours On 921 Hours 3653 Hours S-VIDEO DYNA. ZOOM VIDEO USER THROUGH RGB CINEMA INFO AUX LIGHT Notes: • The maximum life limit of the lamp is 2,000 hours.
❖ Initialize the Lamp Life ENGLISH The lamp has a lamp life of 2000 hours. The projector is designed to shut OFF power if the lamp is used beyond this 2000 hours lamp life. In such case, replace the lamp and reset the lamp life counter as follows. 1. After the message “Lamp Life 0 Hours” appears, power 2. to the projector shuts OFF. Promptly replace the lamp with a new one. (☞ P.
9. Install a new lamp unit in position securely. ENGLISH 5. Remove the lamp cover screw. 10. Lock the lamp unit in place with the two screws removed in step 7. Press on the handle until it folds over and close the cover sheet. 6. Remove the lamp cover in the direction of the arrow. Lamp cover 11. Install the lamp cover back in its original position and fasten with the fastening screw. 7. Open the cover sheet and remove the two screws (slotted head screwdriver required) that lock down the lamp unit.
Color Temperature Adjustment ENGLISH After replacing the lamp or in other cases where the lighting changes, color temperature can be adjusted using the included color temperature sensor. In the adjustment procedure, you must first initialize the sensor itself before adjusting color temperature. It takes about 10 minutes from when the power to the projector is activated for the lamp’s brightness to stabilize. Wait for lamp brightness to stabilize before adjusting color temperature. 1.
color temperature adjustment is complete. Adjustment takes about 4 to 5 minutes. When the color temperature sensor is detached from the lens, the below message appears on the screen. Complete Press "Enter" to exit 8. Press the ENTER button to return to the menu and disconnect the cable of the color temperature sensor from the projector.
TROUBLESHOOTING ENGLISH Try the following troubleshooting before calling for service. 1. Are the connections made properly ? 2. Are you operating the unit properly, following the instructions ? Symptom No power Image is not displayed. Poor color. Picture is too dark. Picture is not clear. Picture rolls. The Remote Controller does not work. Color temperature cannot be adjusted. If the unit does not operate properly, check the items shown in the following table.
ENGLISH ERROR MODE WARNING/LAMP indicator, POWER ON indicator, and STANDBY indicator diagnose error mode of the projector as follows. Indicators Error mode WARNING /LAMP POWER ON STANDBY Possible Cause Recommendation Lamp cover ON OFF Flashing The lamp cover is not closed properly. Close the cover correctly.
SPECIFICATIONS ENGLISH ❖ Optical characteristics ❖ General Panel Power requirement AC 100-120V / 220-240V, 50/60 Hz Power consumption < 320 W 0.8 inch 16:9 1280 x 720 pixels Digital Micromirror DeviceTM Lamp Super High Pressure 200W DC Lens f: 26.5 to 30.7mm (VP-12S3) 40.9 to 55.3mm (VP-12S3L) Standby consumption < 3.3 W Chassis isolation Class-1 Safety UL6500 CSA E60065 EN60950 EMC FCC Part-15 Class-B EN55022 Class-B Dimensions 15 15/16(W) x 18 9/16(D) x 6 1/8(H) inch 404.
❖ Timing chart Resolution 768x240 960x287.5 960x287.5 720x480 720x576 1920x518 1920x540 1920x540 1920x540 1280x720 1280x720 1280x720 1920x540 640x350 640x350 640x400 640x400 640x480 640x480 640x480 640x480 800x600 800x600 800x600 800x600 800x600 1024x768 1024x768 1024x768 1024x768 1024x768 V (Hz) H (KHz) Scan I 59.94 / 60 15.73 I 50 15.63 I 50 15.63 P 59.94 / 60 31.5 P 50 31.3 I 59.94 / 60 33.8 I 59.94 / 60 33.8 I 50 28.1 I 48 27.0 P 59.94 / 60 45.0 P 50 37.5 P 48 36.0 P 59.94 / 60 33.8 P 70 31.5 P 85 37.
16 2 8/ ) 4 ( 6 19/32 - 2 7/16 (15.0 - 61.8) 5 5/8 (143.0) 5 3/16 (132.0) VP-12S3 ❖ Front 6 23/32 (171.0) 3 11/16 (93.5) 25/32 (19.75) 1 21/32 2 9/32 (42.0) (58.0) 3 1/4 ( 82.6) 4 11/16 (119.0) 3 - 3 3/8 (76.0 - 86.0) 18 1/2 - 18 17/32 (470 - 471) POWER ON WARRNING INPUT LAMP DOWN ENTER 4 7/8 (123.5) MENU 42 5 3/4 (145.75) RIGHT LEFT ❖ Bottom PATTERN 7 3/16 (182.5) STANDBY POWER UP LENS SHIFT ENGLISH 13 21/32 (346.5) 11 11/16 (296.5) 10 5/16 (262.
Aspect ratio Width and height ratio of an image. The normal aspect ratio of a computer and video image is 4 : 3. There are also wide images with an aspect ratio of 16 : 9 and 21 : 9. Black Level (Black setup) The signal level which represents black picture intensity. For NTSC system for USA, this level is 7.5IRE. For NTSC system for Japan and DVD, this level is 0IRE. NORMAL: 16 (Black) ~ 235 (White) EXPAND: 0 (Black) ~ 246 (White) Color Temperature White color hue.
www.marantz.com You can find your nearest authorized distributor or dealer on our website. JAPAN Marantz Japan, Inc. 35-1 Sagami Ohno 7-Chome, Sagamihara-shi, Kanagawa 228-8505, Japan U.S.A. Marantz America, Inc. 1100 Maplewood Drive, Itasca, IL 60143, U.S.A. EUROPE Marantz Europe B.V. P.O. Box 8744, 5605 LS Eindhoven, The Netherlands R Printed in Japan is a registered trademark.