• ESPAÑOL • FRANÇAIS • ENGLISH DVD Player DV4003
• ENGLISH Before You Start CONGRATULATIONS ON YOUR PURCHASE OF THIS FINE MARANTZ PRODUCT. MARANTZ is on the leading edge of DVD research for consumer products and this unit incorporates the latest technological developments. WARNING TO REDUCE THE RISK OF FIRE OR ELECTRIC SHOCK, DO NOT EXPOSE THIS APPLIANCE TO RAIN OR MOISTURE. CAUTION We are sure you will be fully satisfied with the DVD player. RISK OF ELECTRIC SHOCK DO NOT OPEN Thank you for your support.
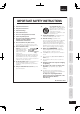
• 2. Keep these instructions. 3. Heed all warnings. 4. Follow all instructions. 5. Do not use this apparatus near water. 6. Clean only with dry cloth. 13. Unplug this apparatus during lightning storms 7. Do not block any ventilation openings. Install in accordance with the manufacturer´s instructions. 14. Refer all servicing to qualified service tripod, bracket, or table specified by the manufacturer or sold with the apparatus.
• ENGLISH Before You Start Additional Safety Information! • • • This product should not be placed in a built-in installation such as a bookcase or rack unless proper ventilation is provided or the manufacturer’s instructions have been adhered to. Apparatus shall not be exposed to dripping or splashing and that no objects filled with liquids, such as vases, shall be placed on the apparatus. When the switch is in the OFF position, the apparatus isn’t completely switched-off from the MAINS.
• Features ............................................................................... 6 What’s in the box .............................................................. 7 Putting the batteries in the remote control................. 7 Using the remote control ................................................ 7 DVD-Video regions ........................................................... 7 Discs compatible with this player.................................. 8 General Information for MP3/WMA/JPEG/DivX ....
• ENGLISH 1 Before You Start Before You Start Features MP3 and WMA*3 USB Operation This player is compatible with CD-R, CDRW and CD-ROM discs that contain MP3 and WMA audio tracks (see pages 27, 29). You can play or view the data files (JPEG, MP3, WMA, or DivX®) in the USB flash drive. CD Ripping Connecting Up This feature allows you to convert audio tracks from an audio CD into MP3 format. The created MP3 files are saved in your USB device.
• ENGLISH 1 What’s in the box Using the remote control Thank you for buying this MARANTZ product. Please confirm that the following accessories are in the box when you open it.
• ENGLISH 1 Before You Start Before You Start Discs compatible with this player Any disc that displays one of the following logos should play in this player. Other formats, including DVD-RAM, DVD-ROM, CD-ROM (except those that contain MP3/ DivX/WMA/JPEG files) and Photo CD will not play.
• ENGLISH • This player can recognize in total about 650 files per folders and 300 folder per disc for MP3/ DivX/WMA. • When writing MP3/WMA/JPEG/DivX files to CDR/RW discs, always be sure to set the writing format to ISO 9660 Level 1. • For MP3 and WMA files recorded in Variable Bit Rate (VBR), the unit may not display the actual elapsed time. • For, MP3 and WMA, this player is not compatible with multi-session discs. If you try and play a multi-session disc, only the first session will be played.
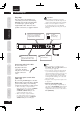
• ENGLISH 2 Connecting Up Before You Start Easy setup Important This easy setup is the minimum set of connections you need to start watching DVD-Video discs. Both sound and picture are fed directly to your TV using the supplied audio/video cables. For other possible connections, see pages 11 and 12. Connecting Up 1 • Before making or changing any rear panel connections, make sure that all components are switched off and unplugged from the wall outlet.
• ENGLISH AUDIO CR/PR If your TV has a SCART input, we recommend using it to connect directly to the A/V EURO CONNECTOR on this player. (for Europe only) Y VIDEO REMOTE CONTROL IN L INT. EXT. R HDMI 3 If your TV and projector have a HDMI terminal for Video and Audio Input, we recommend using it to connect directly to the HDMI out of this player. ANALOG 2 OUT S1 CB /PB DIGITAL COAX.
• ENGLISH 2 Connecting Up Before You Start Home theater audio connections Connecting Up 1 Control & Displays Getting Started Playing Discs DVD Setup Menu Additional Information 12 Important This player outputs multi-channel audio in digital form. Check the manual for your amplifier/receiver to see what equipment it is compatible with (especially which digital formats such as Dolby Digital, DTS, etc. It can decode).
• ENGLISH 3 Front panel 1 2 3 4 5 6 DVD PLAYER DV4003 STOP OPEN/CLOSE PLAY/PAUSE / / STANDBY PROGRESSIVE SCAN ON/STANDBY POWER ON/STANDBY 2 3 4 • Press to turn the power on, and press it again to enter STANDBY mode. Disc tray • Place the disc here. 8 Display • Stops playing the disc play. • Press to open and close the disc tray when stop mode. 9 AUDIO EX indicator § (STOP/OPEN/CLOSE) • Operation indications are displayed here.
• ENGLISH 3 Controls & Displays Before You Start Remote control 5 1 6 7 Connecting Up 2 3 4 5 ! @ # 6 % ^ 7 & 8 Control & Displays 9 0 Getting Started Playing Discs DVD Setup Menu Additional Information 14 8 ¡ 9 10 11 12 13 14 ™ ~ 1 AUDIO EX – Press to turn AUDIO EX off and on • The sound quality of analog audio output is improved by turning off analog video signal output and the front panel display. • HDMI video output cannot be switched off.
• ENGLISH • Throughout this manual, the term “DVD” means DVD-Video, and DVD±R/RW. If a function is specific to a particular kind of DVD disc, it is specified. Press the POWER ON/STANDBY button on the front panel or POWER button on the remote control. If you are playing a DVD or Video CD, also turn on your TV and make sure that it is set to the correct video input. 2 Press § (STOP/OPEN/CLOSE) on the front panel or 0 (OPEN/CLOSE) on the remote control to open the disc tray. 3 Load a disc.
• ENGLISH 4 Getting Started Before You Start Resuming playback from the last stopped point Basic playback controls Button What it does 3 Starts playback. (Remote Control) In title menu, it functions as the Enter key. 8 Pauses a disc that’s playing. (Remote Control) Each time the button is pressed, a new frame will appear. Connecting Up 7 Stops playback.
• ENGLISH Many DVD discs contain menus. Sometimes these are displayed automatically when you start playback; others only appear when you press MENU or TOP-M. Button TOP-M What it does Displays the “top menu” of a DVD disc. This varies with the disc. MENU Displays a DVD disc menu—this varies with the disc and may be the same as the “top menu”. RETURN Returns to the previously displayed menu screen. Cursor Moves the cursor around the screen.
• ENGLISH 5 Playing Discs Before You Start Fast Forward/Fast Reverse DVD-Video Video-CD CD MP3 WMA DivX Connecting Up The video images on DVD and VCD can be viewed as a Fast Forward and Fast Reverse with no sound. In case of CD, the sound can be listened as a Fast Forward and Fast Reverse with sound. Viewing in Fast Forward/Fast Reversed Control & Displays Press and hold ¢ (NEXT) during play. • Fast Forward is engaged.
• ENGLISH With this function, DVDs can be viewed in both forward and reverse direction. Video CD can only be moved in the forward direction. Press ∞ (down) during play. • Slow playback is engaged. • During slow playback, the speed of playback can be adjusted from 1/2 normal playback speed to 1 normal playback speed in 5 steps using 1/2 1/4 1/8 1/16 1 ∞ (down). Press 5 (up) during play. • Slow playback in the reverse direction is engaged.
• ENGLISH 5 Playing Discs Before You Start Using the Repeat Play DVD-Video JPEG Video-CD DivX CD MP3 WMA Connecting Up You can set the player to repeat individual tracks on CDs or Video CDs, chapters or titles on DVD discs, or the whole disc. It’s also possible to loop a section of a disc. You can’t use any repeat mode or looped play with a Video CD playing in PBC mode. Press REPEAT during playback to select a repeat mode.
• ENGLISH CD MP3 DivX Press A-B once at the start of the section you want to repeat, then again at the end. Playback immediately jumps back to the start point and plays the loop round and round. • On a DVD disc, the start and end points of the loop must be in the same title/chapter. • On a Video CD/CD disc, the start and end points of the loop must be in the same track. To resume normal playback, press A-B again.
• ENGLISH 5 Playing Discs Before You Start Switching Camera Angles DVD-Video Some DVD-Video discs feature scenes shot from two or more angles. Check the disc box for details: it should be marked with a icon if it contains camera-angle scenes. • To switch the camera angle, press ANGLE. Connecting Up Note • Depending on the disc, this feature may not work. Switching the Subtitle Language DVD-Video DivX Control & Displays Many DVD-Video discs or DivX discs have subtitles in one or more languages.
• ENGLISH DVD-Video When playing a DVD-Video disc recorded with dialog in two or more languages, you can switch the audio language at anytime during playback. • To display/switch the audio language, press AUDIO repeatedly. The current audio language is shown on-screen. • To set audio language preferences, see page 44. Connecting Up Switching the Audio Language Before You Start 5 Playing Discs • The current playback channel(s) are indicated onscreen.
• ENGLISH 5 Playing Discs Before You Start 2 This option is only available during playback mode. • TRACK/TITLE/CHAPTER DIGEST – View six different TRACK/TITLE/CHAPTER on one screen each time. This allows you to have a quick glance at all the TRACK/TITLE/CHAPTER on the disc. Connecting Up • DISC INTERVAL – View the whole disc in six thumbnail pictures. It divides a disc into six portions at regular intervals and displays them on one screen.
• ENGLISH Play back Information This DVD system can display the disc playback information (for example, title or chapter number, elapsed playing time, audio/subtitle language) and a number of operations can be done without interrupting disc playback. on the TV.
• ENGLISH 5 Playing Discs Before You Start Angle Repeat DVD DVD Connecting Up 1 Press 5/∞ to highlight “Angle”, then press ENTER to access. 1 Press 5/∞ to highlight “REPEAT”, then press ENTER to access. 2 Use the numeric keypad (0-9) to enter in a valid number. 2 Press 5/∞ to select the desired repeat mode, then, press ENTER to access. 3 Press ENTER to confirm. Playback will go to the selected angle. Time Display DVD Control & Displays 1 Video-CD Time CD Press DISPLAY (DISP.
• ENGLISH Previous MP3_MUSIC_1 MP3_MUSIC_2 MP3_MUSIC_3 2 If the disc main menu contains various folders, use the 5/∞ keys to select a desired folder and press ENTER to open the folder. 3 Use the 5/∞ keys to select a track/file and press ENTER to start playback. • Playback will start from the selected file and continue through to the end of the folder. During playback, you can; • Press 4/¢ to playback another track/file in the current folder.
• ENGLISH 5 Playing Discs Before You Start • 12 thumbnail pictures will be displayed on the TV. Connecting Up Control & Displays 2 Press 4/¢ to display the other pictures on the previous/next page. 3 Use the 2/3/5/∞ keys to highlight one of the pictures and press ENTER to start playback. 4 Press the MENU to return to Picture CD menu. Zoom picture Getting Started 1 During playback, press ZOOM repeatedly to select a different zoom factor.
• ENGLISH 3 During MP3/WMA music playback, use the 2/3/5/∞ keys to select a picture folder from the disc menu and press PLAY 3. • The picture files will be played back through to the end of the folder. 4 To stop simultaneous playback, press STOP 7. Tip • It is normal to experience an occasional “skip” while listening to your MP3 disc. • It is normal to experience an occasional pixelation during MP3/DivX playback due to poor clarity of digital contents during internet downloading.
• ENGLISH 5 Playing Discs Before You Start Playing a DivX disc This DVD system supports the playback of DivX movies which you can copy from your computer onto a CD-R/RW, DVD±R/±RW disc (see page 9 for more information). Connecting Up 1 Insert a DivX disc. 2 Press PLAY 3 to start playback. During playback, you can; • If multilingual subtitles are embedded on the DivX disc, you can press SUBTITLE to change the subtitle language while playing.
• ENGLISH Note USB • The set supports USB device with maximum capacity of 80 GB and maximum file size is 4 GB. • The USB jack does not support the connection of other USB devices except to a USB flash drive. • The unit can only support up to a maximum of 300 folders, 648 files and 8 layers. • When the USB device does not fit into the USB jack, a USB extension cable (not supplied) is required. • Copy-protected files are not playable.
• ENGLISH 5 Playing Discs Before You Start Using the Setup Menu Connecting Up Before using the player, you should specify the settings to be used in accordance with the conditions under which the player is to be used. Note that once changed, the settings will be saved and remain the same even after the power has been turned off until the settings are changed again. The Setup menu gives you access to all the player’s settings.
• ENGLISH TV ASPECT PROGRESSIVE PICTURE SETTING BLACK LEVEL VIDEO SETUP 150 MINS Page 37 STEREO LT/RT DIGITAL OUT OFF ALL PCM LPCM OUT 48KHZ 96KHZ ON OFF ON OFF DELAY TIME (0-200 ms) 37 38 38 38 38 0 ms PAL NTSC MULTI default setting USA model: NTSC Europe model: PAL 4:3 PAN SCAN 4:3 LETTER BOX 16:9 WIDE OFF ON STANDARD BRIGHT SOFT PERSONAL BRIGHTNESS CONTRAST TIINT COLOR 7.5 IRE 0 IRE default setting USA model: 7.
• ENGLISH 6 DVD Setup Menu Before You Start GENERAL SETUP PAGE OSD LANGUAGE DIVX(R) VOD CODE MP3 RECORD DISC LOCK DISPLAY DIM PROGRAM SCREEN SAVER SLEEP AUTO STANDBY Connecting Up Note • Press 2 to go back to the previous menu item. Press SETUP to exit the menu. OSD LANGUAGE Control & Displays The language options are different depending on your country or region, and may not match the illustrations shown in the user manual.
• ENGLISH 2 Load an audio CD. 3 Press SETUP on the remote control. Note 7 To start creating the tracks, move to Start in the menu and press ENTER. • The creating process menu appears. • A new folder is created automatically in the USB device to store all the new MP3 files. • You can also select the MP3 RECORD menu with pressing and holding the AUDIO button on the remote control. Use the cursor buttons (5/∞) to select the MP3 RECORD, then press ENTER. • The MP3 RECORD menu appears.
• ENGLISH 6 DVD Setup Menu Before You Start DISC LOCK Connecting Up • Default setting: UNLOCK Not all discs are rated or coded by the disc maker. You can prevent a specific disc from playing by locking the disc. Up to 40 discs can be locked. • LOCK – Selects this to block the playback of the current disc. Subsequent access to a locked disc requires a six-digit password. The default password is “111111”. • UNLOCK – All discs can be played.
• ENGLISH 3 Use the cursor buttons (5/∞) to select the desired item, then press the cursor (3) or ENTER button. AUDIO SETUP PAGE AUDIO OUT Before You Start 6 DVD Setup Menu DIGITAL AUDIO HDMI AUDIO OUT AUDIO OUT • Default setting: STEREO • STEREO – This option will downmix Dolby Digital signals directly into analogue stereo from L/R jacks. • LT/RT – This option should be used only if your DVD player is connected to a Dolby Pro Logic decoder. Note • DTS is not supported.
• ENGLISH 6 Before You Start Connecting Up Control & Displays Getting Started Playing Discs DVD Setup Menu Additional Information 38 DVD Setup Menu LPCM OUT AUDIO DRC • Default setting: 48kHz If you connect the DVD Player to a PCM compatible receiver via the digital terminals, such as coaxial, you may need to adjust “LPCM Output”. Discs are recorded at a certain sampling rate. The higher the sampling rate, the better the sound quality. • 48kHz – Playback a disc recorded at the sampling rate of 48 kHz.
• ENGLISH 1 Press the SETUP button. 2 Select VIDEO SETUP PAGE using the cursor buttons (2/3), then press the ENTER button. 3 Use the cursor buttons (5/∞) to select the desired item, then press the cursor (3) or ENTER button. VIDEO SETUP PAGE Connecting Up Setting up the VIDEO SETUP page Before You Start 6 DVD Setup Menu TV SYSTEM TV ASPECT HDMI SETUP Note • Press 2 to go back to the previous menu item. Press SETUP to exit the menu.
• ENGLISH 6 DVD Setup Menu Before You Start CHANGING PAL TO NTSC 1.ENSURE THAT YOUR TV SYSTEM SUPPORTS NTSC STANDARD. 2.IF THERE IS A DISTORTED PICTURE DISPLAYED ON THE TV.WAIT IS SECONDS FOR AUTO RECOVER CANCEL OK Select one of the options and press ENTER to confirm.
• ENGLISH To deactivate Progressive manually: Tip • There are some progressive scan TVs and highdefinition TVs that are not fully compatible with this unit, resulting in an unnatural picture when playing back a DVD Video disc in the progressive scan mode. In this case, turn off the progressive scan feature on both the DVD system and your TV.
• ENGLISH 6 Before You Start Connecting Up Control & Displays Getting Started Playing Discs DVD Setup Menu Additional Information 42 DVD Setup Menu Note • When the player is set to YCbCr, some TV may not properly synchronise with the player on the A/V EURO connector. HDMI SETUP This feature is only applicable if you have connected this DVD system to a HDMIcompatible TV/device. This setting can be toggled on and off by pressing the HDMI button for three seconds or more.
• ENGLISH Setup Examples 16:9 16:9 Wide Dont' care 4:3 LB 4:3 PS*1 Dont' care 4:3 PS*2 Dont' care HDMI output Sink EDID 4:3 16:9 Connecting Up Format Video YCbCr S-Video TV Aspect PSCAN FORMAT (Progressive:ON) YCbCr (Progressive:OFF) Control & Displays Disc OFF 16:9 Wide Before You Start 6 DVD Setup Menu 16:9 SQUEEZE 4:3 4:3 LB 4:3 PS Dont' care *1: When actual video output is Letterbox. ("TV Aspect" is 4:3panscan but disc does NOT permit Pan-scan.
• ENGLISH 6 DVD Setup Menu Before You Start Setting up the PREFERENCE page Connecting Up 1 Press 7 (STOP) twice to stop playback (if any), then press SETUP. 2 Select PREFERENCE PAGE using the cursor buttons (2/3), then press the ENTER button. 3 Use the cursor buttons (5/∞) to select the desired item, then press the cursor (3) or ENTER button.
• ENGLISH VR LIST Selects the preferred disc menu language for DVD playback. • Default setting: ENGLISH Use the 5/∞ keys to select a language and press ENTER to confirm. • Default setting: ORIGINAL LIST There are two ways to play back a disc in VR (Video Recording) format: ORIGINAL LIST and PLAY LIST. This feature is not available with non-VR format discs. • ORIGINAL LIST – Select this to play the originally recorded titles on the disc. • PLAY LIST – Select this to play the edited version of the disc.
• ENGLISH 6 DVD Setup Menu Before You Start 4 5 Use 2/3/5/∞ to select a title, or use the numeric buttons to enter the title number next to SELECT. • Press 4/¢ to access the previous/ next page. • ON – The index menu (if available) will appear on the TV when you load a VCD/ SVCD. • OFF – The VCD/SVCD will skip the index menu and playback directly from the beginning. Press ENTER to confirm the selection.
• ENGLISH Additional Information 7368 7365 7369 7385 7375 7165 7384 7465 7486 7576 7578 7583 7575 7577 7573 8287 7589 7586 7579 7574 7585 7574 7679 7665 7686 7666 7673 7673 7673 7678 7684 7666 7775 7771 7783 7776 7784 7186 7773 7782 7772 7779 7778 7865 7886 7886 7868 7882 7871 7869 8369 7868 7879 7866 7878 7889 7878 7967 6785 6785 6785 7982 Oromo Ossetian; Ossetic Ossetic; Ossetian Pali Panjabi Persian Polish Portuguese Provençal; Occitan (post) Pushto Quechua Raeto-Romance Romanian Rundi Russian Samoan
• ENGLISH 7 Before You Start Connecting Up Control & Displays Getting Started Playing Discs DVD Setup Menu Additional Information 48 Additional Information Handling discs Discs to avoid When holding discs of any type, take care not to leave fingerprints, dirt or scratches on the disc surface. Hold the disc by its edge or by the center hole and edge. Discs spin at high speed inside the player.
• ENGLISH Additional Information Hints on installation Moving the player We want you to enjoy using this unit for years to come, so please bear in mind the following points when choosing a suitable location for it: If you need to move the player, first press the POWER ON/STANDBY button on the front panel to put the player in standby, then unplug the power cord. Never lift or move the unit during playback: discs rotate at high speed and may be damaged. ✓ Use in a well-ventilated room.
• ENGLISH 7 Additional Information Before You Start Troubleshooting Connecting Up Incorrect operation is often mistaken for trouble or malfunction. If you think that there is something wrong with this unit, check the points below. Sometimes the trouble may lie in another component. Inspect the other components and electrical appliances being used.
• ENGLISH Additional Information • If this unit is connected to a non-DTS compatible amplifier or decoder using a digital audio cable, set DIGITAL OUT to PCM in the Setup menu. If you do not do this, noise will be output if you try and play a DTS disc. • If this unit is connected to a DTS-compatible amplifier or decoder using a digital audio cable, check the amplifier settings, and that the cable is properly connected. Use the remote control within its operating range (page 7).
• ENGLISH 7 Additional Information Before You Start Frequently Asked Questions (USB) Unable to play DivX movies. • Check that the DivX files are encoded with “Home Theater's mode with DivX” certified encoder. No sound during DivX movies playback. • The audio codes may not be supported by the DVD player. Why does it take so long to display the contents on my USB device? • This could be due to the large numbers of files (>500 files/folders) or size of the files (>1MB).
• ENGLISH Additional Information Component video output (Y, CB, CR) Output level.....................................Y: 1.0 Vp-p (75 Ω) ....................................... CB/PB, CR/PR: 0.7 Vp-p (75 Ω) Jacks .................................................................. RCA jacks HDMI output Output terminal .................................................... 19-pin 15 16 17 19 21 R out Blank GND Video out GND Audio output Output level During audio output...................
Printed in China 3139 245 31301 2008/09 PMC 541110153029M