Owner’s Manual Nº390S CD Processor
WARNING: TO REDUCE THE RISK OF FIRE OR ELECTRIC SHOCK, DO NOT EXPOSE THIS APPLIANCE TO RAIN OR MOISTURE. CAUTION RISK OF ELECTRIC SHOCK DO NOT OPEN CAUTION: TO REDUCE THE RISK OF ELECTRICAL SHOCK, DO NOT REMOVE COVER. NO USER-SERVICEABLE PARTS INSIDE. REFER SERVICING TO QUALIFIED PERSONNEL.
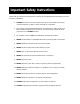
Important Safety Instructions Please read all instructions and precautions carefully and completely before operating your Mark Levinson preamplifier. 1. ALWAYS disconnect your entire system from the AC mains before connecting or disconnecting any cables, or when cleaning any component. 2. This product must be terminated with a three-conductor AC mains power cord that includes an earth ground connection. To prevent shock hazard, all three connections must ALWAYS be used. 3.
From all of us at Mark Levinson, thank you for choosing the Mark Levinson Nº390S CD Processor. A great deal of effort went into the design and construction of this precision device. Used properly, it will give you many years of enjoyment. 4 3 Oak Park Bedford, MA 01730-1413 USA Telephone: 781-280-0300 Fax: 781-280-0490 www.marklevinson.com Customer Support Telephone: 781-280-0300 Sales Fax: 781-280-0495 Service Fax: 781-280-0499 Product Shipments 16 Progress Road Billerica, MA 01821-5730 USA Part No.
Table of Contents Unpacking and Placement . . . . . . . . . . . . . . . . . . . . . . . . . . .8 Unpacking the Nº390S . . . . . . . . . . . . . . . . . . . . . . . . . . . . . . . .8 Remove the Transport Screw . . . . . . . . . . . . . . . . . . . . . . . . . . . .8 Placement of the Nº390S . . . . . . . . . . . . . . . . . . . . . . . . . . . . . .8 Operating Voltage & Frequency . . . . . . . . . . . . . . . . . . . . . . .9 A Quick Start . . . . . . . . . . . . . . . . . . . . . . . . . . . . . . . . . . .
Basic Operation . . . . . . . . . . . . . . . . . . . . . . . . . . . . . . . . .38 Loading a CD . . . . . . . . . . . . . . . . . . . . . . . . . . . . . . . . . . . . .38 Playing a CD . . . . . . . . . . . . . . . . . . . . . . . . . . . . . . . . . . . . . .38 Random Play . . . . . . . . . . . . . . . . . . . . . . . . . . . . . . . . . . . . . 38 Navigating the Disc . . . . . . . . . . . . . . . . . . . . . . . . . . . . . . . . . 39 Direct Time Access . . . . . . . . . . . . . . . . . . . . . . . . . .
Using Learning Remote Controls . . . . . . . . . . . . . . . . . . . . .52 Teaching Nº390S Front Panel Commands . . . . . . . . . . . . . . . . . 52 Teaching Other Nº390S Commands . . . . . . . . . . . . . . . . . . . . .53 Special Commands Table . . . . . . . . . . . . . . . . . . . . . . . . . . . . . 55 Troubleshooting . . . . . . . . . . . . . . . . . . . . . . . . . . . . . . . . .56 Care and Maintenance . . . . . . . . . . . . . . . . . . . . . . . . . . . . 58 Specifications . . . . . . . . . . . . .
Unpacking and Placement Unpacking the Nº390S Important! Unpack your Nº390S CD Processor and remove all accessories from the carton. Keep all packing materials for future transport of your Nº390S. Shipping your new component in anything other than its purpose-designed packing material may result in damage that is not covered by the warranty. Included with your new Mark Levinson CD processor is a pair of knit, white gloves designed to assist you in the initial unpacking and placement of your new purchase.
The Nº390S is designed for continuous operation—hence the standby button on the front panel rather than a power button. However, a rear panel power switch is provided for your convenience should you want to disconnect the unit from the AC mains (as when taking a vacation, for example). Drawings are included in this manual to facilitate special installations and custom cabinetry (see Dimensions on page 61).
A Quick Start . . . We recognize that many people are understandably eager to begin listening to their new components, and that reading the manual is often done (if at all) at a later time—perhaps while listening to music with the new product itself. We strongly recommend that you read this manual thoroughly, as the Nº390S CD Processor incorporates many unusual features that enhance its operation.
Although no damage is likely to result to either CD player or preamplifier, the sound will be badly distorted and the volume may be much louder than you expect.) 4a. If going direct from the Nº390S to an amplifier! See Special Functions setup on page 47 to set the Nº390S to variable output mode. 5. Power up the rest of the system, leaving the power amplifiers for last. Always turn the power amplifier(s) off first, and on last.
Special Design Features Congratulations on your purchase of the Nº390S CD Processor. The design team is confident you will enjoy the outstanding performance of the Nº390S for many years. In case you are interested in technical details, what follows is a brief outline of some of the key technologies in your new CD player.
Digital Servo Control The laser mechanism used in the Nº390S uses all digital servo controls of its operations. Critical functions such as focus and tracking are handled completely in the digital domain with mathematical precision. A digital servo remains stable over time, never needing readjustment under normal conditions.
Convenience Features Too often, high performance CD players have eschewed convenience in the hopes of seeming more “performance-oriented.” While there were good arguments for such a “minimalist” design in the days of analog turntables, the time is long gone when the audiophile needed to give up operational convenience for musical performance.
Design of the fully balanced DAC/analog output module follows the Mark Levinson tradition of rigorous component selection. An unusual hybrid design approach incorporating both advanced Surface-Mount and “through-hole” technologies, allows us to utilize the optimum part at each location in the circuit, without the constraints on parts selection normally associated with traditional PCB assembly practices.
Balanced Analog Volume Control State-of-the-Art Output Buffer 16 Rather than use the digital attenuator on-board the DAC, the Nº390S incorporates a fully balanced analog volume control similar to that found in Mark Levinson separate preamplifiers. When activated (by turning on the variable output function under setup: sound), the output of the Nº390S may be attenuated in precise 0.1dB steps through most of the range.
2. Infrared Transceiver (within display) Infrared commands transmitted from the remote control are received by a receiver behind this section of the display. Remote control of the Nº390S may be unreliable if there is not a clear line of sight between the remote control and the receiver (if the remote is far off-axis, or if the Nº390S is within a cabinet, for example). In such a case consider using a thirdparty IR repeater to route the signal to the IR input jack on the rear panel (see Rear Panel, Nº390S).
5.
function. For example, mode + would either: add a track to a play list; select the next digital input; advance to the next time indication; or raise the volume. Along with mode + and mode –, the mode button is also used to change the option settings. (See Special Functions.) 7. Repeat button You may choose to either repeat the entire disc (including any programs you might have entered for that particular disc) or an individual track by pressing the repeat button.
10. mode – and mode + buttons Using these two buttons in conjunction with the mode button, any of four different Nº390S functions can be controlled from the front panel: • PROGRAM (for creating custom play lists) • INPUTS (for selecting a digital source) • TIMES (for selecting a time indication) • VOLUME* (for controlling the volume of the Nº390S*) * (Note that the volume control is only made available if the Nº390S’s variable output mode is engaged; see Special Functions for more information.
13. track repeat LED This LED is lit when the Nº390S is set to repeat a single track endlessly. This feature is accessed using the repeat button (see number 7, page 19). 14. next/f.fwd button Pressing this button momentarily will advance the Nº390S to the beginning of the next track. Pressing and holding this button will instead perform a fast forward scan of the music, reminiscent of the fast forward function found on many tape decks.
17. play button As you might guess, press this button in order to play a disc. If a programmed sequence of tracks exists for that particular disc, the program will be played from its beginning.
19. Standby & Standby LED Assuming that the Nº390S is connected to AC power and the main power switch on the rear panel is in the “|” position (see Rear Panel, Nº390S), pressing this button takes the Nº390S out of standby mode and enables the front-panel controls. When the Nº390S’s main power switch is first turned on (or when power is restored after an interruption), the Nº390S will go through a brief initialization and then be ready to operate (that is, it won’t be in standby mode).
Rear Panel, Nº390S 1. AC power input and switch This input accepts AC power from the AC mains (via the supplied AC cable). Warning! 24 The Nº390S is set internally for 100, 120, 200, 220, or 240VAC mains operation at either 50 or 60Hz. Make sure that the label on the bottom of the unit indicates the correct AC operating voltage and frequency for your location before connecting it to AC mains. Connect the female end of this cable to the Nº390S.
Caution: Do not switch power off and on rapidly, as this interrupts the normal power-up sequence. We advise waiting at least five seconds between power cycles. 2. Digital Outputs These outputs provide digital audio signal (DAS) via cables equipped with either XLR-type or RCA-type connectors to a digital audio processor. The XLR output conforms to the Audio Engineering Society/ European Broadcast Union (AES/EBU) professional digital audio standard, which calls for a 110Ω transmission of the DAS.
3. digital inputs These inputs accept digital audio signal (DAS) via cables equipped with either EIAJ optical or RCA (S/PDIF) coaxial connectors from digital sources such as a compact disc transport, laser disc transport, digital audio tape transport, or digital broadcast receiver.
5. single-ended analog outputs These outputs provide single-ended line-level analog audio (via cables equipped with RCA-type connectors) to a preamplifier, integrated amplifier, or receiver. Alternatively, you may elect to use the variable output capability of the Nº390S as a volume control, driving the power amplifier in your system directly. Of course, this approach is only appropriate in relatively simple systems lacking any analog sources.
7. communication ports These communications ports allow the Nº390S to “link” to certain compatible Mark Levinson components. (See “Special Functions.”) Linking Connections The Mark Levinson Linking system provides for inter-component communications. Normally, the digital processor in the system would serve as the “master” of this communications system, while other components including the transport would be “slaves” to that master.
Electrically, the Link connection between the preamplifier and the power amplifier(s) in the system is independent of and distinct from the communications Links between various source components and the preamplifier. The reason for this is simple: the power amplifiers, lacking any microprocessor of their own, are dependent on the intelligence of the preamplifier for their Linked functionality. This remains true even when you employ the Nº390S as your “preamplifier.
Remote Control, Nº390S 1. IR Transmitter window The Nº390S’s Remote Control sends infrared (IR) commands through its projection lens, and the Nº390S receives IR commands through its Remote sensor window. (See “Front Panel, Nº390S”). If either of these lenses is obstructed, no IR commands can be received by the Nº390S. If you notice IR performance deteriorating, you may want to clean these lenses with a soft cloth and some glass cleaner.
• stop/dwr ( ) Press to stop play. The same button will operate the drawer if stopping the disc has no relevance (e.g., if it is already stopped, or if there is no disc inside the Nº390S). • pause ( ) Press to pause play in the current location. If left in pause mode for more than two minutes, the Nº390S will enter extended pause mode, shutting down both the laser and the drive motors to enhance longevity and reliability.
5. Numeric Keypad The numbers 0, 1, 2, 3, 4, 5, 6, 7, 8, and 9 may be used to directly access individual track numbers of discs played by the Nº390S. For example, to go directly to track 13, press 1 followed by 3, and then press play. You do not have to add a 0 before a single-digit track number: 7, followed by play, will take you directly to track number 7. (In fact, if the Nº390S is already in play, simply pressing the number button will be sufficient.
6. Other Operational Buttons • time Pressing this button (followed by appropriate numbers from the numeric keypad) allows direct access to any particular time on a disc. Note that this is a context-sensitive control—the time accessed will be according to the currently selected time display mode, e.g., 30:00 with the time remaining and time on disc LEDs lit will take you to that point where thirty minutes remains to the end of the disc.
• (+) volume Pressing this button on the Nº390S remote control will transparently and automatically raise the volume of a Linked Mark Levinson preamplifier, minimizing the need to juggle multiple remotes. Since this function depends on the ability of the Nº390S to pass the instruction to the Nº380 (for example), the two components must be connected by a Link cable. (See Special Functions for more information.
Conditions that Affect IR Performance IR communication between the Remote Control and the Nº390S can be affected by: • direct sunlight • interior lighting • wall, window, ceiling, and floor treatments • the angle of the Remote Control relative to the Nº390S If the Nº390S will be subject to direct sunlight, place it no more than 10 feet from where you’ll normally operate the Remote Control. Where bright sunlight virtually floods the room, IR communication may be inconsistent.
Setup and Installation Caution! Connecting AC Mains For your protection, review “Important Safety Instructions” before you install your Nº390S. Plug the female end of the AC power cord into the appropriate socket on the rear panel of the Nº390S, being certain to seat it firmly, all the way into the receptacle.
Connecting the Digital Audio Outputs The Nº390S incorporates AES/EBU and S/PDIF electrical output connectors for use with either digital recorders or with outboard digital processors. (See Rear panel, Nº390S.) Using appropriate cables, connect the appropriate outputs on your Nº390S to your external digital components. Making Link Connections The Nº390S incorporates sophisticated inter-component communications capabilities when Linked to compatible Mark Levinson components.
Basic Operation Before operating your Nº390S, take a minute to become familiar with its controls and their locations. (See “Front Panel, Nº390S” and “Remote Control, Nº390S.”) Loading a CD To load a CD: 1. Make sure that the main power switch is set to the “|” position. 2. Press stop/drawer to open the drawer. 3. Place a CD into the recess of the drawer, label side up. Handle the CD by the outer edges and center hole only. 4. Press stop/drawer.
Navigating the Disc You may skip to another track any time while a CD is playing. To move to another track, press next (to go forward) or previous (to go backward) until the number of the track you want to play shows on the Display. (You may also select the track using the numbered buttons on the Remote Control.) Play will resume as soon as the pickup reaches that track.
Alternatively, you might want to set the Nº390S to play music for a specific period of time. Say you’d like to listen to music until the evening news begins in 30 minutes. Make sure both the time on disc and time remaining LEDs are on (indicating time remaining on disc, the default display mode when in stop); press time; enter 3 0 0 0; and press play. This sequence will direct the Nº390S to a point 30 minutes from the end of the disc, and engage play at that point.
A-B Repeat To repeat (continuously) a specific phrase or passage on a CD (when learning how to play a favorite solo, for example), press A–B on the remote at the beginning of the passage you would like to repeat. At the end of the passage, press A–B on the remote again. The passage you selected will repeat continuously. While the repeat A–B function is active, the letters A and B will alternate, preceding the track number on the display. To return to normal play, press the A–B button again.
The Nº390S’s memory can store play lists for thousands of different CDs. Saved play lists remain in memory when you place the Nº390S into standby, when you turn off the main power switch — even if AC power is interrupted. When you load a CD, the Nº390S reads that CD’s unique identification code. If you assemble a play list for a particular CD and save it into the Nº390S’s memory, the Nº390S “remembers” that CD’s play list.
Programming by Omission If you want to play most of a CD, and just “omit” a few tracks, you may want to use this shortcut: 1. Load a CD, and wait for the display to show the number of tracks and their total playing time. 2. Make sure that the Nº390S is in the programming mode by clicking the mode button until you see PROGRAM in the display. 3. Using the next and previous buttons (or the numbered buttons on the Remote Control), select the first track you want to eliminate from your program. 4.
Note: If you try to review a nonexistent play list, the display will show NO PGM. 4. To view the next selection, press mode + again, and so on. 5. After you view the last selection, one more press of mode + will cause the display to show END PGM momentarily, and then move on to show the first track in the play list. Deleting a Track from a Play List You may delete any selection from a play list. To delete a selection: 1.
5. Repeat steps 2 and 3 for each selection you want to add to your program. Make sure to press mode + after each selection. 6. If you would like to make this change permanent, press and hold mode + when you finish erasing selections from your program; the display will show REVISED. Overriding a Play List When you load a CD, the Nº390S reads its unique identification code. If you assemble a play list for a particular CD and save it into the Nº390S’s memory, the Nº390S “remembers” that CD’s play list.
To complicate matters further, different portions of (or instruments on) the recording may experience even or odd numbers of inversions, resulting in no single “correct” playback setting. This problem is particularly common among multiple-microphone recordings. Ultimately, only you can decide whether one polarity setting sounds better than the other, and if so, which you prefer. Fortunately, if the Nº390S can control the playback polarity of its processor from the remote control.
displayed, and then press the positive command for program + (see Special Commands table, page 55) to revise the program. Overriding a Polarity Program If you want to double-check you previously-saved polarity program, simply press the polarity button at any time. Doing so will change the polarity of the Nº390S, but will not modify the polarity program (e.g., the next time you play the disc, the polarity you saved in the program will be used).
At any point, having selected the menu item you would like to change, use the mode + and mode – buttons to turn various options on or off, respectively. SOUND Menu Items: • Fixed/Variable Volume The Nº390S gives you the option of engaging a high quality analog volume control, allowing you to use the Nº390S as a digital-sources- only “preamp,” driving a power amplifier directly. This capability is particularly useful in simple systems involving only two or three digital sources.
• Locked Volume Lastly, if (and only if) the volume control circuitry is engaged, you have the option of setting a maximum volume beyond which the Nº390S will not go. This is particularly helpful if you have a combination of high sensitivity speakers and high sensitivity power amplifiers, which might make the normal maximum volume setting on the Nº390S dangerously loud for your particular system. (It was designed to be able to drive even relatively insensitive systems.
• Display Link This links the display intensity functions of the Nº390S and the other Linked components. When the components are linked, all displays will be set to the same brightness. Pressing display intensity on any of the Linked components will affect all the displays.
input selection process to a simple toggle between the two used inputs. Labeling both auxiliary inputs “N.U.” will effectively disable the input selection process on the Nº390S, although it will still control the analog inputs of a Linked preamplifier. Changing Link Options The following procedure will guide you through changing your Link options, should you decide you would like something other than the factory default settings.
To change between manual and timed/ automatic standby: 1. Press and hold the standby button until the display reads MANUAL. 2. Release the standby button and then use the previous and next buttons to either advance or reduce the amount of time you want to transpire between the last activity of the Nº390S and its going into standby. You may select any number of minutes between 1-120. You may restore normal, manual operation by pressing previous to go “below” 1 minute, into MANUAL standby operation. 3.
If you change your mind, simply don’t touch any button for ten seconds and the Nº390S will return to normal operation. (Hint: you may remember that this special “hidden” feature of the Nº390S is accessed via a press-and-hold of the repeat button by associating its use with the external IR “repeaters” so often used in custom installations; the functionality found here is of most value in such installations.) 2. Press any front panel button to cause the Nº390S to send the corresponding IR command.
These “positive control” commands in the Nº390S will place it into a certain mode of operation regardless of its current state. For example, a positive control command to enter standby will leave the Nº390S in standby if already there, or switch it to standby if it is currently operating. This type of positive control is especially helpful when you do not necessarily know the current status of the Nº390S, as might be the case in a multi-room home entertainment system (for example). 1.
5. Repeat the process of “teaching” new special commands until all desired commands have been learned by your remote control. If you take longer than approximately ten seconds between button pushes, the Nº390S will time out and return to normal operation. If this occurs, return to step #1 in this section. You may move through the entire list by pressing repeat. 6. When finished, return to normal operation by allowing the Nº390S to “time out.
Troubleshooting In general, refer any service problems to your Mark Levinson dealer. Before contacting your dealer, however, check to see if the problem is listed here. If it is, try the suggested solutions. If none of these solves the problem, contact your Mark Levinson dealer. 1. The Nº390S won’t function, and the display is dark. The unit is in standby. Press the standby button. The Nº390S isn’t plugged into the AC mains or the main power switch isn’t turned on.
5. When a CD is playing, the sound "skips." The CD is severely scratched or dirty. The Nº390S is on an unstable surface or is too close to your speakers. 6. The linked functions don’t work. The Link cable is disconnected, or is connected incorrectly. Check your Link connections. The Link options are turned off. The preamplifier is not aliased (renamed) for the Nº39. The processor (if one is being used) does not have one of its inputs tied to the Nº390S.
Care and Maintenance To remove dust from the cabinet of the Nº390S, use a feather duster. To remove dirt and fingerprints, we recommend isopropyl alcohol and a soft cloth. Caution! Always apply the isopropyl alcohol to the soft cloth and then wipe the Nº390S with the dampened cloth. Never pour or spray even small amounts of any liquid directly on the Nº390S, as doing so may allow the liquid to reach the circuitry inside the unit.
Specifications The correlation between published specifications and sonic quality is unreliable. A list of numbers reveals virtually nothing. All technical measurements must be subject to qualitative as well as quantitative interpretation. Measurements of the Nº390S yield excellent results by any standards. However, only those specifications that apply to its actual operation are included here. Frequency Response • 10Hz - 20kHz, +0dB, –0.3dB Total Harmonic Distortion (THD) • 0.
Output Complement: Other I/O 60 • 2 male XLR balanced audio outputs • 2 RCA single-ended audio outputs • 1 AES/EBU (XLR) digital output • 1 S/PDIF (RCA) digital output • 2 RJ-45 modular Communication Links • 1 3.
Dimensions 61
Installation Notes 62
3 Oak Park, Bedford, MA, 01730-1413 USA | Telephone: 781-280-0300 | Fax: 781-280-0490 | www.marklevinson.com Customer Support: Telephone: 781-280-0300 | Sales Fax: 781-280-0495 | Service Fax: 781-280-0499 Product Shipments: 16 Progress Road, Billerica, MA 01821-5730 USA Part No.