Installation Instructions & Release Notes Nº 320S Preamplifier Phono Modules
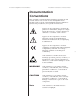
Safety Summary The following general safety precautions must be observed during all phases of operation, service, and repair of the component. Failure to comply with these precautions or with specific warnings elsewhere in this document violates manufacturer safety standards and intended use of the component. Mark Levinson assumes no liability for failure to comply with these requirements.
ESD (Electrostatic Discharge) Precautions CAUTION The following practices minimize possible damage to circuit board assemblies resulting from electrostatic discharge or improper insertion: • Keep circuit board assemblies in their original containers until ready for use. • Avoid having plastic, vinyl, or Styrofoam in the work area. • Wear an anti-static wrist strap. • Discharge personal static before handling circuit board assemblies. • Remove and insert circuit board assemblies with care.
Installation Instructions & Release Notes Mark Levinson Table of Contents Documentation Conventions . . . . . . . . . . . . . . . . . . . . . . . . .5 Special Design Features . . . . . . . . . . . . . . . . . . . . . . . . . . . . .6 Unpacking . . . . . . . . . . . . . . . . . . . . . . . . . . . . . . . . . . . . . .7 Configuring & Installing the Phono Modules . . . . . . . . . . . . . .7 Configuration Instructions • Installation Instructions Making Phono Input Connections . . . . . . . . . . . . . . .
Nº 320S Preamplifier Phono Modules Installation Instructions & Release Notes Documentation Conventions This document contains hardware installation instructions and software release notes for the Nº 320S Preamplifier Phono Modules. Refer to the Nº 320S Preamplifier Owner’s Manual for general safety, installation, and operation instructions.
Installation Instructions & Release Notes Mark Levinson Special Design Features • Seamless Integration When the phono modules are installed, the stereo input connector labeled 7 becomes the phono input connector, accepting input signals from most phono cartridges. As a result, the phono modules benefit from all the high-performance power supply and noise suppression features designed into the Nº 320S, allowing them to deliver exceptional sound quality.
Nº 320S Preamplifier Phono Modules Installation Instructions & Release Notes Unpacking CAUTION EXPOSURE TO STATIC ELECTRICITY MAY DAMAGE OR DEGRADE THE PHONO MODULES. KEEP CIRCUIT BOARD ASSEMBLIES IN THEIR ESD PROTECTIVE BAGS UNLESS CONFIGURING OR INSTALLING. DO NOT REMOVE CIRCUIT BOARD ASSEMBLIES FROM THEIR ESD PROTECTIVE BAGS WITHOUT FOLLOWING ESD PRECAUTIONS (PAGE 3). When unpacking the phono modules: • Save all packing materials for possible future shipping needs.
Installation Instructions & Release Notes Configuration Instructions Mark Levinson The phono modules must be optimized to work with the associated phono cartridge. Each phono module includes: • 1 adjustable resistive load jumper • 1 adjustable capacitive load jumper • 1 adjustable input gain jumper • 2 screw terminals that accommodate custom loads These features are identified in the illustration shown below.
Nº 320S Preamplifier Phono Modules Installation Instructions & Release Notes 1. Resistive Load (RL) Jumper Moving-coil phono cartridges often benefit from a low-value resistor termination. • Leave the resistive load jumper CLOSED to place a 200Ω resistor load on the phono input. • OPEN the resistive load jumper to place a 47kΩ resistor load on the phono input. 2. Capacitive Load (CL) Jumper Low-impedance moving-coil phono cartridges often benefit from a capacitor termination.
Installation Instructions & Release Notes Installation Instructions Mark Levinson The following materials are needed to install the phono modules: Item Quantity Nº 320S Preamplifier 1 Nº 320S phono modules 2 Anti-static wrist strap 1 1/8-inch hex-key 1 Flat-blade screwdriver 1 Note The phono modules must be configured BEFORE installation. WARNING THESE SERVICE INSTRUCTIONS ARE ONLY INTENDED FOR USE BY QUALIFIED PERSONNEL.
Nº 320S Preamplifier Phono Modules Installation Instructions & Release Notes To install the phono modules: 1. Place the Nº 320S upside-down on a towel covering a flat, level surface such as a table or workbench. Do not place the Nº 320S on a surface that is unstable. Note Perform these installation instructions at a static-free workstation to avoid damaging circuit boards.
Installation Instructions & Release Notes Mark Levinson Installation Instructions (continued) 7. Refer to illustrations shown below to locate the following: A. Phono module insertion slots B. Phono module mounting terminals C. Location P300 (plug) D. Location P500 (plug) E. Location P10 (socket) F. Phono module mounting bracket and screw CUSTOM TERMINATION E OPEN P10 F B D 12 RL =47K RL =200 C L =0nF C L=10nF G=40db G=60db No.
Nº 320S Preamplifier Phono Modules Installation Instructions & Release Notes 9. Align the phono module mounting bracket mounting screw (F) with the mounting terminal (B) on the main circuit board. Then, use the supplied flat-blade screwdriver to secure the phono module to the main circuit board. Take care not to “over-tighten” the mounting screw. 10. Gently slide the other phono module into the right-most insertion slot (A) as shown in the illustration to the right.
Installation Instructions & Release Notes Mark Levinson Making Phono Input Connections Installing the phono modules allows the Nº 320S to serve as a phono preamplifier. When shipped the Nº 320S includes seven stereo input connectors that accept line-level input signals from associated components. Once the phono modules are installed, the stereo input connector labeled 7 serves as the phono input connector, accepting input signals from a phono cartridge.
Nº 320S Preamplifier Phono Modules Installation Instructions & Release Notes Phono Input Settings When the phono modules are installed, the stereo input connector labeled 7 serves as the phono input connector. This input is renamed PHONO within the setup menu, and new parameters and settings are added to its Set Inputs menu. Other inputs and setup menus are not affected. The revised setup menu is shown below. No320S Setup Set Inputs Teach IR Mute = -20.0 MaxVol= 80.0 Trig.= 12v,L Sw 1.00 B.
Installation Instructions & Release Notes Mark Levinson Phono Input Settings (continued) The table below indicates all Set Inputs menu parameters available for the phono input. Parameter Default Setting Possible Settings Name PHONO PHONO, PH/MC, unused Gain* +12dB +0dB, +6dB, +12dB, +18dB Offset* 0.0dB –20.0 to +20.0dB Bal 0.0 0.0 to 6.0 (left or right) Rec.
Nº 320S Preamplifier Phono Modules Character List A D G J M P S V Y 1 7 + ( a d g j m p s v y 2 8 – ) B E H K N Q T W Z 3 9 . , b e h k n q t w z 4 & / _ C F I L O R U X _ 5 ‘ : c f i l o r u x 0 6 * ? Installation Instructions & Release Notes When the phono modules are installed, the phono input has access to the same character list as the other stereo inputs. This character list is shown at the left.
Installation Instructions & Release Notes Mark Levinson Name (continued) 6. Rotate the volume knob or press the volume ± buttons to scroll through all available characters. 7. When the desired character appears on the front panel display, press the enter button to select this character. The cursor will automatically advance to the next character space. • SAVING DATA Custom input names can consist of up to 7 characters, including letters, numbers, punctuation marks, and blank spaces. 8.
Nº 320S Preamplifier Phono Modules Installation Instructions & Release Notes To adjust the Bal parameter: PHONO (7) 1. Rotate the front panel select knob or press the remote control select ± buttons to select the phono input. • Name= PHONO 2. Press and hold the front panel or remote control setup button until the Name parameter appears on the front panel display. • Bal= <-0.0-> The front panel display indicates the name and volume level of the selected input.
Installation Instructions & Release Notes Mark Levinson Phono Module Specifications Unless otherwise specified, these specifications indicate nominal values measured over a 20Hz to 20kHz bandwidth through balanced (XLR) connections. Gain • 40 or 60dB @ 1kHz Input Overload • • >100mV @ 1kHz, 40dB gain 200Ω or 47kΩ (user-selectable) Custom • • • THD + N • <0.
Nº 320S Preamplifier Phono Modules Installation Instructions & Release Notes Notes 21 (continued)
Installation Instructions & Release Notes Notes (continued) 22 Mark Levinson
Nº 320S Preamplifier Phono Modules Installation Instructions & Release Notes 23
3 Oak Park, Bedford, MA, 01730-1413 USA | Telephone: 781-280-0300 | Fax: 781-280-0490 | www.marklevinson.com Customer Support: Telephone: 781-280-0300 | Sales Fax: 781-280-0495 | Service Fax: 781-280-0499 Product Shipments: 16 Progress Road, Billerica, MA 01821-5730 USA Part No.