MAC III™ PERFORMANCE USER MANUAL
Dimensions All measurements are expressed in millimeters The minimum center-to-center distance can be reduced if pan limits are set via the control menus © 2008-2010 Martin Professional A/S. Information subject to change without notice. Martin Professional A/S and all affiliated companies disclaim liability for any injury, damage, direct or indirect loss, consequential or economic loss or any other loss occasioned by the use of, inability to use or reliance on the information contained in this manual.
Contents Safety Information . . . . . . . . . . . . . . . . . . . . . . . . . . . . . . . . . . . . . . . . . . . . . . . . . . . . . . . . . . . . . . . . . . 5 Introduction . . . . . . . . . . . . . . . . . . . . . . . . . . . . . . . . . . . . . . . . . . . . . . . . . . . . . . . . . . . . . . . . . . . . . . . . 7 Unpacking . . . . . . . . . . . . . . . . . . . . . . . . . . . . . . . . . . . . . . . . . . . . . . . . . . . . . . . . . . . . . . . . . . . . . . . . 7 Using for the first time . . . . .
Lubrication . . . . . . . . . . . . . . . . . . . . . . . . . . . . . . . . . . . . . . . . . . . . . . . . . . . . . . . . . . . . . . . . . . . . . . . Replacing a color filter . . . . . . . . . . . . . . . . . . . . . . . . . . . . . . . . . . . . . . . . . . . . . . . . . . . . . . . . . . . . . . Gobos in the MAC III Performance . . . . . . . . . . . . . . . . . . . . . . . . . . . . . . . . . . . . . . . . . . . . . . . . . . . . Replacing the gobo animation wheel. . . . . . . . . . . . . . . . . . .
Safety Information WARNING! Read the safety precautions in this section before installing, powering, operating or servicing this product. The following symbols are used to identify important safety information on the product and in this manual: DANGER! DANGER! DANGER! Safety hazard. Refer to Hazardous Risk of severe manual before voltage. Risk of injury or death. installing, severe or lethal powering or electric shock. servicing. Warning! Fire hazard. Warning! Burn hazard. Hot surface. Do not touch.
LAMP SAFETY • Prolonged exposure to an unshielded discharge lamp can cause eye and skin burns. Do not stare directly into the light output. Never look at an exposed lamp while it is lit. • Do not operate the fixture with missing or damaged covers, shields, lenses or ultraviolet screens. • A hot discharge lamp is under pressure and can explode without warning.
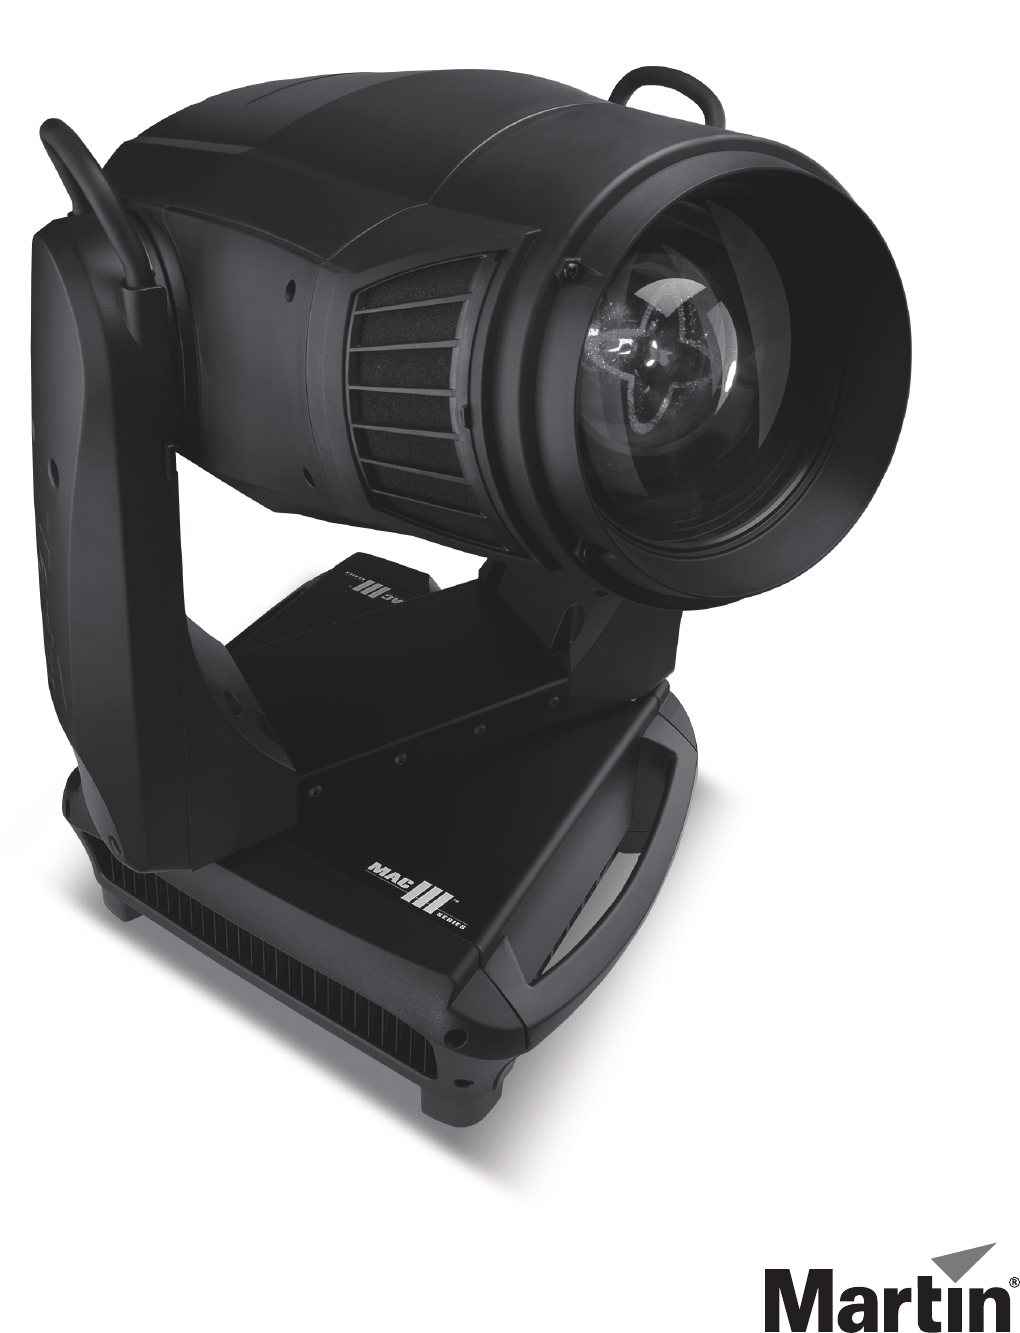
Introduction Thank you for selecting the Martin™ MAC III Performance™.
AC power Warning! For protection from electric shock, the fixture must be grounded (earthed). The AC mains supply must be fitted with a fuse or circuit breaker and ground-fault (earth-fault) protection. Important!Check that the correct fuse is installed before applying power. Power input and primary fuses The MAC III Performance features an auto-sensing switch-mode power supply that automatically adapts to 200-240 V (nominal) AC power at 50 or 60 Hz.
Lamp About the discharge lamp The MAC III Performance is designed for use with an Osram HTI 1500W/60/P50 lamp. This highly efficient double-ended short-arc source provides a color temperature of 6000 K, a color rendering index greater than 85, an average service life of 750 hours and semi-hot restrike, meaning that a hot lamp is ready to strike again after 90 seconds.
Lamp adjustment Warning! Adjust the lamp with the fixture cool. The fixture may become hot during adjustment, so wear heat-resistant safety gloves. As well as being undesirable for aesthetic reasons, a significant hot-spot in the beam will focus extra heat onto optical components and may cause damage that is not covered by the product warranty. After fitting a new lamp, adjustment may be required to obtain an even beam. To adjust the lamp: 1.
DMX data link The MAC III Performance has 5-pin locking XLR sockets for DMX and RDM input and output. The default pin-out on both sockets is: • pin 1 to shield Port 1, DMX and RDM communication: • pin 2 to data 1 cold (-) • pin 3 to data 1 hot (+) Port 2, not used by default but available for data communication: • pin 4 to data 2 cold (-) • pin 5 to data 2 hot (+). The default use of Port 1 for DMX and RDM can be altered in the control panel (see “Personality – tailoring performance” on page 16).
Physical installation Warning! The MAC III Performance has a powerful pan motor. The torque reaction when the head is panned suddenly can cause the base to move if the fixture is standing unsecured on a surface. Do not apply power to the MAC III Performance unless the base is securely fastened to a surface or to rigging hardware. Warning! Use 2 clamps to rig the fixture. Do not hang the fixture from only one clamp. Lock each clamp with both 1/4-turn fasteners.
2. Bolt each clamp securely to a clamp bracket with an M12 bolt (minimum grade 8.8) and lock nut. Figure 5: Martin half-coupler clamp 3. See Figure 6. Note the position of the arrows on the bottom of the base that indicate the front of the fixture. Figure 6: Front of fixture 4. Align a clamp with 2 mounting points in the base. See Figure 7. Insert the fasteners into the base and turn both levers a full 1/4-turn clockwise to lock. Install the second clamp. 5. Block access under the work area.
Control panel operations You can configure individual fixture settings such as the MAC III Performance’s DMX address, read out data, execute service and view the event log using the fixture’s backlit graphic display and control panel. The control menu overview starting on page 55 gives a complete list in table form of the menus and commands available.
Battery power The display and control panel are powered by the MAC III Performance’s onboard battery. This gives access to the most important functions in the control panel – including DMX addressing – when the fixture is not connected to AC power. To activate the display when the fixture is not connected to power, press the Escape button. The display extinguishes after 10 seconds with no jog wheel activity and the control panel is de-activated after 1 minute with no jog wheel activity.
DMX addressing is limited to channels 1 - 478 in 16-bit mode and 1 - 472 in 16-bit extended mode. The upper limit makes it impossible to set the DMX address so high that you are left without enough control channels for the fixture. DMX address setting To set the fixture’s DMX address: 1. Press the jog wheel to enter the main menu. 2. Rotate the jog wheel to scroll down to DMX ADDRESS, then click the jog button. Rotate the jog wheel to scroll to the desired address and click the jog button to save. 3.
Pan range for pan limit purposes runs from 0° to 360° clockwise as seen looking at the fixture from the bottom of the base towards the yoke, as if the fixture was hanging downwards underneath you. Tilt range is +134° and -134° either side of 0°, which is the head straight up position with the front glass pointed directly away from the base. The light beam points fully forward (the front of the fixture is indicated by the arrows printed under the base) when pan is set to 90° or 450° and tilt is set to +90°.
DMX % DMX % Optically linear VRMS linear Output Output Output Output Forced sets all fans to 100% speed until another FAN CLEAN MODE setting is selected. This feature does not eliminate the need to inspect and clean cooling fans at regular intervals (see “Cleaning” on page 39). - FAN MODE allows you to set fans to Always on or Follow lamp off mode, in which fan operation is disabled when the lamp is powered off.
• ERROR MODE enables or disables error warnings. If set to Start, the display is activated and lights up if the fixture needs to report an error. If set to Silent, the fixture does not light the display with error warnings but error messages can still be read when the display is activated manually. In both Start and Silent modes, the status LED in the jog wheel lights amber to indicate a warning and red to indicate an error.
DMX signal monitoring The MAC III Performance provides data on the DMX signal it is receiving in the DMX LIVE menu. This information can be useful for troubleshooting control problems. RATE displays the DMX refresh rate in packets per second. Values lower than 10 or higher than 44 may result in erratic performance, especially when using tracking control. QUALITY displays the quality of the received DMX data as a percentage of packets received.
Adjusting settings via DMX Certain fixture settings and parameters can be adjusted from the DMX controller on DMX channels 33 and 34 in 16-bit mode or channels 39 and 40 in 16-bit extended mode. Commands sent via DMX override any settings entered in the fixture’s onboard control menus.
• Zoom/focus linking • Pan/tilt limits • Calibration offsets Defining calibration offsets via DMX The ”Fixture adjustments/calibration” DMX channel allows effect offsets to be adjusted and stored in the fixture from the DMX controller. To adjust an effect offset: 1. Set the effect to a DMX value from 0 to 255 on its own DMX channel (for example, set Cyan to 192 on channel 3 in 16-bit mode or 4 in 16-bit extended mode). 2.
Effects This section gives details of the effects that can be controlled via DMX. See “MAC III Performance DMX protocol” on page 47 for details of the channels used to control them. Where fine control is available, the main control channel sets the first 8 bits (the most significant byte or MSB), and the fine channels set the second 8 bits (the least significant byte or LSB) of the 16-bit control byte. In other words, the fine channel works within the position set by the coarse channel.
first channel, the indexed angle or rotation speed are set on the next channel. If gobo indexing is selected on the first channel, fine control of gobo index angle is available on the third gobo wheel control channel in both 16-bit and 16-bit extended modes. Crossfading speed between rotating gobos can be set on channel 21 (in 16-bit) or 25 (in 16-bit extended mode).
Animation wheel The MAC III Performance is supplied with the “Tribal waves” gobo animation wheel (P/N 62325143) installed. See under “Specifications” on page 65 for full specifications for this component. Additional stock patterns will be available as accessories from Martin dealers. Figure 14: Tribal waves gobo animation wheel Beam effect (frost) The MAC III Performance is fitted with a frost filter that can be applied to or removed from the beam remotely.
Pan and tilt Coarse and fine pan and tilt control are available in both 16-bit and 16-bit extended modes. Maximum and minimum pan and tilt limits can be set using the control panel (see “Personality – tailoring performance” on page 16) and via DMX. Rotating Framing The 4-blade framing module in the MAC III Performance can be held static or rotated continuously with variable speed. It can form the beam into any shape with three or four sides and morph between shapes.
Followspot mode The MAC III Performance fixture software from version 1.6.0 features a followspot mode in which the fixture ignores any pan, tilt, or pan and tilt commands sent via DMX or the control menu, releasing the head for use as a followspot. In followspot mode, the pan and/or tilt motors can be engaged or disengaged from the control menu as a brake to pan, tilt, or both pan and tilt movement to prevent the head from moving when it is not being held in place.
• Whatever type of screw used, the portion of the screw that goes into the rear head cover must have a length of between 12 mm (0.47 in.) and 15 mm (0.6 in.). • The rear head cover becomes very hot. Ensure that handles are insulated well enough to avoid discomfort or burn injuries for the followspot operator. • A handle must only be fitted after followspot mode is enabled and tilt is performed manually. Always remove any handle that is fitted before disengaging followspot mode.
RDM The MAC III Performance can communicate using RDM (Remote Device Management) in accordance with ESTA’s American National Standard E1.20-2006: Entertainment Technology RDM Remote Device Management Over DMX512 Networks. RDM is a bi-directional communications protocol for use in DMX512 control systems, it is the open standard for DMX512 device configuration and status monitoring.
MAC III Performance supported standard commands GET allowed SET allowed RDM parameter ID’s (slot 21-22) Notes Category – Network Management DISC_UNIQUE_BRANCH DISC_MUTE DISC_UN_MUTE Category - Status Collection 9 QUEUED_MESSAGE 9 STATUS_MESSAGES 9 STATUS_ID_DESCRIPTION 9 CLEAR_STATUS_ID Category - RDM Information 9 SUPPORTED_PARAMETERS 9 PARAMETER_DESCRIPTION Category – Product Information 9 DEVICE_INFO 9 DEVICE_MODEL_DESCRIPTION 9 MANUFACTURER_LABEL 9 9 DEVICE_LABEL 9 9 FACTORY_DE
RDM accessible onboard sensors The following onboard sensors are RDM accessible: LAMP R FAN LAMP L FAN BOTTOM FAN CMY FAN FAN SPEED TOP FAN MAINBOARD FAN POWER FAN 1 POWER FAN 2 UI PCB CHARGER PCB BATTERY FAN PCB ANIMATION FX PCB TEMPERATURE GOBO FX PCB CMY PCB ZOOM FOCUS PCB PAN/TILT PCB POWER UNIT PCB POWER UNIT CAPACITOR MAINS VOLTAGE POWER UNIT LAMP VOLTAGE LAMP CURRENT LAMP WATTAGE MAC III Performance supported manufacturer specific commands GET allowed SET allowed 9 9 9 9 RDM parameter ID
9 9 FOLLOW_SPOT_MODE 9 FOLLOW_SPOT_MODE_LOCK_TOGGLE 9 9 FOLLOW_SPOT_MODE _LOCK_PAN 9 9 FOLLOW_SPOT_MODE _LOCK_TILT Fixture cooling settings 9 9 LAMP_COOLING 9 9 FAN_CLEAN 9 9 FAN_MODE Fixture other settings 9 32 SERIAL_NUMBER 9 LICENSE_KEY 9 EVENT_LOG_USER_EVENT_TRIGGER MAC III Performance user manual
Service and maintenance Warning! Disconnect the fixture from power and allow to cool for 2 hours 45 minutes before removing any cover. Important! Excessive dust, smoke fluid, and particulate buildup degrades performance, causes overheating and will damage the fixture. Damage caused by inadequate maintenance is not covered by the warranty. This section lists service and maintenance operations that may be carried out by the user. Refer any operation that is not described here to a qualified Martin technician.
Event log The MAC III Performance from software version 1.5.0 monitors performance, any errors or warnings, temperatures, etc. and stores data in an ongoing service event log that can be viewed in the fixture’s display or downloaded to a USB memory device and viewed on a PC. Power cycle reports are created automatically each time the fixture is powered up. The fixture stores up to 25 power cycle reports in memory. If the memory is full, the oldest report is deleted each time a new report is generated.
4. Connect the USB memory device to a PC. Logs are stored in the root directory of the memory device in a folder called EVENT LOGS MAC III SERIES using the naming convention LOG MACIII XXXXXXXXXX.xml (where XXXXXXXXXX is the serial number of the fixture). The XML files can be viewed using any web browser that supports XSLT 1.0 such as Internet Explorer 6, Firefox 3, Google Chrome 1, Opera 9, Apple Safari 3 or later versions. 5. Double-click on the event log to open it in your web browser.
• Fixture Information displays data from the fixture’s timers when it was last powered up. • Module Information displays data from the fixture’s effects modules. • PCB information displays data from the fixture’s PCBs. • The Event Section lists all the errors, warnings and setting changes carried out by the user since the last power cycle in the event log. The Time column on the left of the box displays the amount of time between the fixture powering up and the event.
The example below in the Dynamic Content section, shows temperature data for the different sensors in the fixture. In the example, the fixture was powered on 3 hours and 15 minutes before the current temperature data was logged. Temperature change over time at 15 minute intervals can be followed in the table. If you wish, it can also be copied and pasted into spreadsheet software such as Microsoft Excel.
4. Make sure that you are ready for the head to move, then press the Escape button to exit pan/tilt sensor calibration. The head will now pan and tilt back to where it was before you entered calibration mode. Calibrating effects Calibration can be carried out via DMX (see “Defining calibration offsets via DMX” on page 22) but the easiest approach is probably to set multiple fixtures to the same position (e.g.
7. Reconnect the data link. Zoom-focus linking is reset to default (medium distance) when new software is uploaded. Other fixture information and settings are unaffected. Forced upload The fixture can be forced to automatically upload a software file from a USB stick if the Escape button is held down during power up.
Cleaning and replacing the air filters The item AIR FILTERS in the FIXTURE INFORMATION menu is intended to be used to monitor intervals between air filter cleaning, although this counter can be used to monitor any aspect of the fixture. When air filters require cleaning: 1. Disconnect the fixture from power and allow the components to cool for 2 hours 45 minutes. 2. See Figure 17.
Cleaning the fixture To clean the head: 1. Disconnect the fixture from power and allow the components to cool for 2 hours 45 minutes. 2. Remove both head covers by loosening their quarter-turn retaining screws (see Figure 20). 3. Vacuum or gently blow away dust and loose particles inside the head with compressed air. 4.
A B Figure 21: Color filter and gobo replacement Gobos in the MAC III Performance The MAC III Performance uses specially-designed borosilicate 3.3 gobos with a heavy matted aluminum coating that require particularly careful handling and storage. The use of metal gobos in the MAC III Performance is not recommended. Do not use gobos with dark coatings on any side, as these will absorb heat – either directly from the lamp or reflected back from other gobos and optical components – and will not be durable.
Replacing rotating gobos Important! The gobo can fall out if the spring is inserted backwards. Do not lubricate gobo bearings: excess grease can cause loss of step. Correct gobo orientation is critical. Read the guidelines in Figure 23 carefully before installing a gobo. To replace a gobo: 1. Open the top cover as described under “Replacing a color filter” on page 41. 2. See B in Figure 21 on page 42. Rotate the relevant gobo wheel until the gobo you want to replace is accessible.
Gobo orientation The orientations shown in Figure 23 are correct in most cases, but consult your Martin dealer or gobo supplier if you are in any doubt about the orientation of a specific gobo type. To minimize the risk of heat damage, priority must be given to installing gobos with their more reflective sides facing the lamp. Coated Glass Gobos The heavy matted aluminum coated borosilicate gobos in the MAC III Performance are factory-installed with the more reflective sides facing towards the lamp.
Replacing the gobo animation wheel Important! The gobo animation wheel is glass and must be handled gently. Do not attempt to bend it or you will break it. Breakages caused by mishandling are not covered by the product warranty. 1. Disconnect the fixture from power and allow it to cool for 2 hours 45 minutes. 2. Apply the tilt lock in a convenient position. Open the top cover as described under “Replacing a color filter” on page 41. 3. See Figure 24.
Removing modules The MAC III Performance is modular in design. A full procedure for removing and servicing effect modules is included in the Martin™ service package available for the MAC III Performance. Important! A The zoom/focus car and animation wheel must be moved to the positions described below before modules can be removed. 1. See Figure 26.
MAC III Performance DMX protocol Available in software 1.6.
Basic 16-bit Mode 16-bit Extended Mode DMX Value 6 6 7 Function 0 - 100 Yellow White → full yellow 0 1 - 127 128 - 254 255 0 1 - 50 51 - 99 100 Yellow range in random CMY color when random CMY selected on channel 21 (16-bit) or 25 (16-bit extended) Normal (full range) Minimum yellow setting (127 = full yellow) Maximum yellow setting (128 = no yellow) Normal (full range) 0 - 255 0 - 100 CTO Open (6000 K) → warm (3200 K) 0 - 255 5 Percent Color Wheel 7 8 0 1 - 19 20 21 - 39 40 41 - 59 60
Basic 16-bit Mode 16-bit Extended Mode DMX Value Percent Function Gobo wheel: gobo selection, indexing, shake, rotation 0-9 10 - 14 15 - 19 20 - 24 25 - 29 30 - 34 8 9 35 - 39 40 - 44 45 - 49 50 - 54 55 - 59 60 - 89 90 - 119 120 - 149 150 - 179 180 - 209 210 - 232 233 - 255 0-4 4-5 5-8 8 - 10 10 - 12 12 - 14 Indexed gobo: set indexed angle on channel 9 (16-bit) or 10 (16-bit ext.
Basic 16-bit Mode 17 18 16-bit Extended Mode 18 19 19 20 20 21 22 23 24 DMX Value Percent Function 0 - 255 0 - 100 Framing blade 4, position Out → in 0 -126 127 - 128 129 - 255 0 - 49 50 51 - 100 Framing blade 4, angle Angle – Parallel Angle + 0 - 199 200 - 225 226 - 229 230 - 255 0 - 78 79 - 88 89 - 90 91 - 100 Frame rotation: indexing or rotation (MSB) 0 - 395° CW, fast → slow No rotation CCW, slow → fast 0 - 255 0 - 100 Frame rotation: Fine indexing or rotation speed (LSB) 0 -19
Basic 16-bit Mode 21 22 16-bit Extended Mode DMX Value Percent 0 - 18 0-6 19 - 57 7 - 22 25 26 58 - 83 84 - 109 110 - 135 136 - 207 208 - 255 23 - 32 33 - 42 43 - 52 53 - 82 83 - 100 0-5 6 - 10 11 - 15 16 - 20 0-2 2-4 4-6 6-8 21 - 25 8 - 10 26 - 110 10 - 43 111 - 195 44 - 76 196 - 255 77 - 100 Function Color/CMY macros No function (Note: this value is used for setting calibration values on channel 34/40) Color wheel: fast narrow shake → slow wide shake, around currently selected colo
Basic 16-bit Mode 16-bit Extended Mode 28 33 - 34 29 35 30 36 31 37 32 38 DMX Value Percent Function 0 - 255 0 - 100 Zoom (MSB) Flood → spot 0 - 255 0 - 100 Zoom, fine (LSB) 0 - 255 0 - 100 Pan (MSB) Left → right (128 = neutral) 0 - 255 0 - 100 Pan, fine (LSB) 0 - 255 0 - 100 Tilt (MSB) Left → right (128 = neutral) 0 - 255 0 - 100 Tilt, fine (LSB) Table 3: MAC III Performance DMX Protocol 52 MAC III Performance user manual
Basic 16-bit Mode 33 16-bit Extended Mode 39 DMX Value Percent 0-9 10 - 14 15 - 19 20 - 24 25 - 29 30 - 34 35 - 39 40 - 44 45 - 49 50 - 54 55 - 59 0-1 2-3 4-5 6-7 8-9 10 - 11 12 - 13 14 - 15 16 - 17 18 - 19 20 - 21 60 - 64 22 - 23 65 - 69 24 - 25 70 - 74 26 - 27 75 - 79 28 - 29 80 - 84 85 - 89 30 - 31 32 - 33 90 - 94 34 - 35 95 - 99 36 - 37 100 - 139 140 - 144 38 - 53 54 - 55 145 - 149 56 - 57 100 - 154 155 - 159 160 - 164 165 - 169 170 - 174 175 - 199 200 - 204 205 - 209 210 - 214
Basic 16-bit Mode 34 16-bit Extended Mode 40 DMX Value 0 - 39 40 - 44 45 - 49 50 - 54 55 - 59 60 - 64 65 - 69 70 - 74 75 - 79 80 - 84 85 - 89 90 - 94 95 - 99 100 - 104 105 - 109 110 - 114 115 - 124 125 - 129 130 - 134 135 - 139 140 - 144 145 - 149 150 - 154 155 - 159 160 - 179 180 - 184 185 - 189 190 - 194 195 - 199 200 - 204 205 - 209 210 - 214 215 - 219 220 - 224 225 - 229 230 - 234 235 - 239 240 - 244 245 - 249 250 - 255 Percent 0 - 13 14 - 15 16 - 17 18 - 19 20 - 21 22 - 23 24 - 25 26 - 27 28 - 29
Control panel menus Commands marked * can also be executed via DMX Menu level 1 Menu level 2 SETUP WIZARD Gives quick access to most frequently-used menus: FACTORY SETTINGS, DMX ADDRESS, PROTOCOL SET, FIXTURE ID plus most frequently-used PERSONALITY settings: PAN/TILT SETTINGS, SPEED SETTINGS, FANS, DIMMING CURVE, AUTOMATIC LAMP ON, DISPLAY. See table below for details of these settings. Menu level 3 Menu level 4 DMX ADDRESS 1 – 479 (16-bit) 1 – 473 (16-bit ext.
Menu level 1 Menu level 2 Menu level 3 LAMP COOLING FANS FAN CLEAN FAN MODE DIMMING CURVE FOCUS TRACKING PERSONALITY (continued) Menu level 4 Notes (Default settings in bold print) 50% Sets lamp cooling fans to 50% capacity (color temperature of light output from the lamp is different at different thermal lamp temperatures) 80% Sets lamp cooling fans to 80% capacity Off Sets all cooling fans to no cleaning Auto Fan cleaning mode activated automatically if fan error reported Forced Sets
Menu level 1 Menu level 2 PARAMETER SHORTCUTS DISPLAY PERSONALITY (continued) Menu level 3 Menu level 4 Off Effects avoid open positions during effects changes On Effects take shortest route during changes, crossing open positions if necessary. On Display permanently on 2 min. Display goes into sleep mode 2 minutes after last key press 5 min. Display goes into sleep mode 5 minutes after last key press 10 min.
Menu level 1 FIXTURE INFORMATION (continued) DMX LIVE TEST SEQUENCE MANUAL CONTROL Menu level 2 Menu level 3 Menu level 4 FAN SPEED Displays speed in RPM of all cooling fans TEMPERATURE Displays temperature in °C of all PCBs and of ballast capacitor POWER UNIT Displays voltage at mains power input, voltage, current and wattage at lamp terminals, lamp status, igniter status and lamp intensity.
Service and display messages The MAC III Performance gives service and maintenance information by displaying a large 3- or 4-character short code and a smaller full-text message in the display. The short code is visible at a distance, allowing error identification with the fixture still in the rig, for example, while the full-text message gives more detailed information about the error. Service warnings If the MAC III Performance requires service, it displays a warning indicating the service required.
Short code Full-text message CDPT CALIBRATE DATA PAN/TILT Unable to read/write data to external eeprom board (Calibrate Data) on Yoke. The PCB needs to be replaced. CDZF CALIBRATE DATA ZOOM/FOCUS Unable to read/write data to external eeprom board (Calibrate Data) on Zoom/Focus module. The cables need to be checked or the module may need to be replaced. CECH COM ERROR CHARGER I2C communication between main controller and charger failed.
Short code Full-text message FAN LAMP L FAN ERROR FAN BOTTOM FAN ERROR FAN CMY FAN ERROR FAN TOP FAN ERROR FAN MAINBOARD FAN 1ERROR FAN POWER FAN 1 ERROR FAN POWER FAN 2 ERROR FBEP PAN FEEDBACK ERROR Unable to correct pan position FBET TILT FEEDBACK ERROR Unable to correct tilt position FOER FOCUS ERROR FRER FRAMING ROTATION ERROR FSER FRAMING SHUTTER 1 INS ERROR FSER FRAMING SHUTTER 1 ANG ERROR FSER FRAMING SHUTTER 2 INS ERROR FSER FRAMING SHUTTER 2 ANG ERROR FSER FRAMING S
Short code Full-text message LSER LAMP SENSING CIRCUIT ERROR (s/w versions from ver. 1.3) Lamp sensing circuit reports that lamp should be on but is not actually on. LSRR LAMP SENSING CIRCUIT ERROR (s/w versions prior to ver. 1.3) Lamp sensing circuit reports that lamp should be on but is not actually on. LTIM LAMP LIFE WARNING Lamp on counter has timed out and it is time to change the lamp. The counter must be reset once this is done.
Short code Full-text message UPLD DMX UPLOAD ERROR An error occurred during upload via DMX. Check cabling and connections, and then restart. UPLD DMX UPLOAD ERROR Firmware upload via DMX failed. UPLE UPLOAD ERROR ON EFFECT (s/w versions prior to ver. 1.
Troubleshooting Problem One or more of the fixtures is completely dead. Probable cause(s) Remedy No power to fixture. Check that power is switched on and cables are plugged in. Primary fuse blown (located near mains inlet). Isolate fixture from power and replace fuse. Secondary fuse(s) blown (located on PCBs in base). Isolate fixture from power. Check fuses and replace. Bad data link. Inspect connections and cables. Correct poor connections. Repair or replace damaged cables.
Specifications Physical Length . . . . . . . . . . . . . . . . . . . . . . . . . . . . . . . . . . . . . . . . . . . . . . . . . . . . . . . . . . . . . . . 690 mm (27.2 in.) Width . . . . . . . . . . . . . . . . . . . . . . . . . . . . . . . . . . . . . . . . . . . . . . . . . . . . . . . . . . . . . . . . 536 mm (21.1 in.) Height (head straight up) . . . . . . . . . . . . . . . . . . . . . . . . . . . . . . . . . . . . . . . . . . . . . . . . . 914 mm (36.0 in.) Weight . . . . . . . . . . . . . . . . . .
Standard lens, zoom at median Efficiency . . . . . . . . . . . . . . . . . . . . . . . . . . . . . . . . . . . . . . . . . . . . . . . . . . . . . . . . . . . . . . . . . . . . . . . . 23% One tenth-peak angle . . . . . . . . . . . . . . . . . . . . . . . . . . . . . . . . . . . . . . . . . . . . . . . . . . . . . . . . . . . . . . . 32° Total output . . . . . . . . . . . . . . . . . . . . . . . . . . . . . . . . . . . . . . . . . . . . . . . . . . . . . . . . . . . . . . . . . .
Thermal Maximum ambient temperature (Ta) . . . . . . . . . . . . . . . . . . . . . . . . . . . . . . . . . . . . . . . . . . . 40° C (104° F) Maximum surface temperature, steady state, Ta = 40° C . . . . . . . . . . . . . . . . . . . . . . . . . . 170° C (338° F) Cooling. . . . . . . . . . . . . . . . . . . . . . . . . . . . . . . . . . . . Filtered forced air (temperature-regulated, low noise) Total heat dissipation (calculated, +/- 10% at 200 V, 60 Hz) . . . . . . . . . . . . . . . . . . . . . . . . . .
Intellectual Property Rights MAC III™ products are covered by one or more of these patents: US 6,241,366; EP 1234197; US 6,601,973; US 6,687,063; US 6,971,770; US 7,222,997; US 7,498,756; US 7,559,676; US 7,654,693 and/or one or more of these patent applications: CN 1985125A; EP 1747399 (A1); CN 101430073A; EP 2058589; US 2009/0122548; US 12/767,941; CN 101431847A; EP 2091302; US 2009/0196627; CN 200810128771.3; EP 2103864; CN 200810128777.0; US 12/107,827; CN 200810125884.
www.martin.