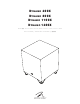
D y n a m o 600X D y n a m o 800X D y n a m o 1100X D y n a m o 1600X M od el/ 型号 : D y n a m o 6 0 0 X / D y n a m o 8 0 0 X / D y n a m o 1 1 0 0 X / D y n a m o 1 6 0 0 X user’s manual / manuel de l’utilisateur / ® 使用手册
Serial Numbers:__________________________________________ Record your serial numbers here for easy reference. You will need this information when filling out your warranty registration. Your serial number is located near the bottom of the backplate and on the shipping container.
Thank you—to you the MartinLogan owner, for loving what we do, and making it possible for us to do what we love. —————————————————————————————— Merci à vous, propriétaire d’un produit MartinLogan, d’aimer ce que nous faisons, et de faire en sorte que nous puissions faire ce que nous aimons.
Contents | Table Overview of Controls and Connections . . . . . . . . . 2 Controls . . . . . . . . . . . . . . . . . . . . . . . . . . . . . . . . . . . 2 Audio Signal Connections . . . . . . . . . . . . . . . . . . . . . . . 3 Wireless Audio Signal Connection . . . . . . . . . . . . . . . . . 4 AC Power Connection . . . . . . . . . . . . . . . . . . . . . . . . . 4 Break-In . . . . . . . . . . . . . . . . . . . . . . . . . . . . . . . . . . .
Introduction Congratulations! You have invested in one of the world's premier subwoofers. Félicitations! Vous avez acheté un des meilleurs caissons de sous-grave au monde. MartinLogan Dynamo subwoofers represent the extension of an intensive, dedicated team research program directed toward establishing a world class line of reference subwoofers using leading-edge technology, without compromising durability, reliability, craftsmanship or aesthetics.
180° 180° Dynamo 600X Dynamo 800X 180° 180° Dynamo 1100X Dynamo 1600X
EU COMPLIANCE INFORMATION Hereby, SVI Holdings (US), Inc.’s declares that this Dynamo 600X, Dynamo 800X, Dynamo 1100X, or Dynamo 1600X ments and other relevant provisions of the following EU Compliance Directive Information. • Conforms to European Union Low Voltage Directive 2014/35/EU; • European Union EMC Directive 2014/30/EU; • European Union Radio Equipment Directive (RED) 2014/53/EU.
In accordance with the European Union WEEE (Waste Electrical and Electronic Equipment) directive effective August 13, 2005, we would like to notify you that this product may contain regulated materials which upon disposal, according to the WEEE directive, require special reuse and recycling processing.
Safety Warnings and Installation in Brief (English) Important Safety Instructions 1 Read these instructions. 2 Keep these instructions. 3 Heed all warnings. 4 Follow all instructions. 5 Do not use this apparatus near water. 6 Clean only with dry cloth. 7 Do not block any ventilation openings. Install in accordance with the manufacturer's instructions. 8 Do not install near any heat sources such as radiators, heat registers, stoves, or other apparatus (including amplifiers) that produce heat.
front of the room. Before deciding on a permanent corner placement, experiment with other positions. Locations away from corners often prove more effective in providing ideal low-frequency performance and blend with the main speakers. Please see the Placement section for details. Step 3: Signal Connection Use the best cables you can. High quality cables, available from your specialty dealer, are recommended and will give you superior performance.
我们深知,您已迫不及待想感受下这款全新的扬声器了。所以我们为 您编写了以下内容,便于您更加简易迅速地进行安装。一旦您着手操 作时,请花点时间仔细阅读本章节,并深入了解随产品附上的用户手 册中的信息。它能教您如何使这款最精确的低音扬声器系统发挥最佳 的性能。 如果您在设置或操作扬声器时遇到任何问题,请参考用户手册中关于 室内声学,摆位或操作的相关信息。如果遇到持续未能解决的问题, 请联系经授权的MartinLogan经销商,他们会向您提供适当的技术分析 来减少问题。 我们深知,您已迫不及待想感受这款全新的扬声器了。所以我们为您编 写了以下内容,便于您更简易迅速地进行安装。一旦您着手操作时, 请花点时间仔细阅读本章节,并深入了解随产品附上的用户手册中的 信息。它能教您如何使这款最精确的低音扬声器系统发挥最佳的性能。 如果您在设置或操作扬声器时遇到任何问题,请参考用户手册中关于 室内声学、摆位或操作的相关信息。如果遇到持续未能解决的问题, 请联系经授权的MartinLogan经销商,他们会向您提供适当的技术分析 来减少问题。 步骤1: 拆开包装箱 将您全新的扬声器从包装箱中取出。出于您可能的将会重新使用原包 装的考
18 19 20 21 jsou noviny, ubrusy, záclony apod .; Na přístroji nesmí být umístěny žádné zdroje otevřeného plamene, jako jsou svíčky; Použití přístrojů v tropickém podnebí Toto zařízení je elektrický spotřebič třídy II nebo dvojité izolace Jako odpojovací zařízení se používá síťová zástrčka nebo spojka zařízení, odpojovací zařízení musí být snadno ovladatelné.
Sikkerhedsanvisning og kort vejledning i ibrugtagning. (Dansk/Danish) Vigtige sikkerhedsinstruktioner 1 Læs disse instruktioner. 2 Opbevar disse instruktioner. 3 Overhold alle advarsler. 4 Følg alle instruktioner. 5 Brug ikke dette apparat i nærheden af vand. 6 Rengør kun med tør klud. 7 Bloker ikke ventilationsåbninger. Installer i overensstemmelse med producentens anvisninger.
ter dig endeligt for at placere subwooferen i et hjørne. Placeringer væk fra hjørner vil ofte resultere i bedre lavfrekvens ydelse og bedre kobling til de øvrige højttalere. Se venligst afsnittet om placering for yderligere detaljer. 5 6 7 Trin 3: Tilslutning af signal Brug de bedste kabler du kan. Kvalitetskabler kan anbefales og vil give dig en overlegen ydeevne. De kan anskaffes hos din faghandler. 8 9 Tilslut din forforstærker/processors udgang til terminalerne (input) på subwooferens bagside.
De bliksemflits met pijlpuntsymbool, binnen een gelijkzijdige driehoek, is bedoeld om de gebruiker te waarschuwen voor de aanwezigheid van niet-geïsoleerde "gevaarlijke spanning" in de behuizing van het product die voldoende groot kan zijn om een risico van een elektrische schok te vormen. WAARSCHUWING! Gebruik dit product niet buiten het land van de oorspronkelijke specificaties voor verkoopspanning, maar verschilt per land. Onjuiste spanning kan schade veroorzaken die mogelijk duur is om te repareren.
Turvallisuusvaroitukset ja lyhyt asennusohje (Suomi/Finnish) Tärkeitä turvallisuusohjeita 1 Lue nämä ohjeet. 2 Pidä nämä ohjeet. 3 Huomioi kaikki varoitukset. 4 Noudata kaikkia ohjeita. 5 Älä käytä laitetta veden läheisyydessä. 6 Puhdista vain kuivalla kankaalla. 7 Älä tuki mitään tuuletusaukkoja. Asenna valmistajan ohjeiden mukaisesti. 8 Älä asenna lähelle lämmönlähteitä, kuten lämpöpattereita, lämpörekistereitä, uuneja tai muita lämpöä tuottavia laitteita (mukaan lukien vahvistimet).
eri paikassa. Subwoofer voi usein soida erottelevammin ja yhtenäisemmin pääkaiuttimien toiston kanssa jos se on sijoitettu etäämmälle nurkasta. Lue ”Placement” –osio lisätietoja varten. 9 Vaihe 3: Äänisignaalin kytkentä Käytä parhaita johtoja mitä voit. Erikoisliikkeestä saatavat laadukkaat johdot takaavat parhaan lopputuloksen. Liitä johto esivahvistimen/prosessorin ulostulosta subwooferin takapaneelin sisääntuloon. Lue tarkempia lisätietoja “Controls and Connections” –osiosta.
AVERTISSEMENT! N'utilisez pas ce produit en dehors du pays d'origine. Les spécifications de tension varient selon les pays. Une tension incorrecte peut causer des dommages qui peuvent être coûteux à réparer. Le subwoofer est expédié aux distributeurs agréés MartinLogan avec l'alimentation correcte pour une utilisation dans le pays de vente prévu. Une liste des distributeurs autorisés peut être consultée sur www.martinlogan.com ou en envoyant un courriel à info@martinlogan.com.
7 8 9 10 11 12 13 14 15 16 17 18 19 20 21 Blockieren Sie keine Belüftungsöffnungen. Installieren Sie in Übereinstimmung mit den Anweisungen des Herstellers. Installieren Sie das Gerät nicht in der Nähe von Wärmequellen wie Heizkörpern, Heizregistern, Öfen oder anderen Geräten (einschließlich Verstärkern), die Wärme erzeugen. Beseitigen Sie nicht den Sicherheitszweck des polarisierten Steckers. Ein polarisierter Stecker hat zwei Klingen mit einer breiter als die andere.
Sollten Sie auf ein Problem stoßen, das nicht gelöst werden kann, wenden Sie sich bitte an Ihren autorisierten MartinLogan-Händler. Dieser wird die entsprechende technische Analyse vornehmen, um Abhilfe zu schaffen. Schritt 1: Auspacken Nehmen Sie Ihren neuen Subwoofer aus der Verpackung heraus. Bewahren Sie die Originalverpackung bitte für einen zukünftigen Bedarfsfall auf, denn Ersatzverpackung kann teuer sein.
19 20 21 Η χρήση συσκευών σε τροπικά κλίματα Αυτός ο εξοπλισμός είναι μια ηλεκτρική συσκευή κατηγορίας ΙΙ ή διπλής μόνωσης Το βύσμα δικτύου ή ο συζευκτήρας συσκευής χρησιμοποιείται ως συσκευή αποσύνδεσης, η συσκευή αποσύνδεσης παραμένει άμεσα λειτουργική. Το θαυμαστικό σε ένα ισόπλευρο τρίγωνο έχει ως στόχο να ειδοποιεί τον χρήστη για την παρουσία σημαντικών οδηγιών λειτουργίας και συντήρησης (συντήρηση) στη βιβλιογραφία που συνοδεύει τη συσκευή.
Βήμα 5β: Ρύθμιση των χειριστηρίων (χρησιμοποιώντας τις εισόδους αριστερά / δεξιά) • Ρύθμιση ελέγχου: Ρυθμίστε το διακόπτη σε 'App'. • Λειτουργία τροφοδοσίας: Ρυθμίστε το διακόπτη σε 'Αυτόματο'. • Κατεβάστε την εφαρμογή ελέγχου MartinLogan Sub Control (από το Google Play ή το Apple App Store). • Χρησιμοποιώντας την εφαρμογή, προσαρμόστε τις παρακάτω ρυθμίσεις: o Όγκος (επίπεδο): Ρυθμίστε σε -10dB και αυξήστε έως ότου ο ήχος έχει βαθιά, εκτεταμένα μπάσα.
• • • • don a hálózati tápkábelt, miközben a villásdugót az elektro-mos csatlakozó aljzathoz csatlakoztatta! Ne tegyen gyertyát, vagy más, nyílt lángot használó eszközt a készülékre! Ne tegyen folyadékot se pohárban, se vázában, se más edényben a készülék tetejére! Ne tegye ki a hangsugárzót csepegő, vagy fröccsenő víz hatásának! Könnyen elérhető helyen legyen a hálózati tápkábel, hogy rendellenes működés esetén hamar áramtalanítani tudja a készüléket! Tudjuk, hogy mihamarabb szeretné élvezni a Ma
8 9 10 11 12 13 14 15 16 17 18 19 20 21 mità con le istruzioni del produttore. Non installare vicino a fonti di calore come radiatori, diffusori di aria calda, stufe o altri apparecchi (inclusi gli amplificatori) che producono calore. Non ostacolare lo scopo di sicurezza della spina polarizzata o con messa a terra. Una spina polarizzata ha due lame con una più larga dell'altra. Una spina con messa a terra ha due poli e un terzo polo di messa a terra.
definitivo in un angolo, effettua delle prove con altre posizioni. In alcuni casi posizionare il subwoofer lontano dagli angoli può essere preferibile dove le basse frequenze andassero ad asciugarsi ed amalgamarsi meglio con l’impianto principale. 5 6 7 8 Step 3: Connessione Utilizza il miglior cavo possibile. Cavi di alta qualità, disponibili presso il tuo rivenditore di fiducia, sono raccomandati e ti daranno una performance superiore.
注意事項 本製品を元の販売国以外で使用しないでく ださい。電圧要件は国によって異なります。 不適切 な電圧は、修理に潜在的に高価になる損傷を引き起 こす可能性があります。 サブウーファーは、販売 目的の国で使用するために、正しい電源を使用して MartinLogan正規販売代理店に出荷されます。 認定代 理店のリストは、www.martinlogan.comまたはinfo@ martinlogan.
7 8 9 10 11 12 13 14 15 16 17 18 19 20 21 통풍구를 막지 마십시오. 제조업체의 지침에 따라 설치하십시오. 라디에이터, 난방 장치, 스토브 또는 열을 발생시키는 기타 장치 ( 앰프 포함)와 같은 열원 근처에 설치하지 마십시오. 극성 또는 접지 형 플러그의 안전 목적을 저 지르지 마십시오. 극 성 플러그에는 두 개의 날이 있으며 한 쪽이 다른 쪽보다 넓습니 다. 접지 형 플러그에는 두 개의 블레이드와 세 번째 접지 단자가 있습니다. 넓은 날 또는 세 번째 갈래는 안전을 위해 제공됩니다. 제공된 플러그가 콘센트에 맞지 않으면 전기 기술자에게 문의하 여 구식 콘센트를 교체하십시오. 전원 코드가 밟히거나 끼지 않도록하십시오. 특히 플러그, 소켓 및 장치에서 빠져 나오는 지점을 피해야합니다. 제조업체가 지정한 부착물 / 액세서리 만 사용하십시오. 제조업체가 지정하거나 장치와 함께 판매되는 카트, 스탠드, 삼각대, 받침대 또는 테이블 만 사용하십시오.
• 레벨: 1시로 세팅하세요 (똑바로 오른쪽) • 서브우퍼 통합을 조절하기 위해서 프로세서/리시버의 베이스 매니 지먼트 시스템을 사용하세요. Step 5b: 컨트롤 세팅 (좌/우 입력장치 사용) • 컨트롤 세팅: ‘App’으로 스위치를 돌리세요. • 파워 모드: ‘Auto’로 스위치를 돌리세요. • 마틴로건 서브 컨트롤 어플을 다운로드하세요. (구글 플레이나 애 플 앱 스토어 사용) • 어플을 사용하며 아래 사항을 따라하세요. o 볼륨(레벨): 10dB 로 세팅하고 사운드가 깊고 저음이 길어질때 까지 볼륨을 올리세요. o 위상: 90°에서 시작하세요 (바뀐 극성이 켜져있는 상태에서) o 룸 게인: 0dB로 시작하세요. o 로우 패스 필터: 메인 스피커의 로우앤드 주파수 응답 보다 낮 게 세팅 하세요. 메인스피커의 로우앤드 주파수 응답에 확신이 없다면 35Hz로 시작하세요. Step 6: Martin Logan 과 음악을 즐기세요.
• • • • odłączany od głośnika w czasie gdy jego drugi koniec znajduje się w gnieździe zasilania AC. Nie umieszczaj na głośniku świec lub innych źródeł wolnego ognia. Nie umieszczaj na głośniku naczyń zawierających płyny. Głośnik nie powinien być narażony na zachlapania. Kabel zasilania powinien być łatwo dostępny w celu odłączenia go, gdy wystąpią nieprzewidziane warunki.
13 14 15 16 17 18 19 20 21 Desconecte este aparelho durante tempestades com raios ou quando não for usado por longos períodos de tempo. Consulte toda a manutenção para pessoal de serviço qualificado. A manutenção é necessária quando o aparelho foi danificado de qualquer forma, como o cabo de alimentação ou o plugue está danificado, o líquido foi derramado ou os objetos caíram no aparelho, o aparelho foi exposto à chuva ou à umidade, não funciona normalmente , ou foi descartado.
(Ligação à Corrente de Sector) deste manual para mais pormenores. 11 Passo 5a: Configurar os controlos (utilizando a entrada LFE) • Configurar o controlo: Coloque o interruptor na posição “Local”. • Modo Ligar/desligar: Coloque o interruptor na posição “Auto”. • Nível: Coloque na posição dos ponteiros da uma hora (na vertical no sentido ascendente). • Utilize o sistema de gestão de graves do processador/amplificador para ajustar a integração do subwoofer.
дистрибьюторам MartinLogan с правильным источником питания для использования в стране предполагаемой продажи. Список авторизованных дистрибьюторов можно получить на сайте www. martinlogan.com или по электронной почте info@ martinlogan.com.
5 6 7 8 9 10 11 12 13 14 15 16 17 18 19 20 21 No use este aparato cerca del agua. Limpie solo con un paño seco. No bloquee ninguna abertura de ventilación. Haga la instalación conforme a las instrucciones del fabricante. No instale cerca de fuentes de calor como radiadores, registros de calor, estufas u otros aparatos (incluidos amplificadores) que produzcan calor. No anule el propósito de seguridad del enchufe polarizado o con toma de tierra.
Paso 2: ubicación Puede empezar situando el subwoofer en una esquina cerca de la parte frontal de la sala. Antes de decidir una ubicación permanente, experimente con otras ubicaciones. A veces, colocarlo lejos de las esquinas puede ser más efectivo para mejorar la integración con las cajas frontales y puede dar un grave más idóneo. Consulte la sección Placement para más información. 3 4 5 6 7 Paso 3: conexión de la señal Use los mejores cables que pueda permitirse.
rätt strömförsörjning för användning i det avsedda landet. En lista över auktoriserade distributörer kan nås på www. martinlogan.com eller via e-post info@martinlogan.com. Om du har för avsikt att ansluta din subwoofer med ingångar för högtalarvolym (hög volym), kan du se kapitlet om ingångar för högtalarvolym för ytterligare information. VARNING! • Farlig högspänning inuti. Undvik att ta isär produkten. • Överlåt alla former av service och reparation till en kvalificerad tekniker.
13 14 15 16 17 18 19 20 21 雷雨期間或長時間不使用時,請拔下本設備的插頭。 將所有維修工作交給合格的維修人員。如果設備受到任何損壞, 如電源線或插頭損壞,液體濺落或物體掉入設備,設備受到雨淋 或潮濕,不能正常工作,則需要進行維修,或者已經被丟棄。 儀器不得暴露在滴水或濺水的環境中,充滿液體的物體如花瓶不 得放在儀器上。 保持設備周圍至少20-30cm的距離,以保證通風良好; 不應通過用報紙,桌布,窗簾等物品蓋住通風口來阻止通風。 設備上不應放置明火等火源,例如蠟燭。 在熱帶氣候中使用儀器 本設備屬二類或雙重絕緣電器 電源插頭或電器耦合器用作斷開裝置,斷開裝置應保持可操作性。 第2步:安置 您可以選擇將低音喇叭放置在靠近房間正面的角落。在決定永久性的 角落安置之前,請嘗試其他位置。遠離角落的位置通常證明在提供理 想的低頻性能和與主揚聲器混合方面更有效。詳情請參閱“展示位置”部 分。 第3步:信號連接 使用最好的電纜,你可以。高品質的電纜,可從您的專業經銷商,建 議,並會給你優越的性能。 將前置放大器/處理器輸出連接到位於超低音揚聲器後面板上的信號輸 入連接器。有關詳細信息,請參閱
9 10 11 12 13 14 15 16 17 18 19 20 21 อุปกรณ์อื่น ๆ (รวมถึงเครื่องขยายเสียง) ที่ผลิตความร้อน อย่าพ่ายแพ้เพื่อความปลอดภัยของปลั๊กชนิดโพลาไรซ์หรือสายดิน ปลั๊ก แบบโพลาไรซ์มีใบมีดสองใบที่กว้างกว่าที่อ่ืน ปลั๊กชนิดพื้นดินมีใบมีด สองใบและง่ามดินที่สาม มีดกว้างหรือง่ามที่สามเพื่อความปลอดภัยของ คุณ หากปลั๊กที่จัดให้ไม่พอดีกับเต้าเสียบของคุณโปรดปรึกษาช่างไฟฟ้า เพื่อเปลี่ยนเต้าเสียบที่ล้าสมัย ป้ อ งกั น สายไฟจากการเดิ น หรื อ ถู ก บี บ อั ด โดยเฉพาะที่ ป ลั๊ ก , เต้ า รั บ ที่ สะดวกและจุดที่พวกเขาออกจากเครื่อง ใช
• ใช้ ระบบควบคุ ม เบสของโปรเซสเซอร์ ( Processor) หรื อ รี ซี ฟ เวอร์ (Receiver) ปรับแต่งเสียงเบสให้เข้ากัน 16 17 ขั้นตอนที่ 5b: การตั้งค่า โดยใช้ช่องต่อขาเข้า Left/Right Input • ปรับสวิทซ์ไปที่ App • ปรับสวิทซ์ไปที่ Auto • ดาวโหลด Martinlogan Sub Control app (จาก Google Play หรือ Apple App Store) • ใช้ App ปรับแต่งดังนี้: o Volume: ตั้งที่ -10db และ เพิ่มขึ้นจนกระทั่ง ได้เสียงเบสต่ำ�ๆ o Phase: เริ่มจาก 90องศา (โดย Inverted polarity เปิดอยู่) o 20–30Hz Level: เริ่มจาก 0db o Low Pass Filte
sunulmaktadır. Hoparlörünüzü, çalışır duruma getirdikten sonra, el kitabında verilen tüm bilgileri dikkatle okuyunuz. El kitabı, son derece hassas olan bu bas hoparlöründen mümkün olan en mükemmel performansı nasıl elde edebileceğinizi gösteren bilgileri içerir. MartinLogan derin baslı hoparlörünüzün, kuruluşu veya çalışması esnasında herhangi bir sorunla karşılaşırsanız, size verilen kullanım kılavuzunun Oda Akustiği, Konumlaması veya İşletim bölümlerine başvurunuz.
16 17 18 19 20 21 vật chứa đầy chất lỏng, như bình, không được đặt trên thiết bị. Duy trì khoảng cách tối thiểu 20-30cm xung quanh thiết bị để thông gió đầy đủ; Không được cản trở thông gió bằng cách che các lỗ thông khí bằng các vật dụng, chẳng hạn như báo chí, khăn trải bàn, rèm ...
Dynamo 600X 14.9” (37.8cm) 14,9 po (37,8 cm) 16.3” (41.5cm) 16,3 po (41,5 cm) 14.5” (36.7cm) 14,5 po (36,7 cm) 14.
Dynamo 800X 13.1” (33.3cm) 13,1 po (33,3 cm) 12.4” (31.5cm) 12,4 po (31,5 cm) 13.7” (34.8cm) 13,7 po (34,8 cm) 12.4” (31.5cm) 12,4 po (31.5 cm) 12.7” (32.4cm) 12,7 po (32,4 cm) 14.6” (37.1cm) 14,6 po (37,1 cm) 12.4” (31.5cm) 12,4 po (31,5 cm) 11.5” (29.
Dynamo 1100X 15.6” (39.6cm) 15,6 po (39,6 cm) 15” (38cm) 15 po (38 cm) 17.1” (43.5cm) 17.1 po (43,5 cm) 15” (38cm) 15 po (38 cm) 16.2” (41.1cm) 16,2 po (41,1 cm) 17.2” (43.
Dynamo 1600X 18.5” (47cm) 18.5 po (47 cm) 17.9” (45.4cm) 17,9 po (45,4 cm) 20” (50.9cm) 20 po (50,9 cm) 17.9” (45.4cm) 17,9 po (45,4 cm) 19.1” (48.6cm) 19,1 po (48,6 cm) 20.1” (51cm) 20,1 po (51 cm) 17.9” (45.4cm) 17,9 po (45,4 cm) 17.9” (45.
x1 x1 x2 x2 x2 x2
Dynamo 800X Dynamo 1100X Dynamo 1600X Dynamo 800X Dynamo 1100X Dynamo 1600X
Wireless Module Connection D YNAMO TM App Setting Control Local (active when Setting Control set to ‘Local’) Level USB Input Status On Trigger Auto 12V Trigger Input + Speaker Level Input Right In – + Speaker Level Input Left In – 50 Line Level Input LFE In
Wireless Module Connection D YNAMO TM App Setting Control Local (active when Setting Control set to ‘Local’) Level USB Input Status On Trigger Auto 12V Trigger Input + Speaker Level Input Right In – Line Level Input LFE In + Speaker Level Input Left In – 51
D y n a m o 600X D y n a m o 800X D y n a m o 1100X D y n a m o 1600X user’s manual ®
Overview of Controls and Connections Controls Setting Control The Setting Control switch adjusts how level (volume) and settings of the subwoofer are controlled. App Setting Control • App: When this switch is set to "App" all of the subwoofer's control functions (except for Power Mode) are controlled via the subwoofer control app. Please note: To fully release control of the sub to the local controls, you must fully exit any active sessions of the Subwoofer Control App.
Figure 2. Controls and inputs. Setting Control (Switch) Level (Knob) USB Input (Micro-B USB) Status (LED) Power Mode Dynamo 600X App / Local ü Min – Max ü – ü – ü On / Auto ü Dynamo 800X ü ü ü ü ü (+ Trigger) – ü Dynamo 1100X ü ü ü ü ü (+ Trigger) ü Dynamo 1600X ü ü ü ü ü (+ Trigger) ü Figure 3. Audio signal inputs.
Line Level Input (LFE In) Found on Dynamo 800X, 1100X, and 1600X. Please note, on the 600X, Right In also serves as LFE In. Connect from the Sub Out on your A/V processor. Crossover settings for LFE In are controlled through your A/V processor. The subwoofer's setting for the Low-Pass Filter is not applied to this connection, except in the Dynamo 600X (if using the 600X for LFE In, set the Low Pass Filter to Bypass). Balanced XLR Input (LFE In) Found on Dynamo 1100X and 1600X.
Overview Figure 6. MartinLogan Subwoofer Control App of the Figure 7. Home screen NOTE: The MartinLogan Subwoofer Control App is subject to change and, depending on future updates, functions may differ from what is outlined here. NOTE: The MartinLogan Subwoofer Control App and the ARC Mobile app may interfere with each other's ability to discover your subwoofer.
English Figure 9. Settings: Low Pass Filter screen Figure 10. Settings: Phase / Polarity screen Figure 11. Settings: Listening Modes screen Settings: Volume Settings: Low Pass Filter • Volume: The volume (level) control allows you to adjust the loudness of your subwoofer from -40dB to 12dB. For most applications a setting between -14dB and 0dB is adequate. Setting the level too high will cause the bass to seem bloated and is the most common cause of bad sounding subwoofers.
Figure 12. Settings: 20–30Hz Level screen Figure 13. Settings: Rename screen Remember, because this setting only applies to Left/Right inputs. This setting is not used if your subwoofer is only connected via a LFE input. However, if you're using a SWT-X wireless system to connect an LFE channel or using the Dynamo 600X as an LFE channel (connected via the Right In/LFE In), you will need to set the Low Pass Filter to Bypass.
In a system where phase and polarity are properly set, the main speakers and subwoofer should work together and sound as if there is more total bass in the system. If your main speakers and subwoofers are out of phase their sound waves will cancel each other and total bass output in the system will sound decreased. Again, experiment and listen for the smoothest bass without any prominent or absent notes.
Connecting the Subwoofer Before Connecting the Dynamo MartinLogan developed the Dynamo subwoofer for easy setup and system integration. Before beginning to connect your subwoofer, please review the controls discussed in the last section. An understanding of these will help speed you along. All signal connections are done on the rear connections panel of the subwoofer. Make certain that all of your connections are tight.
Multi-Channel Mode This setup is recommended if you will use your subwoofer in a dedicated home theater or other multi-channel system. When a signal is connected to the subwoofer’s LFE In, the setting for the Low-Pass Filter control is not used. Your processor handles most of the bass management. • Dynamo 600X and 800X: These subwoofers do not offer the XLR LFE connections discussed here.
7 Use the bass management section of your receiver/processor’s speaker setup to set the subwoofer level at an appropriate level. Follow the instructions in your processor’s manual to finetune the subwoofer level. 8 If you have completed steps 1–7 and still have weak or booming bass consider using the Subwoofer Control App to further adjust the 20–30Hz Level to compensate for these anomalies (yes, you're tweaking the 20–30Hz Level again). Experiment with the settings and listen to the result.
Simultaneous 2-Channel/MultiChannel Mode The advantage of this dual mode is that you are able to achieve an optimum setup for stereo listening and still allow for multi-channel (movie) mode listening. When listening to stereo source material the system achieves optimum music integration. In this mode the subwoofer plays only below the front main speaker’s lowest response frequency.
to set the sub volume level at an appropriate level. Follow the instructions in your processor’s manual to fine-tune the sub level. 7 If your processor offers the option to setup crossovers for a subwoofer, we recommend that you start with the following settings—Crossover: 70Hz, High Pass: 12dB, and Low Pass: 24dB. The optimal setting for these options may vary depending on your room and listening preferences. Experiment and listen for what sounds best to you.
Using Speaker Level Inputs This connection method is recommended if your subwoofer will be used in a 2-channel only system with full-range front loudspeakers. To connect using Speaker Level Inputs the speaker cable sshould be terminated using banana style plugs. The Low-Pass Filter is applied to the signal received through these inputs. Receiver/Processor + Left Out – + Right Out – SWT-X Wireless System: This connection method is not compatible with the SWT-X wireless receiver/transmitter system.
SWT-X Wireless System SWT-X Receiver LED (front) Status: Found on Dynamo 600X, 800X, 1100X, and 1600X. The SWT-X Subwoofer Wireless transmitter/receiver system is sold separately and available from your local dealer. • Off: Standby or subwoofer is unpowered The SWT-X wireless system can be used to establish either a left/ right line level connection or a LFE line level connection.
Placement Subwoofer Position Generally, subwoofers have the most output when placed in the corner of a room. However, this can also exaggerate the subwoofers output making blending difficult. We recommend starting by placing the subwoofer in a corner. If, after the full range of tuning techniques have been employed, the subwoofer sounds like it has too much upper bass energy try pulling it away from the wall, toward the listening position.
Figure 25. Dynamo 800X, 1100X, and 1600X are capable of both front-firing and down-firing woofer orientations. Changing Woofer Orientation Dynamo 800X, 1100X, and 1600X Please note: When configured in the front-firing orientation a right angle adaptor is required if using an XLR connection. When installing the subwoofer in a cabinet it is recommended that the subwoofer be converted to a front-firing configuration. 1 Prepare a flat surface with a blanket to protect the finish.
Room Acoustics Your Room This is an area that requires both a little background to understand and some time and experimentation to attain the best performance from your system. Your room is actually a component and an important part of your system. This component is a large variable and can dramatically add to or subtract from a great sonic experience.
Home Theater It had long been the practice of stereo buffs to connect their television to a stereo system. The advantage was the use of the larger speakers and more powerful amplifier of the stereo system. Even though the sound was greatly improved, it was still mono and limited by the broadcast signal. In the late 1970’s and early 1980’s two new home movie formats became widely available to the public: VCR and laser disc. By 1985, both formats had developed into very high quality audio/video sources.
Anthem Room Correction (ARC™) Setup About ARC Your subwoofer includes Anthem Room Correction technology for optimizing low-frequency output within your room. Your subwoofer's ARC system employs a mobile device connected via Bluetooth or computer and a microphone connected via USB cables. ARC utilizes multiple measurement points, at least five—but up to ten—individual data positions, allowing ARC to analyze the unique characteristics of your room.
Mobile's queues for microphone connection instructions. • When taking ARC measurements the microphone should be at locations approximately where your ears will be. • If using an external microphone when taking ARC measurements, the microphone should point up, towards the ceiling. • If using a mobile devices built-in microphone, the microphone should point in the direction of the device being measured. • When taking ARC measurements the room should be silent.
Frequently Asked Questions and Frequently Asked Questions processor/receiver offers independint control of the inputs, connect your subwoofer to one output and use the receiver/processor's menu to configure the outputs. How do I clean my subwoofer? Use a dust free cloth or a soft brush to clean your subwoofer.
• Check all interconnecting cables. • Check that the subwoofer is connected to the sub out (or other appropriate output) on the receiver/processor/amplifier. • Check that subwoofer output is enabled in the receiver/processor's setup menu. • Make sure the sub's level control is not turned down. • If the problem persists, contact your dealer. Muddy Bass • Check placement. Try moving the subwoofer closer to the front and side walls. • Check the type of feet that are being used. Try installing the ETC spikes.
General Information Warranty and Registration Your subwoofer is provided with an automatic Limited 90 Day Warranty coverage. You have the option, at no additional charge, to receive Limited 3-Year Warranty coverage. To obtain the Limited 3-Year Warranty coverage you need to register your product with MartinLogan. For your convenience MartinLogan offers online warranty registration at www.martinlogan.com.
25
English Specifications* Dynamo 600X* Dynamo 800X* System Frequency Response . . . 27–200 Hz ± 3 dB. Anechoic in LFE mode. 24–200 Hz ± 3 dB. Anechoic in LFE mode. Woofer . . . . . . . . . . . . . . . . . . . 10” (25.4cm) high-excursion, inverted surround, polypropylene cone in a stamped steel basket with extended throw driver assembly. Ported. 10” (25.
Dynamo 1600X* System Frequency Response . . . 22–200 Hz ± 3 dB. Anechoic in LFE mode. 20–200 Hz ± 3 dB. Anechoic in LFE mode. Woofer . . . . . . . . . . . . . . . . . . . 12” (30.5cm) high-excursion, inverted surround, polypropylene cone in a cast aluminum basket with extended throw driver assembly; sealed non-resonant cabinet design. 15” (38.
D y n a m o 600X D y n a m o 800X D y n a m o 1100X D y n a m o 1600X manuel de l’utilisateur ®
Aperçu des commandes et des raccords Commandes Commande de réglage : L’interrupteur Setting Control (commande de réglage) permet de régler la façon dont le niveau (volume) et les réglages du caisson de sous-graves sont commandés. App Commande de réglage • App: lorsque cet interrupteur est réglé à « App », toutes les fonctions de commande du caisson de sous-graves (sauf Power Mode – Mode d’alimentation) sont commandées par l’application de commande pour caisson de sous-graves.
Commande de réglage (Interrupteur) Niveau (bouton) Entrée USB (Micro-B USB) Statut (DEL) Mode d’alimentation Dynamo 600X App / Local ü Min – Max ü – ü – ü On / Auto ü Dynamo 800X ü ü ü ü ü (+ déclencheur) – ü Dynamo 1100X ü ü ü ü ü (+ déclencheur) ü Dynamo 1600X ü ü ü ü ü (+ déclencheur) ü Figure 2. Commandes et entrées. Figure 3.
Right In sert aussi de LFE In. Se à partir de Main-Out ou Pre-Out sur votre récepteur/préamplificateur. La configuration de la commande du Filtre de passe basse est appliquée au signal reçu par ces entrées. Line Level Input (LFE In) (Entrée niveau de ligne (LFE In)) : Sur les modèles Dynamo 800X, 1100X et 1600X. Veuillez noter, sur le modèle 600X, l'entrée Right In sert aussi de LFE In. Se branche à partir de Sub Out sur votre processeur A/V.
Aperçu de l’application de commande du caisson de sous-graves Figure 6. Application de commande du caisson de sous-graves MartinLogan Figure 7. Écran accueil Les modèles Dynamo 600X, 800X, 1100X et 1600X sont dotés d’un système perfectionné de commande par application (disponible pour iOS et Android) qui relie votre caisson de sous-graves à l’aide d'un appareil mobile et d’une connexion Bluetooth. Consultez le site Web MartinLogan.
Figure 9. Écran Réglages : filtre de passe basse Figure 10. Écran Réglages : phase/polarité Réglages : volume Réglages : Filtre de passe basse • Volume: La commande de volume (niveau) vous permet de régler la L’écran Filtre de passe basse vous permet d’ajuster la fréquence de passe basse pour les entrées gauche et droite (RCA ou niveau d’enceinte). Ce réglage n’est pas appliqué aux entrées LFE (RCA ou XLR); la tâche de la gestion des graves est plutôt laissée à votre processeur audio/vidéo.
Figure 12. Écran Réglages : gain de la pièce Figure 13. Écran Réglages : écran Renommer Figure 14. Écran Réglages : écran Mot de passe votre enceinte est 43 Hz. 70 % de 43 Hz donne 30,1; vous devez donc régler le filtre de passe basse du caisson de sous-graves à 30 Hz. Pour votre information, une fois que vous avez essayé le réglage recommandé à l’aide de la formule susmentionnée, vous devez également essayer les autres réglages. approchent du réglage de la fréquence du filtre de passe basse.
phase. Par exemple, si la pièce a une crête dans la zone du répartiteur du caisson de sous-graves, il est recommandé de régler la phase de façon à ce que les sorties acoustiques réelles du caisson de sous-graves et les enceintes principales soient déphasées. Expérimentez, essayez différents réglages et soyez patient. Si vous utilisez le caisson de sous-graves pour compléter d'autres produits MartinLogan, nous vous conseillons de commencer avec un réglage de phase à 90° (avec polarité inversée activée).
Raccord du caisson de sous-graves et commandes de réglage Avant de raccorder le Dynamo MartinLogan a développé le caisson de sous-graves Dynamo afin qu’il soit facile à configurer et à intégrer dans un système. Avant de commencer à raccorder votre caisson de sous-graves, veuillez consulter les commandes analysées dans la dernière section. Le fait de bien les comprendre accélérera le processus. Tous les raccords de signal sont effectués sur le panneau de raccord arrière du caisson de sous-graves.
Mode canaux multiples Cette configuration est recommandée si vous utilisez votre caisson de sous-grave dans un cinéma maison ou un système à canaux multiples. Lorsqu’un signal est branché au LFE In du caisson de sous-graves, la commande de Filtre de passe basse n’est pas active. Le processeur gère la plus grande partie de la gestion des graves. • Dynamo 600X et 800X : ces caissons de sous-graves n’offrent pas les raccords XLR LFE abordés ici.
le résultat. Essayez de trouver la position qui vous offre le bon son. Faites des essais en changeant le volume (niveau)tout en ajustant le 20–30Hz Level (Niveau). Trouvez une position qui vous donne des graves profondes et étendues et un bon mélange avec vos enceintes principales. . 7 Utilisez la section de gestion des graves de la configuration de l’enceinte de votre récepteur/processeur pour régler le niveau du caisson de sous-graves au niveau approprié.
Mode 2 canaux/canaux 1 Réglez la commande de réglage du caisson de sous-graves à App. multiples simultanés 2 Réglez les commandes du processeur pour les enceintes avant en mode large, grand ou plein. Si vos enceintes avant sont petites (p. ex. : enceintes pour étagère), nous vous recommandons de ne pas utiliser cette méthode pour raccorder le caisson de sous-graves; consultez plutôt la section « Mode à canaux multiples ».
dans une salle d’écoute typique. Si vous augmentez des haut-parleurs MartinLogan, nous vous suggérons de commencer avec une phase de 90° (avec polarité inversée allumée) pendant les essais. 6 En faisant jouer du matériel source à canaux multiples, utilisez la section de gestion des graves de la configuration de l’enceinte de votre processeur/récepteur pour régler le niveau de volume du caisson de sous-graves au niveau approprié.
Utilisation de l’entrée Speaker Level (niveau d’enceinte) Récepteur/processeur Left Out (Sortie gauche) Right Out (sortie droite) Cette méthode de raccordement est recommandée si votre caisson de sous-graves est utilisé uniquement dans un système à deux canaux avec des haut-parleurs de gamme complète. Pour raccorder à l’aide des entrées Speaker Level, le câble d’enceinte doit se terminer par des prises de type banane. Le Filtre de passe basse est appliqué au signal reçu par ces entrées.
Système SWT-X sans fil Statut DEL (avant) du récepteur SWT-X : Sur les modèles Dynamo 600X, 800X, 1100X et 1600X. Le système de transmetteur/récepteur sans fil de caisson de sous-graves SWT-X est vendu séparément et disponible auprès de votre revendeur local. • • • • Le système SWT-X sans fil peut être utilisé pour établir un raccord de niveau de ligne gauche/droite ou un raccord de niveau de ligne LFE.
Placement Position d’écoute Généralement, les caissons de sous-graves offrent la meilleure sortie lorsqu’ils sont placés dans un coin de la pièce. Toutefois, cela peut également exagérer la sortie des caissons de sous-graves et rendre le mélange difficile. Nous vous recommandons de commencer en plaçant le Dynamo dans un coin.
Figure 25. Les modèles Dynamo 800X, 1100X et 1600X peuvent être configurés avec le haut-parleur orienté vers l’avant ou vers le bas. Modifier l’orientation du haut-parleur Dynamo 800X, 1100X, et 1600X Veuillez noter : lorsque le caisson est orienté vers l'avant, un adaptateur à angle droit est nécessaire si vous utilisez une connexion XLR.
Acoustique de la pièce Votre pièce C’est l’un des domaines qui requièrent un certain bagage pour comprendre, et un peu de temps et d’expérimentation pour obtenir le meilleur rendement possible de votre système. La pièce est une composante et une partie intégrale de votre système. Cette composante est une variable très importante et peut beaucoup ajouter, ou enlever, à une grande expérience musicale. Tous les sons sont composés d’ondes.
Cinéma Les maniaques de stéréo branchent depuis longtemps leur télévision à leur système stéréo. L’avantage était d’utiliser les enceintes plus grandes et l’amplificateur plus puissant du système stéréo. Même si le son était grandement amélioré, il était encore mono et son signal de diffusion était limité. Fin 1970, début 1980, deux nouveaux formats de cinéma maison sont devenus largement disponibles au public : VCR et disque laser.
Configuration de l’Anthem À propos de l’ARC Votre caisson de sous-graves est doté de la technologie Anthem Room Correction pour optimiser la sortie des basses fréquences dans votre pièce. Le système ARC de votre caisson de sous-graves utilise un dispositif mobile connecté par Bluetooth ou un ordinateur, et un microphone connecté par des câbles USB.
• Avant de lancer l’ARC Mobile, configurez votre caisson de sous-graves en ajustant le positionnement. • Pendant les mesures, l’ARC Mobile outrepasse les réglages des commandes du volume (niveau), de la phase, du filtre de passe basse et du Niveau 20–30 Hz. Ces commandes n’influencent pas les mesures. Après le chargement de la courbe de correction dans l’enceinte, ces commandes peuvent être utilisées pour effectuer un réglage fin du rendement du caisson de sous-graves.
Foire aux questions et Dépannage Foire aux questions Comment nettoyer mon caisson de sous-graves? Utilisez un linge propre ou une brosse molle pour nettoyer votre caisson de sous-graves. Est-il sécuritaire de placer des choses sur mon caisson de sous-graves? Bien que votre caisson de sous-graves soit conçu avec une surface durable qui résiste aux taches, nous vous recommandons de ne rien placer sur celui-ci — particulièrement les objets contenant des liquides.
caissons de sous-graves, y compris le lancement de l’ARC pour le ou les caissons de sous-graves, qu’il est temps de lancer le système de correction de la pièce pleine gamme de votre processeur afin d’aider à équilibrer le rendement général du système dans la pièce. Dépannage Pas de son • Vérifiez que toutes les composantes sont branchées et allumées. • Vérifiez tous les câbles interconnectés.
à droite sur « Ordinateur » dans le menu Démarrer et choisissez « Propriétés »). Dans la liste de périphériques, trouvez « Son, vidéo et commandes de jeu » et étendez la liste des appareils disponibles. Cliquez à droit sur le microphone défectueux et choisissez désinstaller. Avec le câble USB du microphone fixé à votre ordinateur, cliquez à droite sur tout élément du Gestionnaire des périphériques et choisissez « Balayage pour changement de matériel ».
Renseignements généraux Garantie et inscription Votre caisson de sous-graves est vendu avec une garantie limitée automatique de 90 jours. Vous avez la possibilité d’obtenir, sans frais supplémentaires, une garantie limitée de trois ans. Pour obtenir la garantie limitée de 3 ans, vous devez inscrire votre produit chez MartinLogan. Pour plus de commodité, MartinLogan permet également l’enregistrement en ligne à la garantie à l’adresse www.martinlogan.com.
Spécifications* Dynamo 600X* Dynamo 800X* Réponse de fréquence du système . . 27–200 Hz ± 3 dB. Anéchoïque en mode LFE. 24–200 Hz ± 3 dB. Anéchoïque en mode LFE. Haut-parleur de graves . . . . . . . . . . Cône en polypropylène à ambiophique inversé à excursion élevée de 10 po (25,4 cm) dans un panier en acier estampé avec montage de haut-parleur de poussée étendue. Antirésonnant.
Dynamo 1600X* Réponse de fréquence du système . . 22–200 Hz ± 3 dB. Anéchoïque en mode LFE. 20–200 Hz ± 3 dB. Anéchoïque en mode LFE. Haut-parleur de graves . . . . . . . . . . Cône en polypropylène à ambiophique inversé à excursion élevée de 12 po (30,5 cm) dans un panier en acier estampé avec montage de haut-parleur de poussée étendue, boîtier scellé non résonant.
WARNING! Do not use your Dynamo subwoofer outside of the country of original sale—voltage requirements vary by country. Improper voltage can cause damage that will be potentially expensive to repair. The Dynamo subwoofer is shipped to authorized MartinLogan distributors with the correct power supply for use in the country of intended sale. A list of authorized distributors can be accessed at www.martinlogan.com or by emailing info@martinlogan.martinlogan.com.