Installation Operation and Maintenance Instructions Refrigerated Drawer Model 60RDE
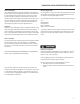
CONTENTS Unpacking your refrigerated drawer unit.......................... Removing the packaging................................................. Warranty Registration...................................................... Installing your refrigerated drawer unit............................. Selecting the location..................................................... Cabinet Clearances.......................................................... Leveling legs.....................................................
UNPACKING YOUR REFRIGERATED DRAWERS Remove Packaging Your refrigerated drawers have been packed for shipment with all parts that could be damaged by movement securely fastened. Cut the banding material at the bottom of the carton, unfold the cartoning at the bottom and remove the carton from the appliance. Remove the plastic bag, styrofoam corner posts, and any tape holding the drawers closed and internal components in place.
INSTALLING YOUR REFRIGERATED DRAWERS Select Location The proper location will ensure peak performance of your appliance. We recommend a location where the unit will be out of direct sunlight and away from heat sources. To assure your product performs to specifications the recommended installation location temperature range is from 55 to 100°F (13 to 38°C). Cabinet Clearance Ventilation is required from the bottom front section of the unit. Keep this area open and clear of any obstructions.
INSTALLING THE ANTI-TIP DEVICE Remove these screws to separate upper and lower sections of anti-tip bracket. Anti - Tip Device A cabinet “anti–tip” device is mounted to the back of your refrigerated drawer unit. If your installation is a built – in under counter application with a counter-top directly above the unit this item can be removed, it does not need to be applied.
DIMENSIONS INDOOR MODEL 60RDE 26-1/32” (66.1 cm) 24-1/4” (61.6 cm) 23-7/8” (60.7 cm) 22” (55.9 cm) 1-7/8” (4.8 cm) Anti tip Bracket must be installed for freestanding applications. Can be removed for built in applications. 34-1/4” to 34-1/2” (87 to 87.6 cm) Front and Rear Leveling Legs 46” Drawer fully opened (116.8 cm) 47-25/32” Drawer fully opened (121.4 cm) RECOMMENDED ROUGH IN OPENING DIMENSIONS, INDOOR MODEL 60RDE Alternate outlet location in adjacent cabinetry. 34-1/2” (87.
USING YOUR REFRIGERATOR DRAWERS Figure 5 Start Your Appliance Your refrigerated drawers have been fitted with a Sentry System™ refrigeration monitor. It is located at the top front of the cabinet and can be accessed by opening the top drawer. Your appliance will start upon initial plug-in. On start the Sentry System™ monitor will flash amber. This is normal. Press the “ON/ OFF” button and the appliance resets and the LED turns green. (Refer to Figure 5 above).
USING YOUR REFRIGERATED DRAWERS Figure 6 Warning Alarms The Sentry System™ monitor will let you know if your unit is not functioning properly for the following reasons. Door ajar, high or low temperature, and power failure. These alarms are explained below. Door Ajar Alarm If the drawer has been left open for over five (5) minutes, the alarm will sound and the LED will flash green. This will stop as soon as the drawer is closed, or can be reset by pressing the “ON/OFF” button.
8 Note that although pressing the “ON/OFF” key resets the alarms, the alarm will resume if the “alarm condition” still exists. Close drawer to reset “DOOR AJAR” alarm. Press the “ON/OFF” key to reset all other alarms. Press and hold the “SET” key for five (5) seconds to enable or disable the Sentry System™ alarms. Reset Alarms Enable / Disable Sentry System™alarms LED displays a steady green when alarms are enabled. LED displays a steady amber when they are disabled.
9 Service Diagnostics Error Codes Show Room Mode Function Condenser fan motor fault, (high/low amps) Evaporator thermistor “sensor B” fault, (out of range) Display thermistor “sensor A” fault, (out of range) E2 E3 E4 Display Error Code Reference: The microprocessor in the control continually monitors critical refrigeration system components for proper operation.
CARE AND CLEANING OF YOUR REFRIGERATED DRAWERS Condenser The machine compartment located beneath the cabinet does not require frequent cleaning; however, satisfactory performance depends on adequate ventilation. Be sure nothing obstructs the required air flow openings in front of the cabinet. At least once or twice a year, brush or vacuum lint and dirt from the front grille openings. See Figure 1 on page 3.
AVAILABLE OPTIONS FOR YOUR DRAWER REFRIGERATOR E-Z Stor Storage System Removable stainless steel bins with clear plastic lids can be moved to prep, cook, or serving areas as desired. Available for 60RDE upper and lower drawers. P/N 42245441 for 60 upper or lower drawers. For further information on available options visit the AGA MARVEL web-site at www.agamarvel.com or contact your AGA MARVEL dealer. NOTE When installing these options in the drawers the standard drawer divider will have to be removed.
TROUBLESHOOTING YOUR REFRIGERATED DRAWERS Before You Call for Service If the unit appears to be malfunctioning, read through this manual first. If the problem persists, check the troubleshooting guide below. Locate the problem in the guide and refer to the cause and its remedy before calling for service. The problem may be something very simple that can be solved without a service call. Some remedies listed in the Troubleshooting Guide are very complex.
OBTAINING SERVICE If Service is Required: • If the product is within the first year warranty period please call AGA MARVEL Customer Service at 800.223.3900 for directions on how to obtain warranty coverage in your area. • If the product is outside the first year warranty period, AGA MARVEL Customer Service can provide recommendations of service centers in your area. A listing of authorized service centers is also available at www.agamarvel.com under the service and support section.
HOUSEHOLD PRODUCT WARRANTY Entire Product Limited One Year Parts and Labor Warranty AGA MARVEL warrants that it will supply all necessary parts and labor to repair or replace in the end user’s home or office, any component which proves to be defective in material or workmanship, subject to the condition and exclusions stated below, for a period of one year from the date of purchase by the end user.
www.agamarvel.com P.O. Box 400 1260 E. VanDeinse St. Greenville MI 48838 800.223.3900 41011913-EN Rev A 2/2/10 All specifications and product designs subject to change without notice. Such revisions do not entitle the buyer to corresponding changes, improvements, additions, replacements or compensation for previously purchased products.