Owner’s Manual 1
Dear Customer, thank you for choosing a MASERATI. This vehicle represents the result of MASERATI's great experience in the design and construction of sports, touring and racing vehicles. The purpose of this manual is to provide you with an understanding of the equipment, systems and controls in the vehicle and to explain how they work.
Historical Background 1914 "Alfieri Maserati Garage Workshop" begins its activity in Bologna. 1961 Giuseppe Furmanik, Type 4CM: breaks the world speed record for the 1100 class at 222 km/h. The 3500 GT is the first Italian car available with fuel-injection. 1939 Creation of Mistral and Quattroporte, then the fastest sedan in the world. 1963 Wilbur Shaw with 8CTF wins the Indianapolis 500. Maserati still remains today the first and only Italian manufacturer to have won this legendary track.
1981 De Tomaso changes strategy and starts producing Biturbo, a sedan with 2 doors with 6-cylinder engine. 1989 Shamal is the first car featuring the new Biturbo 8-cylinder with 3200 hp. 1993 Fiat Auto purchases remaining shares of Maserati and in 1998 presents the new Quattroporte. 3500 GT 1997 Ferrari acquires the control of Maserati. 1998 Quattroporte Evoluzione V8 3.2 - V6 2.8. 3200 GT V8. Mistral coupé 1999 3200 GT V8 Automatica. 2000 The Officine Alfieri Maserati program.
Introduction Consulting the Manual To facilitate reading and rapid use, the topics are subdivided into SECTIONS and CHAPTERS. The important parts requiring particular attention are easily identifiable in the sections and chapters. EXTREME CAUTION REQUIRED: non-compliance with the instructions can cause SERIOUS DANGER involving the safety of persons and damage to the vehicle! WARNING: warning to prevent any damage to the vehicle and thus hazards involving the safety of persons.
Service “Cambiocorsa" gearbox The information contained in this manual is limited to those instructions and indications that are strictly required for the use and maintenance of the vehicle. The Owner will certainly obtain greater satisfaction and the best performance from the vehicle by following these instructions carefully.
Symbols There are specific colored plates on or near some of the components on your MASERATI. The related symbols are important warnings that the user must follow when using the particular component. Symbols included in the labeling on your MASERATI are listed here, along with the component involved with that symbol. Danger symbols Battery Corrosive liquid. Battery Do not approach with open flames. Battery Explosion. Battery Keep children at a safe distance.
Warning symbols Catalytic muffler Do not park or stop over flammable surfaces. Refer to section: “Pollution control devices”. Hydraulic steering Do not exceed the maximum level of fluid in the tank. Only use lubricants of the type prescribed in the chapter “Capacities and technical specifications”. Brake circuit Do not exceed the maximum level of fluid in the tank. Only use fluids of the type prescribed in the chapter “Capacities and technical specifications”.
Symbols
General contents Car identification data 1 Active and passive safety 2 Instruments and controls 3 Before you drive 4 Using the vehicle 5 In an emergency 6 Capacities and technical specifications 7 Maintenance 8 Contents 9 Symbols 11
Symbols
Car identification data Identification plates Homologation plates Instructions plates Key codes Electronic alarm device code 14 15 17 18 19 Symbols 1 13
Identification plates Chassis marking 1 The vehicle's identification number can be found on the dashboard panel in front of the passenger seat. To read this number, lift the mat and open the flap A. A 14 Identification plates Engine marking The engine B serial number is stamped on the lower part of the crankcase, in the starter motor area. The engine type is given on the summary plate located on the front crossmember of the car.
Homologation plates – V.I.N.
– Emission control data plate.
Instructions plates – Lubricant plate.
Key codes 1 The two keys are provided with a CODE CARD, where you will find: – the electronic code A to be used for ”emergency starting“; – the mechanical code B for the keys, to be given to your Authorized Maserati Dealer in the case that you request duplicates of the keys. A B 18 Key codes WARNING: The code numbers shown on the CODE CARD must be kept in a safe place.
Electronic alarm device code Rolling Code 1 Each time the radio operated control is used, the code changes. Keep the plate with the Rolling Code with care and in a safe place. To order extra keys fitted with radio operated controls, contact your Authorized Maserati Dealer indicating your complete Rolling Code.
Electronic alarm device code
Active and passive safety Seat belts Proper transport of children Front and side airbags MSP System ABS and EBD systems ASR system (electronic anti-skid device) Parking sensors (optional) Fire extinguisher (optional) Fuel cut-off inertia switch 22 27 29 34 35 37 38 41 42 2 21
Seat belts 2 The vehicle is equipped with seat belts with automatic retractors for maximum freedom of movement. The seat belts are equipped with electronically-operated pretensioners and the lower attachments points are connected directly to the seat, to help provide maximum protection whatever the seat position. The passenger seat belt is fitted with the KISI system, which improves safety when children are travelling in special child seats.
Front seat belt height adjustment The seat belt height must be adjusted with the car stationary Always adjust the height of the front seat belts in relation to the height of the driver and the passenger. This precaution can help to substantially reduce the risk of injury in the event of a collision. The belt is correctly adjusted when it passes about halfway between the neck and the shoulder.
2 The pretensioners do not require maintenance or lubrication. Tampering with the devices will compromise their efficient operation. If, as a result of exceptional natural circumstances (floods, heavy seas, etc.), the device has been in contact with water and or sludge, it is absolutely essential to replace it. To ensure the best protection from the pretensioners, secure the belt snugly across your chest and pelvis.
General warnings regarding the seat belts The driver is obligated by law to respect and enforce the provisions of local legislation regarding the compulsory use of seat belts. To help provide maximum protection, you are advised to keep the seatback in the most upright position possible and the seat belt close to your chest and pelvis. If the seat belt is loose, in the event of an accident you could move too far forward and could be injured.
Do not carry children on a passenger’s lap. Children must be seated in their own seat. 2 If the seat belt has been subjected to strong mechanical stress, for example during a collision, it must be completely replaced together with its anchorages, the anchor point screws and the pretensioner. In fact, even if there are no visible defects, the seat belt could have lost some of its resistance. Pregnant women must always observe local legislation regarding the use of seat belts.
Proper transport of children For the best protection in the event of a collision, all the vehicle's occupants must travel seated and protected by all the suitable restraining systems. The seat belts are designed to be used by persons whose physical characteristics (age, height, weight) are provided for by established legislation in each country. Anyone who does not comply with these provisions may not travel in the passenger seat. This also applies to children.
The vehicle is equipped with three anchorage points (two lower and an upper one) for child seats, as provided by the country regulations. 2 WARNING 28 Proper transport of children The vehicle is not provided with a manual deactivation switch for the passenger side airbag; it is prohibited to carry children on a rearward facing child-seat mounted on the passenger seat. This regulation is also indicated on the plates attached on the visors and inside the glove compartment.
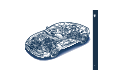
Front and side airbags 10 11 2 1 3 5 2 7 9 4 6 8 Front and side airbags 29
2 30 The vehicle is equipped with 4 airbags (2 front and 2 side) and electronicallycontrolled pre-tensioners for the front seat belts.
In case of a low impact head on collision (in which the retaining action of the seat belts affords adequate protection), or front angular collisions, the airbags do not inflate. In case of a rear collision (e.g., impact from behind by another vehicle) or the airbags do not inflate as they do not offer any additional protection. Therefore the bag's failure to engage in these cases is not an indication of a system malfunction.
If the warning light switches on when the vehicle is running (indicating a fault), contact your Authorized Maserati Dealer as soon as possible to have the system checked. 2 WARNING: The airbag system has a service life of ten years. When this expiration date is approaching, contact your Authorized Maserati Dealer.
Do not travel with objects in your lap or in front of your chest a pipe, pencil or other object held in your mouth; in the event of a collision, the deplayment of the airbag could result in serious injury. Note that with the ignition key inserted and turned to the MAR position, even with the engine switched off, the airbags can inflate even if the vehicle is stationary, if it is run into by another vehicle. Thus, even with the vehicle stationary, occupants should be belted in their seats.
MSP System 2 Activating the MSP system The vehicle is equipped with an MSP (Maserati Stability Program) yaw prevention monitoring system encompassing all of the vehicle's control systems: ABS, EBD, ASR and MSR. It has a model within it that predicts the vehicle's behaviour with extreme accuracy. The system is designed to detect whether the driver is about to lose control of the vehicle.
ABS and EBD systems The vehicle is equipped with ABS (Antilock-Braking System) and EBD (Electronic Brakeforce Distribution) systems which, via the ECU and the ABS sensors, help increase the braking system's performance. In the event of an emergency stop or braking on slippery surfaces (where there is snow, ice, etc.
2 36 If only the > warning light switches on while the engine is running, this normally indicates a malfunction in the ABS only. In this case, the braking system maintains its efficiency, but the antilocking device cannot be used. In these conditions the EBD system may also function less efficiently. Also, in this case we recommend you go to your Authorized Maserati Dealer as soon as possible to have the system checked, avoiding any sharp braking while you drive.
ASR system (electronic anti-skid device) The ASR system helps prevent the driving wheels from skidding during acceleration via the engine's ECU action (delayed spark advance, reduced engine supply throttle opening and injection cut-off), and that of the rear brakes.
Parking sensors (optional) 2 During parking maneuvers, the parking sensors provide the driver with information on the distance between obstacles found behind the vehicle. The information on the presence and distance of the obstacle is transmitted to the driver by warning beeps which sound with an increasing frequency as the vehicle approaches the obstacle. By supplementing his/her direct visual information with that provided by the system's warning sound signals, the driver may avoid potential collisions.
WARNING: When cleaning the sensors, take special care not to scratch or damage them. Do not use dry, rough or hard cloths. The sensors must be washed with clean water, possibly with car shampoo added. In car-washes which use steam jet or high pressure cleaning machines, keep the nozzle at least 4 in (10 cm) away from the sensors. Sensor range The sensors allow the system to monitor the rear of the vehicle; in fact, their position covers the central and lateral zones at the rear of the vehicle.
Fault signals 2 40 The system's ECU runs all the checks on the components every time the reverse gear is engaged. A parking sensor system failure is indicated by a continuous warning signal from the buzzer when the reverse gear is engaged. In the event of a failure signal, stop the vehicle and rotate the ignition key to the STOP position. Then try cleaning the sensors or moving the vehicle away from any possible ultrasound sources (e.g.
Fire extinguisher (optional) A portable fire extinguisher is located on the passenger compartment floor for immediate accessibility in case of need. The extinguisher is fastened by means of special brackets. Charged with powder, it has a 4.4 lb (2 kg) capacity (8 second nominal discharge time) and does not contain chlorofluorocarbons. Check the pressure and the charge status using the pressure gauge A regularly. The fire extinguisher must always be fastened to its special brackets.
Fuel cut-off inertia switch 2 The vehicle is equipped with a safety switch which is designed to intervene in the event of a collision, cutting off the fuel supply and consequently causing the engine to stop. It also prevents the fuel spreading if the fuel lines are damaged during the accident. The intervention of the safety switch is indicated by the warning light appearing on the instrument panel. The switch is positioned inside the lefthand service compartment, in the luggage compartment.
Instruments and controls Dashboard (version with "Cambiocorsa" gearbox) Instrument panel Indicators and warning lights Instruments and indicators Trip odometer reset button Instrument panel dimmer switch Controls and interior equipment 44 46 48 51 55 55 56 3 43
Dashboard (version with "Cambiocorsa" gearbox) 14 15 1 2 3 4 5 6 7 8 9 10 11 12 13 14 15 3 16 17 19 20 21 24 22 32 31 30 29 28 27 26 33 44 Dashboard (version with "Cambiocorsa" gearbox) 19 18 25 23
1) Instrument panel 2) Lower gear activation lever DOWN 3) Interior temperature sensor 4) Driver’s airbag 5) Upper gear activation lever UP 6) Windshield/headlight wiper/washer control lever (optional) 7) Upper ventilation and heating outlet 8) Clock 9) Central air-conditioning and heating vents 10) Fuel tank flap control button (located in the glove compartment) 11) Luggage compartment lid control button (in the glove compartment) 12) Passenger’s airbag 13) Glove compartment 14) Air conditioning and heati
Instrument panel USA - CDN version 3 4 5 6 7 8 9 10 11 12 13 14 15 16 3 21 2 17 22 1 18 24 23 25 30 46 Instrument panel 29 28 27 26 20 19
1) Oil pressure gauge and low pressure warning light 2) Coolant thermometer and high temperature warning light 3) Front seat heating warning light 4) Parking lights/low beams warning light 5) Rear fog light warning light 6) Air bag/pretensioners failure warning light 7) Light failure warning light 8) High beams warning light 9) Warning light for OBDII engine control system failure 10) Catalytic converter high temperature warning light 11) ABS system failure warning light 12) Front brake pad worn/low brake f
Indicators and warning lights Seat heating (optional) Indicates that the heating device of one or both front seats is turned on. Parking lights/low beams 3 It switches on when the dipped lights, low beams or parking lights are turned on. Rear fog lights This lights up when the rear fog lights are switched on. Airbag/pre-tensioner failure When the pre-tensioner and/ or airbag system is defective. Turning the key to MAR, the light comes on but it should go out after a few seconds with the engine running.
WARNING: When you turn the ignition key to the MAR position and the U does not light up or switches on when driving the car, contact your Authorized Maserati Dealer as soon as possible. Catalytic converter high temperature warning light Turning the key to MAR the warning light comes on for self-diagnosis, but should go out after starting the engine. This warning light starts flashing or comes on with a fixed light when engine malfunction results in high exhaust system temperature.
Handbrake on The warning light flashes when the handbrake is operated. Direction indicators This lights up when the direction indicators or the hazard lights are switched on. 3 50 Maserati CODE When the ignition key is turned to the MAR position, it may switch on under three possible conditions: – One flash - key code recognized. The engine can be started. – Fixed light - key code not recognised.
Instruments and indicators 1 – Oil pressure gauge It indicates the engine oil pressure. In normal operation, the needle must be at the center (35 to 70 psi) (2.5 to 5 bar). If it moves towards 0 and at the same time the warning light switches on, stop the car and carry out the necessary checks. The warning light also switches on when the igntion key is turned to the MAR position, but it should switch off as soon as the engine starts.
3 52 17 – Voltmeter 18 – Fuel level gauge It indicates the battery voltage and the consequent normal operation of the charging system. With the battery in good condition, the engine off and the starter key in MAR position, it is located between 10V and 13V. With the engine running the indicator moves to values over 13V. The low recharge warning light inside the voltmeter indicates possible problems in the recharging system.
21 – Multi-function display MSP Switches on when the MSP system is activated. Indicates deactivation or failure of the MSP system. SPORT CRUISE Indicates electronic suspensions "sport" setting. This indicates the defroster for the rear window and external rear-view mirrors is switched on . Indicates that the Cruise Control is activated. Indicates a failure in the electronic suspensions system. v Engine oil pressure low. t Indicates a failure in the “Cambiocorsa" gearbox.
26 – Indicator for "Cambiocorsa" gear engaged / parking lights on When the ignition key is turned to the MAR position, it indicates that the "Cambiocorsa" gear is engaged: – N (neutral) – R (reverse) – 1 (1st gear) 3 – 2 (2nd gear) – 3 (3rd gear) – 4 (4th gear) – 5 (5th gear) – 6 (6th gear) When the key is removed, it indicates, through the warning light F, that the parking lights are on.
Trip odometer reset button Press button A to set the trip odometer to zero. Instrument panel dimmer switch Turn button B, with the external lights on, to adjust the instrument panel lighting.
Controls and interior equipment Hazard warning lights 3 Press button A to turn on the hazard warning lights. Their operation does not depend upon the position of the ignition key. Press the button again to turn them off. When these lights are on, the directional indicators, the related warning lights on the instrument panel and the button are flashing. WARNING: When the hazard warning lights are activated, the directional indicators control is disabled.
Rear fog lights Press button D to switch on the rear fog lights. They only work with the front fog lights or low beams on. The LED on the pushbutton switches on when the lights are on. Do not use the rear fog lights in normal visibility conditions to avoid dazzling vehicles behind. Heated side window and sideview mirror defroster Activation of the heated side window and of the side rear view mirror defroster is only possible when the ignition key is in the MAR position and by pressing button E.
Opening the luggage compartment Press pushbutton F (located inside the glove compartment) to open the trunk lid. Vehicles are also equipped with a lever inside the luggage compartment, which permits opening from the inside. Opening the fuel tank flap Clock Press the G pushbutton (inside the glove compartment) to open the fuel tank flap on the right-hand rear side of the car. Press pushbutton H to set the clock: slight pressure = slow adjustment prolonged pressure = fast adjustment.
Front overhead lights Rear overhead lights Sun visors The overhead lights include one central light and one reading light. The central light switches on automatically when one of the doors is opened and switches off a set period of time after they are closed. It can also be switched on manually by pressing button L. The reading light is controlled by button M.
Glove compartment It is positioned in the lower part of the dashboard on the passenger's side, and the opening pushbutton R is equipped with a lock. The compartment is lit by a courtesy light when it is opened. 3 The glove and luggage compartment locks cannot be operated using the “garage” key.
Coat-hooks These are found in the rear of the passenger compartment. To pull out a hook press button S. To reposition it back, push it upwards in its seating. When the hooks are not in use, turn them to the closed position.
Controls and interior equipment
Before you drive Doors Engine compartment hood Luggage compartment Fuel tank flap Keys Ignition switch Electronic alarm device Front seats Rear seats Side-view mirrors Steering wheel External lights and directional indicators Windshield wipers and headlight washers (optional) Sound system Air conditioning and heating system Specific luggage set (optional) 64 66 67 68 69 72 73 78 82 83 85 86 88 90 92 99 4 63
Doors Opening doors from the outside 4 Switch off the alarm device and the centralized door locking by the electronically operated control (see paragraph “Electronic alarm device” on page 75). With the central lock released, lift the handle to open the door. With alarm device off it is possible to open the door by inserting and turning the key in the lock of one of the doors. Never use the lateral aerodynamic extensions located underneath the door as a step.
Pressing the window button on the driver side B with the key in the MAR position operates the window in automatic mode: the window is closed when it reaches the limit stop (or by pressing the button again). WARNING: If the power window is operated with the door open, the window stops before reaching the upper threshold to prevent interference with the strip when closing the door.
Engine compartment hood To open the engine compartment hood: pull lever A located on the lower left hand side of the dashboard. WARNING: If necessary, the engine compartment hood can be released by pulling the eyelet on the emergency cable found near the lever. 4 Release the safety device by lifting button B located in the middle of the grille. Lifting the engine compartment lid: The procedure is facilitated by the side gas struts.
Luggage compartment The luggage compartment trunk can be opened from the inside or outside of the car. To open it from the inside use button A, which is found in the glove compartment. To open the trunk from the outside, use the ignition key. Raising the lid is is facilitated by the action of the gas struts. Vehicles are also equipped with a lever inside the luggage compartment, which permits opening from the inside.
Fuel tank flap The fuel tank flap is found on the right-hand rear side of the car. To open the flap, press pushbutton A which is located inside the glove compartment. The cap’s hermetic seal may result in a slight pressure increase in the tank. Any hissing noise while the cap is being released is normal. 4 When refueling, the cap must remain hanging from the flap by means of the respective hook B. The cap is joined to the filler neck with a strap to prevent misplacement while refueling.
Keys The Maserati CODE system In order to increase protection against attempts at theft, the car is equipped with an electronic engine immobilizer system (Maserati CODE), which is automatically activated when the starter key is removed. Each starter key contains an electronic device which transmits a code signal to the Maserati CODE control unit, and engine ignition is enabled only if the key code is recognized by the system. The keys supplied are two of type A and one “valet” key, B.
2) If the warning light CODE is flashing, it means that the vehicle is not protected by the engine immobilizing device. Contact your Authorized Maserati Dealer immediately to have all the keys stored in the memory. WARNING: Strong impact can damage the electronic components in the key. 4 70 WARNING: Each key supplied has its own specific code, which must be stored in the memory of the system control unit.
4) Wait until the number of flashes is the same as the first digit on the CODE CARD and then press the accelerator pedal down and keep it pressed until the warning light OBDII switches off, after being lit for about 4 seconds, then release the accelerator. 5) The warning light OBDII will start flashing again. As soon as the displayed number of flashing is equal to the second digit of your CODE CARD, press down the accelerator pedal and keep it pressed.
Ignition switch 4 Start button The ignition key can be turned to 3 positions: STOP - Engine off, engine immobilizer and steering wheel lock activated, connected devices excluded apart from those that are not key-controlled (e.g. centralized door lock, trunk opening control, etc.). The key is removable. ACC - Position for cigarette lighter. The key is not removable. MAR (ON) - Position for engine starting and driving. All electrical devices can operate. AVV - Position with no functions.
Electronic alarm device The electronic alarm device carries out the following functions: – remote management of the centralized door locking/unlocking – perimeter surveillance, detecting the opening of doors, engine hood and trunk lid – motion surveillance, detecting intrusion in the passenger compartment – car movement surveillance.
4 74 Should directional indicators be flashing 8 times when you activate the alarm system, this means that one of the doors or the hood/trunk is not closed and therefore is not protected by the perimetral surveillance. Check for correct closing of doors, hood/ trunk and close the open one without deactivating the alarm system: the directional indicators flashing once indicate that now the door, hood/ trunk are closed properly and are protected by the perimetral surveillance.
Alarm memory Should the red LED B on the instrument panel be flashing when you deactivate the alarm system, this means that during your absence the alarm system was activated. 1 switching off ever 6 seconds = passenger compartment volume control alarm 2 switching offs ever 6 seconds = door alarm 4 switching offs ever 6 seconds = hood/ trunk alarm 16 switching offs ever 6 seconds = selfpowering alarm. The alarm system memory is reset when you turn the ignition key.
Replacing the Key radio control batteries If pressing one of the two key buttons, A or B, the related function (activation/ deactivation of the electronic alarm, opening of the luggage compartment lid) is not activated, check that the alarm system is working using the other key. If it functions using the other key, the first radio control battery must be replaced.
Replacing “valet” key radio control batteries If pressing the radio operated control button does not cause the electronic alarm activation or deactivation, the battery must be replaced (after checking correct operation of the electronic alarm with another radio operated control).
Front seats Back/forward adjustment Only adjust the seat when the car is stationary. You could lose control of the car while driving. Moving the seat could distract you or make you press a pedal unintentionally. Adjust the driver's seat only when the car is stopped. 4 Seat adjustment is possible only with the ignition key in the MAR position.
Seatback tilt To tilt the seatback on the front seats, lift lever C and move the seatback forward. To facilitate access to the rear seats or getting out of the car, the front seats come equipped with the “Easy Entry” device (operational only with the door open), which moves them forward and downward automatically when the seat back is completely tilted and returns them to the driving position when it is straightened.
Storing the seat and side rear view mirror position (optional) 4 The system allows the user to store and recall two different positions of the driver’s seat and of the side rear view mirrors. Storage is only possible with the ignition key in the “MAR” position. Adjust the seat and side rear view mirror positions, then shift the gear to reverse and arrange the mirrors once again so as to find the optimum field of view for executing maneuvers. Afterwards, disengage the reverse gear.
Headrest Headrests are integrated in the seats.
Rear seats Armrest The rear armrest is movable and can be inserted into the backseat. To lower it, pull handle A. 4 A 82 Rear seats Headrest The rear headrests are a fixed part of the seatback.
Side-view mirrors External side-view mirrors Can be adjusted electrically (with the ignition key in the MAR position) and they are equipped with anti-mist defrosters. – Mirror selection (right-hand or lefthand): move the selector A to the right or left, depending upon the mirror you wish to adjust. Bring the selector back to the center to prevent mirror position being changed involuntarily. – Mirror positioning: control B allows each mirror to be adjusted with four movements (up – down – right – left).
The side rear view mirrors feature different curvatures; the left-hand mirror is flat, while the right-hand one is convex. Pay particular attention as objects viewed in the righthand mirror are closer than they appear. WARNING: Do not retract the mirrors manually as this could damage the powering mechanism. 4 84 The mirrors must always be in the open unretracted position when the car is moving.
Steering wheel The steering wheel can be adjusted for height and depth. – Move lever A to position 1. – Make the steering wheel height and depth adjustments. – Move lever A back to position 2 to re-lock the steering wheel. Do not adjust the steering wheel with the car moving. Under no circumstances remove the steering wheel; this procedure, if necessary, must be carried out by an Authorized Maserati Dealer.
External lights and directional indicators 4 The external lights and directional indicators switch on only with the ignition key in the MAR position, with the exception of the parking lights, which can be turned on at any time.
Flashing the headlights Parking lights Directions indicators Headlights can be flashed by pulling the left-hand lever towards the steering wheel. Headlights can be flashed even with the lights switched off, if the ignition key is in the MAR position. The parking lights work only with the ignition key in the STOP or ACC positions, or with the key removed. They are switched on by turning the light switch to the F position. When the parking lights are on, the warning light on the F switches on.
Windshield wipers and headlight washers (optional) The windshield wiper and washer work only with the ignition key in the MAR position. The windshield wiper is started by shifting the lever in the E position. Windshield wiper operation is limited to the time in which the lever is manually held in that position. Upon release, the lever automatically returns to the A setting and the windshield wiper stops.
Windshield washer Headlight washers (optional) Pulling the lever towards the steering wheel (non-permanent position) activates the windshield washer and wiper. When the windshield washer is activated, the windshield wiper starts automatically. Releasing the lever cuts off the jet of fluid while the blades continue to wipe for a for strokes. The headlight washers are activated automatically when the windshield washer is started and the external lights are on.
Sound system – two mid-range loudspeakers C on the rear side valance panels – two subwoofer loudspeakers D on the back shelf The stereo system is comprised of a Becker Mono Sinto “on line pro” CD player capable of reading MP3 files using the CD-R and memory card. The sound system can also be integrated with a GPS navigator, plus GSM tri-band 900-1800-1900Mhz telephone.
– built-in aerial in the rear window – aerial incorporated in the windshield – CD-changer E (optional) positioned on the left-hand side of the trunk. WARNING: The cable for installation of the CD player in the lugguage compartment is supplied only in cars equipped with CD-changers. Diversity system It consists of two combined aerials, that are activated alternatively, depending on the one that better receives the signal.
Air conditioning and heating system E D B D A A 4 C A C F 92 Air conditioning and heating system
A - Dashboard central and side vents B - Dashboard upper vent C - Dashboard lower vents D - Side window demisting/defrosting vents E - Windshield demisting/defrosting vents F - Rear vents Central and side dashboard vents Press the tab in point H to open the central and side outlets. Turn the vent with open tabs to obtain the required air flow direction. Front windshield pillar vents Vents L positioned on the windshield pillars are fixed and directed for demisting/defrosting the front side windows.
Lower dashboard vents Rear vents Vents M are positioned on the lower dashboard sides, and they cannot be aimed. The rear seat air-conditioning and heating vents are positioned at the end of the central console. To open the vents, press the fin at point N. The airflow can be directed as desired by turning the vent with the fins open.
Automatic air conditioning and heating controls 1) Knob for setting the required “comfort” temperature 2) Knob for adjusting fan speed and switching off the system 3) Air distribution knob 4) Pushbutton for air recirculation activation/deactivation 5) ECON pushbutton for deactivation of the ventilation compressor Equivalent temperature Description of controls The systems allows automatic and manual control of the temperature and humidity inside the passenger compartment.
2) System deactivation and fan speed adjustment control Turning the control to the left or the right respectively decreases or increases the fan speed and therefore the amount of air blown into the passenger compartment, thereby maintaining the equivalent temperature requested. AUT fan speed is adjusted automatically by the system. OFF the air conditioning system is switched off.
5) Deactivation button for the airconditioning system compressor Pressing the ECON button disables the air-conditioning system compressor function. When this is disabled the LED on the button switches on. To deactivate the ECON function, press the button again. The LED on the button will turn off. The air is cooled and/or dehumidified according to the temperature set.
4 When the ECON button is pressed, the ventilation compressor is switched off. With deactivated compressor, the air entering the compartment cannot be cooled or dehumidified and the recirculating air function is automatically deactivated to avoid window steaming. Pressing again the ECON button with disabled compressor, activates the previous operating conditions.
Dust/pollen air cleaner The ventilation and heating system is provided with an air cleaner which combines the mechanic air filtering function with an electrostatic effect in order to help clean the air entering the compartment from dust, pollen, etc. Specific luggage set (optional) The specific luggage set allows the passengers to use the vehicle luggage compartment capacity very efficiently.
Specific luggage set (optional)
Using the vehicle Starting the engine “Cambiocorsa” gearbox Optimization of fuel consumption Using the brakes Use of the engine Constant speed control Cruise Control Electronic suspension Skyhook Headlights Driving conditions Pollution control devices Parking Tires 102 104 111 112 113 115 118 121 122 126 128 129 5 101
Starting the engine Keep the brake pedal pressed when starting the engine. It is dangerous to operate the engine in a closed space. The engine consumes oxygen and discharges carbon dioxide, carbon monoxide and other toxic gases. 5 WARNING: Before starting-up the vehicle, deactivate both the electronic alarm by pressing the radio-controlled key and the electrical devices with high power absorption (air-conditioning, heated side window, headlights etc.).
Starting-off when the engine is cool Start-off slowly, avoiding sudden accelerations and rev the engine at low-medium speeds. Highperformance driving should be avoided until the water temperature reaches 122°-140°F (50° - 60°C). Emergency starting with auxiliary battery If the battery is discharged, the engine can be started using another battery having the same or slightly higher capacity than the flat one.
“Cambiocorsa” gearbox 5 The "Cambiocorsa" gearbox is controlled by the levers on the steering wheel for gear-shifting, by the lever on the central console for engaging the reverse gear and by the pushbuttons to activate the "automatic transmission" and "low grip" functions.
If the warning light t remains on, there may be a system multifunction. This status is also indicated by a beep when the key is brought to the MAR position. WARNING: Contact your Authorized Maserati Dealer for service to have the cause of this malfunctioning eliminated. Operation with the engine switched off After completing the "system startup" stage, the gear currently engaged will appear on the display: – N (Idle) – R (Reverse gear) – 1 (1st gear).
WARNING: Engagement of the reverse gear is accompanied by a safety sound signal, which sounds intermittently for the entire time in which it is engaged. 5 When shifting from reverse to 1st gear, if the system automatically engages the 2nd gear, it indicates that a problem has occurred with the 1st gear. Therefore, this is not a failure, as it falls into the logic of the system operation.
Important UP for overrunning speed rate – With the car stationary and a gear engaged, keep the brake pedal pressed until starting-off. – Engage the reverse gear only when the car is at a full stop and with the brake pedal pressed. – When the MSP device is switched off, the antiskid system is deactivated. The system switches to an upper gear "automatically" if the engine reaches a value approaching the "overrunning rate" and the accelerator pedal is pressed.
Switching off the engine and the system The engine can only be switched off with the gearbox in 1st, or reverse gear R. After turning the key from the MAR to the STOP position, the display remains on for several seconds, showing the gear currently engaged. If the gearshift is in neutral (N) a buzzer is activated. 5 108 Never leave the car with the gearshift in neutral (N). Switch to 1st gear or reverse, ensure that the display is not flashing and always engage the handbrake.
A DOWN request from 6th to 5th gear will only be accepted if the engine speed rate in 5th gear proves to be lower than 3,200 r.p.m. As the "low-grip" mode can be activated at any time and the system limits the engine's speed rate to 3,200 r.p.m. in all gears except for the 6th, unrequested UP shifts could take place. It is a good rule to switch off the other operating modes ("automatic gearshift" and "SPORT") before you select the "low-grip" mode.
The "SPORT" mode is characterized by a stiffening of the suspension and faster gearshift compared to gear-shifting in the "normal" mode. 5 Gear-shifting is "faster" if requested with the accelerator pedal pressed down to the floor and when exceeding about 7,000 r.p.m. Under these conditions, even on dry roads, the driving wheels could start to skid (particularly in low gears).
Optimization of fuel consumption This procedure is valid for versions with manual gearbox and for those with the Cambiocorsa gearbox (in “Manual” mode) In order to optimize fuel consumption, Maserati recommends that you shift gears "UP" as follows: Gearshifting 1 st Vehicle speed during gearshifting [mph] 2 nd 15 2 nd 3 rd 20 3 rd 4 th 25 5 th 30 5 th 6 th 35 4 th Shifting gears as outlined above, will allow you to improve fuel consumption levels without significantly reducing p
Using the brakes WARNING: In order to run in the brake pads and discs suitably, avoid sudden and sharp brakings during the first 190 miles (300 Km). 5 112 ABS is a component of the braking system that offers two basic advantages: – It helps avoids locking of the wheels and thus skidding during emergency braking and especially under low grip conditions.
Use of the engine Breaking-in Today's modern methods of production afford high precision in the construction and coupling of components. However, the moving parts do undergo a breaking-in process, basically in the first hours of the car’s operation. Engine and transmission Avoid exceeding 5000 r.p.m. for the first 600 miles (1,000 km). After starting the car, do not exceed 4,000 r.p.m. until the engine has warmed up sufficiently (water temperature: approx. 150-160 °F (6570 °C).
Engine control system OBDII 5 114 This system continuously monitors the components of the vehicle related to emissions; it also warns the user about the deterioration condition of the components themselves, by means of the warning light U on the instrument panel.
Constant speed control Cruise Control General information The electronic cruise control makes it possible to drive the car at the desired speed without pressing the accelerator pedal. This helps reduce driving fatigue, especially on long trips because the speed stored in the memory is kept constant automatically. WARNING: The device can only be switched on at speeds exceeding 18 mph (30 km/h) and it switches off automatically when the brake pedal is pressed.
Storing a speed 5 116 Turn switch A to the ON position and reach the desired speed of the vehicle in a normal manner. Turn the ring nut B to (+) for at least three seconds and then release it. The car speed is saved and the accelerator pedal can then be released. The car will proceed at the constant speed stored in the memory until the brake pedal is pressed. If necessary, (for example, to pass another vehicle), you can accelerate by simply pressing the accelerator pedal.
Reducing a speed saved in the memory The speed stored in the memory can be reduced in two ways: – by switching off the device, pressing the brake pedal and then saving the new speed in the memory (turning ring nut B to the (+) position for at least three seconds); or – by keeping ring nut B turned to the (–) position until the new speed is reached: the latter will be stored automatically.
Electronic suspension Skyhook 5 118 The electronic system managing the vehicle suspensions is the result of the sophisticated processing run by the onboard sensors, which are designed to optimize performance. The system is capable of constantly monitoring suspension damping by means of the actuator fitted on each shock absorber. It is possible to adjust the shock absorber setting according to the road and to the vehicle dynamic conditions, improving comfort and road grip.
Setting selection The driver can select, in relation to roadbed, speed, driving style and comfort, one of the two setting levels provided by the system: normal or “sport”. Normal setting, active when the SPORT function is deactivated, favors comfort and higher driving stability with low and average grip conditions. “Sport” setting, active when the SPORT function is enabled, favors and permits sportier driving with the improved road holding.
Fault signals 5 120 When driving the car, if one or more of the electrical components in the system is malfunctioning, in addition to switching on of the warning light on the multi-function display, the electronic control unit checks that the shock absorbers are set to a preestablished calibration, which permits a normal car set-up. Should the fault involve one shock absorber only, this is no longer controlled by the electronic control unit and remains in the position it had when the fault occurred.
Headlights Headlight beam aiming It is essential that the headlights are adjusted properly, not only for the comfort and safety of the driver but also for all road users. Moreover, correct beam aiming is an essential requirement of local traffic laws. To ensure that the driver and all other users benefit from the best visibility conditions when travelling with the lights on, the car must feature a correct beam setting. Consult your Authorized Maserati Dealer for a check and any adjustments required.
Driving conditions Before your trip Check the following at regular intervals and always before long trips: – tire pressure and conditions – levels of fluids and lubricants – conditions of the windshield wiper blades – proper operation of the warning lights and of the external lights. 5 WARNING: In any case, it is advisable to carry out these checks at least every 500 mi (800 km), and to always comply with the compulsory measures prescribed by the factory scheduled maintenance plan.
In addition to being prohibited by current regulations, it is extremely dangerous to travel inside the luggage compartment or on the car hood. In the event of an accident, persons transported in this manner are at a much greater risk of serious injury. Passengers must only travel seated in the car seats, with the seat belts properly fastened. Always check that both you and car occupants have their seat belts correctly fastened. Travelling – The first rule for safe driving is caution.
Driving at night 5 124 The main guidelines to follow when driving at night are set out below: – Use extra caution: at night, driving conditions are more demanding. – Reduce your speed, especially on roads with no streetlights. – At the first signs of drowsiness, stop: to continue driving would be a risk for yourself and for others. Proceed only after you have had proper rest.
Driving in fog Driving in the mountains Driving on snow or ice If the fog is dense avoid traveling where possible. When driving in mist or fog: – Keep a moderate speed. – Even in the daytime, turn on the low beams, and the front and rear fog lights. Do not use the high beams. – Remember that fog creates dampness on the asphalt and thus any type of maneuver is more difficult and braking distances are extended. – Keep a greater than normal distance from the vehicle in front of you.
Pollution control devices 5 126 Even if the car is fitted with antipollution devices, the environment deserves the utmost respect from every one of us. By following a few simple rules, the car driver can help reduce damage to the environment and very often can reduce his fuel consumption as well. In this regard, some useful information is listed here below. The correct operation of the antipollution devices is not only less harmful to the environment, but also affects vehicle efficiency.
Engine exhaust, some of its constituents, and certain vehicle components contain or emit chemicals known to the State of California to cause cancer and birth defects and reproductive harm. In addition, certain fluids contained in vehicles and certain products of component wear contain or emit chemicals known to the State of California to cause cancer and birth defects or other reproductive harm.
Parking Engage the handbrake, leave the 1st gear engaged when travelling both up and downhill, turn the wheels and switch off the engine. As 1st gear is the lowest gear, it is suited to use the engine as a brake. When parking on a sharp incline, use a wedge or rock to block the wheels. Never leave the ignition key in the MAR position. Always remove the key when getting out of the car. Never leave children unattended in the car. 5 Handbrake The handbrake lever is located between the front seats.
Tires DOT Quality Grades Tire inflation pressure when cold Tires Tread wear Traction Temperature The tire inflation values, indicated in this manual, are intended for cold tires. Michelin Pilot Sport 220 AA A The maximum speed that can be reached with winter tires is indicated by the tire manufacturer. Always comply with the local regulations. When using the spare wheel (emergency wheel) do not exceed 50 mph (80 km/h). Avoid driving at full throttle, braking sharply and cornering at high speeds.
5 Temperature Winter tires The temperature grades are “A” (the highest), “B”, and “C”, representing the tire’s resistance to the generation of heat and its ability to dissipate heat when tested under controlled conditions on a specified indoor laboratory test wheel. Sustained high temperature can cause the material of the tire to degenerate and reduce tire life, and excessive temperature can lead to sudden tire failure.
Snow chains The use of snow chains is subject to the local state and provincial law. Use snow chains of reduced dimensions, with a maximum protuberance of 0.35 in. (9mm) beyond the tire tread. The chains should be fitted only on the driving wheel tires (rear wheels). Check chain tension after driving for a distance of about 55 yards (50 meters) with the chains fitted. Deactivation of the MSP system is advised when chains are fitted on the tires.
Tires
In an emergency Emergency starting Toolkit If a tire gets a puncture If an exterior light goes out If an interior light goes out If a fuse blows If the battery is fully discharged If you have to jack up the car If you have to tow the car In the event of an accident 134 135 136 143 146 149 159 160 161 162 6 133
Emergency starting If the MASERATI CODE does not deactivate the engine immobilizer, the warning light CODE is permanently lit, whereas the warning light OBDII U turns off after 4 seconds and then switches on again immediately. In these conditions the engine cannot be started. To start the engine, it is necessary to follow the emergency starting procedure. WARNING: We recommend to carefully read the entire procedure before carrying it out.
Toolkit The car is equipped with the following tools: – toolkit, located in the luggage compartment – spare wheel with electric compressor, jack and tools is (optional) located inside the spare wheel itself. The tools which may be contained in the box fixed to the luggage compartment panel by belt, are: – universal pliers – 8 mm open end wrench – 10 mm open end wrench – 13 mm open end wrench – 17 mm open end wrench – slot screwdriver – phillips-head screwdriver – towing hook.
If a tire gets a puncture Precautions in the event of a puncture 6 If a tire is punctured, you can make a first emergency repair using the special Fix&Go kit located in the trunk. Tire punctures of up to 7/32 inch (6 mm) can be repaired; the kit can be used in all weather conditions. Do not remove the foreign object from the punchured tire, i.e., screw or nail. Remove the special Fix&Go kit from the vehicle, take it out from the bag and place it near the punchured tire.
Peel off the warning label F from the bottle and place it on the dashboard as a reminder to the driver that the tire has been treated with Fix&Go. Do not drive over the speed limit or exceed 65 mph (110 km/h) whichever is less. Have the tire checked as soon as possible at an Authorized Maserati Dealer. The sealant maybe harmful or irritant. Do not swallow, avoid contact with eyes & skin. In case of contact rinse with plenty of water. Contact a physician in case of allergic reaction.
Spare wheel (emergency wheel - optional) With the spare wheel fitted, never exceed the maximum speed of 50 mph / 80 Km/h; in fact, exceeding this speed jeopardizes the stability, road holding and braking of the car. Avoid driving at full throttle, braking sharply and cornering at high speeds. 6 Upon request, the car can be fitted with an optional spare wheel (emergency wheel), jack and tools for replacing a wheel. The spare wheel is of a special type and is housed in the luggage compartment.
– Open the compressor cover and take out the hose with the pressure gauge N and the electric wire O with the power plug. – Unscrew the spare wheel's valve cap and screw down the union P for the inflating pipe on the valve. – Open the cap of the power plug R, housed in the right hand side of the luggage compartment, and insert the connection O. – Turn the ignition key to MAR to supply power to the plug and activate the compressor pressing switch Q.
– Take out the jack from the box and open it partially. – Place the jack near the wheel to be replaced, in one of the indicated positions. – Make sure that the jack head is properly fitted into one of the special seats on the side member. Failure to position the jack correctly could result in the car dropping, damage to the body when raised, and personal injury.
– Insert the wrench onto the jack and rotate it until the wheel rises a few inches off the ground. – Loosen the 5 studs completely and remove the wheel. – Fit the spare wheel and fix it using the 5 special studs L, found in the box. – Screw the 5 new fixing studs. The spare wheel must be fitted using the supplied studs only. Remember to keep the studs from the removed wheel, which must be used when refitting the wheel after repair. – Turn the jack wrench to lower the car and withdraw the jack.
Refitting the standard wheel – Following the procedure described above, lift the car and remove the spare wheel. – Fit the standard wheel using the tighten studs, removed during the disassembly procedure. – Tighten the studs using the special wrench. The standard wheel must be fitted using the specific studs only. Put back the spare wheel's studs into the box, to use them again in the event of refitting the spare wheel. 6 – Lower the car and remove the jack.
If an exterior light goes out WARNING: Before replacing a lamp, make sure that the corresponding fuse is in good working condition. Use only new and original bulbs having the same features as the older ones for replacement. Front lights To access the front lights under the car it is necessary to remove the wheel housing. It is therefore recommended to contact your Authorized Maserati Dealer to replace the bulbs for the low beams, high beams, fog lights, parking lights and direction indicators.
Directional indicator lights To replace the direction indicator light bulb (5W): 1) Push forward the directional indicator to press on the spring clip H. 2) Remove the rear part releasing the retaining tab L and remove the unit. 3) Remove the bulb holder M turning it in an a counter direction. 4) Remove and replace the bulb. 5) Refit the bulb holder turning it in a clockwise direction.
Side marker lamp Third stop light License plate lights To replace the side marker lamps, we recommended to contact your Authorized Maserati Dealer. In order to replace the bulbs, the lens unit has to be removed. It is therefore recommended that you contact your Authorized Maserati Dealer. To replace the license plate light bulb: 1) Loosen the fastening screws for the lens/bulb holder unit. 2) Remove the unit and replace the bulb.
If an interior light goes out 3) Refit the overhead light inserting the left-hand side first and then pushing the right-hand side into place. WARNING: Before replacing a lamp, make sure that the corresponding fuse is in good working condition. Use only new and original bulbs having the same features as the older ones for replacement.
Vanity mirror light Glove compartment light Courtesy lights (below door) To replace the bulb (12V – 5W torpedo): 1) Remove the fixing plate by levering it out at points E. 2) Replace the bulb. 3) Refit the fixing plate by pressing it into place. To replace the bulb (12V - 5W “torpedo” type): 1) Remove the lens by levering it out gently in point F with a flat head screwdriver. 2) Replace the bulb. 3) Refit the lens, inserting first the twotab side and then pressing on the other side.
Luggage compartment light To replace the bulb (12V - 5W all glass): 1) Lever it out gently from its ceiling light seat L with a flat head screwdriver and remove it. 2) Press the sides of lens M to release the retaining tabs and remove the lens. 3) Replace the pressure-fitted bulb. 4) Refit the lens. 5) Refit the lighting unit inserting first the left side and then pressing on the right side to hook up the clip N.
If a fuse blows Replace the faulty fuse with a new one featuring the same rating (same color). If the fault reoccurs, consult your Authorized Maserati Dealer. Replacing the fuses When an electrical device ceases to work, check that the corresponding fuse is sound. A - Sound fuse. B - Blown fuse. Never replace a blown fuse with anything other than a sound fuse (same rating/ color).
Fuses and relays under the dashboard, on the right hand side To gain access to the fuses/relays it is necessary to remove the mat, lift the covering panel and open the protection cover C loosening its fastening screws. The fuses/relays are contained in 4 box units, protected by covers. To remove the covers, gently lever up the fastening tabs D and slide them out. Spare fuses are positioned vertically. The fuse and relay list is shown in the following pages.
Relays under the dashboard Posit.
Posit. 6 152 Amps. Color System/Component 7 10A Red +87 main relay 8 15A Pale blue +87 main relay for Lambda sensor, air flow meter etc. 9 15A Pale blue +87 main relay for injectors, coils 10 7.
Posit. Amps.
Fuses/relays in the engine compartment The fuses/relays in the engine compartment, are located on the righthand side and on the rear panel, righthand side. To gain access to the side relays, remove the right-hand covering E of the engine compartment, loosening, then lift the cover F releasing it from the retaining tab. If necessary, the cover can be removed by pulling it upwards. To refit the engine compartment covering, position it correctly, then press it and rotate the fastening studs. Side relay Posit.
To gain access to the fuses on the engine compartment rear panel, remove the rear covering, backing off the fastening screws. Fuses on the rear panel WARNING: This work should be performed by your Authorized Maserati Dealer. Posit. Amp. Color System/Component 1 Maxi 60A Blue Air pump 2 Maxi 60A Blue ABS 3 Maxi 40A Orange First speed fans 4 Maxi 50A Red Second speed fans To access the fuses, remove cover G gently levering up the fastening tabs H.
Relay/fuse box units in the luggage compartment To gain access to the fuses/relays, open the covering panel L, fixed with a Velcro strap on the right-hand side of the luggage compartment. There are three fuse and relay box units which are located as follows: M- over the battery N - above the M ECU O - above the power socket P - next to the M and N ECUs To gain access to the fuses and relays of units M and N, remove the covers by opening the fastening clips.
Luggage compartment relays Posit.
Luggage compartment fuses 6 158 Posit. Amp. Color System/Component 1 – – Not used 2 20A Yellow Fuel pump (rear) 3 7.5A Brown Heated rear window and mirror defrosting (rear) 4 30A Green Defroster 5 – – Not used 6 30A Green Radio amplifier 7 30A Green Fuel tank flap (rear) 8 – – Not used 9 25A White Luggage compartment lid, coil for luggage compartment and fuel tank flap opening cut out relay (rear) 10 15A Pale blue Power socket 11 7.
If the battery is fully discharged First of all, you are advised to carefully read the Chapter “Maintenance”, where a specific section illustrates the precautions to take to prevent the battery from discharging and to help ensure long life. WARNING: Before disconnecting the battery, lower the side windows by at least 1.5-2 in (4-5 centimeters), in order to avoid damaging the strips when opening and closing the doors.
If you have to jack up the car The jack can be used only to replace the wheels. Under no circumstance should it be used for repairs under the car. Using the jack See the section “If a tire gets a puncture”, in this chapter (pg. 136).
If you have to tow the car The car is fitted with a front emergency towing hook. The towing hook is located in the tool box. Do not use other attachment points for towing. To access the towing hook seat, remove the cap on the lower righthand side of the front bumpers. Screw down the hook into its seat. WARNING: If you have to tow the vehicle with 2 wheels raised, make sure the ignition key is in the STOP position.
In the event of an accident It is important always to stay calm. – If you are not directly involved, stop at a distance of at least ten yards or meters away from the accident area. – If you are on a highway, stop without obstructing the emergency lane. 6 If there are injured persons – Never leave an injured person alone. – Do not crowd around injured persons. – Reassure the injured person that assistance is on the way and stay close to him/her to help with possible fear.
Capacities and Technical Specifications Fuel Engine oil Capacities: quantities and specifications of the products to be used Fuel consumption Technical specifications Tire pressure 164 164 165 167 168 175 7 163
Fuel Only “Premium gasoline” with an AKI (Anti Knock Index) rating no lower than 91 (approximately 96 R.O.N.) must be used. Tank capacity: about 23 US gallons (88 liters), including a reserve of about 5 US gallons (18 liters). WARNING: The anti-pollution devices of the car require unleaded gasoline to be used at all times.
Capacities: quantities and specifications of the products to be used Recommended quantities and products Parts to be refilled Quantity Fuel tank (reserve included) about 23 US Premium gasoline with a minimum of 91 AKI. gallons (88 liters) Fuel reserve about 5 US gallons (18 liters) Engine oil: Product specifications Multi-grade semi-synthetic or fully synthetic lubricants with SAE 5W/40 strength, over API SG - CD - CCMC - G5 standards. Recommended AGIP TECSINT SL 5W/40. - scheduled replacement 2.
Parts to be refilled Quantity Product specifications Battery 74 Ah 700 AMPS Cold cran king start Hydraulic servo steering 0.26 US gallons 1 liter Oil type ATF DEXRON II D LEV, SAE 10W. Recommended AGIP ATF II D. “Cambiocorsa” gearbox 0.74 US gallons 2.8 liters 75W/90 over the API GL4-GL5C API MT1-PG2 standards Recommended ROTRA LSX. “Cambiocorsa” system 0.26 US gallons 1 liter Oil type CHF Recommended AGIP CHF. Brake system circuit 0.29 US gallons 1.1 liters Synthetic fluid NHTSA n.
Fuel consumption The fuel consumption values shown in the following table were established based on homologation tests. Fuel consumption Urban Extra-urban 12.55 mpg 21.
Technical specifications Injection – Ignition Engine General Type code M138P Cylinder number and position 8 - 90° V Number of valves per cylinder mm 92 x 79.8 Total displacement cm3 4,244 Compression ratio Maximum output (EEC) corresponding rpm Maximum torque (EEC) corresponding rpm 7 168 4 Piston bore and stroke Technical specifications 11.11±0.2 : 1 kW 295 HP 400 r.p.m. 7,000 Nm 451 kgm 46 r.p.m.
Lubrication system Gearbox The engine lubrication system is of the dry sump type with scavenge and delivery pumps aligned with the cooling pump, in a single unit driven by the crankshaft through a chain. Six forward speeds and one reverse.
7 170 The “Cambiocorsa" gearbox helps relieve the driver from bothering and straining aspects of manual transmission management, without depriving him of the pleasure of controlling gearshifting directly. In the event that the driver, in particular situations, prefers to give up this option as well, the total automatic mode can be also enabled.
Differential Differential reduction torque 3.727 Brakes Suspension Service and emergency brakes Front and rear Disc-type, on four wheels, selfventilating. Two diagonally opposed and independent hydraulic control circuits. Vacuum brake servo. 4-channel ABS system with Electronic Brake force Distribution (EBD). Articulated quadrilateral.
Steering Wheels Rack and pinion hydraulic steering, with pump driven by the drive shaft and reservoir. Articulated steering column, with energy absorption and adjustable inclination and height. – Steering diameter = 39 ft (12 m) – No. of steering wheel turns = 1,5 (to the left and to the right). Rims and tires Rim size Tire size Brand tires front 8”J x 19” 235/35 ZR19 PIRELLI P ZERO ROSSO rear 9.
Snow chains Maximum radial protuberance permitted over the tire profile: 0.35 in (9 mm). Rear tire Snow chains: brand/type 265/30 ZR19 Konig/SUPER MAGIC WARNING: Snow chains must be fitted only on the rear wheels. Use is subject to local laws Contact your Athorized Maserati Dealer for purchasing your snow chains. Performance Maximum speed km/h mph 290 180 The maximum speed that can be reached with winter tires is indicated by the tire manufacturer.
Dimensions 946 mm 37.24 in 2660 mm 104.72 in 903 mm 35.55 in 1295 mm 50.98 in 4509 mm 177.51 in Trunk volume (VDA standard): approx. 340 dm3 including approx. 60 dm3 for spare wheel compartment 7 1525 mm 60.03 in The height refers to an unladen car Dimensions in mm 174 Technical specifications 1538 mm 60.55 in 1822 mm 71.
Tire pressure Tire inflation pressure when cold (psi/ bar). Rim size Tire size Tire brand Inflation pressure when cold (psi) Inflation pressure when cold (bar) front 8”J x 19” 235/35 ZR19 PIRELLI P ZERO ROSSO 35 2.4 rear 9.5”J x 19” 265/30 ZR19 PIRELLI P ZERO ROSSO 32 2.2 * front 8”J x 18” 225/40 R18 MICHELIN PILOT ALPIN 29 2.0 * rear 9.5”J x 18” 265/35 R18 MICHELIN PILOT ALPIN 29 2.0 spare wheel (emergency wheel) - 185/60-17 93P VREDESTEIN 36 2.
Tire pressure
Maintenance Scheduled Maintenance Additional checks Level checks Air filters Anti-dust/anti-pollen filter Battery Electronic Control Units Spark plugs Wheels and tires Windshield wipers Air conditioning Bodywork Interiors If the car is not used for long periods Battery master switch 178 182 183 188 188 189 191 191 192 194 195 195 197 198 200 8 177
Scheduled Maintenance Correct maintenance is clearly the best way to maintain car performance and safety features, ensure respect for the environment and help lower operating costs. WARNING: Also remember that the proper observance of the maintenance procedures is essential for maintaining warranty coverage.
Main operations to be performed at the specified mileage Main operations Kilometres covered (in thousands) Miles covered (in thousands) 10 6 30 18.5 50 31 70 43.5 90 56 110 68.5 130 81 150 93.
Main operations Kilometres covered (in thousands) Miles covered (in thousands) Engine coolant level 10 6 30 18.5 50 31 70 43.5 90 56 110 68.5 130 81 150 93.
Main operations Kilometres covered (in thousands) Miles covered (in thousands) 10 6 Wheel alignment 30 18.5 50 31 70 43.5 90 56 110 68.5 130 81 150 93.
Additional checks Every 300 miles (500 km) or before long journeys, check and if necessary restore: – engine coolant level – windshield washer fluid level – tire pressure and condition.
Level checks 1) Engine oil 2) Engine coolant 3) Windshield washer fluid 4) Brake fluid 5) Power steering fluid 3 4 2 5 8 1 Level checks 183
Engine compartment panels To check and top up the engine oil and coolant level, remove the right-hand covering panel A of the engine compartment. To check and top up the brakes fluid and the power steering fluid, remove the left-hand covering panel B of the engine compartment. To remove the engine compartment panels, rotate the fixing pins. To refit the panels, position them correctly then screw the tightening pins.
If the oil level is near or even below the MIN reference mark, top up with oil pouring it through the filler cap D until reaching the MAX reference mark. The oil level should never exceed the MAX reference. WARNING: Do not top up with oil having characteristics other than those of the oil already used in the engine. After topping-up or replacing the oil, check the level once again. WARNING: The engine oil used and the oil filter replaced contain substances that are dangerous for the environment.
Engine coolant Windshield/headlight washer fluid When the engine is very hot, do not remove the cap from the pan: risk of burns! To gain access to the pan, remove the right-hand panel of the engine compartment, following the instructions contained in the section “Engine compartment panels” (pag. 194). The fluid level must be checked when the engine is cold, and it must fall between the MIN and MAX references marked on the pan.
With the oil hot the level may also exceed the MAX notch. If necessary, top up with fluid making sure that it has the same characteristics as the one already used in the system. Brake fluid To gain access to the reservoir, remove the LH panel of the engine compartment following the instructions contained in the section “Engine compartment panels” (pag. 194). Check that the fluid level in the reservoir is at the maximum level.
Air filters To replace the air filters, please contact your Authorized Maserati Dealer. WARNING: Always replace both filters at the same time. Anti-dust/anti-pollen filter This filter performs mechanical/ electrostatic air filtering, provided that windows and doors are closed properly. Have your anti-dust/anti-pollen filter replaced at least once a year at your Authorized Maserati Dealer, preferably at the beginning of the summer period.
Battery The battery fitted is of the “low maintenance” type, and is located on the right side of the luggage compartment. To gain access to the battery, open panel A, which is fastened through a Velcro strap. The battery fluid (electrolyte), with the car on a level ground, must always fall between the reference marks MIN and MAX on the battery. In the event that the level is below the MIN reference mark, please contact your Authorized Maserati Dealer to have the system checked.
WARNING: Ventilation hose: The battery generates hydrogen gas, which is flammable and explosive. The battery is fitted with a ventilation hose which vents hydrogen gas out of the battery compartment throught a ventilation opening in the bottom of this compartment. If the battery must be replaced, it is essential that the ventilation hose is properly connected to the battery and that it is routed through the ventilation opening provided (see illustration). Be sure the ventilation hose is free of the debris.
Electronic Control Units No special precautions are required for the normal use of the car. In case of repairs to the electrical system or in an emergency starting, the following instructions must be strictly followed: – Never disconnect the battery from the electrical system when the engine is running. – Disconnect the battery from the electrical system when recharging it. WARNING: When disconnecting the battery, first detach the negative terminal post (-) and then the positive one (+).
Wheels and tires To obtain the best performances and the longest mileage from the tires, comply with the following precautions during the first 300 miles (500 Km): – do not drive at maximum allowed speed – drive on curves at low speed – avoid sudden steering – avoid sudden braking – avoid sudden accelerations – do not drive at high speed for a prolonged period of time. How to use the tires WARNING: The tires must be constantly kept in good condition to ensure safe driving.
Have the old tires inspected by an experienced tire fitter, to make sure they can still be used safely. If the same tire has been on your car for 4 or 5 years, have it inspected by an experienced tire fitter. Never fit tires of uncertain origin. “Directional” tires have an arrow on their side showing the rolling direction. To keep the best performance when replacing a tire, make sure that the rolling direction corresponds to the one marked by the arrow.
Windshield wipers Clean the rubber parts regularly using the appropriate products. Change the blades if the edge of the rubber is deformed or worn. In any case, the blades should be changed about once a year. Travelling with worn wiper blades is very dangerous because it reduces the visibility in the event of poor atmospheric conditions. The arms of the wiper blade have to be replaced with new ones after two disassembling operations.
Air conditioning During the winter, the air conditioning system should be operated at least once a month for about 10 minutes. Before the summer season have the system efficiency checked by your Authorized Maserati Dealer. WARNING: The system uses R134a type coolant that, in the event of accidental leakage, is not harmful for the environment. Under no circumstances should you use R12 fluid that, in addition to being incompatible with the system components, contains chloro-fluoro-carbons (CFCs).
Normal paint maintenance consists in washing, the frequency of which depends on the conditions of use and of the environment. For example, in areas where there is high atmospheric pollution or the roads are spread with anti-freeze salt, it is advisable to wash the car more frequently. WARNING: Detergents pollute water. Therefore the car should be washed in areas equipped for the collection and purification of the fluids used for washing.
Interiors Check at regular intervals that there is no water trapped under the mats (due to drips off shoes, umbrellas etc.) which may cause the metal parts to oxidize. Cleaning the leather upholstery – Remove the dried dirt with a slightly damp deerskin or a cloth, without rubbing too hard. – Remove any liquid or grease stains with a dry absorbent cloth, without rubbing. – Then run a soft cloth or deerskin damped with water and neutral detergent.
If the car is not used for long periods If the car has to stand idle for several months, take the following precautions: – Wash and dry the car thoroughly. – Park the car, in a covered, dry and possibly ventilated area. – Engage a gear. 8 198 WARNING: Before disconnecting the battery, lower the side windows by at least 1.5-2 in (4-5 centimeters), in order to avoid damaging the strips when opening and closing the doors.
Restarting the car Before restarting the car after a long period of inactivity, we recommend to carry out the following operations: Check the tires for pressure and for any damages, cuts or cracks. If this is the case, have them replaced. – Do not dry-rub the external surface of the car. – Visually check if there are any fluid leaks (oil, brake and clutch fluid, engine coolant etc.). – Have the engine oil and filter replaced.
Battery master switch If the car is not used for long periods of time, we advise to disconnect the battery using the switch found to its left, on the right-hand side compartment of the trunk. To open the compartment, pull the cover using handle A. Before disconnecting the battery: – Make sure that the electronic alarm is not activated. 8 – Open the luggage compartment. – Close the doors and lock them using the key (in order to avoid their being opened when the battery is disconnected).
Re-connecting the battery – Open the luggage compartment with the key. – Connect the battery. – Release the door locks with the key. – Reactivate the electronic alarm device pressing the remote control button once. – Set the clock. – Check that the seats work correctly: if not, carry out the “initialization” procedures described in the section “Seats” pg. 80, contained in the chapter “ Before you drive ”.
Conversion Table Distance 1 km = 0,6214 mi 1 mi = 1,609 km 1m = 3,2808 ft 1 ft = 0,3048 m 1m = 1,0936 yd 1 yd = 0,9144 m 1 cm = 0,3937 in 1 in = 2,54 cm 1 US gallon = 3,785 l 1 lb = 0,4536 kg 1 hp = 0,746 kW 1 psi = 0,0689 bar 1 mpg = 2,3524 km/l Volume 1l = 0,2642 US gallon Weight 1 kg = 2,2046 lb Power 1 kW = 1,341 hp Pressure 1 bar = 14,5 psi Consumption 1 km/l 202 Battery master switch = 0,4251 mpg
Contents 9 Contents 203
Historical Background Introduction Consulting the Manual Abbreviations Updating Service “Cambiocorsa" gearbox NHTSA’s Toll-free Auto Safety Hotline Symbols Danger symbols Symbols of prohibitions Warning symbols Symbols indicating compulsory measures 7 8 8 8 9 9 General contents 11 Car identification data 13 Identification plates Chassis marking Engine marking Homologation plates Instructions plates Key codes Electronic alarm device code Rolling Code 14 14 14 15 17 18 19 19 9 204 4 6 6 6 6 7 7 Con
Rear overhead lights Sun visors Glove compartment Seat pockets Coat-hooks 59 59 60 60 61 Before you drive 63 Doors Opening doors from the outside From the inside Door open warning lights Power windows Door open indicator Buzzer Door courtesy light Engine compartment hood Luggage compartment Fuel tank flap Fuel tank flap emergency opening Keys The Maserati CODE system Operation Duplicating the keys Emergency starting Ignition switch Start button Electronic alarm device System activation Deactivation Excl
Using the vehicle 9 206 101 Starting the engine 102 Starting-off when the engine is cool 103 Emergency starting with auxiliary battery 103 Starting with inertia maneuvers (push-start, etc.
Glove compartment light 147 Courtesy lights (below door) 147 Luggage compartment light 148 If a fuse blows 149 Replacing the fuses 149 Position of fuses/relays 149 Fuse Color 149 Maxi Fuse Colors 149 Fuses and relays under the dashboard, on the right hand side 150 Relays under the dashboard 151 Fuses under the dashboard 151 Fuses/relays in the engine compartment 154 Side relay 154 Fuses on the rear panel 155 Relay/fuse box units in the luggage compartment 156 Luggage compartment relays 157 Luggage compartme
Protection from atmospheric agents Tips for keeping the bodywork in good condition Interiors Cleaning the leather upholstery Leather upholstery treatment Briar wood parts If the car is not used for long periods Restarting the car Battery master switch Re-connecting the battery Conversion Table 195 197 197 197 197 198 199 200 201 202 Contents 203 Details to be recorded 209 9 208 195 Contents
Details to be recorded Owner Number plate Registration no. Address Engine identification no. Paint identification no.
All the information contained in this manual is of a purely indicative nature since MASERATI car versions and models can be modified for either legal or commercial reasons without notice. MASERATI does therefore reserve the right to make any modification to the cars described in this manual, at any time, for either technical or commercial reasons without notice. Ask your MASERATI Dealer for any further information you may require.