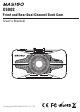
X5002 Front and Rear Dual Channel Dash Cam User's Manual Copyright © 2020 MASI AUTO CO., LTD.
1 Safety Precautions and Notice To ensure that the product is used correctly and safely, please read the instruction manual carefully before use. The precautions described in this manual are intended to ensure the safe and proper use of the product and to prevent injuries to yourself and others, or damage to property. .Keep the device away from extreme heat, cold, moisture and dust. .Do not use liquids and chemical cleaners for cleaning the device. .Do not insert any objects into the device.
2 FCC Statement Changes or modifications not expressly approved by the party responsible for compliance could void the user's authority to operate the equipment. This device complies with part 15 of the FCC Rules. Operation is subject to the following two conditions: (1) This device may not cause harmful interference, and (2) this device must accept any interference received, including interference that may cause undesired operation.
Product Overview 2 1 3 OK 4 5 6 7 8 9 10 1 Speaker: Audio output 2 LED indicator: Steady red light: Power on Flash red light: Recording Steady blue light: Recharging Blue light off: Fully charged or not charging 3 Function buttons: There are 4 function buttons to operate the camera in difference way.
Open menu, and go through video menu, system menu and playback menu. Swich PIP display Turn off/on the microphone. Hold and press to enable Wi-Fi. File protected button. 《At Menu Screen》 Viedo Menu Resolution Video Length Exposure Microphone Back OK Enter OK → → → → Back to previous page. Up button: Navigate to the previous option. Down button: Navigate to the next option. OK 《At Video Playback Screen》 OK OK → → → → Press once to stop the video, press twice to the previous menu page.
4 Memory card slot: Insert a micro SD card for recording. 5 Power port: Plug the power cable into the USB port. 6 Microphone: Records audio. 7 Mounting slot: Attached the suction cup mount. 8 Reset: Press to force the camera restart. 9 Power button: Hold to turn the camera on/off; Press once to turn off/on the screen, and the camera is on standby mode. 10 HD out port: Output recorded video or live view.
6 Getting started Inserting memory card A micro SD memory card is required to insert to the camera before start recording. Your micro SD card should have a minimum write speed rating of class 10. Be sure to format the memory card with the device before initial use. To remove a memory card, turn off the camera and press the memory card to pop it out of the slot. Note: Removing the memory card while the camera is on can result in a loss of data.
Installation in your vehicle 【Installing the front camera】 Car Charger 【Installing the front and rear cameras】 Y-Cable Rear camera cable Car Charger 【雙鏡頭⾞內佈線⽰意圖】 1.Clean your windshield: Cleaning the inside and outside of the windshield with window cleaner before applying the adhesive. 2.Mount the dash cam: Mount the dash cam in or near the middle of your vehicle's windscreen and just below, behind the rear view mirror, don't block driver's view of the road ahead. 3.
7 Basic Operation Turn on/off the camera .Automatically The camera will automatically power on and start recording once received power. .Manually Press and hold the power button. Select language, time zone, date time and speed unit Go through the settings below for the first-time setup to select language, Time Zone, date time and Speed unit. .Select language Press the up and down button ” button ” OK ” to the next setting.
8 Incident recording During continuous recording, when the camera detects possible accidental collisions, a 1 minute/3 minutes video footage (depends on the loop recording selected length) is locked from been overwritten and save in the “Event video” folder automatically. You can adjust the G-sensor level in Video Menu setting, default is low.
Folder Name Recording Type Normal Continuous recording Event Video Incident recording during continuous recording; Manually recording. Event photo Snapshot when press the file protected button ” continuous recording. ” during File name format 200701_092830_001_F.MOV 200701_092830_001_R.
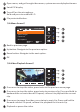
11 Camera Setting Press Menu button ” ” once to access the Menu setting, use the up and down button ” ” to scroll down the function, and press the OK button to enter the options screen. Video Menu Resolution Video Length Exposure Microphone G Sensor Plate Stamp Parking Surveillance Rotate Display-Front Rotate Display-Rear Mirror Display-Rear Time & Date Stamp Model Number Stamp GPS Stamp Description (*Factory default setting) [1080P 60PFS] [1080P 30PFS]* Set the video resolution.
Speed Stamp On*/Off Displays the driving speed on the recorded video. Press Menu button ” System Setting Wi-Fi Format Memory Card Time & Date Time Zone Speed Units Language PIP Display Screen Saver Device Sounds Frequency Default Settings System Version ” twice to access the system setting. Description (*Factory default setting) On/Off* Set Wi-Fi on to connect the camera to a smartphone via Wi-Fi network.
13 Warranty Terms Thank you for your purchasing MASIGO dash cam. Should your product require warranty service, please contact us directly to determine the problem and the most appropriate solution for you. See details below MASI AUTO CO., LTD 7F.-10, No.9, Sec.2, Nankan Rd., Luzhu Dist., Taoyuan City 338, Taiwan Online chart: www.masiauto.com Email: service@masiauto.com.