
Service manual

Section 2: Getting Started
Euphonix CS3000/2000 Operation Manual 2 - 15
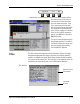
You can use [F1], [F2], the SpinKnob or the DSC [+]/[–] keys to toggle through
the options so you can set parameters:
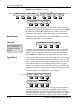
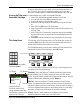
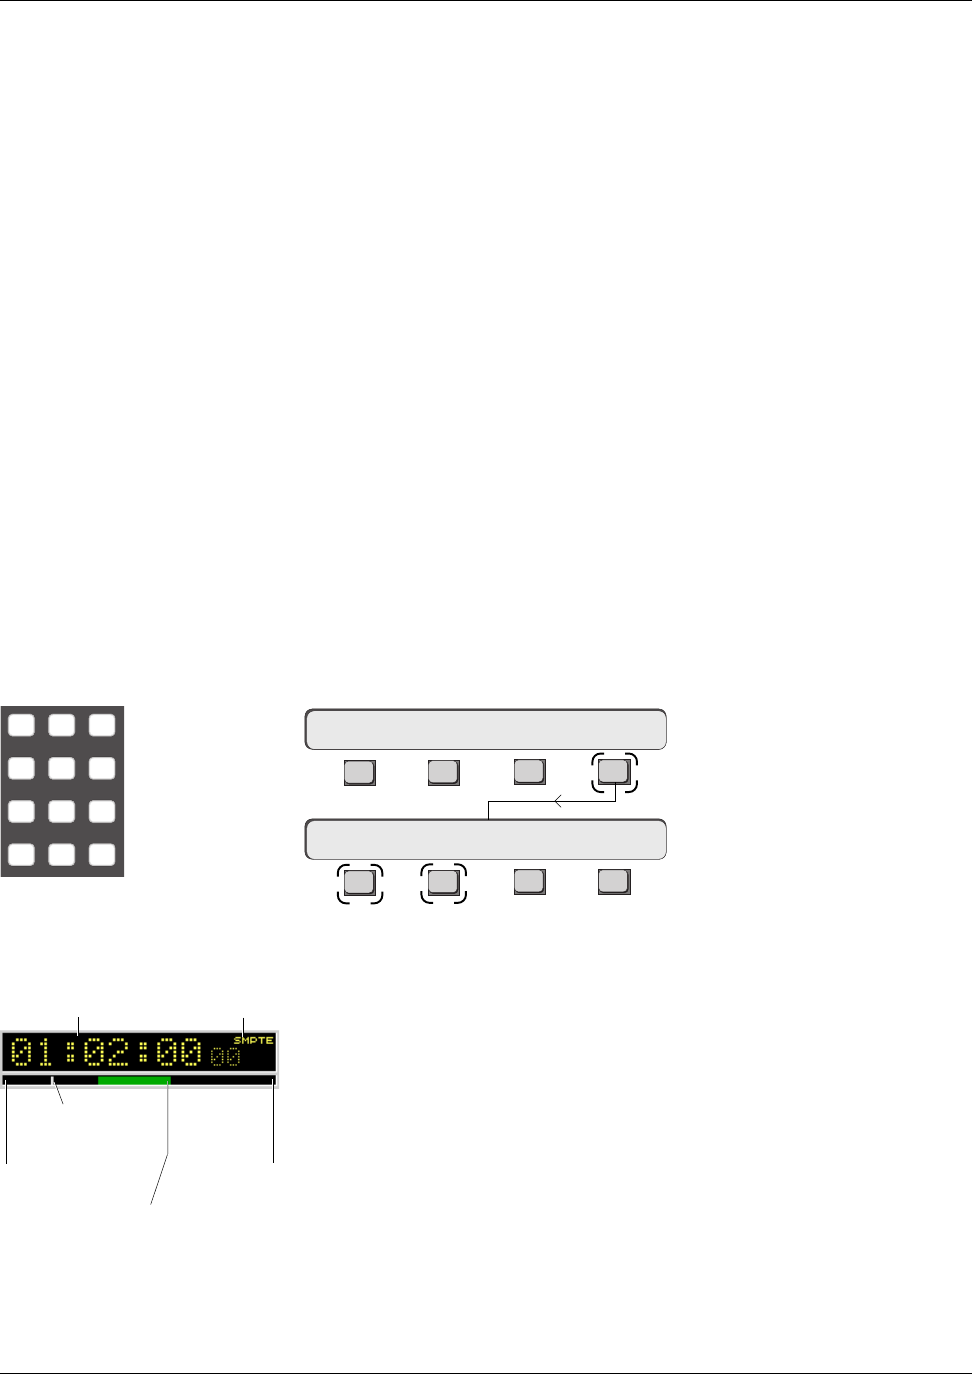
Title Head - Sets a start reference TC address used by the Current Position
Marker displayed in the TC Display, (upper right corner of the DSC display
screen). Using the Numeric keypad, enter the timecode value that you wish the
display to reference from, followed by the DSC [Enter] key.
Title Tail - Sets an end reference TC address used by the Current Position
Marker. The head and tail times need not be exact; they are only used for the
start and end points in the Pass Control window. Locate to Head is an option in
the Cue list. Represented by a green or red line along the bar, it is used during
automation so that you can see what part of the title was changed.
Film o/s - Sets a TC offset number which is applied to film’s incoming
feet|frames reference in order to sync your mixes to film.
F3F1 F2 F4
F3F1 F2 F4
When the currently selected title is copied, you will be given the chance to
rename the title before the copy is made. You cannot rename a title that is in
use. You cannot copy a title to a disk without a project name on that disk.
Make sure to create a project on a disk before attempting to copy to that disk.
To make a backup copy of a title on a removable cartridge:
1. Insert a DOS, preformatted removable cartridge in the D: drive.
2. Go to the Disk menu; press [F2] to perform a disk read.
3. Create a new project on the removable D: disk .
4. Go back to into the original project and select the title you wish to back
up.
5. Select Title Copy [F3] from the Title Utility menu.
6. At the ‘Copy to Disk?’ prompt select the D: drive with the SpinKnob or the
DSC [+]/[–] keys.
7. At the “Copy to Proj?” prompt select the project name on the removable
disk drive that you want to copy the title into using the SpinKnob or DSC
[+]/ [–] keys.
8. Press [OK] to confirm and make the copy, renaming the file if necessary.
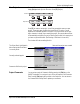
The final menu in the File System menus is the Title Setup menu. Access this
by pressing [F4] from the Title Utility menu (see previous page, last menu). A
window opens showing current settings on the screen.
The SmartDisplay allows you to set various options which are stored with the
selected title. From the Title Utilities menu, press [F4] (Setup):
Backing Up Titles onto a
Removable Cartridge
Title Setup Menu
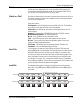
Title Head 00:00:00
ReNm? Del? Copy? Setup
Title Utilities Menu
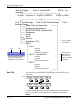
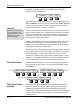
Key in the timecode number,
followed by [Enter]
789
456
123
0 Enter Del
Title Head
Current Position
Marker
Title Tail
T/C Display
T/C Standard
Pass Bar Indicator.
Shows the location of the
current automation pass Start
and End times in relation to the
Head and Tail of the title.