
Instructions / Assembly


PARTS LIST
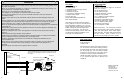
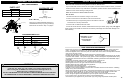
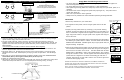
NOTE: Do not tighten hardware.
Place leg (1) inside windshield. Attach leg to
windshield using screw (A) as shown. Repeat
with other legs. Secure foot ring (2) to each leg
using screw (A).
Tighten all hardware at this time.
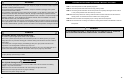
READ ALL INSTRUCTIONS AND WARNINGS CAREFULLY BEFORE
ASSEMBLY OR OPERATION OF YOUR COOKER.
THIS MANUAL HAS ASSEMBLY INSTRUCTIONS FOR SEVERAL COOKER MODELS.
STEP 2
Mounting Legs
SOME COOKER MODELS HAVE PRE-THREADED LEG HOLES. NUTS ARE NOT REQUIRED.
SECURE WITH NUTS IF SUPPLIED.
HARDWARE LIST
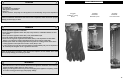
Before each use check all nuts and bolts to be sure that they are tight and secure.
ASSEMBLY INSTRUCTIONS
613
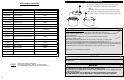
Using the Pot with the Drain Hook Basket:
Do not overfill pot with oil or water. Smaller fry pans may not be marked.
1. Place seasoned food into basket.
2. Slowly lower basket into oil or water using lifting hook. (Wear Protective Gloves)
3. Cover with lid.
4. When food is ready to remove, turn the burner to OFF position. Remove lid and use the lifting hook
to pull basket up slowly. (Wear Protective Gloves)
5. Hook basket to the side of pot with the drain hook, allowing food to drain and cool.
Wind Shield
2
4
3
A
1
Lifting Hook
Basket
Drain Hook
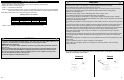
(A)
M6X8
Phillips Flange Screw
BOLT TOGETHER MB10
ITEM NO. QUANTITY
DESCRIPTION
1 3 Legs
2 1 Foot Ring
3 1 Fryer Head
4 1 Regulator and Hose
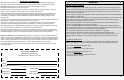
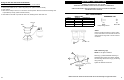
Remove nut (B) from bottom of burner. Place
burner onto burner mount bar with burner bolt
sticking down through hole in center of burner
mount bar.
STEP 1
Burner Mount Bar
B
(B)
Burner Nut