28 masterbuilt.com/contact 1.800.489.1581 www.masterbuilt.com @masterbuilt Masterbuilt Manufacturing, LLC 1 Masterbuilt Court | Columbus, GA | 31907 Customer Service Service à la clientèle Servicio de atención al cliente Rest assured, we’re here to help. Master it. Masterbuilt. 1 Manual Code: 9807170114 171019-GSB Please record this information immediately and keep in a safe place for future use. IMPORTANT These numbers are located on the rating label of the unit. Mfg.
REMINDER: MAINTAIN A MINIMUM DISTANCE OF 10 FEET FROM REAR, SIDES AND TOP OF UNIT TO OVERHEAD CONSTRUCTION, WALLS, RAILS OR OTHER COMBUSTIBLE CONSTRUCTION. THIS CLEARANCE PROVIDES ADEQUATE SPACE FOR PROPER COMBUSTION, AIR CIRCULATION AND VENTING OF SMOKE FROM THE UNIT. DO NOT BLOCK AIR INTAKE OPENING. WARNING: ELECTRIC POWER CORD IS A TRIP HAZARD 10 Feet 10 Feet 10 Feet 10 Feet STRUCTURAL PROXIMITY AND SAFETY USAGE RECOMMENDATIONS CALIFORNIA PROPOSITION 65 1.
INTAKE FAN CHECK Turn off smoker and allow to cool to touch. Unplug from wall. Remove pellets from hopper. Remove four screws holding pellet hopper to auger housing. Reference Fig. 1 on page 41. Disconnect intake fan from controller. Reference Fig. 2 on page 41. Tip: Tie a piece of string to old plug at this step. This will make feeding new element plug thru housing easier in future steps. Remove four screws that mount intake fan to auger housing.
out while cooking or smoking, when sufficient pellets are still in the pellet hopper. Failure to do so may cause a hazardous “over-firing” of your smoker due to an excess of unburned pellets in the crucible. 1) Press the ON/OFF button to turn OFF the smoker. Once the fan has stopped, unplug the power cord. If the smoker is still hot, allow it to thoroughly cool. Open the door and remove all food, all racks, grease deflector and the heat diffuser.
Pellet Hopper Panel Auger Housing ELEMENT CHECK Element Crucible Fig. 2 String Controller 24 Turn off smoker and allow to cool to touch. Remove cooking racks, water bowl, grease deflector and heat diffuser. Clean out any ash, pellets or debris in crucible. Turn unit on and set the cook cycle. Check that heating light is on. • If heating light does not come on, contact Masterbuilt for support. 5. Element should begin to turn red.
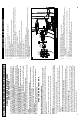
11 A 28 12 6 2 M6x12 Qty-40 B 29 19 5 4 M6 Qty-1 30 34 31 13A 13B 9 8 25 27 22 10 C M6x30 Qty-2 HARDWARE LIST D 14 21 Parts may vary by item number of model. 18 7 3 Actual product may differ from picture shown PARTS LIST M6 Qty-16 32 24 23 33 E 16 M4x12 Qty-4 15 26 17 20 1 8. 9. 10. 11. 12. 13. 14. 15. 16. 17. 18. 6. 7. 1. 2. 3. 4. 5. Turn off smoker and allow to cool to touch. Unplug from wall. Remove pellets from hopper.
22 Flame going out and not reigniting to maintain the cabinet set temperature Auger not feeding Error code: ERRC No smoke (Smoke light is on) Grease leaking from smoker Cabinet temp is inaccurate Symptom Move appliance to level surface. Fully seat grease tray in holder. Empty grease tray and reinstall under smoker. Clean drain tube. Appliance not level Grease tray not in proper location Grease tray is full Drain tube is clogged Call Masterbuilt for replacement.
X6 A 2 1 7 ASSEMBLY Front of smoker body 15 6 2 A Actual product may differ from picture shown 7 2 17 Set Temp and Time per operation instructions. Call Masterbuilt for replacement. Reference “Controller Access / Replacement” instructions. Smoker has completed the set smoke cycle and has changed to the cook cycle and the Heating light is on. Smoke light is only on during the smoke cycle. Set Time per operation instructions. Call Masterbuilt for replacement.
20 Clean your smoker after each use. Make sure the unit is cool prior to cleaning and storing. Remove and wash racks, water tray, grease tray and grease deflector with mild dish detergent. Remove ash from ash tray. Disposal of ashes – Ashes should be placed in a metal container with a tight-fitting lid. The closed container of ashes should be placed on a noncombustible floor or on the ground, well away from all combustible materials, pending final disposal.
X8 D X10 A 6 X5 A 5 31 A A 19 ASSEMBLY 12 D Front 28 To change the SP (smoke program) setting: 1. Press the smoke button. You should see the letter “S” on the display screen. 2. Press the temperature button. Using the up and down arrows change the SP setting. 3. Press the temperature button again. You have successfully changed the smoke program. 19 SP Setting Table: SP 0: Moves the pellets to the crucible for 15 seconds, then the auger rests for 45 seconds.
NOTE: The cook cycle time represents the overall time of the cooking process. During the cooking process, the smoker will be at the set temperature of the cook cycle unless a smoke cycle has been set. During the smoke cycle, the smoker varies at a low temperature to output the desired amount of smoke to increase the flavor of the foods. The smoke cycle will run for the desired time while subtracting from the time of the overall cooking process.
10 X1 B X1 A 9 10 ASSEMBLY 1 A • 8 or 12 rack supports, depending on model. 1 B PRE-SEASON INSTRUCTIONS Before turning the smoker on, fill the hopper with food grade wood pellets. Remove the bottom two smoking racks to access grease deflector and heat diffuser. Remove grease deflector and heat diffuser. This will allow you to see pellets falling into the crucible. Press the on/off button. Press and hold the smoke button until the letter “P” (prime) appears on the display screen.
16 18 17 25 ASSEMBLY • Plug meat probe(s) into control panel. You may have 1 or 2 meat probes, depending on model purchased. Insert meat probe(s) through hole in side of smoker body.
14 13 9 21 ASSEMBLY 21 21 X2 A 16 15 11 18 ASSEMBLY A 18 • 4 or 6 racks, depending on model.