MasterCraft’s PROSTAR, MARISTAR AND X-SERIES Owners Manual WORLD HEADQUARTERS M A S T E R C R A F T 100 B OAT C H E R O K E E VONORE TN COMPANY C O V E 37885 D R I V E U S A Pro ProStar 190 ProStar 197 ProStar 209 Star 2 0 5 V- D R I V E MariStar 210 VRS MariStar 230 VRS MariStar 280VLD X - 2 423.884.2221 423.884.2295 FAX X - 7 X - 9 X-10 WWW .MASTERCRAFT.
WELCOME > > > > > A B O A R D Congratulations on your choice of the finest ski and wakeboard boat available. MasterCraft is the recognized world leader for inboard ski boats today and has been for more than 35 consecutive years. The quality, innovation, selection and value are unmatched in the industry. Please take a few minutes to read this owners manual completely in addition to carefully reviewing the Operations and Maintenance Manual that was also provided with your new boat.
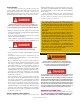
DANGERS WARNINGS & CAUTIONS Throughout this manual the terms “danger,” “warning” and “caution” appear, alerting the boat owner or operator to dangerous or potentially dangerous situations that may arise. Those terms have the following respective meanings whenever they appear herein: This is the safety alert symbol. It is used to alert you to potential personal injury hazards. Obey all safety messages that follow this symbol to avoid possible injury or death.
3: Gasoline is explosive. If you see or smell the presence of gasoline during your inspection, DO NOT START YOUR ENGINE! Remove your ignition key from the ignition switch and call your MasterCraft dealer for service. (Page 16-17) 4: Gasoline is extremely flammable and highly explosive under certain conditions. Always stop the engine and never smoke or allow open flames or sparks within 50 feet of the fueling area when refueling. (Page 7-2) 5: Take care not to spill gasoline.
3: Battery electrolyte fluid is dangerous. It contains sulfuric acid, which is poisonous, corrosive and caustic. If electrolyte is spilled or placed on any part of the human body, immediately flush the area with large amounts of clean water and seek medical aid. (Page 16-3) 4: When charging, batteries generate small amounts of dangerous hydrogen gas. This gas is highly explosive. Keep all sparks, flames and smoking well away from the area.
in oil until after the initial ten (10) hours of operation. At that time, an oil change should be performed by an authorized MasterCraft service technician/your local MasterCraft dealer. (Page 9-1) 2: DO NOT use the ski pylon for lifting. It is NOT designed as a central lifting point. Also, DO NOT use the stern ski tow as a lifting ring. The deck will be damaged. See the Storage Cradle sub-section of the Lifting the Boat section of this Manual.
T A B L E O F > > > > CONTENTS BOATING SAFETY FULLY CHARGED BATTERY --------------------------------------------------------------------- 16-7 COMMON SENSE APPROACH --------------------------------------------------------------------- ENGINE OIL LEVEL -------------------------------------------------------------------------------- 1-1 2-1 RULES OF THE OPEN WATER --------------------------------------------------------------------- 3-1 INDIVIDUAL MODELS -----------------------------------------------
> > >B O A T I N G Your safety, as well as the safety of others with and around you, is a direct result of how you operate and maintain your boat. Read and comprehend this manual. Make sure that you understand all the controls and operating instructions before attempting to operate the boat. Improper operation is extremely dangerous! The basic safety rules are outlined in this section of the manual.
SAFETY EQUIPMENT Federal law requires certain safety equipment to be on-board at all times. In addition, responsible boaters carry other equipment in case of emergency. Check with the local boating authorities for any additional requirements over and above the federal stipulations. USA WATER SKI ASSOCIATION 1251 HOLY COW ROAD POLK CITY FL 33868 (863) 324-4341 http://usawaterski.
SAFETY AFLOAT Boating-related accidents are generally caused by the operator’s failure to follow basic safety rules or written precautions. Most accidents can be avoided if the operator is completely familiar with the boat, its operation, and can recognize potentially hazardous situations before an accident occurs. Failure to comply with safety-related information and instruction may result in serious injury or death to you and/or others.
T H E COMMON SENSE A P P R O A C H > > > > > > This manual have been developed to help ensure an enjoyable experience as you boat, wakeboard and ski with your MasterCraft boat. As stated earlier, this information is not all-inclusive. There are many other factors to consider and additional information that you need to research before undertaking any boating. Beyond the study involved, you should also always use common sense when boating.
RULES WATER OF THE OPEN > > Just as there are rules that apply when driving a vehicle on the street, there are waterway rules that apply when you are driving a boat. These rules are used internationally, and they are enforced by the United States Coast Guard and local agencies. You should be aware of these rules and follow them whenever you encounter another vessel on the water.
CROSSING When two power-driven vessels are crossing each other’s path close enough to run the risk of collision, the vessel that views the crossing vessel to the starboard (right) side must give-way. If the other vessel is to the port (left) side, maintain your course and direction, provided the other vessel gives you the right-of-way as it should. OVERTAKING If you’re passing another vessel, you are the give-way vessel. This means that the other vessel is expected to maintain its course and speed.
GUIDE MODELS TO INDIVIDUAL > > > > > > > > PROSTAR PROSTAR PROSTAR PROSTAR 190 197 209 205V X-2 X-7 X-9 X-10 X-30 X-80 X-STAR 2005 MASTERCRAFT OWNERS MANUAL–PAGE 4-1 MARISTAR 210 MARISTAR 230 MARISTAR 280
PROSTAR 190 I A FUEL TANK FILLER B BLOWER J C SWIM D STERN EXHAUST PLATFORM LIGHT RECEPTACLE E STORAGE UNDER SUN PAD F ENGINE COMPARTMENT G THROTTLE / SHIFT K H INSTRUMENT H I BOW LIGHT J GLOVE BOX K BATTERY L L DRAIN CONTROL PANEL ( UNDER SEAT ) PLUG 1 2 3 4 5 6 7 8 9 10 11 12 13 14 15 16 17 18 G F A D OIL PRESSURE GAUGE ENGINE TEMPERATURE GAUGE SPEEDOMETER MULTI -FUNCTION/TACHOMETER CHECK ENGINE LIGHT SPEEDOMETER OR PERFECT PASS GAUGE VOLTMETER FUEL GAUGE HORN ACCESSORY ACC
PROSTAR 197 I A FUEL TANK FILLER B BLOWER C SWIM EXHAUST J PLATFORM D STERN LIGHT RECEPTACLE E STORAGE UNDER SUN F ENGINE G THROTTLE / SHIFT H INSTRUMENT I BOW LIGHT J GLOVE K CONTROL PANEL H BOX K BATTERY L DRAIN PAD COMPARTMENT ( UNDER SEAT ) L PLUG 1 2 3 4 5 6 7 8 9 10 11 12 13 14 15 16 17 18 OIL PRESSURE GAUGE ENGINE TEMPERATURE GAUGE G SPEEDOMETER MULTI- FUNCTION/TACHOMETER CHECK ENGINE LIGHT SPEEDOMETER OR PERFECT PASS GAUGE VOLTMETER F FUEL GAUGE HORN ACCESSORY ACCESSORY
PROSTAR 209 I A FUEL TANK FILLER B BLOWER C SWIM D STERN EXHAUST PLATFORM LIGHT RECEPTACLE E STORAGE UNDER SUN PAD F ENGINE J COMPARTMENT G THROTTLE / SHIFT H INSTRUMENT K H I BOW LIGHT J GLOVE BOX K BATTERY L DRAIN CONTROL PANEL (UNDER SEAT ) PLUG 1 2 3 4 5 6 7 8 9 10 11 12 13 14 15 16 17 18 G L F D OIL PRESSURE GAUGE ENGINE TEMPERATURE GAUGE SPEEDOMETER MULTI- FUNCTION/TACHOMETER CHECK ENGINE LIGHT SPEEDOMETER OR PERFECT PASS GAUGE VOLTMETER FUEL GAUGE HORN ACCESSORY ACCESSORY
PROSTAR 205V I A STERN LIGHT RECEPTACLE B BLOWER C SWIM EXHAUST PLATFORM D FUEL TANK FILLER E STORAGE UNDER SUN F ENGINE PAD COMPARTMENT G THROTTLE / SHIFT H INSTRUMENT I BOW LIGHT J GLOVE J CONTROL PANEL BOX K BATTERY ( UNDER SEAT ) K L SKI LOCKER H M DRAIN PLUGS 1 2 3 4 5 6 7 8 9 10 11 12 13 14 15 16 17 18 OIL PRESSURE GAUGE L ENGINE TEMPERATURE GAUGE SPEEDOMETER MULTI -FUNCTION/TACHOMETER CHECK ENGINE LIGHT G M SPEEDOMETER OR PERFECT PASS GAUGE VOLTMETER FUEL GAUGE HORN ACCE
MARISTAR 210 I A STERN LIGHT B BLOWER C SWIM RECEPTACLE EXHAUST PLATFORM D FUEL TANK FILLER E STORAGE UNDER SUN J PAD (BEHIND SEAT) THROTTLE / SHIFT CONTROL F BATTERY G H INSTRUMENT K I BOW LIGHT J GLOVE BOX K SKI H LOCKER L ENGINE M DRAIN M COMPARTMENT PLUGS 1 OIL PRESSURE GAUGE 2 ENGINE TEMPERATURE GAUGE 3 MULTI-FUNCTION/TACHOMETER 4 CHECK ENGINE LIGHT 5 SPEEDOMETER OR PERFECT PASS 6 VOLTMETER 7 FUEL GAUGE 8 HORN 9 12-VOLT RECEPTACLE 10 GAUGE DISPLAY SELECTOR 11 SPEEDOMETER CALIBR
MARISTAR 230 I A STERN LIGHT RECEPTACLE B BLOWER C SWIM EXHAUST PLATFORM D FUEL TANK FILLER E STORAGE UNDER SUN PAD (BEHIND SEAT ) THROTTLE / SHIFT CONTROL F BATTERY G H INSTRUMENT I BOW LIGHT J GLOVE K SKI PANEL J BOX H LOCKER L ENGINE K COMPARTMENT M DRAIN PLUGS 1 OIL PRESSURE GAUGE 2 ENGINE TEMPERATURE GAUGE 3 MULTI-FUNCTION/TACHOMETER 4 CHECK ENGINE LIGHT 5 SPEEDOMETER OR PERFECT PASS 6 VOLTMETER 7 FUEL GAUGE 8 HORN 9 12-VOLT RECEPTACLE 10 GAUGE DISPLAY SELECTOR 11 SPEEDOMETER C
MARISTAR 280 A BLOWER B SWIM EXHAUST PLATFORM C FUEL TANK FILLERS D B ATTERIES E THROTTLE / SHIFT F INSTRUMENT H CONTROL PANEL G BOW LIGHTS H SKI G G LOCKER I ENGINE J SINK COMPARTMENT K HEAD L DRAIN K PLUG F E J C C I D A L 1 2 3 4 5 6 7 8 9 10 11 12 13 14 15 16 17 18 19 20 21 22 23 24 OIL PRESSURE GAUGE ENGINE TEMPERATURE GAUGE CLOCK TACHOMETER SPEEDOMETER PERFECT PASS GAUGE VOLTMETER DEPTH FINDER FUEL GAUGE HORN CLOCK ADJUSTMENT SWITCH SPEEDOMETER ADJUSTMENT SWITCH COURTESY LI
MASTERCRAFT X-2 I A STERN LIGHT RECEPTACLE B BLOWER C SWIM EXHAUST PLATFORM D FUEL TANK FILLER E STORAGE UNDER SUN F ENGINE PAD J COMPARTMENT G THROTTLE / SHIFT H INSTRUMENT I BOW LIGHT J GLOVE CONTROL PANEL BOX K BATTERY ( UNDER K SEAT ) H L SKI LOCKER M DRAIN PLUGS L 1 2 3 4 5 6 7 8 9 10 11 12 13 14 15 16 17 18 OIL PRESSURE GAUGE ENGINE TEMPERATURE GAUGE SPEEDOMETER G M MULTI -FUNCTION/TACHOMETER CHECK ENGINE LIGHT SPEEDOMETER OR PERFECT PASS GAUGE VOLTMETER FUEL GAUGE HORN ACC
MASTERCRAFT X-7 I A FUEL TANK FILLER B BLOWER C SWIM D STERN EXHAUST PLATFORM LIGHT RECEPTACLE E STORAGE UNDER SUN J F ENGINE G THROTTLE / SHIFT H INSTRUMENT K I BOW LIGHT J GLOVE L DRAIN CONTROL PANEL BOX K BATTERY H PAD COMPARTMENT ( UNDER SEAT ) PLUG L 1 2 3 4 5 6 7 8 9 10 11 12 13 14 15 16 17 18 G F D A OIL PRESSURE GAUGE ENGINE TEMPERATURE GAUGE SPEEDOMETER MULTI -FUNCTION/TACHOMETER CHECK ENGINE LIGHT SPEEDOMETER OR PERFECT PASS GAUGE VOLTMETER FUEL GAUGE HORN ACCESSORY AC
MASTERCRAFT X-9 I A FUEL TANK FILLER B BLOWER C SWIM D STERN EXHAUST PLATFORM LIGHT RECEPTACLE E STORAGE UNDER SUN F ENGINE G THROTTLE / SHIFT H INSTRUMENT I BOW LIGHT J GLOVE BOX K BATTERY L DRAIN PAD COMPARTMENT J CONTROL PANEL K ( UNDER H SEAT ) PLUG 1 2 3 4 5 6 7 8 9 10 11 12 13 14 15 16 17 18 OIL PRESSURE GAUGE ENGINE TEMPERATURE GAUGE SPEEDOMETER MULTI- FUNCTION/TACHOMETER G CHECK ENGINE LIGHT L SPEEDOMETER OR PERFECT PASS GAUGE VOLTMETER FUEL GAUGE HORN ACCESSORY ACCESSORY
MASTERCRAFT X-10 I A STERN LIGHT B BLOWER C SWIM RECEPTACLE EXHAUST PLATFORM D FUEL TANK FILLER E STORAGE J UNDER SUN PAD (BEHIND SEAT ) THROTTLE / SHIFT CONTROL F BATTERY G H INSTRUMENT I BOW LIGHT J GLOVE K SKI K H M PANEL BOX LOCKER L ENGINE M DRAIN COMPARTMENT PLUGS 1 OIL PRESSURE GAUGE 2 ENGINE TEMPERATURE GAUGE 3 MULTI-FUNCTION/TACHOMETER 4 CHECK ENGINE LIGHT 5 SPEEDOMETER OR PERFECT PASS 6 VOLTMETER 7 FUEL GAUGE 8 HORN 9 12-VOLT RECEPTACLE 10 GAUGE DISPLAY SELECTOR 11 SPEEDOM
MASTERCRAFT X-30 I A STERN LIGHT B BLOWER C SWIM RECEPTACLE EXHAUST PLATFORM D FUEL TANK FILLER E STORAGE UNDER SUN PAD (BEHIND SEAT) THROTTLE / SHIFT CONTROL F BATTERY G H INSTRUMENT I BOW LIGHT J GLOVE BOX K SKI PANEL J H LOCKER L ENGINE M DRAIN K COMPARTMENT PLUGS 1 OIL PRESSURE GAUGE 2 ENGINE TEMPERATURE GAUGE 3 MULTI-FUNCTION/TACHOMETER 4 CHECK ENGINE LIGHT 5 SPEEDOMETER OR PERFECT PASS 6 VOLTMETER 7 FUEL GAUGE 8 HORN 9 12-VOLT RECEPTACLE 10 GAUGE DISPLAY SELECTOR 11 SPEEDOMETER C
MASTERCRAFT X-80 A BLOWER B SWIM EXHAUST PLATFORM C FUEL TANK FILLERS D B ATTERIES E THROTTLE / SHIFT F INSTRUMENT CONTROL PANEL G BOW LIGHTS H H SKI G G LOCKER I ENGINE J SINK COMPARTMENT K HEAD L DRAIN PLUG K F E J C C I D 1 2 3 4 5 6 7 8 9 10 11 12 13 14 15 16 17 18 19 20 21 22 23 24 OIL PRESSURE GAUGE ENGINE TEMPERATURE GAUGE CLOCK TACHOMETER SPEEDOMETER PERFECT PASS GAUGE VOLTMETER DEPTH FINDER FUEL GAUGE HORN CLOCK ADJUSTMENT SWITCH SPEEDOMETER ADJUSTMENT SWITCH COURTESY LIGH
MASTERCRAFT X-STAR A BLOWER B SWIM EXHAUST PLATFORM C FUEL TANK FILLERS D B ATTERIES E THROTTLE / SHIFT F INSTRUMENT CONTROL PANEL G G BOW LIGHTS H ENGINE I F COMPARTMENT DRAIN PLUGS 1 2 3 4 5 6 7 8 9 10 11 12 13 14 15 16 17 18 19 20 21 22 23 24 OIL PRESSURE GAUGE ENGINE TEMPERATURE GAUGE G CLOCK TACHOMETER SPEEDOMETER I PERFECT PASS GAUGE VOLTMETER DEPTH FINDER E FUEL GAUGE HORN CLOCK ADJUSTMENT SWITCH SPEEDOMETER ADJUSTMENT SWITCH COURTESY LIGHTS SWITCH SHOWER SWITCH HEATHER SWITCH ACCE
A N D > > > > ENGINE PROPELLER > > > > Boat ProStar 190 & 197, X-7 ProStar 190 & 197, X-7 ProStar 190 & 197, X-7 ProStar 190 & 197, X-7 ProStar 190 & 197, X-7 ProStar 190 & 197, X-7 ProStar 190 & 197, X-7 ProStar 209, X-9 ProStar 209, X-9 ProStar 209, X-9 ProStar 209, X-9 ProStar 209, X-9 ProStar 209, X-9 ProStar 209, X-9 ProStar 205V, X-2 ProStar 205V, X-2 MariStar 210, X-10 MariStar 210, X-10 MariStar 210, X-10 MariStar 210, X-10 MariStar 230, X-30 MariStar 230, X-30 MariStar 230, X-30 MariStar 230, X-3
Displacement .................................................. 350 C.I.D. (5.7 litres)—310 horsepower Bore ................................................................................................................................. 4.00" Stroke .............................................................................................................................. 3.48” Compression Ratio ............................................................................................................
Displacement ............................................... 364 C.I.D. (6.01 litres)–375 horsepower at 5200 RPM Bore ............................................................................................................................... 3.898” Stroke ............................................................................................................................ 3.623” Compression Ratio ......................................................................................................
& CONTROLS > > INDICATORS While the Guide to Individual Models pages provide specific information regarding the location of individual gauges and switches for each MasterCraft model, there is some general information about various gauges that has a direct impact in the operation and maintenance of your boat. The following includes information that should be reviewed and recalled on a regular basis. MULTI-FUNCTION GAUGE This gauge provides several functions of interest and support to the boater.
FUEL GAUGE The readings are only approximate. The gauge is activated with the ignition switch. Rocking motion of the boat during normal operation will cause fluctuation of the fuel gauge. For a more accurate reading, make sure that the boat is level and at rest. When the boat is placed into initial operation, do not run the boat below a quarter of a tank until you have refueled several times and a have sense of how long you can operate the boat on the fuel available.
temperatures. If the system detects readings outside the acceptable range, the system shuts off the stereo (if ON) and sounds the alarm for a period of one minute. Even after the alarm ceases, the Check Engine light will remain on. This signals the need to return to shore and seek assistance from your dealer as soon as possible to diagnose and, if necessary, repair the issue.
15A ATO fuse for the ECM unit. If you suspect that any of these fuses may not be operating as designed, you should take your boat to your dealer for attention. If during maintenance or inspection it becomes necessary to remove or re-position any of the engine’s wiring or wire harness(es) verify that the wiring has been returned to its original position and that all harnesses are routed correctly before attempting to use the boat again. If a wiring clip or retainer breaks, replace it immediately.
FUELING > > > > The ignition timing as set by the factory requires the use of unleaded fuel with an Anti-Knock Index Number (AKI)/Pump Octane Number range between 89 octane and 93 octane. Nearly any medium-grade gasoline available for automotive use may be used. FUEL SYSTEMS The ProStar and MariStar models are equipped with a new, highly innovative fuel system. This system is designed to provide you with years of trouble-free service.
Fuels that are blended to contain methanol or wood alcohol are not to be used in MasterCraft engines. These fuels can corrode some metal parts in your fuel system and engine. Damage caused by the use of unapproved fuels is not covered by warranty. Extended storage with fuel in the system can affect the fuel’s stability and may require system inspection and fuel filter replacement when the unit is placed back into service.
CHECKS SERVICES S A F E T Y A N D > > > The following checks and services are essential to safe boating and must be performed. Get in the habit of performing these checks in the same order each outing so that it becomes routine. BEFORE EACH OPERATION These tasks are best accomplished before the boat is launched. Check the weather report, wind and water conditions. Check for recommended on-board tools and parts.
B O A T > > > > > > NEW BREAK-IN The first 20 hours of operation are the most important to your boat. Proper break-in will ensure maximum performance and the longest possible power train life. The break-in period allows moving parts within the engine and transmission to wear-in properly. All MasterCraft boats are lake-tested on the water before leaving the factory, but the break-in must continue for the first 20 hours of your ownership.
FIRST HOUR OF OPERATION Start the engine and allow the warm-up to normal operating temperature (140 degrees F to 190 degrees F) at low idle (600 to 800 RPM). Operate the boat in forward gear, accelerate quickly, but gradually, to planing speed. Then return the throttle back to maintain a planing attitude. Vary the engine speed, but do not exceed 2000 RPM for the first hour. Carry only a light load.
STARTING OPERATION A N D B A S I C > > > > > > Note: If you are operat- ing this boat for the first time, you must follow the New Boat Break-in procedures as described in the previous section. to follow these procedures could result in SERIOUS ENGINE DAMAGE and would your warranty! FAILURE void BEFORE STARTING Familiarize yourself with the controls and indicators used on your MasterCraft boat. Perform all Safety Checks and Services as described earlier.
STARTING THE ENGINE Step 1: Attach the emergency engine safety switch tether (lanyard) between an article of your clothing and the switch. Step 2: For normal starting, leave the throttle lever in neutral. The electronic controls will meter the correct fuel and air automatically. Step 3: Turn the key switch to the start position and hold until the engine starts. Release the key as soon as the engine starts. If the engine does not start within 1015 seconds: a) Pull out the neutral detent.
Note: When from forward to reverse or reverse to forward, the control lever in the neutral position and ALLOW THE EN GINE to fall between 600800 RPM completing the shift. shifting be sure to stop - before UNDERWAY If the oil pressure gauge indicates low or no oil presssure, stop and check the oil level. If the temperature gauge indicates overheating, stop and check the raw water impeller for blockage. DO NOT operate the boat until the cause for the warning has been found and corrected.
O P E R A T I O N A L > > > > > > HINTS MasterCraft urges you–and all others who will be operating the boat–to seek certified instruction from the local boating authorities. This section is designed to present the most basic operational principles. It is NOT intended to cover all conditions encountered during operation.
gine, propeller-drive boats. A counterclockwise rotation propeller tends to cause the boat to drive to port when going forward, and to starboard when going backward, with the rudder in the straight-ahead position. At high speed, there is compensation for this effect and it is virtually non-existent. But, at slow speed–and especially during backing–the effect can be very pronounced. This is the main reason most experienced drivers approach with the dock to the starboard of the boat.
If the WOT RPM is higher than the maximum RPM in your engine’s WOT operating range, the boat is under-propped. The engine operating ranges for engines in MasterCraft boats are: RPT-1 engine: 4400-4800 RPM MCX engine: 4800-5200 RPM LQ9 Cadillac engine: 4800-5400 RPM 8.1 Liter engine: 4800-5400 RPM Installing a higher-pitched propeller will reduce the WOT RPMs. An engine that is over-revving may quickly experience catastrophic damage.
T H E > > > > > LIFTING BOAT When the boat is hoisted from the water, use the lifting eyes or a sling for easy, damage-free lifting. DO NOT use the ski pylon for lifting. It is NOT designed as a central lifting point. Also, DO NOT use the stern ski tow as a lifting ring. The deck will be damaged. See the Storage Cradle sub-section of the Lifting the Boat section of this Manual.
CORROSION > > > > > > GALVANIC CORROSION Galvanic corrosion (electrolysis) to the boat is the decompositoin of metal due to the effects of electrolytic action. When two dissimilar metals are immersed in a conductive fluid (salt water), an electric current is produced, much like the action of a battery. As the current flows, it takes with it tiny bits of the softer metal. If left unchecked, a great deal of damage could occur.
CLEANING > > > Periodic cleaning is the best way to keep your boat looking like new. Regular washing and waxing keep dirt and scum from building up and deteriorating the finish. Keeping your boat in a showroom-new condition results in personal satisfaction and higher resale value. Your boat is made of fiberglass-reinforced plastic resin material that is easy to clean and care for. Several layers of resin material are chemically bonded together to form the hull.
tion. These are not recommended for use. Dry cleaning fluids and lacquer solvents should not be used as they will remove the printed pattern and gloss. Waxes are not recommended because many contain dyes and solvents that can permanently damage the protective coating. In some instances, consumers have reported the appearance of a pink stain on vinyl that is resistant to various cleaning methods.
TEAK WOOD STAINLESS STEEL AND CHROME Regular cleaning and oiling of teak wood will maintain its Stainless steel and chrome-plated parts are not totally reoriginal appearance. Use a teak cleaner that can penetrate the sistant to corrosion. Occasional cleaning and polishing with a pores of the wood and cleanse them of dirt and stains. Avoid marine chrome-and-stainless polish will maintain and extend caustic teak cleaners since they can damage the wood. Im- the useful life.
SCHEDULED & SERVICE M A I N T E N A N C E C H E C K S > > FREQUENCY AND SCHEDULED MAINTENANCE Proper care, maintenance and adjustment will contribute to the peak performance of the boat, while also extending the overall service life and the resale value. Most MasterCraft boats built over the past decade are equipped with Indmar engines, and the information that follows was developed with their assistance. The instructions are grouped by the required service intervals.
• • • Inspect the propeller shaft log for excessive water entry. Inspect the fuel system lines and connections for leakage. Inspect the exhaust system for leaks. As you start the engine: • Check that the voltage registers a fully charged battery. After running the engine at least five minutes: • Check the transmission fluid level. • Check the engine oil level. QUARTERLY (EVERY 50 HOURS) Note: MasterCraft recommends that these functions be performed by factorytrained MasterCraft technicians.
BEFORE > > > EACH USE CHECK THE TRANSMISSION COOLER FOR DEBRIS Because this process should be completed while the engine is cool and cannot cause burns to your skin, we recommend you do this before starting your boat. Step 1: Ensure the engine is OFF and the engine safety starting switch disconnected. Be certain that the throttle/shift control lever is in neutral. Open the engine compartment. The transmission cooler is located either near the top or on the side of the engine.
Step 3: If the tank was completely empty, see your MasterCraft dealer for assistance immediately as your engine cooling system needs purging. This function should be completed only by a trained MasterCraft service technician. Failure to maintain your coolant at the proper level can cause engine damage. Your warranty will not cover engine damage due to overheating or any other cause associated with improper coolant levels.
Battery electrolyte fluid is dangerous. It contains sulfuric acid, which is poisonous, corrosive and caustic. If electrolyte is spilled or placed on any part of the human body, immediately flush the area with large amounts of clean water and seek medical aid. • Use a battery terminal cleaning brush to remove corrosion from the inside of the battery terminals. Clean the terminals with a water-and-baking-soda solution and rinse. • Reconnect the positive terminal first, then the negative.
INSPECT THE THROTTLE AND SHIFT CABLES FOR KINKS, WEAR AND INTERFERENCE (RPT-1 ONLY) Because this process should be completed while the engine is cool and cannot cause burns to your skin, we recommend you do this before starting your boat. Step 1: Ensure the engine is OFF and the engine safety starting switch disconnected. Be certain that the throttle/shift control lever is in neutral. Step 2: Open the engine compartment and locate the throttle and shift cables.
Step 5: If you are uncertain about the condition of the impeller, remove it and inspect. When installing or re-installing one, you will find it is a tight fit. This ensures proper operation. The use of soap or Vaseline will help with installation. You will note that proper placement on the gear results in a squeeze on the arms. This is the correct installation. Step 6: Place a gasket between the housing and the cover after ensuring that the surfaces are smooth and clean; then re-install the screws in place.
The engine box serves as a machinery guard. The engine must be OFF whenever the box is open. Clothing or body parts can get caught in moving parts, causing serious injury or death. Keep away from moving parts! Step 3: This portion of the inspection requires the operation of the engine with the engine compartment open and should be performed by your MasterCraft dealer.
immediately shut down. The leak must be repaired before the engine is restarted. See your MasterCraft dealer for parts and service. Because the lines on late model MasterCraft boats are pressurized, they can be disconnected and/or removed ONLY by using specialized tools that are not available to the public. This is important! Fuel leakage can lead to a build-up of potentially explosive fumes within the engine compartment.
the voltage level reaches a set level of 11.5 volts, the system will shut off the stereo system and sound the alarm for a period of two minutes to give boaters ample time to adjust. If you have a dead battery, charge it with a battery charger before attempting to start the engine. Jump-starting from another boat or battery is dangerous. Charging a dead battery with the alternator on your engine will put undue stress on the alternator, which may cause it to fail.
CHECK THE TRANSMISSION FLUID LEVEL Because you will get an accurate reading only after the engine has run long enough to thoroughly warm up, this should be one of the last checks you conduct before boating. Run the engine in the water at least five minutes in the water, and check the fluid immediately after shutting down to get an accurate reading.
Step 5: Lubricate the starter bendix with a light coating of waterproof grease or white lithium grease. Step 6: Return the starter to the engine and reconnect. After closing the engine compartment, reconnect the positive (+) battery terminal. MasterCraft recommends that your quarterly–or 50-hour–maintenance requirements be performed by your MasterCraft dealer. The staff there has the proper equipment and technical training to best meet your service needs.
Step 6: The oil filter should be changed each time the oil is changed. Remove the oil filter and dispose of it properly on-shore. Step 7: Fill a new MasterCraft oil filter about half full with clean engine oil. Lightly lubricate the oil filter gasket and spin the filter on until the gasket makes contact. Hand tighten the filter one-quarter to one-half turn after contact. DO NOT use a filter wrench to tighten.
Even if you plan to have annual maintenance work completed by your MasterCraft service technician, you still should review this section and ensure that you have some understanding of what is necessary to keep your boat in top condition. MasterCraft recommends that your annual–or 100 hour–maintenance requirements be performed by your MasterCraft dealer. The staff there has the proper equipment and technical training to best meet your service needs.
Note: Do not use compressed air, open flame nor heat dryers. Excess heat will shrink the cotton filter media. Compressed air will blow holes in the element. Step 7: After cleaning the air filter, always re-oil before using. Spray K&N air filter oil down into each pleat with one pass per pleat. Wait 10 minutes and re-oil any white spots still showing. Or use the oil from a squeeze bottle, down into the bottom and along each pleat with just one pass in each pleat.
CHANGE TRANSMISSION FLUID In order to thoroughly drain all the old transmission fluid, you will need to run the boat engine for a period of at least five minutes. Do not run your engine without it being in water, unless you have the appropriate, professional hook-up available to protect the engine and drive-train components.
CHECK THE PROPELLER SHAFT COUPLING ALIGNMENT Step 1: Ensure the engine is OFF and disconnect the engine safety starting switch. Be sure that the throttle/shift control lever is in neutral. The engine must be cool. Step 2: Open the engine box and locate the propeller shaft coupling. Step 3: Remove the coupling bolts and slide the coupling apart only slightly so that the pilot flange on the propeller shaft side is still seated in the pilot bore of the transmission side.
Step 6: Using the flexible end on a grease gun, give two full shots of white lithium grease to the two grease fittings: one on the rudder shaft, and one on the pivot. Clean up any old grease purged from the areas. Step 7: Rotate the steering wheel back and forth several times to work the lubricant in. Step 8: Re-install the access panel.
INSPECT COMPLETE FUEL SYSTEM FOR LEAKAGE Although your boat engine is similar to your automobile engine, the engine compartment differs substantially. The underside of your automobile engine compartment is totally open to the atmosphere. This allows complete air circulation and ventilation. Your boat engine is housed in a closed compartment, the underside of which is the bottom of the boat. The enclosed engine compartment limits the ventilation of gasoline and oil fumes.
EMISSION CONTROL > > > > WARRANTY INFORMATION The following information is applicable only to boats sold in California. The inboard engine in your boat includes the Indmar Emission Control System identified as MFI or TBI or EM. Refer to the identification sticker on your engine to determine which emission control system was used on your engine. The fuel and ignition systems on your engine meet the stringent requirements set forth by the California Air Resources Board (CARB).
Emissions Components Warranty The following components are considered as part of the emissions control system and are covered under the Emissions Control Warranty. 1. Fuel Metering System A. Fuel injectors B. Fuel pressure regulator C. Manifold Absolute Pressure Sensor D. Throttle Position Sensor E. Idle Air Control Valve F. Throttle Body – Port Fuel Injection Models G. Throttle Body Assembly – Throttle Body Fuel Injection Models H. Coolant Temperature Sensor I. Intake Valves 2. Air Induction System A.
If the ownership of a product is transferred during Emission Components Warranty period, this warranty shall also be transferred and be valid for the remaining coverage period provided that Indmar is notified in the following way: a. The former owner contacts Indmar and provides us with the required information listed below; or b. Indmar receives proof that the former owner agreed to the transfer of ownership and we are provided with the information listed below.
Emission Maintenance Procedures Engine oil and filter: See Operator’s Manual Spark Plugs: See Operator’s Manual PCV Valve: See Operator’s Manual Flame Arrestor: See Operator’s Manual Spark Plug Wires: See Operator’s Manual Breather Hose: See Operator’s Manual Ignition Timing: See Operator’s Manual CALIFORNIA EMISSION CONTROL WARRANTY STATEMENT YOUR WARRANTY RIGHTS AND OBLIGATIONS The California Air Resources Board and Indmar Products are pleased to explain the emission control system warranty on your 2005
Electronic Fuel Injected Engines NOTE: The MasterCraft RTp-1, LQ9 and 8.1 Liter engines do not have adjustable timing. 1. Start engine. 2. Attach an appropriate inductive pickup timing light to the number one cylinder spark plug wire. 3. P u t e n g i n e i n t o b a s e t i m i n g mode by running a jumper wire from pin “A” to pin “B” on the engine data link connector. The idle should automatically adjust to 900-1100 RPM.
STORAGE& W I N T E R I Z A T I O N > > > > Damage DUE TO IMPROPER STORAGE Note: to Storage or winter lay-up requires special preparation to prevent damage to the boat. the boat Since winter storage is an annual event, it presents an excellent opportunity to perform the annual maintenance at this time. will Without proper preparation, storage for long periods of time may cause internal parts of the warranty! the engine and transmission to rust because of lack of lubrication.
Step 4: Carefully loosen the flame arrestor and lift it far enough to insert the tube of the fogging oil can. Spray four to six (4 to 6) ounces of oil into the throat of the carburetor or throttle body. Shut off the engine. Re-attach the flame arrestor and seal with low-tack tape. Step 5: Perform the annual maintenance as described in the previous chapter. Step 6: Loosen all accessory drive belts and check their condition. ALL ENGINES Step 1: Drain water from the exhaust manifolds.
Step 3: If the coolant level is low, add a sufficient amount of coolant/water mix to fill the heat exchanger. Use an appropriate mix of prypylene glycol anti-freeze and distilled water, mixed in accordance with the directions on the container for the anticipated temperatures. Step 4: If the coolant in the heat exchanger is not strong enough to protect the engine to the lowest anticipated temperature, take your boat to your dealer for replacement of the coolant.
Step 3: Turn on one pump to fill and pump until antifreeze comes out the thru-hull. Then shut off. Step 12: Check the entire engine system for fluid, oil and coolant levels. Add as necessary. Step 4: Repeat on all pumps. Step 13: Check the entire engine for cracks or leaks caused by freeze damage. Step 5: After placing antifreeze in all three pumps, turn all pumps to fill and pump anti-freeze into the tanks and/or bags.
> > > > > U N S C H E D U L E D MAINTENANCE Propeller damage is caused by striking solid objects. If the propeller is not rotating at the time it strikes a solid object, the damage is usually confined to just one blade and may be difficult to see. If the propeller is rotating when it strikes an object, usually damage can easily be seen on all blades. not use a propeller that is the source of a vibration.
TROUBLESHOOTING The following charts will assist you in finding and correcting minor mechanical and electrical problems with your boat. Problems are listed in the order of the most-likely event to the least-likely. To correct a problem, first determine what the symptom is. Start with the first cause and eliminate the possibility of each until the problem is corrected. Because of the specialized skill and tools needed to correct major issues, we have not included that information.
Poor boat performance. • Fouled spark plugs. • Contaminated fuel. • Plugged flame arrestor. • Weak ignition coil. • Fuel filter clogged. • Ignition problems. Poor gas mileage. • Fouled spark plugs. • Plugged flame arrestor. • Inefficient driving habits. • Plugged PCV valve. • Ignition problems. Throttle/shifting problems. • Corroded cables. • Defective throttle return spring. • Low transmission oil level. • Sticking transmission shift detent ball. • Kink in cable(s).
> > > > L I M I T E D WARRANTY STATEMENT MasterCraft Limited Warranty Statement 1. Limited Warranty and Term.
(g) damage resulting from use of the boat for rental, commercial or industrial purposes; (h) damage to hardware and other components fastened or adhered to the hull, deck or liner; (i) damage caused by fire, theft, freezing, vandalism, explosion, lightning, hail storms, flooding, or other natural disaster; (j) damage to any component parts and accessories not manufactured by MasterCraft, including but not limited to the engine, drive train, transmission, propeller, shift and throttle control levers and cabl
MasterCraft’s sole liability and obligation in the event of any claim arising out of its performance or non-performance of any provision of this Limited Warranty. Because some states and jurisdictions do not allow the exclusion or limitation of liability, the above limitations may not apply to you. 5. Transfer of Limited Warranty.
7. No Modification of Warranty. No oral or written information, advice or communication of any nature by or from MasterCraft or its representatives, employees, dealers, agents, distributors or suppliers shall create a warranty or in any manner increase or modify the scope of this Limited Warranty. Power Train Warranty Indmar Products Company, Inc., administers the Indmar engine warranty on marine propulsion engines sold by it (the “product”): A.
All insurance and freight charges for return by Indmar of the product (or its substitute) to the original retail purchaser shall be paid by the original retail purchaser. Expenses for labor incurred by Indmar in the repair of any warranted products shall be paid by the original retail purchaser to the extent that such expenses for labor exceed the specified service rates of Indmar in effect at the date of receipt of the product by Indmar.
GMP G E N U I N E > > > > > > M A S T E R C R A F T P A R T S Recognizing the pride that MasterCraft owners take in their boats, MasterCraft has been diligently working to develop our own line of products designed specifically to ensure a better-looking, longer-lasting product. Your 2005 model ProStar, X-Series or MariStar boat is just the third full model year to be able to utilize these products.
W A R R A N T Y > > > > > > TRANSFER For first purchase of a specific MasterCraft boat, the original owner will receive a warranty registration card to complete and turn in. You should be aware that under federal law, completion of the warranty card is a requirement and should be completed as follows: 1. Dealer must complete the warranty registration at date of sale. 2. Dealer must secure buyer’s signature! 3.
W E L C O M E T O W O N D E R F U L T H E W O R L D O F > > > > > > MASTERCRAFT TEAM Purchasing a new MasterCraftProStar, MariStar or X-Series boat has the added benefit of automatic one-year membership in the fun that is Team MasterCraft. And your membership will be renewable in succeeding years, too.
SERVICE > > > > L O G As Needed Date Date Date Date Date Date Date Date Date Date Date Date Date Date Date Replace raw water impeller Add/change oil & filter Replace battery Every 50 Hours Lubricate starter gear & shaft Change engine oil & filter Check all safety equipment Every 100 Hours Clean flame arrestor Replace raw water impeller Engine tune-up Change transmission fluid Check engine mounts Check prop shaft coupling alignment Inspect exhaust flaps Lubricate steering system Lubricate
SERVICE > > > > L O G(continued) As Needed Date Date Date Date Date Date Date Date Date Date Date Date Date Date Date Replace raw water impeller Add/change oil & filter Replace battery Every 50 Hours Lubricate starter gear & shaft Change engine oil & filter Check all safety equipment Every 100 Hours Clean flame arrestor Replace raw water impeller Engine tune-up Change transmission fluid Check engine mounts Check prop shaft coupling alignment Inspect exhaust flaps Lubricate steering syste
SERVICE > > > > L O G (continued) As Needed Date Date Date Date Date Date Date Date Date Date Date Date Date Date Date Replace raw water impeller Add/change oil & filter Replace battery Every 50 Hours Lubricate starter gear & shaft Change engine oil & filter Check all safety equipment Every 100 Hours Clean flame arrestor Replace raw water impeller Engine tune-up Change transmission fluid Check engine mounts Check prop shaft coupling alignment Inspect exhaust flaps Lubricate steering syst
MasterCraft’s PROSTAR, MARISTAR AND X-SERIES Owners Manual WORLD HEADQUARTERS M A S T E R C R A F T 100 B OAT C H E R O K E E VONORE TN COMPANY C O V E 37885 D R I V E U S A Pro ProStar 190 ProStar 197 ProStar 209 Star 2 0 5 V- D R I V E MariStar 210 VRS MariStar 230 VRS MariStar 280VLD X - 2 423.884.2221 423.884.2295 FAX X - 7 X - 9 X-10 WWW .MASTERCRAFT.