
Installation Instructions


Page 12
By changing the position of the guide and
using the same straight edge as a guide, it is
possible to quickly and easily make parallel
cuts in the workpiece.
NOTICE: When adjusting the cutting angle,
you can move the parallel guide locking
screw to the left or right.
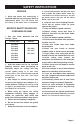
MAKING A CUT (FIG. 9)
FIG. 9
1. Turn on the jigsaw and allow the blade
to reach maximum speed. Do not allow
the blade to contact the workpiece until
it has reached full speed.
2. Slowly guide the jigsaw forward using
both hands, keeping the shoe plate at
against the workpiece.
NOTICE: Use only enough pressure to keep
the blade cutting. Do not force the cutting;
allow the blade and the saw to do the work.
STRAIGHT CUTING
A straight cut can be made by clamping
a piece of wood or a straight edge to the
workpiece and guiding the edge of the saw
against it. Make the cut from one direction
only. NEVER cut halfway and then complete
the cut from the opposite end.
The straight cut can be also made by using
the parallel guide supplied.
OPERATION
PLUNGE CUTTING (FIG. 10)
FIG. 10
Plunge cutting is useful and time-saving for
making rough openings in soft materials. It
makes it unnecessary to drill a hole for an
inside or pocket cut.
1. Draw lines for the opening you want to
cut.
2. Hold saw rmly and tilt it forward so
the toe of the saw foot rests on the
workpiece.
3. Make sure that the blade is well clear of
the workpiece.
4. Start the saw and then gradually lower
the blade into the workpiece, rmly
holding the toe of the saw base to
prevent side wobble.
5. Keeping the toe of the foot on the
workpiece, slowly pivot the saw
downward like a hinge until the blade
cuts through and the base rests at on
the workpiece.
6. Begin sawing in the usual manner along
the cut line.