
Installation Manual
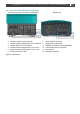


ChargeMaster Plus 12/75-3, 12/100-3, 24/40-3, 24/60-3 – User and Installation Manual
15
3.9 Commissioning after installation
1 Check the wiring; positive connected to
positive (red cables), negative connected to
negative (black cables).
2 When all wiring is OK, place the DC fuse(s)
to connect the batteries to the ChargeMaster
Plus.
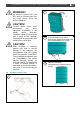
WARNING!
When placing this fuse, a spark
might occur, caused by the
capacitors used in the
ChargeMaster Plus. This is
particularly dangerous in places
with insufficient ventilation. Due to
the gassing of the batteries, an
explosion can occur. Avoid having
flammable materials close by.
3 Switch on the AC power supply.
Note: when new, the ChargeMaster Plus will
not start charging batteries before activated
with the ON/OFF button. See step 6.
4 Check the DIP switches.
See chapter DIP switch settings on page 16.
5 Check and adjust the settings of the
ChargeMaster Plus with MasterAdjust
(MasterBus network) or with the CZone
Configuration Tool (CZone network).
See chapter SETTINGS on page 16.
6 When the settings meet the power system's
needs, press and hold the ON/OFF button for
3 seconds to switch the charger on and
initiate the charging process.
9
If required, use a small screwdriver to
change DIP switch settings. See
section 4.1.
10
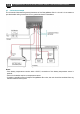
Check all wiring; see also Figure 3
for wiring details. If all wiring is OK:
Place the DC fuses.
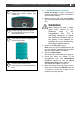
11
Close the connection compartment
by fixing the screws.
12
Continue with section 3.9 for
commissioning of the ChargeMaster
Plus.