RETRO 4 BURNER BBQ 467200814 G518-001-110801 05/21/13 Retain manual for future reference.
CONTENTS FEATURES IMPORTANT GAS AND SAFETY INSTRUCTIONS OPERATING PROCEDURE COOKING TIPS CARE AND MAINTENANCE BARBECUE ASSEMBLY INSTRUCTIONS PARTS DIAGRAM ASSEMBLY INSTRUCTIONS NATURAL GAS WARRANTY 3 4 6 7 8 9 10 11 28 30 CONTACT INFORMATION For spare parts order from your nearest Bunnings Warehouse. For service and warranty queries call (07) 3279 1800 or email warranty@oztrail.com.au Your purchase receipt is required for all warranty claims. www.matadorbbqs.com.
MATADOR RETRO FEATURES Retro design Deluxe BBQ with high output side burner Double skinned hood for maximum heat retention Vitreous enamel roasting hood with temperature gauge Satin enamel grill & hotplate Electronic ignition to all burners Vitreous enamel warming rack Powder coated cabinet trolley with internal cylinder storage Handy towel rail on side shelf BARBECUE DIMENSIONS Length Width Height Hood 1450 mm 621 mm 1129 mm Cabinet 695 mm 621 mm 670 mm MATADOR INSTRUCTION MANUAL 3
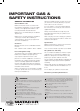
IMPORTANT GAS & SAFETY INSTRUCTIONS GENERAL INFORMATION Gas installation codes Barbecues must be used in accordance with the installation requirements of your gas supply authority, or the appropriate installation code issued by Standards Australia AS 5601. Barbecues for use with bottled gas are labelled ‘propane gas’. Barbecues for use with natural gas are labelled ‘natural gas’ and must be installed by an authorised person. Check the gas type sticker attached to the barbecue.
NOMINAL HOURLY GAS CONSUMPTION Gas Type Number of BBQ Burners Injector Size BBQ Burner Injector Size Side Burner 4 Ø 0.94 mm Ø 1.07 mm MJ/h each 10.55MJ/h 13.72MJ/h 4 Ø1.55mm Ø1.80mm MJ/h each 10.55 MJ/h 13.72MJ/h Total Gas Consumption Mj/h Gas Pressure kPa 55.92MJ/h 2.75kPa 55.92MJ/h 1.00kPa Propane Natural Gas If you store your barbecue indoors, ALWAYS disconnect the gas cylinder first and store the cylinder safely outside.
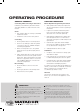
OPERATING PROCEDURE GENERAL ASSEMBLY LIGHTING PROCEDURE Connecting & Disconnecting to Gas Source Burner Operation & Ignition System Check Familiarise yourself with the general information and safety guidelines located at the front of this manual. 1. With cylinder valve in OFF position press the electronic igniter button. Check for sparking to the burners. Check 2.
COOKING TIPS Burn-off Roasting The cooking surface does not need any burnoff time. Due to the nature of the coating, it is recommended that sharp or metallic objects are NOT USED on the surface. For best results when roasting, the outer two burners should be used on the low to medium setting. Preheating It is necessary to preheat the barbecue for at least 5 minutes before cooking certain foods, depending on the type of food and the cooking temperature.
CARE & Maintenance As with all appliances, proper care and maintenance will keep them in top operating condition and prolong their life. Your new gas barbecue is no exception. By following these cleaning procedures on a timely basis, your barbecue will be kept clean and working properly with minimum effort. Flash-Back Spiders and small insects occasionally spin webs or make nests in the burner tubes during warehousing and transit.
PARTS LIST Key 1 2 3 4 5 6 7 8 9 10 11 12 Qty 2 2 1 2 1 1 1 1 1 1 1 4 13 2 14 2 15 16 17 18 19 20 21 22 23 24 25 3 1 1 1 1 1 2 4 5 1 1 26 2 27 28 29 30 31 32 33 34 35 36 2 1 1 1 1 1 1 1 1 1 37 1 38 1 39 2 40 1 Description LOCKING CASTER FIXED CASTER BOTTOM SHELF DOOR MAGNET ASSEMBLY LEFT SIDE TROLLEY PANEL RIGHT SIDE TROLLEY PANEL LOWER BACK TROLLEY PANEL GROMMET, F/ HOSE, SMALL FIREBOX HEAT SHIELD, F/ HOSE GUARD MATCH HOLDER AND CHAIN MAIN BURNER ELECTRODE SET, F/ MAIN BURNER, 900MM WIR
PARTS DIAGRAM #24 #31 #15 #30 #27 #29 #57 #25 #26 #12 #59 #58 #13 #14 #56 #40 #45 #42 #9 #39 #44 #47 #10 #33 #36 #17 #11 #38 #34 #20 #37 #18 #28 #41 #60 #23 #23 #35 #16 #19 #48 #4 #22 #46 #43 #51 #32 #6 #7 #50 #53 #21 #53 #49 #8 #4 #3 #54 #52 #1 #55 #5 #2 #2 #1
ASSEMBLY #2 1 #2 1ST #1 2ND #1 3RD Caster pin #3 2 #5 A 1/4-20x1/2” Screw Qty.6 A B B #6 7mm Lock Washer Qty.
3 #7 B A A B A 1/4-20x1/2” screw Qty. 5 B B A A A B B 7mm Lock Washer Qty.
5 A B A B #32 A 1/4-20x1 ½” Screw Qty.4 B B A B A 7mm Lock Washer Qty.
6 1ST Remove screws and washers #33 2ND #34 #35 3RD Use screws and washers removed front 1ST one 4TH A A 1/4-20x1/2” Screw Qty.1 C B B 7mm Lock Washer Qty.1 C Fiber Washer Qty.1 D 1/4" Nut Qty.
7 #36 #40 #37 1ST #41 2ND C C C B B B A A A Remove screws and washers Keep the three screws and washers for next step 3RD A #10-24x3/8” Screw Qty.3 B 5mm Lock Washer Qty.3 C 5mm Flat Washer Qty.
8 1ST Use the three screws and washers removed front last step 2ND C D B A 1/4-20x1/2” Screw Qty.1 B 7mm Lock Washer Qty.1 C Fiber Washer Qty.1 D 1/4" Nut Qty.
9 A #42 1/4-20x1 ½” Screw Qty.4 B 1/4-20x1/2” Screw Qty.
1ST 10 Remove screws and washers Side burner valve 2ND Use screws and washers removed from 1st one TOP Side burner valve 3RD #43 B A A #8-32x3/8” Screw Qty.2 B 4mm Lock Washer Qty.
11 #44 1ST 5TH #47 2ND 3RD 4TH A A #46 Wing Nut Qty.
12 #48 Back of grill A A A #8x3/8" self-tapping Screw Qty.
13 1ST #49 2ND #50 #49 A #10-24x3/8” Screw Qty.4 B A B #10-24 Nut Qty.
14 #53 A A #54 A A #53 A #52 1/4-20x1/2” Screw Qty.
15 #21 #52 #54 16 #54 #55 MATADOR INSTRUCTION MANUAL 23
17 1ST #56 #56 2ND
18 #58 #57 #59 MATADOR INSTRUCTION MANUAL 25
19 #60 20 + #50 Battery -
21 LP Cylinder (not included) CAUTION Cylinder valve must face to front of trolley once tank is attached. Failure to install cylinder correctly may allow gas hose to be damaged in operation, resulting in the risk of fire.
NATURAL GAS CONVERSION TO BE INSTALLED ONLY ON OR IN A NON-COMBUSTIBLE ENCLOSURE Note: Recommended clearances must be maintained, see page 4. Tools Required: Adjustable spanner Phillips head screwdriver Gas Piping 1. (a) A minimum pipe diameter of 15mm is required for inlet piping. A lever operated shutoff valve should be installed within 1 metre of the appliance for servicing the unit. (b) Where it is not practical to install solid tube AGA certified stainless steel braided hose can be installed.
Appliance conversion - Main Burners 1. Remove cooking grate, hot plate, and heat tents. 2. Remove clips retaining flame carryover tubes and burners. 3. Remove flame carryover tubes and burners. 4. Using a 7 mm nut drive remove LP orifices and save in case barbecue needs to be converted back to LP. 5. Remove control knobs, LP bezel plates and screws and washers (Shown below). Only do one control knob at a time. 6.
MATADOR WARRANTY YOUR MATADOR BBQ IS COVERED AGAINST DEFECTS FOR A PERIOD OF 2 YEARS FOR PARTS AND LABOUR, REPAIR OR REPLACEMENT. Goods presented for repair may be replaced by refurbished goods of the same type rather than being repaired. Refurbished parts may be used to repair the goods THIS WARRANTY EXCLUDES SURFACE RUST AND DAMAGE CAUSED BY ABUSE OR NEGLECT.
MATADOR WARRANTY • Lack of maintenance, abuse, neglect, misuse, accidental or improper installation of this appliance. • Scratches, dents, corrosion or discoloration caused by heat, abrasive chemical cleaners or chipping of porcelain enamel parts. • Corrosion or damage caused by exposure to the elements such as insects, weather, hail or grease and fat fires • Rusting of cast iron plates, grills and burners.
SAFE APPLIANCE LOCATIONS This appliance shall only be used in an above ground open-air situation with natural ventilation, without stagnant areas, where gas leakage and products of combustion are rapidly dispersed by wind and natural convection. • Any enclosure in which the appliance isused shall comply with the following: • An enclosure with walls on all sides, but at least one permanent opening at ground level and no overhead cover (see Example 1).