
User`s guide
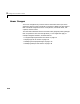


Table Of Contents
- Getting Started
- Using Instrumentation in a Model
- Categories of ActiveX Controls
- Placing ActiveX Controls in a Different Window
- Library Reference
- Index

Knobs & Selectors
3-13
9 Change the color of the currently chosen value to red by setting
HighlightColor to red.
Manually Adjusting the Selections
It is generally easier to let the block determine the positions of selections and
their captions. However, you can also adjust the positions manually by using
one or more of these techniques:
•To vary the horizontal justification of a selection caption, first uncheck the
AutoAlign check box on the Auto panel. Then, on the Selections panel, set
SelectionID to the ID of the selection you want to change and vary the
SelectionAlign property.
•To vary the positions of the selection captions, first uncheck the
AutoAlign
and
AutoOffset check boxes on the Auto panel, in that order. Then, on the
Selections panel, set SelectionID to the ID of the selection you want to
change and vary the
SelectionOffsetX, SelectionOffsetY, and
SelectionRadius properties.
•To vary the angles of a selection, first uncheck the
AutoAngle check box on
the
Auto panel. Then, on the Selections panel, set SelectionID to the ID of
the selection you want to change and vary the
SelectionAngle property.
Changing Output Values
The Frequency Selector block outputs the SelectionID property of the selection
to which the knob points. These values are integers between 0 and one less
than the value of the
Selections property.
To convert the output values to a base-10 logarithmic scale, you can send the
output to the block called Freq. Selector convert to Simulink, located in the
Knobs & Selectors library. To convert these output values to an arbitrary set of
numbers that might be useful for your application, you can send the output to
a Look-Up Table block in Simulink.
2
Half Rate
3
Full Rate
SelectionID SelectionCaption