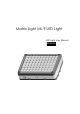
Matrix Light ML-9 LED Light LED Light User Manual ENGLISH
••• Contents ••• ABOUT PRODUCT Advantages of product ·············································· 4 Safety and Warnings ················································· 5 Product Features Checking product and accessories ······························10 THE NAME AND FUNCTION OF EACH PART LED Light ·······························································11 Battery, L type Slide and Camera-Tripod Attachment ····· 12 INSTALLATION AND USE OF LIGHT Light Installation and usage ·····················
USING AND CHARGING THE BATTERY How to use and charge the battery ···························· 21 TROUBLESHOOTING Points to check ························································22 WARRANTY, STORAGE INSTRUCTIONS & SPECIFICATIONS Warranty ································································24 Storage Instructions ·················································24 Specifications ··························································25 ••• Before using this product carefully read th
••• ABOUT PRODUCT Advantages of product ••• New Matrix Light ML-9 LED Light Matrix Light has been providing broadcasting stations and professional broadcasters with the best quality products since the release of the ML-80 LED light. Long term customers such as KBS, MBC, and NHK, and Fuji TV have demonstrated the reliability and superiority of the Matrix Light products. Accepting various inputs from professional broadcasters, the new Matrix Light ML-9 will be the ultimate light in the field.
One Source Multi Use The highly adaptable Matrix Light ML-9 is suitable for ENG cameras to handheld cameras. Also, it is very effective for general studio lighting as well. The on-board USB connectivity port allows simultaneous control of multiple ML-9 units, maximizing its flexibility. Solid body and precise micom control ML-9 LED Light’s aluminum body is lightweight, durable, and acts as an excellent heat sink, maximizing durability and lifetime.
Safety tips Please read carefully safety tips before using the product. ▶ Page 5~9 Product drawings on this manual and the actual product may differ slightly. Please refer to 'Check point before asking for service,' before requesting for service. ▶ side 23~24 Service charges are applicable for a non-defective product received by us, even within the warranty period. Injury or damage caused by violating instructions of this manual is solely the responsibility of the user.
so may lead to overheating and may cause fire. Safety and Warnings about battery ⚠ Never dismantle or short out the battery. Do not mix with other batteries. Do not charge battery improperly. Doing any of the above may cause fire and explosion. ⚠ When battery warning lamp is blinking, charge the battery immediately. Excessive charging and discharging can shorten the life of battery and can cause mechanical malfunctions. ⚠ Avoid shock and impact on the battery.
unwashed it will cause damage to the eyes. ⚠ If your skin or clothing comes in contact with chemicals leaked out of the battery, wash it immediately with clean water. If left unwashed it will cause damage to the skin or clothing. ⚠ Do not dismantle the battery case or damage any parts. Do not use the battery without case or in a broken case. It may cause overheating and/or explosion. ⚠ If the battery fails to completely charge after a prolonged period of time, please stop charging it immediately.
⚠ Do not block the front panel or vent of the light. Doing so will degrade the life of LED module by raising the internal temperature and may cause a fire. ⚠ Use only designated batteries as the power source. Using other power equipment can cause malfunctions and creates a risk of fires. ⚠ Do not put your hands on the light for a long time after using the light for five or more minutes, as you may get a low-temperature burn. Please Handle the light after it cools down in the case of overheating.
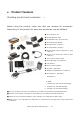
••• Product Features Checking product and accessories ••• Before using the product, make sure that you received all accessories. Depending on the product kit, parts and accessories may be different.
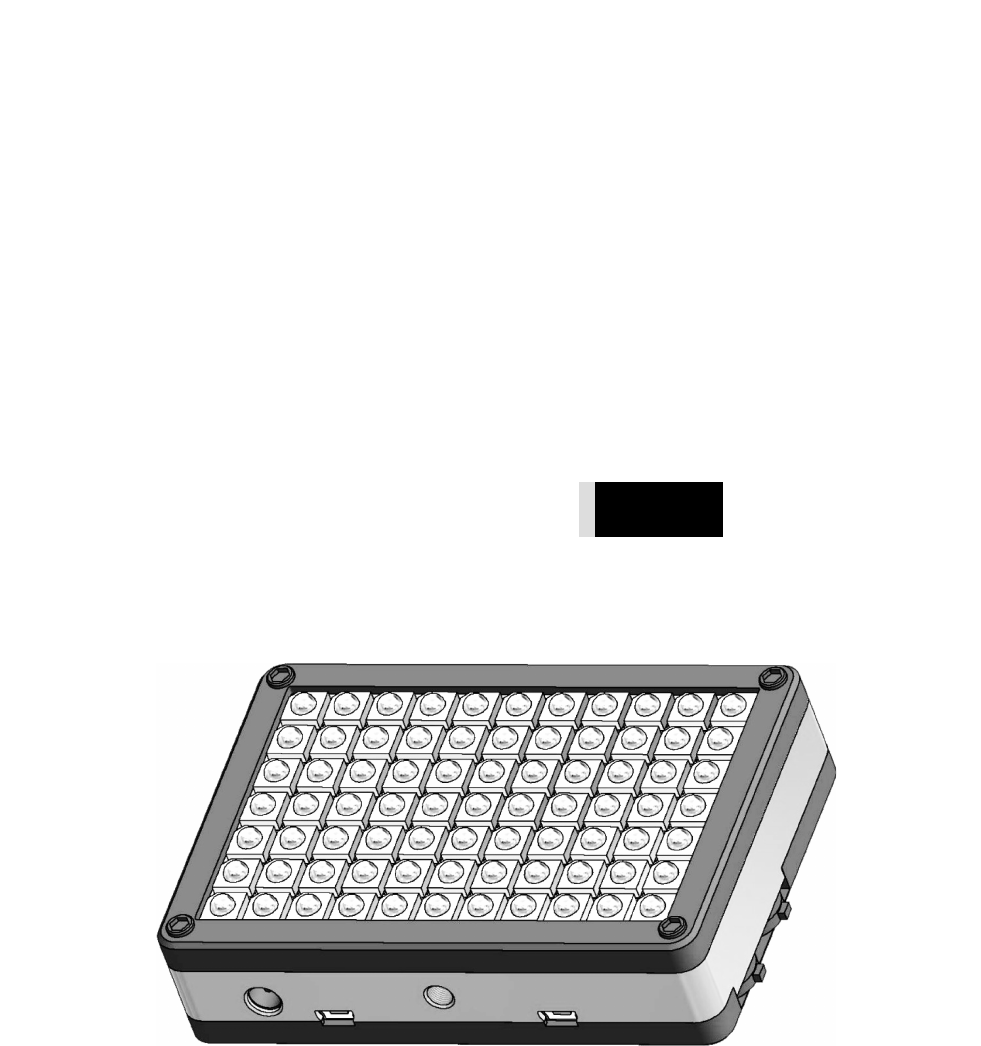
••• THE NAME AND FUNCTION OF EACH PART LED LIGHT ••• [Front, Bottom] ➊ LED light ➋ 12V DC connector ➌ USB Link connector ➊ ➍ Bracket attachment nut ➎ Power and brightness switch ➎ ➏ Turbo mode and ➌ ➋ ➏ ➍ Color temperature switch [Back] ➐ Brightness and Color temperature indicators ➑ ➒ ➑ Memory Buttons ➒ Memory Indicators ➓ - Power On /Off indicator ➐ - Battery Low warning indicator ➓ ⓫ - Turbo Mode On/Off indicators ⓫ Auto Mode On/Off indicators ⓬ Cooling Fan vent Matrix Light ML-9 LED Ri
Battery, L type slide and Tripod Attachment ••• [Top & Side] ➋ ➊ ➊ Battery ➋ 12V DC connector ➌ ➌ Through hall for L-slide ➍ ML-AT1 attachment ➎ Camera attachment bolt ➐ ➏ Fastening screw ➑ ➐ ML-SL30 L Type Slide ➑ ML-SLC10 C Type Slide ➍ ➏ ➎ * L Type Slide used mainly to handheld video camera. * C Type Slide used mainly to DSLR camera.
Light Installation and Usage ••• 1. Power and brightness switch - Press once for power on, press again for power off - Press and hold for more 3 seconds to enter remote operation mode. (Doing so makes the LED light’s power switch synchronized with Que/Cut button of camera.) - Push up the switch to increase brightness by 10%, down to decrease by 10%. - Keep pushing up or down to adjust brightness quickly. 2.
- If you want to get the stored value, press the button in which the settings are stored. Then the light’s settings will be changed to the stored value, and the indicator LED beside the memory button will turns on. 4. LED indicators There are indicators that display the color temperature, brightness, and the operating condition at the back of ML-9 LED Light. The features of each indicators are shown below.
when you store current values) and which memory was used. - Battery level warning LED When the battery level drops below 15%, the battery warning indicator lights up. In this case, recharge the battery as soon as possible. Matrix Light’s ML-BA12 Li-ion battery does not suffer from a memory effect, so frequent charging is recommended. In fact, completely discharging the battery will drastically reduce the capacity of the battery and should be avoided.
⚠ Caution: Using turbo mode reduces the battery life by half and may increase the fan noise. 5. Mini-USB connector The two mini USB connectors located at the bottom of the light are communication ports that receive or send synchronization signals. This allows convenient control over multiple units in light stand or studio settings.
1. Mount the ML-9 light unit to the female shoe of the camera utilizing the ML-LB3 bracket. 2. If the camera is equipped with a male shoe, please use the appropriate converter (ML-MSC1) or the screw (ML-SCR1) which are sold separately. 3. Use the Power Tap Connector cable (ML-PT3) to connect the light to the 12V DC output on the camera, or use Power Tap Connecter (ML-PT2) to connect the light to the battery pack or 12V DC output port in V Mount Adaptor.
4. Tighten the screw on the ML-LB2 Ball-head Bracket once the light is adjusted correctly. 5. To synchronize the light and the ENG camera’s Cue/Cut button, turn the light on, and set the ENG camera to Auto mode. Then set the light to the Auto mode pressing the light’s Power switch for 3 seconds. To switch to the Manual mode, press Power switch for 3 seconds again. Installation on a Camera using supplied Battery ••• 1.
3. Insert the L-bracket slide (ML-SL30 or ML-SL15) into the hole of the Tripod Adapter and tighten the fastening screw. Hook the battery on to the slide and connect it to the light with the power cable (ML-PC1). 4. If required, extra attachments can be used with the Tripod Adapter and the Slide in place utilizing the threaded nut at the bottom of the Adapter.
••• How to use Accessories Using the Tripod Adapter(ML-AT1) & L type Slide(ML-SL30) ••• Tripod Adapter (ML-AT1) and L type Slide (ML-SL30) will help you film more conveniently. 1. Adjusting the length of the L-bracket Slide (ML-SL30) a. Loosen the fastening screw. b. Slide the bracket to the desired length c. Tighten the fastening screw ⚠ CAUTION: It is possible to damage the attachment points on the camera as well as the adapter when excessive load is placed on the slide.
••• USING AND CHARGING THE BATTERY How to use and charge the battery ••• 1. Connecting ML-9 LED Light to Battery a. Connect the power cable (ML-PC1) to the battery's DC power jack. b. Connect the other end of the power cable (ML-PC1) to the LED Light's power connector. c. Turn on the ML-9 LED Light. 2. Charging the battery a. Unplug the power cable (ML-PC1) from the battery's DC power jack. b. Plug the battery charger (ML-CHG1) into an AC outlet. Connect the charger plug to the battery's DC power jack.
3. To replace the battery during filming a. Unplug the power cable (ML-PC1) from the battery's DC power jack. b. Release the attachment screw and pull out the L-Slide and battery. c. Hold and grip the L-Slide then lift up the battery. d. Hold the L-Slide and install new battery. e. Reinstall the L-Slide and battery on the camera. f. Plug in the power cable (ML-PC1) to the battery's DC power jack.
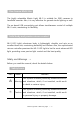
Symptoms Check your symptoms Is the battery pack connected securely? Check connection to the fully charged battery pack. Is the battery fully charged? Fully charge the I cannot turn on the battery or replace with a charged battery Is the battery connected properly? Make sure that power. the power cable (ML-PC1) is connected to the battery's DC power jack and the light properly. 17-19 Page Light doesn't work even Make sure the switch is turned on.
••• WARRANTY & STORAGE INSTRUCTIONS Warranty ••• Warranty is valid for 1 year after purchase. The warranty does not cover theft, loss, damage from and not limited to accidents, natural disasters, abuse, tampering, normal wear, misuse, or modified products. Please submit the defective product with a receipt showing purchase date to an approved service center or Matrix Light for warranty repair. Storage Instructions ••• Keep in a well-ventilated and dry place.
Specifications ••• Type: Current regulated power LED light Light projection range : 0.