
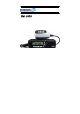
User's Manual


Installation Safeguards
WARNING -DO NOT install the radio unit where it would interfere with the
proper operation of automatic collision protection devices
(air bags).
WARNING - DO NOT install the radio unit where it would likely cause injury in case of accident.
NOTE: The radio is not intended for operation in a positive ground vehicle.
1. Select a location for the radio where you can easily see and reach all controls,
A. including the microphone.
2. Using the radio mounting bracket as a template, mark with a pencil the locations
A. where the bracket securing screws will be placed.
NOTE -Before drilling holes in the vehicle, verify that there is nothing that could be
damaged or get in the way by drilling and putting screws in this location. It is better to
use existing passages in the dashboard, trunk, and sfloor for the routing cable, thus
avoiding excessive drilling.
After drilling holes for the mounting bracket, attach bracket to the surface by using the
two large Phillips head screws provided.
3. Install the radio unit to the bracket using the black screw knobs (located on each side
of the radio) along with the two spring lock washers, and two large flat washers
provided.
NOTE -Depending on the radio mounting location, it may be more convenient to install the
microphone bracket before installing the entire radio unit.
4. Mount the microphone bracket to the most convenient side of the radio unit, using the
two small Phillips head screws provided. There are two options for installing the
microphone bracket, allowing the on-hook placement of the microphone from either
the top or the front of the bracket.
5. Connect the DC power supply cord to the radio. If necessary, the power supply cord
may be connected before mounting the radio unit to the radio bracket.
6. Push the modular microphone connector into the microphone jack (located in the front
of the radio unit) until a click is heard.