
User's Manual


3
4) GWR/PWR Button
5) Lamp / Lock Button
6) Battery Latch
7) Push-To-Talk (PTT)
8) Monitor Button
9) Menu/Scan Button
10) Emergency Button
11) Microphone
12) Accessory Connector
13) Belt Clip
14) Battery
15) Battery Charge Contacts
16) LCD
17) Speaker
Antenna Installation
Fasten the antenna to the radio by turning the antenna clockwise into the receptacle on top of the radio.
Installing and Removing the Battery Pack
To Install:
Position the guides of the battery in line with the radio battery guide rails and slide the battery into position
until a click is heard.
To Remove:
Holding radio in one hand, push and hold battery latch button located in the bottom of the Set , held as if
looking at the back of the unit. Hold radio firmly and slide battery in downward direction while pushing
the battery latch button.
Attaching and Removing the Belt Clip
To Install:
Install belt clip onto the belt clip holder located on the upper left hand corner of the radio, held as if
looking at the back of the unit. Locate slot location in belt clip and push belt clip until a click is heard.
To Remove:
Push and hold release button located at top of belt clip and slide clip off the belt clip holder.
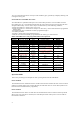
Battery Charging and Care
To ensure peak performance from your radio, the battery pack must
be fully charged. Proper care and charging will allow maximum performance and life of your battery pack.
SPC-3000 Desktop Charger provides 2 hours charging to one radio and one battery.