
Product Manual


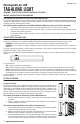


1
Model #:42170
USB Rechargeable
TAG-ALONG LIGHT
IMPORTANT: PLEASE READ ALL INSTRUCTIONS BEFORE USE.
ASSEMBLY AND INSTRUCTION GUIDE
Your usb rechargeable tag-along light is not just a flashlight!
It is a portable, versatile, multi-use and multi-mount light bar with 6 brilliant LEDs that provides light where and when you need it. The
integral, rechargeable Lithium-ion battery charges via the included USB charging cable when connected to a computer, car cell phone
jack or wall adaptor. When fully charged, the battery provides up to 5 hours of light.
The Tag-Along Light is perfect for many different uses in different locations and situations.
• In the house: Light a closet, a circuit breaker box, a file cabinet, kitchen cabinets, crawlspaces and more!
• In the car: Light a trunk or toolbox; use as an emergency flashlight, a hood light, and more!
• In other locations: Light a tent, a locker, utility room or any other location you need quick, bright, portable light.
OPERATING YOUR TAG-ALONG LIGHT
Before the first use of the Tag-Along Light, it should charge for 2 hours. Use the included USB cable to connect the light to a computer
or any regular phone charger. A fully charged battery pack can provide power to the light for up to 5 hours.
NOTE: Do not use any turbo or fast chargers as they can damage the Tag-Along Light!
NOTE: If using a phone charger, only use trusted chargers provided by the phone manufacturer.
A red light will appear by the motion sensor if your light is charging properly. Once the light is fully charged, the red light will turn green.
The Tag-Along Light is simply operated by moving the power switch located on the side of the light as shown below:
There are three settings:
OFF: The light is off and will stay off.
ON: The light will activate once the switch is moved to this setting and the light will stay on as long as the switch is at the ON
setting and the battery pack has energy.
AUTO with Motion Activation: The light will activate when motion is detected in a dark environment. The light will stay on as long
as motion is detected, there are no external light sources nearby and the battery pack has energy. The motion sensor has a range
of 15 feet and 150°.
When the battery is drained, simply plug in the charging cable and charge the light for 2 hours to get up to another 5 hours of use.
MOUNTING OPTIONS
There are a number of ways to secure your Tag-Along Light.
The Mounting Bracket
This bracket is perfect for creating a “Home Base” for the Tag-Along light. The bracket can be
mounted with either the mounting hardware provided (screws and anchors) or double-sided tape.
The tape works great for drywall; however, we recommend using the hardware for any other
type of surface. You can place the mounting bracket near an outlet for easy charging or under
a cabinet, in a closet, on the wall in the garage/mud room, or anywhere else that is convenient.
To install the mounting bracket with the sticky tape:
1. Simply peel off the protective layers and place the sticky tape on the flat side of the
mounting bracket.
2. Place the mounting bracket on the mounting surface and press and hold for 10 seconds.
To install the mounting bracket with the mounting hardware:
1. The mounting bracket comes attached to the Tag-Along Light. Grab the edge of the
mounting bracket and pull the bracket off of the light.
2. Put the flat side of the mounting bracket against the mounting surface. Mark the center
of the mounting holes with a pen or pencil.
3. If the surface is very hard, you may need to drill holes before installing the screws or wall
anchors. The wall anchors should be used for drywall with no stud behind it, cement,
brick, or similar surfaces. If you are installing into wood or into drywall with a stud behind
it, then the wall anchor is not needed.
4. If you are installing wall anchors, remove the mounting bracket from the wall and install
the wall anchors. If you are not using wall anchors, skip to step 5.
5. Install the screws through the mounting bracket holes into the surface at the points you
marked in Step 2 or into the back of the wall anchors installed in step 4.