F 60 E 50 D 40 C 30 B 20 A 10 MaxVenturi ™ O P E R AT I N G MANUAL & INSTRUCTIONS FOR USE R211P03 R211M03 Rev.
Maxtec 6526 South Cottonwood Street Salt Lake City, Utah 84107 USA Authorized Representative: QNET BV Hommerterweg 286 6436 AM Amstenrade The Netherlands TEL (800) 748.5355 FAX (801) 270.5590 email: sales@maxtecinc.com website: www.maxtecinc.com EC REP NOTE: Before use, all individuals using the MaxVenturi should become familiar with the information contained in this Operation Manual. Adherence to these instructions is necessary for safe, effective product performance.
WARNINGS ! Indicates a potentially hazardous situation, if not avoided, could result in death or serious injury. • • • • This device is not intended for use with life supporting devices/systems.
CAUTION: Indicates a potentially hazardous situation, if not avoided, could result in minor or moderate injury and property damage. • • • • • • • • • • • • • • The MaxVenturi is intended for use with specific patient interface configurations. The numbered scale is intended for use with the Fisher & Paykel* heated humidifier (MR850) and the Optiflow high flow patient interface system (OPT544, OPT546, OPT570).
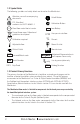
TABLE OF CONTENTS Classification . . . . . . . . . . . . . . . . . . . . . . . . . . . . . . . . . . . . . . . . . . . . . . . . . . . . . . . . I Warranty . . . . . . . . . . . . . . . . . . . . . . . . . . . . . . . . . . . . . . . . . . . . . . . . . . . . . . . . . . . I Warnings . . . . . . . . . . . . . . . . . . . . . . . . . . . . . . . . . . . . . . . . . . . . . . . . . . . . . . . . . . II 1.0 SYSTEM OVERVIEW . . . . . . . . . . . . . . . . . . . . . . . . . . . . . . . . . . . . . . . . .
1.0 SYSTEM OVERVIEW 1.1 Component Identification 1 10 11 12 2 13 3 14 4 5 9 8 6 7 1 Flow meter 8 ON/OFF Button: 2 Oxygen On/Off Valve 9 Calibration Button: 3 Inlet Oxygen Fitting 10 MAX-250 Series Oxygen Sensor 4 Oxygen % Control Knob: O2 11 Low Battery Indicator: 5 Flow Control Knob: 12 3.5-Digit Display 6 Room Air Inlet: 13 Calibration Needed Indicator: 7 Room Air Inlet Filter 14 Patient Outlet: 866.4.Maxtec www.maxtecinc.
1.2 Symbol Guide The following symbols and safety labels are found on the MaxVenturi: ! CAL Attention, consult accompanying documents On/off Button ETL Classified conforms to ULSTD 60601-1 Calibration Button Read flow meter float at center BAT Do not throw away.
2.0 SET-UP INSTRUCTIONS 2.1 Sensor Installation 1 3 2 ...30-90 minutes Remove Max-250 sensor from package and pull off barrier film. 4 Attach sensor to sensor cable. Wait 30 to 90 minutes for sensor to stabilize. 5 6 Press and hold CAL button for three (3) seconds. Wait for display to read "20.9%". 866.4.Maxtec Attach flow diverter. Insert sensor into port on MaxVenturi. www.maxtecinc.
2.2 Calibration A new calibration is required when: • The measured O2 percentage in 100% O2 is below 97.0%. • The measured O2 percentage in 100% O2 is above 103.0%. • The CAL reminder icon is blinking at the bottom of the LCD. • You are unsure about the displayed O2 percentage, see Factors Influencing Accurate Readings in section 3.0. The MaxVenturi can be calibrated at 100% oxygen or room oxygen (20.9%). The One Touch calibration will assume one of these two concentrations. 2.2.
2.2.2 100% Oxygen Calibration 2 1 Connect Oxygen supply. 3 Plug room air inlet. 6 5 4 Turn ON/OFF valve to the ON position. ...2 minutes Turn flow knob a few turns to flow gas. Wait 2 minutes for sensor to equilibrate. Press and hold CAL button for three (3) seconds. Wait for display to read 100%. 8 7 Remove plug from room air inlet. Insert filter into room air inlet. Note: Analyzer will read "Cal Err St" if the sample gas is not stable or if the oxygen sensor has reached its end of life.
2.3 Device Set-up 2 1 Attach MaxVenturi to IV pole. Twist knob to tighten. 3 Connect oxygen supply line from wall to MaxVenturi. Insert air inlet filter in room air inlet port. 5 4 Attach patient circuit to MaxVenturi outlet. Turn ON/OFF valve to on position. Note: Patient circuit and patient interface should be assembled according to manufacturers instructions supplied with them. 6 866.4.Maxtec www.maxtecinc.
2.4 Flow and Oxygen Settings Adjustment 2.4.1 Initial Settings 2 1 Adjust flow to desired setting and read flow meter. Set desired oxygen mixture by opening O2% knob and read analyzer display. 3 Adjust flow if it has changed. 2.4.2 Changing Flow Settings 1 2 Adjust flow to new desired flow rate. 866.4.Maxtec Readjust oxygen concentration to desired setting and wait for analyzer to equilibrate. Temporarily disconnect patient circuit if necessary. www.maxtecinc.
2.4.3 Changing Oxygen Settings 2 1 Adjust O2% knob to desired level and wait for analyzer to equilibrate. Temporarily disconnect patient circuit if necessary. Verify flow rate has not changed and adjust if necessary. Warning: Adjusting the oxygen setting too high at low flows may cause oxygen to exit the air inlet port. Verify the direction of flow by placing your hand under the air filter to feel for air escape. 2.5 Disposables The MaxVenturi is intended for use with approved disposables.
Hudson RCI Concha Humidifier with 22mm Single Heated Limb Circuit 6’ - 22mm Corrugated Tube F&P Humidifier with 22mm Single Heated Limb Circuit The delivery circuits can be paired with the patient interface circtuits listed in the table below: Table Instructions: To determine the desired flow, locate the patient delivery circuit and interface in the two left-hand columns. Find the corresponding flow rate by reading to the right under columns A through F.
3.0 FACTORS INFLUENCING ACCURATE READINGS 3.1 Elevation/Pressure Changes • • • Changes in elevation result in a reading error of approximately 1% of reading per 250 feet. A change in altitude greater than 500 ft will require sensor recalibration. This device does not automatically compensate for changes in barometric pressure or altitude. If the device is moved to a location of a different altitude, it must be recalibrated before use (see section 2.2). 3.
CAL Err hi: SENSOR VOLTAGE TOO HIGH • Repeat calibration routine as described in this manual. If unit repeats this error more than three (3) times, contact Customer Service. CAL Err Bat: BATTERY VOLTAGE TOO LOW TO RECALIBRATE • Replace batteries. 5.0 CHANGING THE BATTERIES 2 1 Turn off analyzer. 3 Use screwdriver to remove four (4) screws in back of device. 4 6 5 Remove battery pack from rear wall of cavity. Use caution with wires. 7 Remove two (2) depleted batteries.
6.0 CHANGING THE OXYGEN SENSOR 2 1 Turn off analyzer. 3 Disconnect sensor from sensor cable. Remove sensor from sensor port. Dispose of sensor according to local guidelines. Note: For new sensor installation, follow procedure for new sensor installation in section 2.1. 7.0 CLEANING AND MAINTENANCE Store the MaxVenturi at a temperature similar to that of its daily use.
8.0 SPECIFICATIONS 8.1 Analyzer Specifications Measurement Range: . . . . . . . . . . . . . . . . . . . . . . . . . . . . . . . . . . . . . . . . . . . . . . . . . . . . 0-100% Resolution: . . . . . . . . . . . . . . . . . . . . . . . . . . . . . . . . . . . . . . . . . . . . . . . . . . . . . . . . . . . . . . 0.1% Accuracy and Linearity: . . . . . . . . . . . . . . . . . . 1% of full scale at constant temperature, R.H. and pressure when calibrated at full scale Total Accuracy: . . . . . . . . . . . . . .
8.3 Oxygen Inlet Supply: This device was designed for an oxygen inlet pressure of 3.5 bar (50psi). Certain geographical areas use 4 bar (58psi) or 5bar (73psi) as the standard piped oxygen distribution pressure. This device can be operated at these pressures but the flow readings on the flow meter must be corrected for the additional pressure.
10.0 TROUBLESHOOTING Problem: The flow does not reach 55LPM even with the flow valve wide open. Possible Cause: The pressure of your piped oxygen supply in your hospital may be low. Also check to see if the float in the flow meter is sticking. Tip the unit back and forth. Ball should roll freely. If it seems to stick or hesitate, return the unit to Maxtec for service. If you cannot detect the problem, contact the Maxtec Service Department by calling the number listed in this manual.