High Performance 32-Bit PCI Bus Ethernet Adapter With support for BNC and RJ45 connectors NX-32PCI USER'S GUIDE Part #MAN108 Rev. 1.
Contents Section Section Section Section Section Section Section Section Section One - Introduction ................................. 1 Two - Installation .................................. 1 Three - Driver Installation ..................... 8 Four - Using the Remote Boot ROM .. 10 Five - Troubleshooting ......................... 11 Six - Cable Information ....................... 12 Seven - Specifications ........................ 12 Eight - Technical Support ................... 13 Nine - Notices ..........
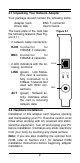
2.1 Unpacking Your Network Adapter Your package should contain the following items: Adapter Card Driver disk BNC T-connector User's Guide The back plate of the card has the following features (See Figure 2-1): Figure 2-1 • 2 network cable connectors: RJ45 Connector for 10BASE-T networks BNC Connector for 10BASE-2 networks • 2 LED indicators with the following functions: LINK ACT LINK (green) - Link Status. The card is successfully connected to a 10Base-T network. Not used with BNC connections.
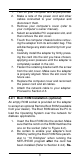
1. 2. 3. 4. 5. 6. 7. 8. 9. Turn off your computer and all peripherals. Make a note of the power cord and other cables connected to your computer and disconnect them. Remove your computer’s cover (refer to your computer’s owner manual). Select an available PCI expansion slot, and then remove the slot cover. Touch the computer chassis before removing the adapter from its anti-static bag. This will discharge any static electricity from your body.
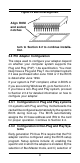
Figure 2-2 Boot ROM alignment Align ROM and socket notches turn to Section 2.2 to continue installation. 2.3 PCI Adapter Configuration The steps used to configure your adapter depend on whether your computer system supports the Plug and Play (PnP) 1.0a specification. You most likely have a Plug and Play 1.0a compliant system if it was purchased after June 1994 or if the BIOS is dated after June 1994. If your system is PnP compliant, either in BIOS or if you are running Windows 95, go to Section 2.3.1.
the IRQ. The procedures to perform PCI card setup on early generation PCI bus PCs and the related terms to describe each procedure vary depending on which BIOS your computer uses. Refer to your computer's manual for specific information on configuring PCI slots. As an example, generally an early generation Phoenix BIOS has a “Device Select” field where you should input the number of the slot (printed on the PC motherboard next to the PCI slot) into which the card was inserted.
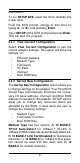
information. To run SETUP.EXE, insert the driver diskette into a disk drive. From the DOS prompt, change to that drive by typing A: (or B:) and pressing Enter. Type \SETUP at the DOS prompt and press Enter. This will start the program. 2.4.1 View Current Configuration Select View Current Configuration to see the current adapter settings. This option will show the settings for: • • • • • • Ethernet Address Medium Type Full Duplex I/O Base Interrupt Boot ROM Size 2.4.
The Full-Duplex Function should be enabled only if the server you are attached to and all interconnecting devices (e.g. switching hubs) support this mode. Boot ROM Size should only be set if a Boot ROM is present on the card. Enabling this setting allows remote booting from the server. Refer to Section 2.2.1 for more information on installing the Boot ROM. 2.4.
5. RAM Test: Checks on-board RAM. The Run Diagnostics on Network option allows the user to test the network cable connection between two cards. One card is setup as a Responder and a second card is setup as an Initiator. The Initiator and Responder will exchange packets and display the number of transmit and receive packets that have passed or failed. Note: A Responder can only recognize one Initiator at a time. 2.5 Configuration Files Two options are available in SETUP.
32-bit (PCI) adapter can only function with 32-bit versions of the EMM386.EXE memory manager program (version 4.49 or later). You can verify its version by entering EMM386 at the DOS prompt. Do not specify the “highscan” option with the EMM386.EXE statement in your CONFIG.SYS file or your system will hang. If you run MEMMAKER and select Custom Setup, do not specify “Aggressively scan upper memory,” or it will automatically insert the HIGHSCAN flag into the EMM386 command line.
tion for the adapter. Click “OK” to install the adapter. Windows 95 may request its own installation disks for some files. Insert the Windows 95 disks as required. When all necessary files are copied, the adapter is configured. Restart Windows 95 as prompted. 3.1.2 Windows 95 Release 4.00.950 B When Windows 95 starts for the first time after card installation, it detects the card and displays the Update Device Driver Wizard. Insert the driver disk into the disk drive and click “Next.
Section Five - Troubleshooting This section describes some of the common problems you may encounter while using your network adapter. When troubleshooting, you should make sure that the network you are connected to is functioning. If you suspect that the adapter is malfunctioning, replace it with another adapter which is known to function properly. Also try the adapter in another computer. This can indicate whether the adapter or computer causes the problem.
nators. If the terminators do not measure 50 ohms +/- 1%, replace the terminator. Measure the coaxial cable with a 50-ohm terminator attached to one end. The total resistance of the cable plus the terminator should be no more than a few ohms more than the terminator alone. Section Six - Cable Information The MaxTech NX-32PCI network adapters support both Coax and UTP cable schemes used in Ethernet networks. 10Base-T networks use unshielded twisted-pair cable and 8-pin RJ-45 modular connectors.
IRQ: Interrupt: RAM Buffer: Power Consumption: Temperature: BIOS/Operating System selectable. INT A 16 KB 2.5 W 0 to 50 degrees C (Operating) -20 to +70 degrees C (Storage) Humidity: 10% to 80% (Non-condensing, operating) 5% to 90% (Non-condensing, storage) Dimensions: 4.73" x 3.15" Certification: FCC Part 15 Class B Drivers: Artisoft Lantastic, Novell NetWare 3.x, 4.x, FTP PC/TCP, LAN Manager V2.x, Windows For Workgroups, Windows 95, Windows NT V3.1 & 3.5, DEC Pathworks V4.x & 5.
from the date of purchase. During the warranty period, MaxTech will repair (or at its option, replace) the product that proves to be defective, provided the product has not been abused, misused, modified, or repaired by an unauthorized center. In the event the product requires service, follow the procedure outlined in Section Eight - Technical Support.
lation. This equipment generates, uses and can radiate radio frequency energy, and if not installed and used in accordance with the instructions, may cause harmful interference to radio communications. However, there is no guarantee that interference will not occur in a particular installation.