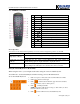
KGUARD Standalone DVR KG-SHA104/108 User Manual CONTENTS www.kguardsecurity.
KGUARD Standalone DVR KG-SHA104/108 User Manual CONTENTS SAFETY INSTRUCTIONS................................................................................................................. 1 CHAPTER 1. DVR FEATURES ......................................................................................................... 2 CHAPTER 2. LAYOUTT ................................................................................................................... 3 2.1. FRONT PANEL .................................
KGUARD Standalone DVR KG-SHA104/108 User Manual 5.2.5.3. Video Setup....................................................................................................................22 5.2.5.4. Language .......................................................................................................................22 5.2.5.5. Info ................................................................................................................................22 5.2.5.6. System Maintenance ...........
KGUARD Standalone DVR KG-SHA104/108 User Manual Safety Instructions 1. Use proper power source. Do not use this product with a power source that applies more than specified voltage (100-240V AC). 2. Never insert anything metallic into the DVR case. Putting something into the DVR case can be a source of dangerous electric shock. 3. Do not operate in wet & dusty area or use near water. Avoid places like a damp basement or dusty hallway. 4. Do not expose this product to rain or use near water.
KGUARD Standalone DVR KG-SHA104/108 User Manual Chapter 1. DVR Features Real time monitoring Supports real time surveillance via Monitor Save Recordings DVR saves real-time recording image to HDD Backup Recordings Supports DVR backup via USB flash drive and hard drive.
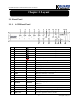
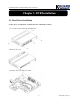
KGUARD Standalone DVR KG-SHA104/108 User Manual Chapter 2. Layoutt 2.1. Front Panel 2.1.1.
KGUARD Standalone DVR KG-SHA104/108 User Manual 2.1.2.
KGUARD Standalone DVR KG-SHA104/108 User Manual 2.2.
KGUARD Standalone DVR KG-SHA104/108 User Manual 2.3.
KGUARD Standalone DVR KG-SHA104/108 User Manual Chapter 3. DVR Installation 3.1. Hard Drive Installation Caution: Please do NOT install or uninstall hard drive while DVR is running! 1. Loosen the screws in the left and right sides. 2. Remove the cover 3. Connect data cord and power cable. 7 www.kguardsecurity.
KGUARD Standalone DVR KG-SHA104/108 User Manual 4. Install HDD on the bracket, fixed with screws firmly. 5. Check if the connectors are properly connected and there is no problem with wiring and close up cover, and fix it with screws. 3.2. Camera and Monitor Connection Connect camera cable to video input port of DVR, and from video output of DVR to Monitor via BNC connector or VGA port (refer to system figuration on Chapter 9.6).
KGUARD Standalone DVR KG-SHA104/108 User Manual Chapter 4. DVR Boot Up out 4.1. System Initialization After connecting the power adapter the system will boot-up and start initializing. 4.2. Main Interface After initialization, the system will display main interface. When there are video inputs, live images from the cameras will be displayed on screen.
KGUARD Standalone DVR KG-SHA104/108 User Manual Chapter 5. DVR Menu 5.1.
KGUARD Standalone DVR KG-SHA104/108 User Manual 5.2. Main Menu Press SEL button on the front panel or click the right button of mouse to display pop-up menu. Select MAIN MENU to enter main OSD menu. Press ▲, ▼, ◄, keys on front panel to move the cursor, then press SEL key to enter selected item. Or use you mouse to select and enter menu. Press ESC key or click right button of mouse to return to previous window Picture 5-2 5.2.1.
KGUARD Standalone DVR KG-SHA104/108 User Manual 5.2.1.2. Privacy Zone Setup Privacy zone function allows you to cover the private area, such as password input area on ATM machines. The covered areas will not be able to see in live view mode or in playback mode. You can select max. 4 privacy zones for each channel. 1. Select the No. of area (AREA1 – AREA4) you want to set 2. Press SETUP button to adjust the position of the privacy zones. 3.
KGUARD Standalone DVR KG-SHA104/108 User Manual 5.2.2. Record Setup Functions: CHANNEL: ON/OFF option decides to record or not. RESOLUTION: (4-CH only) decides the recording video resolution. About the definition of resolution, please refer to the specification chapter. 4-CH QUALITY: select recording video quality, higher quality will need more HDD space to save the video AUDIO REC.: DVR supports to record 1 channel audio signal.
KGUARD Standalone DVR KG-SHA104/108 User Manual You are able to config 24 hours recording schedule for every channel or all channel from Sunday to Saturday. Steps: 1. Select Channel 2. Select a recording status among ALARM, GENERAL and NO RECORD 3. Move the cursor to the time point you want to set, click on the box in the schedule time line that you want to apply the selected record type to. 4. If you want to change another recording status, repeat step 2 & step 3. 5.
KGUARD Standalone DVR KG-SHA104/108 User Manual Search All Recorded File: Press SEARCH button, system will search and show you the recorded status. RED color indicates ALARM recoding, GREEN color indicates continuous recording. You can click the time point to play back. For 4-CH DVR, system will play back all 4 channels at the same time. For 8-CH DVR, system can play back 1 channel only at the same time.
KGUARD Standalone DVR KG-SHA104/108 User Manual 3. Press BACKUP button on the menu. NOTE: Do not remove your USB device during making backup. Note: Backup files will be in H.264 format, you can play them with Netviewer program, or convert them to AVI format using the Netviewer program that comes with the DVR, so you can use any player that supports AVI format. (Introduced on Chapter 6) 5.2.4..
KGUARD Standalone DVR KG-SHA104/108 User Manual 5.2.4.1.1. HDD Format When a new HDD is installed into the DVR, the HDD status will show “NOT FORMATED”. You need to format the HDD otherwise the system cannot record. Warning: If you format a HDD which is being currently used, all data saved in the HDD will be lost! System will restart automatically after formatting the HDD. USB FORMAT: to format USB devices. 5.2.4.2.
KGUARD Standalone DVR KG-SHA104/108 User Manual Take GMAIL for example to demonstrate the email setting: 1. Set SSL to “On” via Gmail.com server, and set to “Off” via other mail server. 2. SMTP Port: indicates sender port of SMTP server. Generally the SMTP port value is 25, SMTP port of G-mail server is 465. 3. SMTP: smtp.gmail.com 4. SEND EMAIL: dvrtest@gmail.com 5. SEND PW: enter the login password of send email 6.
KGUARD Standalone DVR KG-SHA104/108 User Manual 5.2.4.3. Motion Detection Setup STATUS: This option allows you enable motion detection on the channels. SENSITIVITY: This option allows you to set sensitivity level of motion detection from 1 to 4 with 4 being the most sensitive. MD AREA (motion detection area): Click this button of the corresponding channel to select the area you want to have motion detection. The channel is separated into a 13*10 area.
KGUARD Standalone DVR KG-SHA104/108 User Manual Open auto cruise function on PTZ setting menu if you want to setup cruise function, and set up cruise channel, cruise point, total quantity and stop time (by second) etc. Channel: select the channel with the PTZ camera TOTAL: set up presetting bit (angle) quantity. Please refer to your camera’s manual for detail CUR POINT: System has default starting (current) cruise point as 01.
KGUARD Standalone DVR KG-SHA104/108 User Manual 5.2.5.2. Password This option allows you set the device ID for the DVR and set the system password if you want to use one. Click APPLY button to save the settings. When you have enabled Password by setting the option to “ON”, you can setup a user password and administrator password respectively. The password supports up to 6 characters. Click “APPLY” to save the settings. NOTE: Please write down your passwords and store in a safe location.
KGUARD Standalone DVR KG-SHA104/108 User Manual 5.2.5.3. Video Setup VGA RESOLUTION: select the VGA video output solution to match your VGA monitor from 800x600, 1024x768, 1280x1024, 1440x900 and 1920x1200. VIDEO SYSTEM: Select the TV system from PAL and NTSC 5.2.5.4. Language Select system OSD language. System need to restart in order to complete the language switch after you APPLY the change. 5.2.5.5. Info You can check the system information, including Device Type (model No.
KGUARD Standalone DVR KG-SHA104/108 User Manual 5.2.6. Network Setup Your DVR supports to be remotely accessed via network, so that you can remotely control the DVR for monitoring, recording, playing back or making backup. Prior to the remote access, you need to set the network configuration at MAIN MENU NETWORK interface. 5.2.6.1.
KGUARD Standalone DVR KG-SHA104/108 User Manual 5.2.6.2. Internet Access Setup Important Note: If you are using a DSL modem, the modem must be set to “bridge mode”. Note: Before the NETWORK configuration, it is strongly recommended that you perform the following tasks: 1. The DVR supports 3 common types of Internet Services: DHCP (Cable Modem), PPPoE (DSL Modem) and Static IP (Fiber Optics). Please check with your ISP (Internet Service Provider) what kind of service you are exactly using. 2.
KGUARD Standalone DVR KG-SHA104/108 User Manual If your ISP uses STATIC IP network, select STATCI network TYPE. 1. Input the PORT (media port) 2. Input the WEB PORT (Must be different from media PORT) 3. Enter the IP Address that you have reserved at the beginning of this section into this field to be the unique address of your DVR in your local network 4. NETMASK: It is recommended to leave the Subnet mask as the default 255.255.255.0. 5. Set the GATEWAY to the IP Address of your router. 6.
KGUARD Standalone DVR KG-SHA104/108 User Manual Chapter 6. Network Access There are 3 methods to remote access the DVR via network: Internet Explorer Browser (IE), Netviewer client software & Mobile phones. 6.1. IE & Netviewer Access You can use Netviewer client software & Internet Explorer (IE) 6.0 or newer version to remote access the DVR. 6.1.1.
KGUARD Standalone DVR KG-SHA104/108 User Manual Warning! It is strongly recommended to return all Internet Explorer Security to its default settings after the ActiveX Control has been installed. Enabling all ActiveX controls put your computer at risk of being attacked by computer virus. 6.1.2. Connect to DVR To connect to the DVR from a remote computer, you would then open an Internet Explorer browser window and enter the Internet IP of your router that you received by going to www.myipaddress.com.
KGUARD Standalone DVR KG-SHA104/108 User Manual 6.1.3. Control Network Access 6.1.3.1 Live 1. On / Off Live display [ ]: When the live display status is “On”, clicking the button to close live display. When the live display status is “Off”, clicking the button to open live display. 2. Capture [ ]: Capture Screen image and save to PC as *bmp image. 3. Recording [ ]: Operate DVR recording remotely 4.
KGUARD Standalone DVR KG-SHA104/108 User Manual 3. 4. Click CONVERT. File conversion begins. The progress bar indicates the status of the conversion. Click OK in the confirmation window. 6.1.3.5. Remote Backup You can backup recorded video files from DVR to your PC using the Replay menu in the remote surveillance software. To backup files remotely: 1. Click REPLAY at the top of the main screen. 2. Select a date on the calendar and click RELOAD. 3. Double-click a file from the File List to begin playback.
KGUARD Standalone DVR KG-SHA104/108 User Manual 6.1.3.8. Playback Local File with Netviewer Run the Netviewer software, you will see the OFFLINE button displayed on the Login interface. Press this button to enter local file playback mode. Press the ADD button to add backup H.264 files or folder saved in your computer, you will see the files will be listed in the queue window, select a file then press PLAYFILE button to play. 30 www.kguardsecurity.
KGUARD Standalone DVR KG-SHA104/108 User Manual 6.2.. Mobile Phones Access This function allows you to view 1 channel live image at the same time with your mobile phone. The DVR is currently compatible with mobile phones running Windows® Mobile, Symbian® S60 3rd/5th Edition operating systems, iPhones® and Blackberry® on GPRS and/or 3G networks. 6.2.1.. Mobile Setup Before you can view the live image from your DVR with compatible mobile phones, you need to set the settings first.
KGUARD Standalone DVR KG-SHA104/108 User Manual 3. Choose storage location and click “Install” to start the installation. 4. After installation finishes, click the icon named window mobile to run the program. This will display the program screen. 5. Click the “Setting” button to enter the Setting menu.
KGUARD Standalone DVR KG-SHA104/108 User Manual 6.2.1.2. Install & Operate Mobile Client in Symbian® Phones 1. Install the webcam program that is included on the supplied CD by copying the “Symban_3.0.sisx” (Symbian 3.0 version) or “Symbian_5.0.sis” (Symbian 5.0 version) file to the mobile phone. You can do this by attaching the mobile phone to a computer and copying the file from the CD to the phone. 2. Select the Symbian_3.0/Symbian_5.0 icon in this window to install it. 3.
KGUARD Standalone DVR KG-SHA104/108 User Manual 6. Click “Continue” and wait for the program to install. 5. Once the installation is complete, go to the Applications folder and select the “Symbian_5.0” program, and click “Open” to display the settings menu. Default Access Point: :Input the access point. System default for the access point is GPRS connection. Server Address: DVR’s public IP address or DDNS domain name Server Port: :Same as the Server Port you set in the DVR under section 5.2.10.4.
KGUARD Standalone DVR KG-SHA104/108 User Manual 6.2.1.3. Install & Operate Mobile Client in iPhone® Step 1: Download iTunes Visit Apple website http://www.apple.com/itunes/ to download & install the iTunes. Step 2: Download & install surveillance software “Aplayer” 2.1 Register iTunes Store 2.1.1 Run the installed iTunes, you might need to create an account to visit iTunes store firstly. Move to the menu “Store”, and click the option “Create Account”. 2.1.2 Continue 35 www.kguardsecurity.
KGUARD Standalone DVR KG-SHA104/108 User Manual 2.1.3 Select & continue 2.1.4 Fill in your personal info & continue. Please note that the options of Payment Method are different from different regions, please select another payment method. Don’t worry, “Aplayer” is free software & you don’t need to pay for it. 2.1.5 Finished the register, and go to your email box to verify your account. ** 36 www.kguardsecurity.
KGUARD Standalone DVR KG-SHA104/108 User Manual Click the link included in the email message. It will connect to the iTunes store and turn to iTunes interface. Sign in your account. The register of your iTunes store account has been done. 37 www.kguardsecurity.
KGUARD Standalone DVR KG-SHA104/108 User Manual 2.2 Authorize Computer You need to authorize your computer with the registered ID. Move to the menu “Store”, and click the option “Authorize Computer”. Input your registered ID & password, then click Authorize button. 2.3 Download & install “Aplayer” into your iPhone 2.3.1 Click iTunes Store(1), then input “aplayer” into the search bar(2) on the right upper corner and press Enter. 2 1 You will find the Aplayer icon displayed as below. 38 www.
KGUARD Standalone DVR KG-SHA104/108 User Manual 2.3.2 Click the icon and it will turn to the download page. Click the “GET APP” button to download the file. You will find the downloaded file on the directory of Application 2.3.3 Connect your iPhone to the computer, you will find your Device displayed on the left sidebar. Select the DEVICES ID(1), and then click “Applications” option(2). Select the “Sync Applications” & “Aplayer” (3) and then click “Sync” button(4). 2 3 4 1 39 www.kguardsecurity.
KGUARD Standalone DVR KG-SHA104/108 User Manual The devices ID is different from different iPhones. After finishing the sync, you will find the Aplayer Icon on your iPhone Step 3: Setup & run “Aplayer” Main interface of Aplayer & function keys: Ⅰ. Direction keys of PTZ control Ⅱ. Zoom+ & ZoomⅢ. Focus+ & FocusⅣ. Iris+ & IrisⅤ. Channel selection keys Ⅵ. Play & Pause Ⅶ. Snapshot Ⅷ. Full screen Ⅸ. Next group of channels Ⅹ. Setup Ⅰ Ⅵ ⅡⅢⅣ Ⅶ Ⅷ Ⅸ Ⅴ Ⅹ 3.
KGUARD Standalone DVR KG-SHA104/108 User Manual 6.2.1.4. Blackberry Handheld Application Installation Guide 1. 2. 3. 4. Install the Blackberry desktop manager on the computer; Connect the handheld to computer using the USB port; Open the Blackberry desktop manager; Select the [Application Loader] item in the main menu; 5. Click the start button on the [Add / Remove Application] side; 41 www.kguardsecurity.
KGUARD Standalone DVR KG-SHA104/108 User Manual 6. Browse and open the [*.alx] file then click [Next]; 7. Just click the [Finish] button to complete the installation. 42 www.kguardsecurity.
KGUARD Standalone DVR KG-SHA104/108 User Manual The startup shortcuts are usually located in the Downloads directory. Main screen of the application. 43 www.kguardsecurity.
KGUARD Standalone DVR KG-SHA104/108 User Manual Chapter 7. Specifications Model KG-SHA104 ( 4CH ) Video Compression H.
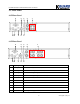
KGUARD Standalone DVR KG-SHA104/108 User Manual Chapter 8. System connection Configuration 4Channel DVR 45 www.kguardsecurity.
KGUARD Standalone DVR KG-SHA104/108 User Manual 8Channel DVR 46 www.kguardsecurity.
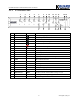
KGUARD Standalone DVR KG-SHA104/108 User Manual Chapter 9. Appendix 9.1 Operation Function Table Type Title Setting system date, time and format and day-light saving time setting 20 Language Select Setting system language 22 Setting CH title and position; adjusting image color parameter value; setting CH display to 11 Setting Network Setting Network Function Auxiliary function Menu button ON / Off and time display/recording time overlaying to On/Off. Rec.
KGUARD Standalone DVR KG-SHA104/108 User Manual 9.2. Recording Alarm setting Please refer the below matrix: “⊥” stand for “only alarm but no recording”; “AMR” stand for “alarm recording”; “NLR” stand for “normal recording”; and “NOR” stand for “ no recording”. Once alarm is triggered, alarm icon will occur, and when many alarms are triggered, alarm remarks will occur on the screen.
KGUARD Standalone DVR KG-SHA104/108 User Manual 9.4. Email server check list(The below info only for your ref.) (Web site) www.yahoo.com www.google.com Email address Sender server(25) Receiver server(110) @yahoo.com.tw smtp.mail.yahoo.com.tw pop.mail.yahoo.com.tw @yahoo.com smtp.mail.yahoo.com pop.mail.yahoo.com @gmail.com smtp.gmail.com(465/587) pop.gmail.com(995) List 9-3 9.5. Usage Maintenance 1. 2. 3. 4. 5. Please make sure DVR keep away from heating source.
KGUARD Standalone DVR KG-SHA104/108 User Manual 9.7. HDD Device Support List Brand Seagate WD Maxtor Hitachi Samsung SHA Series – SATA HDD Support Suggestion Model No. Note Capacity 80G ST380815AS 160G ST3160815SV ST3250310SV ST3250410AS 250G ST3250312CS ST3250310SV 320G ST3320410SV ST3500312CS ST3500320AS Special design for Standalone DVR. 500G ST3500320SV ST3500320NS Special design for Standalone DVR. ST3500410SV 750G ST3750330SV 1T ST31000322CS 1T ST31000340NS Special design for Standalone DVR.
KGUARD Standalone DVR KG-SHA104/108 User Manual 160G 500G 9.8. HD161HJ HD501IJ/CNG 3G Cell Phone Support List 3G Cell phone Support Suggestion Brand Nokia Motorola Sony Ericsson Samsung HTC Apple Blackberry Model No. N70 N73 N95 E65 V3x E770 SE K600i SE k700i SE 700i SE 800i Z610i SGH 400 TyTNII CHT9000 iPhone 9000 9530 9630 Note PDA Phone 51 www.kguardsecurity.
KGUARD Standalone DVR KG-SHA104/108 User Manual The material in this document is the intellectual property of our department . No part of this manual may be reproduced, copied, translated, transmitted, or published in any form or by any means without our department prior written permission. Our products are under continual improvement and we reserve the right to make changes without notice. But no guarantee is given as to the correctness of its contents.