I n s t a l l at i o n G u i d e Getting Started with MaxAttach NAS 6000 Rack Mount Base Unit Systems
MaxAttach NAS 6000 Getting Started MaxAttach NAS 6000 Getting Started Document Revision Information Document Title: Getting Started with MaxAttach NAS 6000 Rack Mount Base Unit Systems Part Number: 000001630 Corporation: Maxtor Corporation Product Name: MaxAttach NAS 6000 Operating System: Microsoft Windows-Powered Max Operating System Version 2.0 O/S Name Revision: Max O/S 2.0 Manual Release Date: 10/16/01 Manual Revision: Revision 2.0.
MaxAttach NAS 6000 Getting Started with Base Only Systems System Applicability Use this document for MaxAttach NAS 6000 rack-mountable Base Unit only systems. For more information, see: n Getting Started for MaxAttach NAS 6000 Base Unit Only Systems - PN: 000001630, or n Chapter #3 - Getting Started for Base Only Systems in the MaxAttach NAS 6000 Installation and Configuration Guide - PN: 000001577.
MaxAttach NAS 6000 Getting Started Getting Started with Base Only Systems Documents for Other MaxAttach NAS 6000 Systems n Default Disk Array Configuration for MaxAttach NAS 6000 Expansion Units n Chapter #7 - Getting Started with Disk Array Default Configuration in the Maxtor MaxAttach NAS 6000 Installation and Configuration Guide. Thank You Thank you for purchasing this MaxAttach NAS 6000. The MaxAttach comes with the Microsoft Windows-Powered Max Operating System Version 2.0 installed.
MaxAttach NAS 6000 Getting Started Getting Started with Base Only Systems 2: Required Installation Environment n Electronic system documentation (all as Adobe Acrobat PDF files unless otherwise noted) consisting of: • Quick Start Card for MaxAttach NAS 6000 • Getting Started for MaxAttach NAS 6000 Cabinet Systems • Getting Started for MaxAttach NAS 6000 Rack Mount Base Only Systems • Getting Started for MaxAttach NAS 6000 Rack Mount Base Plus Systems • Getting Started for 48” Cabinet Rack Systems • Gettin
MaxAttach NAS 6000 Getting Started Getting Started with Base Only Systems 4: Record Unit Information n Rack A standard 19” rack with at least 4U of space for the Base Unit. If the addition of Expansion Units is anticipated, leave an additional 4U above the Base Unit for each Expansion Unit, up to a total of 8U empty for future needs. n Floor fastening hardware. n Earthquake hardware or similar securing systems. AC Power Strips or Power Blocks n Two AC Power Strip with at least three connectors per strip.
MaxAttach NAS 6000 Getting Started Getting Started with Base Only Systems 5: Rack Mount Your Maxtor MaxAttach NAS 6000 Base Unit For more information, see Re-Seat All Hard Disk Drive Carrier Assemblies on page 7. 5: Rack Mount Your Maxtor MaxAttach NAS 6000 Base Unit In this procedure, you will install your rack, install the MaxAttach NAS 6000 Base Unit, install a necessary EMU cable, and connect the Base Unit Power Cords to the user-supplied power strips. 1.
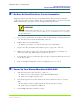
MaxAttach NAS 6000 Getting Started Getting Started with Base Only Systems 7: Connect Network Cables and AC Power Cords 7: Connect Network Cables and AC Power Cords In this section, you will connect your NICs to your network with user-supplied NIC cables. You will also connect the AC power cords to the equipment shelves and connect them to user-supplied AC power strips. Network Connections 1. Connect the appropriate NIC cables. n Between each NIC and the network.
MaxAttach NAS 6000 Getting Started Getting Started with Base Only Systems 8: Re-Seat All Hard Disk Drive Carrier Assemblies 8: Re-Seat All Hard Disk Drive Carrier Assemblies Shipping vibration may have disconnected individual hard drives from their back plane connectors. One drive at a time, pull the drive out of its Drive Bay, record its size and serial number information, and replace it in its as-shipped Drive Bay location.
MaxAttach NAS 6000 Getting Started Getting Started with Base Only Systems 9: Power Up Your Maxtor MaxAttach NAS 6000 n n n n n Green System Status LEDs: When fully booted, the system power-on (middle) LED will be green. Blue System Error Status LED: The blue upper system status and the lower drive status LEDs should be dark. Green Drive Activity LEDs: The green disk drive activity LEDs will indicate when the system has reached a steady status.
MaxAttach NAS 6000 Getting Started Getting Started with Base Only Systems 10: Install MaxNeighborhood Discovery and Setup Wizard 10: Install MaxNeighborhood Discovery and Setup Wizard Install the MaxNeighborhood Discovery and Setup Wizard, find your new MaxAttach NAS 6000, and begin its initial configuration. 1. Insert the CD labeled MaxAttach NAS 6000 Installation and Documentation CD into your CD-ROM drive. Figure #1 MaxNeighborhood Discovery Wizard Starting Page n 2.
MaxAttach NAS 6000 Getting Started Getting Started with Base Only Systems 11: Find Your MaxAttach NAS 6000 on the Network 11: 1. Find Your MaxAttach NAS 6000 on the Network As the installation process concludes, select the check box to launch MaxNeighborhood, and then click on the FINISH button. Figure #2 MaxNeighborhood Searching Screen n n 2. A MaxNeighborhood window will appear with a “SEARCHING, Please Wait...” message.
MaxAttach NAS 6000 Getting Started Getting Started with Base Only Systems 13: Modifying Default Network Settings in Non-DHCP Service 2. If a DHCP server is not running on your network, or you want to manually assign the IP address, skip ahead to Step #13 - Modifying Default Network Settings in Non-DHCP Service on page 11 below. NOTE Network and server administration best practices recommend assigning a fixed IP address to a Maxtor MaxAttach NAS 6000.
MaxAttach NAS 6000 Getting Started Getting Started with Base Only Systems 14: First Log On From MaxNeighborhood Discovery and Setup Wizard Figure #5 MaxNeighborhoor Change Setting Screen with DHCP Disabled 4. Delete the default IP Address and enter your unique address, subnet mask, and gateway (if applicable). 5. Optionally, you can also change the default computer name MaxAttach Server Name with any combination of alpha-numeric characters (without spaces). 6.
MaxAttach NAS 6000 Getting Started Getting Started with Base Only Systems 15: Complete the O/S First Time Setup Wizard n n 3. 15: A Status Screen will appear. Select the “Administer this server appliance.” link. A second identical login will be required. Complete the O/S First Time Setup Wizard The O/S First Time Setup Wizard will help you set the date and time, assign the administrator password, setup E-mail alert notifications, and assign a name for your MaxAttach.
MaxAttach NAS 6000 Getting Started Getting Started with Base Only Systems 16: Next Steps • • n 6. 16: A full reboot takes about 4.5 minutes to complete. Once rebooted, your MaxAttach NAS 6000 server is ready for use or additional administration and configuration. If you did not change the server appliance name (host name), the DNS suffix, the workgroup or domain membership, nor the workgroup or domain name, a reboot restart is not required.