EXTERNAL HARD DRIVE Maxtor OneTouch II TM User's Guide P/N:20259600 i
Contents 1 Introduction . . . . . . . . . . . . . . . . . . . . . . . . . . . . . . . . . . . . . . . . . . . . . . . . . Maxtor OneTouch™ II Drive Components . . . . . . . . . . . . . . . . . . . . . . . . . . . . System Requirements . . . . . . . . . . . . . . . . . . . . . . . . . . . . . . . . . . . . . . . Handling Precautions . . . . . . . . . . . . . . . . . . . . . . . . . . . . . . . . . . . . . . . . About this Guide . . . . . . . . . . . . . . . . . . . . . . . . . . . . . . . . . . . . . . . . .
1 Introduction Thank you for selecting a Maxtor product. TM Your Maxtor OneTouch II drive is an external hard drive that allows you to add storage to your computer to hold and organize your documents, videos, music, photos, graphics, and more. You can also use your new drive to make copies of critical files as a part of your overall backup solution. By using the Maxtor OneTouch feature, your drive can create and store a copy of your important files with the touch of a button.
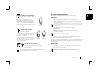
1 Maxtor OneTouch II drive Components Included in this Kit Before installing your new drive, review the features shown in Figure 1. The Maxtor OneTouch II drive comes complete with the components shown in Figure 2. Familiarize yourself with each of these items prior to installation. Refer to the capacity label on the front of the box of your Maxtor OneTouch II drive to determine which model you have.
System Requirements FireWire model includes: 1 The following are the minimum system requirements. 6-pin to 6-pin FireWire cable Windows • Pentium III, 500 Mhz equivalent processor or higher Many laptop computers, have a smaller 4-pin FireWire port requiring a special 4-pin to 6-pin FireWire cable. This is not included, but is available for purchase at: http://www.maxstore.com • Windows® 98SE, Me, 2000 Professional, or XP Professional or XP Home Edition.
• OS 9: 64 MB RAM or more as required by the operating system. 1 • OS X: 128 MB RAM or more as required by operating system. • CD-ROM drive • Available FireWire or USB 1.1 or 2.0 port depending on model About this Guide The following symbols and conventions are used in this guide: Bold Used for menu, command, and keyboard selections you make and screens you will see. Italics Used for emphasis and to identify new terms, which may also be defined in the Glossary.
Dantz Support Contact Dantz Development Corporation for help with Retrospect Express software, making copies with Maxtor OneTouch, or for restoring files. 1 Dantz provides 1 free incident of installation support 30 days following the date of purchase (proof of purchase may be required). Dantz also has a comprehensive support section on its web site, including the latest software downloads, Knowledge Base (answers to common questions and problems), hardware compatibility and contact information.
2 Installing Your Drive 2 In this chapter you will install your Maxtor OneTouch™ II drive, the Dantz Retrospect Express backup software, and activate the Maxtor OneTouch button for simple backups of your valuable data anytime you need them. To ensure a successful installation, follow the steps outlined below. Please do not connect the drive to your computer until after you have installed the software.
Windows 2000 and XP The Main Menu will appear next. 4. Select Install Software. Step 1. Install the Software If you receive a message that you do not have sufficient privileges to complete the installation, You may not have the Administrative Privileges required to install the software. 2 The Install Software screen will appear. 5. Select Full Installation or Install Drivers. (Full Installation is recommended.) It may take a few seconds for the next screen to appear.
In the Destination Folder section of the screen, you can see where the Maxtor software will be installed. If you wish to change this, click Browse and choose a new location. 9. When you are ready, click Next. The Select Program Folder screen will appear. You can see the name of the Maxtor program folder and where it will appear in the Windows Start menu. You can make changes to these settings, if you need to. 10. When you are ready, click Next.
18. If you’re ready to install the Retrospect software, click Install. After the software is installed on your computer, the message “InstallShield Wizard Completed” will appear. 2 19. Click the Finish button. If a message appears asking you to restart, follow the on-screen directions to restart your computer. The Welcome to Maxtor OneTouch Setup screen will appear and a Maxtor OneTouch shortcut icon will appear on your desktop. 20. Please remove the Maxtor Install CD from your computer. Step 2.
FireWire, proceed to “Connecting with the FireWire Cable” on page 11. Connecting with the USB Cable If you have a Maxtor OneTouch II drive with both USB and FireWire interfaces, do not plug a USB cable into the drive when a FireWire cable is already connected to the drive. The drive only operates with one interface at a time. 3. If the Welcome to Maxtor OneTouch Setup screen is still visible, click Cancel to close it. Your computer may require a restart to complete the hardware installation.
If you have already registered, click Already Registered. In order to register, you must be connected to the internet. 1 By registering , you will have the option of receiving product updates, special offers, and important information about other data storage solutions from Maxtor. 2 Once you’ve made your selection, the Retrospect welcome screen will appear. This screen displays the automatic backup settings for your computer.
A ‘Found New Hardware’ message will appear briefly at the bottom of the screen once your drive is recognized by your computer. 6. To register immediately, enter your information in the registration form provided and click Register. If you do not wish to register at this time, click Register Later. 3. If the Welcome to Maxtor OneTouch Setup screen is still visible, click Cancel to close it. If you have already registered, click Already Registered.
2 You can back up manually, at any time, by pressing the button on the front of your drive and clicking Back up now. Windows 98SE and ME Your hardware and software installation is now complete. See “Using Your Drive” on page 38 in chapter 3, for information about using your drive for common applications and using Retrospect Express HD. Step 1. Install the Software Internet Explorer 5.01, or later, must be installed. 1. Turn on your computer 2. Insert the Maxtor Installation CD into your CD-ROM drive.
If a message appears asking you to restart, follow the on-screen directions to restart your computer. (Please do not eject the Installer CD.) Once your computer restarts, the InstallShield welcome screen will open. The Setup Status window will appear briefly, and then the installation will begin. 12. When the installation completes, the InstallShield Wizard Complete window should appear. 2 13. Click Finish. 6. Click Next. The License Agreement screen will appear. 7.
If the Welcome to Maxtor OneTouch Setup screen appears, click Cancel to close it. A message will appear asking you to restart your computer. 22. Click Yes. 16. Click Next. 2 The License Agreement screen will appear. 17. After reading the agreement, select “I accept..” and click Next. The Customer Information screen will appear. 18. Fill in your information and click Next. The Setup Type screen will appear. 19. Choose the Recommended option to install all of the Retrospect Software (recommended).
Step 2. Connect the Drive The Maxtor OneTouch II drive connects to your computer using either a FireWire or USB interface. Make sure you know which interface is available on your drive and on your computer. Please Install the software BEFORE you connect the drive. Connecting the Power 1. Plug the round female connector from the power adapter into the drive’s power connector. 2. Plug the two-pin female connector on the power cord into the power adapter. 5.
Once you’ve made your selection, the Retrospect welcome screen will appear. Your may be required you to restart your computer to complete the hardware installation. This screen displays the automatic backup settings for your computer. Retrospect Express HD will back up all the files on your computer to your Maxtor OneTouch II drive, every day at 10 PM. 3. If the Welcome to Maxtor OneTouch Setup screen is still visible, click Cancel to close it.
Connecting with the FireWire Cable Do not plug a FireWire cable into the drive when a USB cable is already connected to the drive. The drive only operates with one interface at a time. For more information about the FireWire interface, go to: http://www.1394ta.org. If you are using Windows ME, please move on to the next section: ‘To Connect the FireWire Cable’ Windows 98SE Only: Make sure you have first installed the Windows 98SE 1394 Storage Supplement.
The Retrospect registration screen will appear. 5. To register immediately, enter your information in the registration form provided and click Register. If you do not wish to register at this time, click Register Later. 2 If you have already registered, click Already Registered. FireWire Ports In order to register, you must be connected to the internet.
You can back up manually, at any time, by pressing the button on your drive. Your hardware and software installation is now complete. See “Using Your Drive” on page 38 in chapter 3, for information about using your drive for common applications and using Retrospect to make and restore copies of your of your important files. Macintosh OS X Step 1.
1. Turn on your computer. 2. Insert the Maxtor Installation CD into your CD-ROM drive. 2 After a few seconds, the Install CD should appear on your Macintosh’s desktop. 10. This screen allows you to specify what type of installation you want and where. It is automatically set up to do a Full Installation (recommended) into the Applications folder on your Macintosh. 3. Open the Install CD Icon.
Step 2. Connect the Drive The Maxtor OneTouch II drive connects to your computer using either a FireWire or USB interface. Make sure you know which interface is available on your drive and on your computer. Please install the software BEFORE you connect the drive. Connecting the Power 1. Plug the round female connector from the power adapter into the drive’s power connector. 2. Plug the two-pin female connector on the power cord into the power adapter.
3. Depending on the size of your drive and version of OS X, your next step will vary. Find your version of OS X in the table below to determine your next step. Table 1: Capacity Under 137 GB 2 OS Version Message OS X 10.1 Message appears saying OS X is unable to read volume. Go to Step 4. OS X 10.2 Drive mounts as “Untitled Volume.” Open the Apple Disk Utility located in the Utilities folder within the Applications folder on your Macintosh and proceed to Step 5. OS X 10.
Make sure you select your new drive. This utility will erase all data on your drive. 8. Enter a name for your drive in the Name field. 9. Select the check box next to Install Mac OS 9 Drivers. A description of the drive appears in the window. This will allow your disk to be recognized if you start your system in Mac OS 9. (If you will never use this drive with OS 9, you can leave this unchecked). 10. Click Erase to continue. Figure 8.
Connecting with the FireWire Cable 2 Do not plug a FireWire cable into the drive when a USB cable is already connected to the drive. This drive will only operate with one interface at a time. For more information about the FireWire interface, go to: http://www.1394ta.org. 3. Find your version of OS X in the table below to determine your next step. Table 3: Capacity Under 137 GB OS Version Message Your next step OS X 10.1 Message appears saying OS X is unable to read volume. Go to Step 4. OS X 10.
Table 4: Capacity Over 137 GB Drive doesn’t appear on the Desktop. OS X 10.2 OS X 10.3 Drive mounts as “Untitled Volume.” A description of the drive appears in the window. Open the Apple Disk Utility located in the Utilities folder within the Applications folder on your Macintosh and proceed to Step 5. 2 Open the Apple Disk Utility located in the Utilities folder within the Applications folder on your Macintosh and proceed to Step 5.
9. Select the check box next to Install Mac OS 9 Drivers. This will allow your disk to be recognized if you start your system in Mac OS 9. (If you will never use this drive with OS 9, you can leave this unchecked). 2 10. Click Erase to continue. Setting Up Bootable Backup with the OneTouch Button The following steps will provide you with a complete bootable backup of your Macintosh computer. Bootable backup works with FireWire only. The Erase Disk window appears to confirm the Erase process. 11.
The following step will erase everything that currently exists on your Maxtor OneTouch II drive. Check your drive carefully to make sure there are no files on it you wish to keep. 4. Click on the Volume Scheme pull-down menu and select two partitions. 5. Select the first partition in this list and type in the capacity of your system drive (you checked in step #1 above) to the Size field. In the Name field, enter the name Maxtor Bootable Backup. 6.
Once you’ve made your selection, Retrospect Express will open and the Maxtor OneTouch Setup screen will appear. 5. Click Next. 2 The Step 1 screen will appear. 6. Select the hard drive where your operating system is installed and click Next. The Step 2 screen will appear. 7. Choose All Files, bootable backup copy and click Next. The Step 3 screen is displayed. 8. Select the Maxtor OneTouch II drive as the location to store an exact copy of all your computer’s files.
Macintosh OS 9 Step 1. Install the Software 1. Turn on your computer 2. Insert the Maxtor Installation CD into your CD-ROM drive. After a few seconds, the Maxtor CD should appear on your Macintosh desktop. pop-up menu, as well as change the location of the installation using the Install Location menu at the bottom of the screen. 8. When you are ready, click Install. The installation will begin. When the installation finishes, the Installation was successful window should appear, asking you to restart. 9.
Step 2. Connect the Drive The Maxtor OneTouch II drive connects to your computer using either a FireWire or USB interface. Make sure you know which interface is available on your drive and on your computer. 2 Please install the software BEFORE you connect the drive. Connecting the Power 1. Plug the round female connector from the power adapter into the drive’s power connector. 2. Plug the two-pin female connector on the power cord into the power adapter.
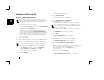
To connect the USB cable 1. Plug the larger end of the USB cable into any available USB port on your computer. This USB logo ™ may help you identify a USB port. 3. Enter a Name for your drive and select Mac OS Extended from the Format drop-down menu. 4. Click Initialize. A window will open that says: ‘Initializing will erase all information on this disk.’ 2. Plug the smaller end of the USB cable into the USB connection on the drive. 2 5. Click Continue.
Connecting with the FireWire Cable 2 Do not plug a FireWire cable into the drive when a USB cable is already connected to the drive. This drive will only operate with one interface at a time. For more information about the FireWire interface, go to http://www.1394ta.org. Before you connect To connect the FireWire Cable 1. Plug one end of the FireWire cable into any available FireWire port on your computer or any other FireWire device that is connected to your computer. 2.
3. Enter a Name for your drive and select Mac OS Extended from the Format drop-down menu. If you’d like to learn how to set up OneTouch button for backing up your files at the touch of a button, see “Setting Up the Maxtor OneTouch Feature” on page 46 in chapter 3. 4. Click Initialize. A window will open that says: ‘Initializing will erase all information on this disk.
Backing Up Your Computer To backup your entire Macintosh including the operating system, use the following steps: You cannot run Retrospect Express under OS 9 to create system backups of OS X. You must run Retrospect Express under OS X to back up an OS X system. 2 1. Open Retrospect Express The Retrospect Express Directory window will open. 2. Click the Automate tab. The Scripted Retrospect operations section will appear. 3. Click EasyScript. The ‘Welcome to EasyScript’ window will appear. 4.
Doing your first backup 1. Open Retrospect Express (if not already open). The Retrospect Express Directory window will open. This is a reminder to make sure that the drive you plan to use for the next backup (your Maxtor OneTouch II drive) is connected to your computer and ready. If you are not sure, you can click the Check Media button to have Retrospect check for you. 2 2. Click the Run drop-down menu at the top of the screen and select EasyScript Backup. The EasyScript Backup window will appear. 3.
Installing Drivers Only To Install Retrospect at a Later Time This section describes how to install your new drive without installing Retrospect software. If you wish to install a complete copy of Retrospect software and the Maxtor OneTouch feature at a later time, you can do so by following the original installation instructions provided in “Installing Your Drive” on page 6 of this chapter. 2 The Maxtor OneTouch button feature will not function if you choose to install under this option.
3 Using Your Drive Once installed, you can use your new Maxtor OneTouch II drive in the same way you use the other drives on your computer. Some of the basic ways you can use your new drive are: • Move or copy files or folders from your other drives, CDROMs, or other storage devices. • Within virtually any application, save files to and open files from the new drive. • Store video files, games, spreadsheets, and other commonly used files.
Connecting and Disconnecting the Drive The FireWire and USB interfaces allow you to hot swap your Maxtor OneTouch II drive; that is, connect and disconnect the drive while the computer and your drive are turned on. To connect the drive to a Windows computer 1. Make sure the drive is turned on and that both blue lights are illuminated. 3 2. Plug the FireWire or USB cable into the drive and your computer.
Using Large Capacity Drives with Windows When using Windows with drives that have capacities higher than 64 GB, there are special considerations. Table 2 gives some information about how the Windows file systems and certain Microsoft utilities behave when used on drives with capacities greater than 64 GB. Table 2: Considerations for drive capacities greater than 64 GB Windows 98SE Windows Me FAT32 and NTFS FAT32 operates properly with partition < 127 GB.
Naming Your Maxtor OneTouch II Drive Your new untitled drive appears in the same way as your other drives, with a new drive letter assigned by the operating system. The assigned letter will vary depending upon the number of other drives connected to your computer. Make a mental note of this drive letter. It¹s a good idea to name your new drive, so that is easy identify later when you use it for backing up your files. 3 To name your drive: 1. Open your My Computer icon (where your other drives appear.) 2.
Opening Retrospect Express HD You can open Retrospect Express HD from either the Start Menu: • Start >Programs >Dantz >Retrospect Express HD From the System Tray: • Right-click the red Retrospect Express HD icon: OR • Open Retrospect Express HD and click Back up now. Revising Your Backup Settings 1. Open Retrospect Express HD. 2. The Welcome Screen will appear. It should identify when the next scheduled backup is to take place. Click Setup to make changes to your backup. 3 3.
3. Select a restore point from which you wish to recover your data and click Next. Retrospect Express HD will now scan your computer. 4. Place a check in each box containing data you wish to restore 5. Use the search field to find specific files (e.g., music files, Word documents, etc.) 3 6. Click Next. You will now be asked where you wish to restore your files to. You have two options: •Their original location •The following location 7. Make your choice and click Restore.
Viewing Restore Point Logs Creating Retrospect Express HD Duplicates There may be times that you want to see what may be causing problems with various restore points. You can accomplish this through viewing a restore point log. A duplicate saves the most recent version of files, in their original format, and overwrites the previous version. The following steps will show you how to create a duplicate. 1. Open Retrospect Express HD.
4. Make your choice and click Next. 2. Double-click on the Retrospect Duplicates folder You will then be prompted to select a disk where you wish to store your duplicate files. 5. Check the appropriate box associated with your Maxtor OneTouch II drive (or whichever drive you wish to back up to) and click Finish. The welcome screen will appear where your duplicate settings are displayed. 3 6. Click Duplicate now to start the first duplicate backup.
By registering1 your new drive, you will have the option of receiving product updates, special offers, and important information about other data storage solutions from Maxtor. Macintosh OS 9 Setting Up the Maxtor OneTouch Feature You can set up the Maxtor OneTouch feature to automatically make a backup copy of your selected files each time you press the OneTouch button. 4. Retrospect Express will open and the Maxtor OneTouch Setup screen will appear. Click Next.
5. Select the drive to copy your files from and click Next. The Step 2 screen will appear. 6. Choose the type of files to copy: Just Documents copies only documents you have created including your favorite files, bookmarks, and cookies. This selection is ideal for most users. 3 Applications and Documents copies application files in addition to documents. This selection allows you to restore an application file if it has become damaged.
Using Retrospect Express Can I customize the Maxtor OneTouch Backup? Macintosh Yes. Using Retrospect Express, you can customize OneTouch backup in a variety of ways. The default type is a duplicate backup You can even customize how the duplicate replaces files on the destination drive. Your Maxtor OneTouch II drive includes a full copy of the Dantz Retrospect Express software. It includes many powerful and convenient features.
Archiving files Archive is another type of backup you can do with Retrospect Express. Note that using this function will permanently remove files from the source drive and place them on the destination drive. If your destination drive is lost or damaged, you will have lost your only copy of these files. 3. Drag the file or group of files you wish to restore to the desired folder as you would to move or copy any other file.
Adding Maxtor OneTouch Advanced Features You can further customize your Maxtor OneTouch script with advanced features from Retrospect Express. To learn more about these advanced features, use the Express User’s Guide in the Retrospect Express Folder on your Macintosh. If is not installed on your computer, you can access it on the Maxtor installation CD. Retrospect User guide Use the Express User’s Guide in the Retrospect Express folder on your Macintosh.
operating system, this product will only support the restoration of user files and does not support under those circumstances restoration of the Operating System, drivers, applications or settings.
5. Click Restore The next window displays a calendar with a listing of all your restore points. 6. Select the date that contains the restore point you wish to restore from. 7. Click the restore point you wish to restore from. If your system restore was successful, you can exit Retrospect. 13. Click the red ‘X’ in the upper right corner of the window. 14. Restart your computer. Your system may require more than one restart.
Restoring your complete system Macintosh OS 9 3 Before you begin, you must format your system hard drive and install your operating system. If you had multiple partitions on your hard drive(s), you must create and format the same number of disk partitions. These partitions must be of equal or greater size to what they were on your original system. For information on how to partition and format your system drive, see the Maxtor Knowledgebase online at: http://www.maxtorkb.com.
9. Click OK. The Destination Selection window will now appear, asking you to choose a ‘Destination for restore.’ Make sure Restore Entire Disk is selected. and select the drive that you want to restore your system to (your Macintosh hard drive where the system was originally installed). Retrospect will begin to restore your system. This process may take several minutes. When Retrospect Express finishes, you should see the message: ‘Execution completed successfully.
Using the Maxtor OneTouch Settings Your Maxtor OneTouch II drive includes a utility that allows you to: • Find out more information about your drive • Customize your OneTouch button to open a different application or file 3 your drive, adjust power settings, customize the OneTouch button, run diagnostics, and adjust performance settings. Security Settings: Where you can control access to your Maxtor OneTouch II drive.
3. Click Apply and then click OK. Adjust Performance You can adjust the performance of your drive. Windows ME From the desktop: 1. Click Start>Control Panel>Power Options 2. Click the Power Schemes tab and select Never from the System Standby drop-down menu. 3. From the Hibernate tab, remove the check next to Enable hibernate. 4. Click Apply and then click OK. Customize OneTouch Button You can set the button on your Maxtor OneTouch II drive to open an application or file of your choice.
Setting your Password 1. Click Security Settings 2. Enter and re-enter a Password Your password must contain at least six characters and one digit. You may also choose a secret question (from the list provided) and type in the answer. If you do not want to choose a secret question and answer, go to step 5. 3 3. 4. 5. 6. 7. Choose a Secret Question. Enter and re-enter an answer to the question. Click Apply. Click Confirm. Click Close. Changing your Password 1. Click Security Settings. 2.
Macintosh The OneTouch Settings utility does not work with USB using OS 9. Opening the OneTouch Settings utility Go to the Applications folder on your Macintosh and open the Maxtor OneTouch Settings. The Maxtor OneTouch Settings window will appear. The features are grouped into 3 sections: OneTouch Action: Where you can customize the OneTouch button. DriveLock TM Data Security: Where you can control access to your Maxtor OneTouch II drive.
You may also choose a secret question (from the list provided) and type in the answer. If you do not want to choose a secret question and answer, go to step 5. 3. Choose a Secret Question. 4. Enter and re-enter an answer to the question. 5. Click Set Password or Set Password and Q/A, if you chose a secret question and answer. 3 Changing your Password 1. Click DriveLock Data Security. 2. Enter your current Password. 3. Enter and re-enter a new Password.
Diagnostics and Tuning Diagnostic Test You can check the health of your drive and adjust its performance. Power Management Settings for OS X 1. Under the Apple menu, select System Preferences. The System Preferences window will open. 2. Click the Energy Saver icon (a light bulb). If you suspect there may be problems with your Maxtor OneTouch II drive, you can run the diagnostic test: Click Begin Test.
Retrospect Express User guide For Windows: Use the built-in help system in Retrospect Express HD by clicking the question mark icon at the top of the screen in Retrospect. 3 For Macintosh: Use the Express User’s Guide in the Retrospect Express Folder on your Macintosh. If is not installed on your computer, you can access it on the Maxtor installation CD. Macintosh version of the Retrospect User’s Guide on the CD: 1. Insert the Maxtor Installation CD into your CD-ROM drive.
Editing Video Using a computer to capture and edit video recorded with a digital camcorder is quickly becoming popular. Digital video files are typically very large, using about 13 GB per hour of video content. Maxtor recommends connecting your drive using the FireWire interface for best results when working with video.
Glossary Backup – In Restropsect HD, a backup contains all the files and folders you selected to back up from a specific point in time. Previous backups are preserved, allowing you to store copies of your backup files from multiple points in time. See Restore Point. Byte – A unit of storage on a drive that holds a single character. A byte is equal to 8 bits. Capacity – The amount of information, measured in bytes, that can be stored on a drive. Also known as storage capacity.
GB – (Gigabyte) Equal to 1,000,000,000 (billion) bytes. Hard Drive – An electromechanical device used for information storage and retrieval, incorporating one or more rotating disks on which data is recorded, stored, and read magnetically. Hot-Swap – This feature allows you to connect and disconnect external devices while the computer and the devices are running. External drives, such as the Maxtor OneTouch II drive can be hot-swapped. KB – (Kilobyte) Equal to 1,000 (thousand) bytes.
Index A About this Guide Installing Applications on Your Drive 61 4 Adding Rubber Feet to Your OneTouch II Drive 62 Archiving files 49 B Backing up your computer 35 C Cable Installing Your Drive 6 Installing Drivers Only 37 L Laptop cable 18 11, 25, 33 Changing Your Maxtor OneTouch Backup Settings 49 Connecting and Disconnecting the Drive 39 D Dantz Support M 39 Disconnect the drive from a Windows system 39 Drive components Handling precautions E Editing Video H Handling Precautions
©2004 Maxtor Corporation. All rights reserved. Changes are periodically made to the information herein which will be incorporated in revised editions of this publication. Maxtor may make changes or improvements to the product(s) described in this publication at any time and without notice. For purposes of storage capacity, a gigabyte (GB) equals 1,000,000,000 bytes. Total accessible capacity varies depending on operating environment.