TABLE OF CONTENTS Introduction ..................................................................................................... 1 Safety Information ........................................................................................... 3 Generator Safety Warnings ............................................................................. 4 Know Your Pressure Washer............................................................................ 7 Starting Preparation .................................
ABOUT YOUR PRESSURE WASHER: Thank you for purchasing a MAXWATT pressure washer (hereinafter referred to as “the pressure washer”). This pressure washer is suitable for use on various trade worksites, home and commercial use. Please read and understand this manual for instructions on start-up, shut down, operations, adjustments, maintenance as well as safety guidelines before using this product. Please take all possible precautions to protect your own safety and that of the people in the immediate vicinity.
BEFORE STARTING UNPACKING AND DELIVERY INSPECTION You should inspect the pressure washer immediately after you receive delivery thereof. If you have any missing parts, please contact your place of purchase. DO NOT attempt to operate the pressure washer if there are any missing parts. The pressure washer is shipped without oil. You must add an adequate amount of engine oil before using it for the first time. The engine will be damaged beyond repair if it is started without oil.
All fuels are flammable. Never fuel a running or hot engine. Never pump fuel directly into the engine at a petrol station – use an approved container to transfer the fuel. Ensure that there are no fuel leaks and keep sources of sparks and flames away. Wait for the engine to be cool before fuelling. ALWAYS keep a fire extinguisher rated “ABC” nearby. STOP! CHOOSE THE RIGHT PRESSURE WASHER FOR YOUR NEEDS.
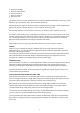
Use personal protection equipment. Always wear eye protection. Wear approved safety impact eye goggles, dust mask, non-skid safety shoes, hard hat and hearing protection for appropriate conditions. DO NOT overreach. Keep proper footing and balance at all times. This enables better control of the pressure washer in unexpected situations. Dress properly. DO NOT wear loose clothing, gloves, neckties or jewellery. Keep your hair and clothing away from moving parts.
4. 5. 6. 7. 8. Receptacle damage; Pressure washer misfire; Excessive vibration; Flame or smoke or Abnormal noise This product contains or emits chemical known to the Commonwealth of Australia to cause cancer, birth defects or other reproductive harm. Avoid inhalation of exhaust. DO NOT operate the engine or handle any electrical equipment while standing in water, while barefoot, while hands are wet or while in the rain or snow. An electric shock may result.
Use a portable container to fill the tank. NEVER fill the engine’s petrol tank directly from the fuel pump – the engine’s tank is not grounded and the high velocity flow of petrol from a fuel pump can cause static electric build-up. Use an approved portable container to transfer to the engine’s tank. TYPICAL SOURCES OF STATIC ELECTRIC HAZARDS DURING FUELLING The following objects can accumulate a static electric charge and cause an ignition spark in typical fuelling situations: Ungrounded tanks/containers.
Poisonous fumes from its exhaust. Always make sure there is adequate ventilation when operating this equipment. EXPLOSIVE HAZARD: Fuel and its vapours are extremely flammable and explosive. Fire or explosion from these vapours can cause severe burns or even death. ROTATING PARTS: Starter and other rotating parts on this tool can entangle Loose clothing, long hair and accessories resulting in moderate to severe injury. HOT SURFACES: Engine muffler and other engine parts can become very hot.
UNPACKING AND INSPECTION After opening the carton, unpack your new pressure washer and related parts and accessories. Please inspect it carefully for any damage that may have occurred during transit. If any parts are missing, please contact Gentech Industries. Check to see that all nuts, bolts and fittings are secure before putting this pressure washer into service. If you have any questions, or require assistance with damaged or missing parts, please do contact Gentech Industries.
Use the right tool. Use tools properly and for their intended use/task. Do not force a small tool to do the job of a heavy-duty tool. Using the right tool to do the right job will make doing the job easier and safer. Always make user the tool is in the OFF position when making adjustments, changing parts or performing any maintenance. Service must be performed only by qualified repair personnel. Service or maintenance by unqualified personnel may result in a risk of injury.
SYMPTOMS OF CARBON MONOXIDE POISONING Carbon monoxide (CO) is a product of incomplete combustion of fuels and occurs in exhaust fumes of fuel-burning heaters and all internal combustion engines. It collects in spaces where there is no constant air flow or ventilation. If you or anyone near you starts to feel sick, dizzy or weak due to exposure to CO while using the engine, GET FRESH AIR IMMEDIATELY.
Do not make contact with the muffler area while the engine is running. The muffler gets extremely hot and can cause severe burns. Exhaust gases can ignite combustible items such as clothing or structures in close proximity. Gases leaking from a worn muffler can heat up and damage the fuel tank resulting in a fire and/or explosion. DO NOT touch hot parts of the engine or muffler. AVOID hot exhaust gases. Keep a minimum of 5 ft (1.5m) clearance on all sides of the engine including the top.
The wheel kit is not designed for over-the-road use. The pressure washer must be transported in a vehicle or on a trailer. The unit is heavy. Take care when lifting or moving the unit. Transport or repair with the fuel tank EMPTY to prevent an unintentional spark Igniting fuel vapours resulting in a fire and/or explosion. Transport or repair with the spark plug disconnected.
RISK OF INJURY: The pressure washer produces fluid pressures and velocities high enough to penetrate human and animal flesh which could result in serious injury and/or amputation. Ensure all connections are tightened securely. Inspect all hoses to ensure they are not damaged or kinked. Loose connections or damaged hoses can result in injection injuries. Ensure all quick-connect fittings are properly connected. Pull on connection to ensure fittings are secure.
The pressure washer must be run with the rubber feet resting on a flat and stable horizontal surface. The pressure washer must be used in a clean and well-ventilated area. Keep the pressure washer a minimum of 5 feet (1.5m) clearance on all sides including overhead. DO NOT place the pressure washer in an area: Where there is evidence of oil or gas leaks Where flammable gas vapours or materials may be present Where extremely dirty air or water could be drawn into the pressure washer.
Pull the handle lock pin and fully raise the handle upright. Release and snap the lock pin into its locking hole in the frame. Assemble the top and bottom gun holders (using the nuts and bolts) to the fame as shown. Tighten all mounting hardware. PRESSURE HOSE TO PRESSURE PUMP Pull back the high-pressure outlet fitting collar. Insert the pressure hose inside the fitting and release the collar. Tug on the hose to make sure it is secured.
SELECTING THE RIGHT NOZZLE FOR THE JOB The pressure washer comes furnished with five spray nozzles. Each nozzle is colour coded and delivers a specific spray pattern and pressure for a particular cleaning job. The size of the nozzle determines the size of the fan spray and the pressure out of the nozzle. 0 Degree Nozzle – RED: This nozzle delivers as pinpoint stream of pressurised water and is extremely powerful. It covers only a small area of cleaning.
PREPARING THE PRESSURE WASHER PRESSURE PUMP The pressure washer is shipped with shipping oil plug to prevent oil leakage from the pump during shipping. To replace the shipping plug with the breather plug (provided), perform the following: Using a wrench, remove shipping plug from pressure pump. Discard shipping plug. Remove the pump breather plug from the parts bag and insert it into the pressure pump. Tighten pump breather plug securely by hand. Do not use a wrench to tighten.
ADDING FUEL Move the pressure washer outside and place it on a flat and level surface. Remove the gas tank cap. Carefully add 87 octane (or higher) grade gasoline to the tank. DO NOT overfill. Leave room for the gasoline to expand. Replace and hand tighten the gas cap and wipe off any spilled fuel. WHEN ADDING FUEL TO PRESSURE WASHER, OBSERVE THE FOLLOWING: DO NOT use unapproved gasoline such as E85 (85% ethanol / 15% gasoline). DO NOT mix oil with gasoline.
Place the pressure washer on a flat and level surface and close to the working surface. Keep a minimum of 5 feet (1.5 meters) clearance on all sides of the engine including the top. Face the engine exhaust outlet away from dwellings. Make sure the throttle lever is set to the fast position. Slide the fuel valve lever to the ON position to allow the fuel to flow to the engine. Slide the choke lever to START position. Turn the engine ON/OFF switch clockwise to ON position.
Release the trigger to stop water flow. WASHING / CLEANING Firmly grip the spray gun with both hands. Point the nozzle to a safe direction and squeeze the spray gun trigger to allow the pump to purge air and impurities in the system and then redirect the nozzle to the working surface. When finished, release the gun trigger to stop water flow. USAGE TIPS For most effective cleaning, keep the spray nozzle 8 to 24 inches away from the cleaning surface.
Lock the trigger and attach the detergent nozzle (black) to the wand. Unlock the trigger and squeeze the spray gun trigger and apply detergent to a dry surface, starting at a lower portion of area to be washed and work upwards, using long, even and overlapping strokes. Wetting the surface first is not recommended, as it dilutes the detergent and reduces its cleaning ability. Allow detergent to soak in for 3-5 minutes before washing and rinsing. Reapply as needed to prevent the surface from drying.
NEVER turn off the water supply with the engine running. This will cause the pressure pump to overheat and this will result in internal damage. The pressure washer MUST be properly stored. Refer to the next pages for proper storage instructions. MAINTENANCE Regular maintenance will improve performance and extend the life of the pressure washer. The pressure washer’s warranty does not cover items that have been subjected to operator abuse or negligence.
Remove dipstick/oil plug from the crankcase and wipe clean. Oil level is correct if it covers the lower half of the dipstick. CHANGING THE PRESSURE PUMP OIL Place the container under the pressure pump oil drain plug. Using a wrench, loosen the oil drain plug. Remove the oil drain plug and drain the oil into a container. Replace the oil drain plug and retighten using the wrench. Loosen and remove breather plug from top of the pressure pump.
Use a damp cloth to wipe the exterior surfaces clean. Use a soft bristle to loosen caked-on dirt or oil. Use a shop-vacuum to pick up any loose dirt and debris. STORAGE Fuel and fuel vapour are extremely flammable and explosive. Fire or explosion from misuse of fuel can cause severe burns or even death. ENGINE Fuel can become stale when store for over 30 days. Stale fuel causes acid and gum deposits to form in the fuel system or crucial carburettor parts.
IT IS RECOMMENDED that you follow these steps to protect the internal seals of the pressure washer when storing the unit for more than 30 days and/or when freezing temperatures are expected: Obtain a funnel, six ounces of RV anti-freeze and approximately 36 inches of garden hose with a male hose connector on one end. Use ONLY RV anti-freeze. Any other type is corrosive and can damage the pressure pump. Connect 36 inch length of garden hose to the water inlet of the pressure pump.
TROUBLE SHOOTING GUIDE: 26
27
28
29
30
SPECIFICATIONS: 31
WARRANTY INFORMATION 2 YEAR TRADE WARRANTY This warranty is provided by Gentech Industries PTY LTD. Express Warranty Subject to the exclusions set out below, we warrant that this product will be free from defects in materials or workmanship for 24 months from the date of purchase. The benefits conferred by this warranty are in addition to all rights and remedies which you may be entitled to under the Australian Consumer Law and any other statutory rights you may have under other applicable laws.
WARRANTY PROCEDURES: Take the pressure washer and your proof of purchase either to the store where purchased, or to the nearest accredited service agent. Please visit www.maxwatt.com.au for more information on where to find a list of accredited service agents.
Consumable parts including but not limited to keys, spark plugs, fuel and oil filters, recoil starter ropes, wheels, lubricants, oil grease and fuel. Cleaning adjustments and normal periodic maintenance work including but not limited to cleaning of the battery, carburettor, engine oil, fuel tank and injectors. Over loading resulting in the damage of the AVR, circuit breaker, stator and rotor. Charging and proper maintenance of the battery.
Where you believe an item is faulty, it may be necessary for us to send your goods to the manufacturer or their service agent for it to be assessed within a reasonable period of time. If there is a major failure with the item, you may choose a refund, exchange or repair. If the failure is minor, we will repair the item (or, at our discretion, we may replace the item) within a reasonable time.