User Manual ORBIT 5400T User Manual 1
User Manual Contents 1.APPEA APPEARANCE AND KEYPAD OPERATIONS OPERATIONS............................ RATIONS ............................ 3 2.USING MEMORY CARD AS U DISK............................. DISK............................. 4/5/6 /5/6 3.WIFI ....................................................... ....................................................... 7 4.BLUETOOTH .................................................. .................................................. 8 5.MAIL ......................
User Manual 1 . Appearance and Keypad Operations Keys Functions home Press this button to return home from any application or interface. Press it to open recently opened application window. menu Press it to start the menu,which allows you to perform actions in the current interface or options’ menu. back power Press it to return to the previous interface,or to close dialog box 、 options’ menu、notification panel or the keypad.
User Manual • Notice: different PC operating system to how to operate to normal use the U disk. • 1) WIN7 Can directly use 2) XP update windows media player to 11 3) Install wpdmtp.inf driver 4) Vista Unconfirmed Notice :On the PC operation assistant tool such as mobile phone, Must be open the USB debugging. 3.WIFI Wi-Fi provides as far as 300feet (100M) range of wireless network access. If you use cell phone to connect wifi, you should connect to the wireless access point or 「hot spots」.
User 2) • 5 Manual Touch other Wi-Fi networks, and then you can connect to this network. Notices:in addition, you can surf the internet via GPRS. We default that the GPRS in SIM1 is opened after started, users can select manually ,the specific location is “settings>wireless and internet>data connection” ,touch “SIM1、SIM2、no data connection”,when the dot turns green, it’s already opened.
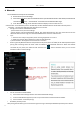
User Manual 4. Bluetooth Turn on Bluetooth or set the phone can be detected 1) Press home>menu, the touch settings. 2) Touch wireless and internet, then choose Bluetooth box to open the Bluetooth function. After started, the status box will show this icon ( ). Touch “scan for devices”the it starts to scan for all devices within range. 3) Touch Bluetooth settings, all the devices founded will display in the list under the icon.
User Manual 5.Mail 5.Mail 5.1 Gmail Create an electronic mail account Select mail> settings. You can activate or edit existing e-mail accounts as well as create a new e-mail account. a. Select mail, Google account setting interface appears. Then touch‘next step’> create account>enter name,last name and e-mail account. b.
User Manual Click on the bottom folder options, list all folder options 6.Dialling 6.Dialling When the icon of internet server appears in the screen, you could dial or receive callings. The signal bar on the top right corner show the strength of network signal (the maximum with 4 signal bars) . Start dialing Open application’s main menu>dial. You could choose SIM1 or SIM2 to do the dialing.
User Manual Dialling At the dialing Keboard ,enter the phone number,and then click the dialing key , after that,you should choose one SIM card or internet call. If needed to call the extension,you could click the “dial pad” in the bottom of the screen • to open the interface or press menu key to select “delay 2 seconds”,and then enter the number of the extension.
User • Manual Refuse to answer the phone a. When standby, calling comes,press “refuse”button and slide towards left side until the middle button, then you could refuse the calling. b. When using,calling comes,click on the “refuse”button to refuse the calling. • Two-way call/multiparty call(conference call) • Notices:this function needs that SIM card open multiparty call features.
User Manual The second way to use video call Open the menu of applications>contacts, press one contact of the contacts,then press long the phone number,and select the” video call”. Call settings Voice Call 1)Voice Mail:The voice mailbox in setting in the input voicemail number.
User Manual 7. Messaging • • Important:the message title of this phone is the phone number,will be reserved in s similar for of dialog, instead of the usual folder structure. Messages with blue background are those received, and messages with white background are those sent. Send SMS to certain phone number 1) Press home>messaging,touch“new messages”.
User Manual Notices: a, If you want send MMS with many pages, you should select “append PPT” in the “append” interface. b, You can append 10 pictures, with the form of GIF, JPEG. c, Click “adding themes”, the box of “theme” will appear under the box of “recipient”, meanwhile it is turned to MMS automatically. • Send messages to multiple numbers Enter multiple numbers in the box of entering,each number is divided by the comma in English.
User Manual When a message is sent or sent again,a little yellow letter will appear. The number 1 or 2 on the letter refers to SIM1 or SIM2. When message sending failed,a red triangle with exclamation will appear. when editing information other functions of Menu button 8. Contacts • 14 Open the menu of applications>contacts Default display phone contacts and SIM card contacts, sort contacts by first letter of alphabet.
User Manual 2)Click Search Icons,You can enter the contact search interface. a.To enter the Numbers or letters and the list of names of the agreement, which will be shown in the search results. b.If it were not so search to match of the contact, interface will appear 'not find any contact. 3)Click“Add Contact”Icons,Can create New Contacts Select save contacts to phone or a a SIM card, into contact editing interface.
User Manual 4)In contact interface, click on the Menu button a. Menu >Delete contacts Can “All”Icons checked, click the delete button, delete all the contact person, including cell phone and SIM card of contact. Can separate check one or more contacts, click the delete, delete the selected all contacts. b. Menu> To display of the contact You can choose all contact, one a SIM card of contact, the mobile phone contacts c.
User Manual be in all of contact search, and added to the group. Finally click "finish". 3) In a group, click on the Menu button, Menu functions a. Menu>Update You can modify the group name, delete or add group of contacts b. Menu >Delete You can delete the group, and will not delete the contact itself. c. Menu >Send messaging by group. Automatic new information, and the group added to contact the address bar recipients d.
User Manual 3) Menu>Windows You can view all open windows to the current. 4) Menu>Bookmarks a. Click the “Bookmarks”to make the current URL as a bookmark saved. b. Click the bookmark under the bookmarks list,will open the URL. 5) Menu>More a. Add bookmarks,save the current URL as bookmark. b. Find on page,search what you need in current page. c. Select text,in the text, click and drag to select a piece of text. d. Page info,display page address and other information of the current browsing. e.
User Manual 11.Clock 11.Clock 1) Open the menu of application, click 2) Click screen except the alarm at any position, screens, black, time with white shows, this time the standby time to screen will not extinguish screen. Click again on the screen, and restore normal clock interface. 3) Click screen set alarm button and enter the alarm clock set interface • Alarm After functions set,phone will arrives in the setting time to alert you by ringing or vibrating to achieve it’s function.
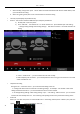
User Manual 13. 13.Camera 13.1 camera Prior preparation Install memory card before using the camera or video camera. All your photos or videos taken by the phone are stored in memory card. • Open camera Press home, touch menu, select camera. Take pictures 1)Aim your object with the screen. 2)Touch the “shutter” button on the screen. 3)After taking,photos will save to the camera’s galley folder with the name of taking time. 4)You can view the photos by touching the preview box button.
User 13.2 Manual Video camera Prior preparation Install memory card before using the camera or video camera. All your photos or videos taken by the phone are stored in memory card. • • Take video 1)Aim your object with the screen. 2)Touch the “shutter” button on the screen. 3)After taking,photos will save to the camera’s galley folder with the name of taking time. 4)You can view the videos by touching the preview box button.
User Manual 14. Images • Open images Press home,touch label of applications,then touch photos’ galley. In the interface of camera,Press menu to open it,then touch to operate. 1) Files Interface a. In the library the interface, upper right a slide show the play button, click on the way to the slide circulation play all image files. b. Click on the images, enter the picture to see interface. c. 22 Choose a long press image files, pop-up corresponding operation.
User • Manual Use images After taking pictures, you can view them and share them with your friends. a.Use E-mail to send pictures :choose Gmail or E-mail, pictures will be automatically added to an E-mail. Write your information, click send. b.Use Messaging to send pictures:Select the information, pictures will be additional to the MMS. Write your information, click send. C.Use Bluetooth:Bluetooth list, select already pairing of bluetooth equipment, through bluetooth send a picture.
User Manual View images 1) In the picture interface, touch photo album to view images. 2) Touch the thumbnail to view pictures on full screen. You can choose to display small or large thumbnails. Hold down the screen towards the left side to view the next photo or towards right to view the previous one. • In the photo album or list, press and hold down the picture towards left to view the next picture, or towards right to view the previous one. 15.
User • Manual Tips: You can play all of the songs in the interface of music media, in random sequence . Press Menu, and then touch the Party Shuffle. Then will start playing the first song randomly selected . To close the Party Shuffle, press Menu, then touch to turn off the Party Shuffle. 16. Calender Enter the calender application Load Goggles accounts, enter the application, In the interface of month or week will use gray to highlight the day. Display default the date on the current month.
User Manual 17.FM Radio FM Radio Through this program, you may listen to FM radio on the device, FM radio use the wired headset as an antenna to receive signals, before opening this program ,you can install the original equipment-headphones, when listening, you can switch it manually to speakers or the mode with wired headphones. • Open FM radio Touch this label to open the application of FM radio.
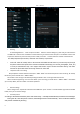
User • Manual Listen to FM radio background Click to return to key, the radio program moved to the background, right now you can still continue to listen to the show, and can also carry out any other program. 18.Settings Your service provider may default some device settings, so you may not be able to change these settings. • SIM management 1) Touch it to choose or to disable the SIM card, the card is grey when disabled, the flight mode displays on status bar.
User c. Manual Can choose the default memory. • Battery Boot time that use and each module to use power in general • Applications 1) Unknown sources Allow to install non-electronic market applications 2) Manage applications Manage and delete the installed applications. 3) Running services Touch any of the services listed in> pop up 'to stop the service? 'two-button operation box, touch the 'Stop 'the service is stopped, and disappear from the "running services" list.
User Manual 1) Selecting Language District Include all the languages on the phone and totally amount of 12 kinds. 2) Custom Dictionary Add words to custom dictionary or delete.
User Manual m. Don’t keep activities n. Background process limit o. Show all APRs • About phone You can check the information on status bar and remaining power. 19. Notices for the use of phone Your phone is a product of superior design and craftsmanship and should be treated with care. The following suggestions can help you comply with the terms of repair kits, to extend the life of mobile phone. 1) Place the mobile phone and their parts and components out of reach of small children.
User Manual there is no guarantee that interference will not occur in a particular installation. If this equipment does cause harmful interference to radio or television reception, which can be determined by turning the equipment off and on, the user is encouraged to try to correct the interference by one or more of the following measures: -- Reorient or relocate the receiving antenna. -- Increase the separation between the equipment and receiver.
User Manual (C95.1). Nevertheless, we recommend that you use a hands-free kit with your phone (such as an earpiece or headset) to avoid potential exposure to RF energy. The design of your phone complies with the FCC guidelines (and those standards). Use only the supplied or an approved replacement antenna. Unauthorized antennas, modifications, or attachments could damage the phone and may violate FCC regulations.