Precision Touch Control 700 Electric Smoothtop Use and Care Guide Table of Contents Important Safety Instructions ............................... 1-3 Care & Cleaning ....................... 4-6 Self-Clean Oven Cleaning Procedures Maintenance ................................. 7 Oven Window Oven Light Troubleshooting ........................... 8 Form No. A/01/08 Part No. 8113P698-60 Surface Cooking .................... 9-12 Surface Controls Warming Center Smoothtop Surface Oven Cooking ...............
technician. Do not attempt to adjust, repair, service, or replace any part of your appliance unless it is specifically recommended in this guide. All other servicing should be referred to a qualified servicer. Installer: Please leave this guide with this appliance. Consumer: Please read and keep this guide for future reference. Keep sales receipt and/or canceled check as proof of purchase. Always disconnect power to appliance before servicing.
Child Safety Cooking Safety Never heat an unopened food container in the oven. Pressure build-up may cause container to burst resulting in serious personal injury or damage to the appliance. CAUTION NEVER store items of interest to children in cabinets above an appliance. Children climbing on the appliance or on the appliance door to reach items could be seriously injured. Use dry, sturdy potholders. Damp potholders may cause burns from steam.
Self-Clean Oven Turn pan handle toward center of cooktop, not out into the room or over another surface element. This reduces the risk of burns, ignition of flammable materials, or spillage if pan is accidently bumped or reached by small children. CAUTION Before self-cleaning the oven, remove the oven racks, broiler pan, food and any other utensils. Wipe spillovers to prevent excessive smoke and flare-ups. Cooktop NEVER leave surface units unattended especially when using high heat.
Care & Cleaning Self-Clean Oven To set Self-Clean: Important: Oven temperature must be below 400° F to program a clean cycle. CAUTION 1. Close the oven door. • It is normal for parts of the range to become hot during a self-clean cycle. 2. Press the Clean pad. • CLEAN flashes in the display. • To prevent damage to oven door, do not attempt to open the door when LOCK is displayed. 3. Press the More+ or Less- pad. • MEd (Medium soil, 3 hours) is displayed.
. After four seconds, CLEAN, DELAY and LOCK will appear in the display to show that the oven is set for a delayed clean operation. The delay time is displayed. If oven racks were left in the oven and do not slide smoothly after a clean cycle, wipe racks and rack supports with a small amount of vegetable oil to make them easier to move. Fine lines may appear in the porcelain because it went through heating and cooling. This is normal and will not affect performance.
• Turn on each element to be sure the knobs have been correctly replaced. Oven Interior • Follow instructions on pages 4-5 to set a self-clean cycle. Cooktop – Glass-Ceramic Never use oven cleaners, chlorine bleach, ammonia or glass cleaners with ammonia. Important: Call an authorized servicer if the glass-ceramic top should crack, break or if metal or aluminum foil should melt on the cooktop. • Allow the cooktop to cool before cleaning.
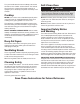
Maintenance Oven Door Leveling Legs CAUTION CAUTION Do not place excessive weight on or stand on an open oven door. This could cause the range to tip over, break the door, or injure the user. Important: The oven door on a new range may feel “spongy” when it is closed. This is normal and will decrease with use. Oven Window Be sure the anti-tip bracket secures one of the rear leveling legs to the floor. This bracket prevents the range from accidentally tipping. Be sure the range is leveled when installed.
Troubleshooting For most concerns, try these first. • Check if oven controls have been properly set. • Check to be sure plug is securely inserted into receptacle. • Check or re-set circuit breaker. Check or replace fuse. • Check power supply. • Metal marks. - Do not slide metal pans across top. When cool, clean with Cooktop Cleaning Creme. See page 6. • Brown streaks and specks. - Remove spills promptly. Never wipe with a soiled cloth or sponge. Make sure cooktop and pan bottom are clean.
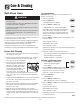
Surface Cooking Surface Controls other factors affecting heat settings, refer to Cookware Recommendations on page 11. The following descriptions will aid in choosing the settings that will give optimum results. Use to turn on the surface elements. An infinite choice of heat settings is available from Low to High. The knobs can be set on or between any of the settings. Hold or Warm: Food maintains a temperature above 140°F without continuing to cook. Food is initially hot and then heat is reduced.
Triple Zone Element with Power BoostTM Option • Do not heat cold food on the Warming Center. The cooking surface has one triple element with Power BoostTM option located in the right front position. This element can be used for larger cooking utensils when the triple element is used, or for smaller pans when the single or dual settings are chosen. To operate the single element only, use the left side of the control knob and select any setting from Low to High.
To Prevent Stains Pans should not extend more than 1/2 to 1-inch beyond the cooking area. • Never use a soiled dish cloth or sponge to clean the cooktop surface. A film will remain which may cause stains on the cooking surface after the area is heated. When a control is turned on, a glow can be seen through the smoothtop surface. The element will cycle on and off to maintain the preset heat setting, even on High. • Continuously cooking on a soiled surface may/will result in a permanent stain.
Select Canning and Oversize Cookware Avoid Flat, smooth-bottom Pans with grooved or warped bottoms. pans. Pans with uneven bottoms do not cook efficiently and sometimes may not boil liquid. Heavy-gauge pans. Very thin-gauge metal or glass pans. All canners and large pots must have flat bottoms and must be made from heavy-gauge materials. This is critical on smoothtop surfaces. The base must not be more than 1 inch larger than the element. Pans that are the same size as the element.
Timer and then reconnect power. If the flashing still continues, disconnect power to the appliance and call an authorized servicer. The timer can be set from one minute (0:01) up to 99 hours and 59 minutes (99:59). The timer can be used independently of any other oven activity. It can also be set while another oven function is operating. Baking The timer does not control the oven. It only controls a beeper. 1. Press the Bake pad. To set Bake: To set the Timer: • BAKE will flash. 1.
Cook & Hold To set a Delayed Cook & Hold cycle: 1. Press the Bake and Timer pads at the same time. Cook & Hold allows you to bake for a preset amount of time, followed by a one-hour Keep Warm cycle. To set Cook & Hold: • DELAY lights in the display. 1. Press the Cook & Hold pad. • 00:00 appears in the display. 2. Press the More+ or Less- pad to set the delay time. • BAKE and HOLD flash. • 000 lights in the display. 3. Press the Cook & Hold pad. 2. Select the oven temperature.
Broiling Keep Warm For safely keeping foods warm or for warming breads and plates. CAUTION To set Keep Warm: Use CAUTION when cooking with the Broil feature. The grease from fatty foods may ignite. If a fire should occur, close the oven door and turn the oven OFF. If the fire does not extinguish, DO NOT put water on the fire. Use baking soda, dry chemical or fire extinguisher to smother the fire. 1. Press the Keep Warm pad. • WARM flashes. • 000 appears in the display. 2.
Broiling Chart RACK POSITION APPROX. TIME FIRST SIDE APPROX. TIME SECOND SIDE 6 6 6 or 7 8 minutes 10 minutes 9 minutes 7 - 12 minutes 8 - 14 minutes 6 - 9 minutes Pork Bacon Chops, 1” Ham Slice 6 6 6 6 - 10 minutes 10 - 11 minutes 5 minutes (no turning) 12 - 14 minutes 3 - 7 minutes Poultry Breast Halves 4 LO Broil 15 minutes LO Broil 15 - 25 minutes Seafood Fish Steaks, buttered, 1” thick Lobster Tails, 3-4 oz.
To cancel a Favorite cycle in progress: Notes: 1. Press the CANCEL pad. • Sabbath Mode can be turned on at any time with or without the oven on. • The stored Favorite cycle will not be affected. • Sabbath Mode cannot be turned on if the touchpads are locked out or when the door is locked. 2. Remove food from the oven. • If the oven is baking when Sabbath Mode is set, BAKE will go out at the end of the baking cycle. There will be no audible beeps.
Baking Layer Cakes on Two Racks Oven Racks For best results when baking cakes on two racks, use racks 2 and 4. CAUTION • Do not attempt to change the rack position when the oven is hot. Place the cakes on the rack as shown. • Do not use the oven for storing food or cookware. The oven has two racks. All racks are designed with a lockstop edge. Create-A-SpaceTM Half Rack To remove: Select range models are equipped with a convertible half rack.
MAYTAG® MAJOR APPLIANCE WARRANTY LIMITED WARRANTY For one year from the date of purchase, when this major appliance is operated and maintained according to instructions attached to or furnished with the product, Maytag brand of Whirlpool Corporation or Whirlpool Canada LP (hereafter “Maytag”) will pay for factory specified parts and repair labor to correct defects in materials or workmanship. Service must be provided by a Maytag designated service company.