THANK YOU for purchasing this high-quality product. If you should experience a problem not covered in TROUBLESHOOTING, please visit our website at www.maytag.com for additional information. If you still need assistance, call us at 1-800-688-9900. In Canada, visit our website at www.maytag.ca or call us at 1-800-807-6777. You will need your model and serial number, located on the inside wall of the refrigerator compartment.
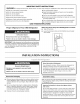
IMPORTANT WARNING: SAFETY INSTRUCTIONS To reduce the risk of fire, electric shock, or injury when using your refrigerator, follow these basic precautions: • Plug into a grounded • Use nonflammable 3 prong outlet. • Do not remove ground prong. • Do not use an adapter. • Do not use an extension cord. • Disconnect cleaner. • Keep flammable materials and vapors, such as gasoline, away from refrigerator. • Use two or more people to move and install refrigerator.
Electrical Shock Hazard Explosion Hazard Keep flammable materials and vapors, such as gasoline, away from refrigerator. Plug into a grounded Do not remove ground Failure to do so can result in death, explosion, or fire. To ensure proper ventilation for your refrigerator, allow for a 1/2" (1.25 cm) space at the top and behind the refrigerator. If your refrigerator has an ice maker, allow extra space at the back for the water line connections.
5= WaterPressure Using a cordless drill, drill a V4"hole in the cold water pipe you have selected. A cold water supply with water pressure of between 35 and 120 psi (241 and 827 kPa) is required to operate the water dispenser and ice maker. If you have questions about your water pressure, call a licensed, qualified plumber.
. Attach thecopper tubingtotherefrigerator witha "P"clamp. Slidetheplastic waterlineintotheretainer. All graphics referenced in the following instructions later in this section after "Final Steps." Remove and Replace are included Handles 1. Using a 3/32"Allen wrench, loosen the two setscrews located on the side of each handle. See Metal Handle graphics 1 and 2. 2. Pull the handle straight out from the door. Make sure you keep the screws for reattaching the handles. 3.
2= Replace Doors and Hinges 1. Assemble the parts for the top hinges as shown in Top Hinge graphic. Do not tighten the screws completely. 2. Replace the parts for the bottom hinge as shown in Bottom Hinge graphic. Tighten screws. Replace the refrigerator door. Turn the brake foot clockwise until it is firmly against the floor to keep the refrigerator from rolling forward when the freezer drawer is pulled open.
Fa_:ade Top Hinges A. Screw A. Hinge Cover Screw B, Top Hinge Cover C, 5/18"Hex-Head Hinge Screws D. Top Hinge \\ \\ \\\\ Bottom Hinges \\ A B C \\ \\\ \\ \\\ A, Hinge Pin Cover B, Bottom Hinge C. Hinge Screws \\ \\ \ A. 3/32"Setscrew Wiring Plug Water Connection A A, _f_2"Setscrew iiiiiiiiiiiiiiiiiiiiiiiiiiiiiiiiiiiiiiiiiiiiiiiii I A.
REFRIGERATOR USE • There are two refrigerator compartment doors. The doors can be opened and closed either separately or together. There is a vertically-hinged seal on the left refrigerator door. • When the left side door is opened, the hinged seal automatically folds inward so that it is out of the way. • When both doors are closed, the hinged seal automatically forms a seal between the two doors. To change the display screen text from French to English, press the HOME button on the dispenser.panel.
Freezer Controls Door Ajar Alarm Make sure FREEZER is selected. The up and down arrows on the display screen allow you to adjust the freezer compartment temperature. The set point range for the freezer is -5°F to 5°F (-21 °C to -15°C). • Press the down arrow to lower the set point. The Door Ajar Alarm feature sounds an alarm when the refrigerator or freezer door is open for 5 minutes and the product cooling is turned on. The alarm will repeat every 2 minutes. • Close both doors to turn it off.
Depending onyourmodel, youmayhaveoneormoreofthe 1. PressWATER onthedisplay screen toturnthefeature on. following options: theabilitytoselectcrushed orcubedice;a NOTE: Thedispenser willautomatically exittheMeasured Fill rotating waterdispenser faucetandpull-out tray;aspecial light screen after15seconds ofinactivity. thatturnsonwhenyouusethedispenser; a lockoptiontoavoid waterbytheounce, cup,orliter.Press unintentional dispensing; oranindicator thattellsyouwhenthere 2.
Rotating Faucet and Pull-out Tray (on some models) To Dispense Ice: 1. Select the desired type of ice. Your dispenser may includea rotating water faucet and a small pull-out tray at the bottom of the dispenser. Cut Hazard B Use a sturdy glass when dispensing ice. Failure to do so can result in cuts. A. Faucet rotated B. Pull-out tray 2. The faucet rotates to the center to allow for easy dispensing into large containers. To rotate it, push in on the right-hand side of the faucet as shown.
Power Outage Indicator Ice Production (on some models) Rate The power outage indicator lets you know if the power supply to your refrigerator is cut off for more than 1 hour. • Allow 24 hours to produce the first batch of ice. Discard the first three batches of ice produced. When power is restored, a power outage alert will appear on the display screen. The display shows how long the refrigerator was without power, using exact times if the clock has been set.
The water filter is located in the upper right-hand corner of the refrigerator compartment. Do not use with water that is microbiologically unsafe or of unknown quality without adequate disinfection before or after the system. Systems certified for cyst reduction may be used on disinfected waters that may contain filterable cysts. IMPORTANT: The disposable water filter should be replaced at least every 6 months.
TROUBLESHOOTING First try the solutions suggested here or visit our website and reference FAQs (Frequently Asked Questions) to possibly avoid the cost of a service call. In the U.S.A., www.maytag.com In Canada, www.maytag.ca The refrigerator will not operate The refrigerator seems noisy Refrigerator noise has been reduced over the years. Due to this reduction, you may hear intermittent noises from your new refrigerator that you did not notice from your old model.
The ice cubes Temperature • • are hollow or small NOTE: This is an indication of low water pressure. is too warm New installation? Allow 24 hours following installation for the refrigerator to cool completely. Door(s) opened often or left open? Allows warm air to enter refrigerator. Minimize door openings and keep doors fully closed. • Large load of food added? Allow several hours for refrigerator to return to normal temperature.
• • Refrigerator door closed completely? Close the door firmly. If it does not close completely, see "The doors will not close completely." WATER FILTER CERTIFICATIONS Recently removed the doors? Make sure the water dispenser wire/tube assembly has been properly reconnected at the top of the refrigerator door. See "Refrigerator Doors and Drawer." State of California Department Reverse osmosis water filtration system connected to your cold water supply? This can decrease water pressure.
PRODUCT DATA SHEETS Interior Water Filtration System Model UKF8001AXX-750 Capacity 750 Gallons (2839 Liters) System tested and certified by NSF International against NSF/ANSI Standard 42 for the reduction of Chlorine Taste and Odor, Particulate Class I*; and against NSF/ANSI Standard 53 for the reduction of Lead, Mercury, Atrazine, Benzene, p-Dichlorobenzene, Carbofuran, Toxaphene, Cysts, Turbidity, Asbestos, Tetrachloroethylene and Lindane.
Interior Water Filtration System Model UKF8001AXX-200 Capacity 200 Gallons (757 Liters) Chlorine Taste and Odor, Particulate Class I*; and against NSF/ANSI Standard 53 for the reduction of Lead, Mercury, Atrazine, p-Dichlorobenzene, Toxaphene, Cysts, Asbestos,of System tested and Benzene, certified by NSF International Carbofuran, against NSF/ANSI Standard 42 Turbidity, for the reduction O-Dichlorobenzene, Ethylbenzene, Chlorobenzene, Endrin, Tetrachloroethylene and Lindane.
MAYTAG ®MAJOR APPLIANCE WARRANTY LIMITED WARRANTY For one year from the date of purchase, when this major appliance is operated and maintained according to instructions attached to or furnished with the product, Maytag brand of Whirlpool Corporation or Whirlpool Canada LP (hereafter "Maytag") will pay for factory specified parts and repair labor to correct defects in materials or workmanship that existed when this major appliance was purchased.
NousvousREMERCIONS d'avoiracheteceproduitdehautequalit&Sivousrencontrez unprobleme nonmentionne dansla sectionDI_PANNAGE, veuillez visiternotresiteWebwww.maytag.com pourdesinformations supplementaires. Sivousavez toujours besoind'assistance, veuillez noustel6phoner au1-800-688-9900. AuCanada, visiteznotresiteWebwww.maytag.ca ou tel6phonez-nous au1-800-807-6777. Vousaurezbesoindevosnum@os demodeleetdes@iesituessurlaparoiinterneducompartiment derefrig@ation.
Mise au rebut de votre vieux r_frig_rateur Avant de jeter votre vieux r_frig_rateur • Enlever les portes. • ou cong_lateur : Laisser les tablettes en place de sorte que les enfants ne puissent pas y pen6trer facilement. Risque de suffoquer Enlever les portes de votre vJeux r_frig_rateur. Le non-respect de cette instruction peut causer un d_c_s ou des I_sions c_r_brales. IMPORTANT : L'emprisonnement et I'etouffement des enfants ne sont pas un probleme du passe.
REMAROUE : II est recommande de ne pas installer le refrig6rateur pres d'un four, d'un radiateur ou de toute autre source de chaleur. Ne pas installer le refrigerateur dans un endroit oQ la temperature baissera au-dessous de 55°F (13°C). / / _ ........................ ................d<:' ................. : e__}ea_>, Rassembler les outils et pieces necessaires avant de commencer I'installation. Lire et suivre les instructions fournies avec les outils indiques ici.
ea , Lire toutes les instructions avant de commencer. IMPORTANT • Si on doit utiliser le refrig6rateur avant qu'il soit raccorde & la canalisation d'eau, placer la commande de la machine a glagons a la position OFF (arret). Raccordement 1. Raccordement _ une canalisation d'eau 1. Debrancher le refrigerateur ou deconnecter courant electrique. 2. FERMER le robinet principal d'arrivee d'eau.
Achever I'installation Enl_vement IMPORTANT des portes et des charni_res : • Retirer les aliments et tout balconnet ou compartiment utilitaire des portes. • Laisser les portes du refrig6rateur fermees jusqu'& ce vous soyez pr_t ales soulever de la caisse. REMARQUE : Prevoir un support additionnel des portes pendant le retrait des charnieres. La force d'attraction des aimants des portes ne suffit pas ales maintenir en place.
2= R_installation des portes et des charni_res 1. Assembler les pieces des charnieres superieures. Voir I'illustration de la charniere superieure. Ne pas completement serrer les vis. 2. Replacer les pieces de la charniere inferieure. Voir I'illustration de la charniere inferieure. Serrer les vis. Replacer la porte du refrigerateur.
Chami_res sup_rieures Panneau de fagade c A. Vis A. Vis du cache B, Cache de/a de/a C. Vie de chamiere de 5/18" D. Chamiere charniere charniere superieure a t_te hexagonale superieure \\\ \\ Chami_res inf_rieures \',\\ \\ \\\\ \\ \\ A, Couvercle de raxe de la chamiere B, Charniere infedeure C. Vis de charniere \ \\ \\ A, Vis de reglage de %2" Fiche de branchement Raccordement @ d'eau A A, Vis de reglage de 3/32" iiiiiiiiiiiiiiiiiiiiiiiiiiiiiiiiiiiiiiiiiiiiiiiii A.
UTILISATION P P DU REFRIGERATEUR Pour faire passer le texte de I'ecran d'affichage du frangais I'anglais ou & I'espagnol, appuyer sur le bouton HOME (accueil) du tableau de distribution. Sur I'ecran d'affichage, appuyer sur OPTIONS, puis PRg:Fg:RENCES, et enfin LANGUE. Selectionner ANGLAIS ou ESPAGNOL, attendre 15 secondes ou appuyer sur RETOUR, et le texte de I'ecran sera modifi& II y a deux portes pour le compartiment de r6frigeration.
Ajustement des commandes Pour ajuster les points de reglage, appuyer sur le bouton TEMP (temperature) sur le tableau de distribution. Les points de reglage et les informations d'ajustement apparaftront sur I'ecran d'affichage. Commandes du r_frig_rateur S'assurer que RI2FRIGI2RATEUR est selectionn& Les fleches vers le haut ou vers le bas sur I'ecran d'affichage permettent d'ajuster la temperature du compartiment de refrigeration.
Volume sonore • Apr_s avoir connecte le refrigerateur & une source d'alimentation en eau, vidanger le systeme d'eau. Utiliser un recipient robuste pour appuyer sur la plaque du distributeur d'eau pendant 5 secondes, puis rel&cher pendant 5 secondes. Repeter I'operation jusqu'& ce que I'eau commence & couler. Une fois que I'eau commence & couler, repeter I'operation (appui sur la plaque du distributeur pendant 5 secondes puis rel&chement pendant 5 secondes) pendant 5 minutes supplementaires.
II est possible de puiser I'eau en once, en tasse ou en litre. Appuyer sur UNIT¢:S pour selectionner I'unite de mesure desir6e. Les volumes minimum et maximum sont indiqu6s ci-dessous. 2, Unit_s Minimum Maximum Onces 1 128 Tasses 1/4 16 Litres 0,05 4 A. Robinet entierement B.
Pour la glace concassee, les cubes de glace sont concasses avant d'etre distribu6s. Cela peut entrainer un leger retard dans la distribution de glace concassee. Le bruit du broyeur de glagons est normal et la dimension des morceaux de glace peut varier. Lorsqu'on passe du mode glace concassee au mode glagons, quelques onces de glace concassee sont distribu6es avec les premiers glagons.
Pour r_installer le bac d'entreposage a gla<;ons : IMPORTANT : Le bac d'entreposage & gla(;ons doit _tre bloqu6 en place pour une distribution appropriee de gla£;ons. 1. Reinstaller le bac d'entreposage 2. Faire pivoter le bac jusqu'& ce qu'il soit bien en place et le pousser vers I'arriere pour s'assurer qu'il est bien fix& Taux de production des gla£;ons sur la porte. Accorder 24 heures pour produire le premier lot de gla£;ons. Jeter les trois premiers lots de gla£;ons produites.
I'assechement des aliments, envelopper ou recouvrir hermetiquement les aliments. 4, Nettoyage de votre r_frigerateur : REMARQUE • Ne pas utiliser des nettoyants abrasifs ou puissants tels que les nettoyants a vitre en atomiseurs, nettoyants & recurer, liquides inflammables, cires nettoyantes, detergents concentres, eau de Javel ou nettoyants contenant du petrole sur les pieces en plastique, les garnitures interieures et de portes ou les joints de portes.
Le r_frig_rateur semble bruyant <:,t Le bruit des refrig6rateurs a et6 reduit au cours des annees. Du fait de cette reduction, il est possible d'entendre des bruits intermittents venant de votre nouveau refrig6rateur qui n'avaient pas et6 decel6s avec votre ancien modele. Voici une liste des sons normaux accompagnes d'explications.
• Un gla£on est-il coinc_ dans le bras _jecteur? Enlever le gla£;on du bras ejecteur avec un ustensile en plastique. • Un filtre a eau est-il install6 sur le r_frig_rateur? Enlever le filtre et faire fonctionner la machine & gla(;ons. Si le volume de glace augmente, le filtre est probablement obstru6 ou real install& Remplacer le filtre ou le reinstaller correctement.
FEUILLES DE DONNEES SUR LE PRODUIT Syst me ModUle de filtration d'eau int rieur UKF8001AXX-750/Capacite : 750 gallons (2839 litres) Systeme teste et certifie par NSF International en vertu de la norme NSF/ANSI 42 (reduction du goQt et de I'odeur du chlore, et particules (classe I*)); et en vertu de la norme NSF/ANSI 53 (reduction de plomb, mercure, atrazine, benzene, p-dichlorobenzene, carbofuran, toxaphene, kystes, turbidite, amiante, tetrachloro6thylene, et lindane).
Syst me ModUle de filtration d'eau int rieur UKF8001AXX-200/Capacite : 200 gallons (757 litres) Systeme teste et certifie par NSF International en vertu de la norme NSF/ANSI 42 (reduction du goQt et de I'odeur du chlore, et particules (classe I*)); et en vertu de la norme NSF/ANSI 53 (reduction de plomb, mercure, atrazine, benzene, p-dichlorobenzene, carbofuran, toxaphene, kystes, turbidite, amiante, O-dichlorobenzene, ethylbenzene, chlorobenzene, endrine, tetrachloro6thylene, et lindane).
GARANTIE P DE GROS APPAREIL MENAGER MAYTAG ® GARANTIE LIMITI_E Pendant un an a compter de la date d'achat, Iorsque ce gros appareil menager est utilise et entretenu conformement aux instructions jointes a ou fournies avec le produit, Maytag, marque de Whirlpool Corporation ou Whirlpool Canada LP (ci-apres designees "Maytag") paiera pour les pieces specifiees par I'usine et la main-d'ceuvre pour corriger les vices de materiaux ou de fabrication qui existaient deja Iorsque ce gros appareil menager a ete ac
Pour des informations supplementaires Au Canada, visiter www.maytag.ca. sur le produit, aux €:.-U., visiter www.maytag.com. Si vous n'avez pas acces & Internet et que vous necessitez une assistance pendant I'utilisation du produit ou que vous souhaitez prendre un rendez-vous, vous pouvez contacter Maytag au numero ci-dessous. Ayez votre numero de modele a disposition. interne du compartiment de refrigeration.
W10252999A SP PN W10253000A © 2009 All rights reserved. Tous droits reserves. ®Registered ®Marque deposeef trademarkf TM Trademark Marque de commerce Used under license Emploi sous licence TM of de by par Maytag Maytag Maytag Maytag Corporation or its related companies. Corporation ou de ses compagnies affiliees. Limited in Canada. Limited au Canada. 7/09 Printed in U.S.A. Imprime aux E.-U.