○ ○ ○ ○ ○ ○ ○ ○ ○ ○ ○ ○ ○ ○ ○ ○ ○ ○ ○ ○ ○ ○ ○ ○ ○ ○ ○ GAS RANGE WT TABLE OF CONTENTS ○ ○ ○ ○ ○ ○ ○ ○ ○ ○ ○ ○ ○ ○ Care and Cleaning ........................................... 10-11 Maintenance .................................................... 12-13 Before You Call for Service ............................. 13-14 Warranty ............................................................... 15 ○ ○ ○ ○ ○ ○ ○ ○ ○ ○ ○ ○ ○ ○ ○ ○ ○ ○ ○ ○ ○ ○ ○ ○ ○ ○ ○ ○ ○ ○ ○ ○ ○ ○ ○ ○ ○ ○ ○ ○ ○ ○ ○ ○ ○ ○ Welcome .............
Models: MGR4410B • MGR4450B Welcome ○ ○ ○ ○ ○ ○ ○ ○ ○ ○ ○ ○ ○ ○ ○ ○ ○ ○ ○ ○ ○ IMPORTANT SAFETY Congratulations on your choice of a Maytag gas range. Your INSTRUCTIONS ○ ○ ○ ○ ○ ○ ○ ○ ○ ○ ○ ○ ○ complete satisfaction is very important to us. Read and follow all instructions before using this appliance to prevent the potential risk of fire, electric shock, personal injury or damage to the appliance as a result of improper usage of the appliance. Read this user’s guide carefully.
General Instructions To eliminate the hazard of reaching over hot surface burners, cabinet storage should not be provided directly above a unit. If storage is provided, it should be limited to items which are used infrequently and which are safely stored in an area subjected to heat from an appliance. Temperatures may be unsafe for some items, such as volatile liquids, cleaners or aerosol sprays.
SAFETY INSTRUCTIONS (continued) About Your Appliance ○ ○ ○ ○ ○ ○ ○ ○ ○ ○ ○ ○ ○ ○ ○ ○ ○ ○ ○ ○ ○ NEVER heat an unopened container on the surface burner or in the oven. Pressure build-up may cause container to burst resulting in serious personal injury or damage to the appliance. NEVER use appliance as a space heater to heat or warm a room to prevent potential hazard to the user and damage to the appliance. Also, do not use the cooktop or oven as a storage area for food or cooking utensils.
Utensil Safety Cleaning Safety Use pans with flat bottoms and handles that are easily grasped and stay cool. Avoid using unstable, warped, easily tipped or loose-handled pans. Also avoid using pans, especially small pans, with heavy handles as they could be unstable and easily tip. Pans that are heavy to move when filled with food may also be hazardous. Turn off all controls and wait for appliance parts to cool before touching or cleaning them.
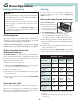
Controls at a Glance ○ ○ ○ ○ ○ ○ ○ ○ ○ ○ ○ ○ ○ ○ ○ ○ ○ ○ ○ ○ ○ ○ ○ ○ ○ ○ ○ ○ ○ ○ Clock and Timer Control 1 1 : 35 NOTE: The display will flash when electrical power is first supplied to the appliance or if there has been a power failure. To Set the Clock: 2. Press or press and hold the ▲ or ▼ pad until the correct time appears in the display. 1. Press the CLOCK pad. • A beep will sound when the CLOCK pad is pressed. 2.
Surface Cooking ○ ○ ○ ○ ○ ○ ○ ○ ○ ○ ○ ○ ○ ○ ○ ○ ○ ○ ○ ○ ○ ○ ○ ○ ○ ○ ○ ○ ○ ○ ○ ○ ○ ○ ○ ○ Surface Controls Setting the Controls 1. Place a pan on the burner grate. CAUTIONS: • If flame should go out during a cooking operation, turn • The burner flame may lift off or appear separated from the port if a pan is not placed on the grate. the burner off. If a strong gas odor is detected, open a window and wait five minutes before relighting the burner. 2.
Surface Cooking (continued) ○ ○ ○ ○ ○ ○ ○ ○ ○ ○ ○ ○ ○ ○ ○ ○ ○ ○ ○ ○ ○ ○ ○ ○ ○ ○ ○ ○ ○ ○ ○ ○ Cooktop To prevent the cooktop from discoloring or staining: • Clean cooktop after each use. • Wipe acid or sugar spills as soon as the cooktop has cooled as these spills may discolor the porcelain. Unlike a range with standard gas burners, this cooktop does not lift-up nor is it removable. Do not attempt to lift the cooktop for any reason. Burner Grates The grates must be properly positioned before cooking.
Oven Operation ○ ○ ○ ○ ○ ○ ○ ○ ○ ○ ○ ○ ○ ○ ○ ○ ○ ○ ○ ○ ○ ○ ○ ○ ○ ○ ○ ○ ○ ○ ○ ○ ○ ○ ○ ○ ○ Baking and Roasting Broiling For best results, use a pan designed for broiling. For additional broiling tips, refer to the “Cooking Made Simple” booklet. Notes . . . • You may find that the cooking times and temperatures vary slightly from your old oven. This is normal. Every oven has its own characteristics.
Oven Operation (continued) ○ ○ ○ ○ ○ ○ ○ ○ ○ ○ ○ ○ ○ ○ ○ ○ ○ ○ ○ ○ ○ ○ ○ ○ ○ ○ ○ ○ ○ ○ Oven Racks Half Rack Accessory CAUTION: Do not attempt to change the rack position when the oven is hot. A half rack, to increase oven capacity, is available as an accessory. It fits in the left, upper portion of the oven and provides space for a vegetable dish when a large roaster is on the lower rack. Contact your Maytag dealer for the “HALFRACK” Accessory Kit or call 1-800-688-8408. Your oven has two racks.
Care & Cleaning ○ ○ ○ ○ ○ ○ ○ ○ ○ ○ ○ ○ ○ ○ ○ ○ ○ ○ ○ ○ ○ ○ ○ ○ ○ ○ ○ ○ ○ ○ ○ ○ ○ ○ ○ ○ Cleaning CAUTIONS: • Be sure appliance is off and all parts are cool before handling or cleaning. This is to avoid damage and possible burns. • To prevent staining or discoloration, clean appliance after each use. • If a part is removed, be sure it is correctly replaced.
Care & Cleaning (continued) ○ ○ ○ ○ ○ ○ ○ ○ ○ ○ ○ ○ ○ ○ ○ ○ ○ ○ ○ ○ ○ ○ ○ ○ ○ ○ ○ ○ ○ ○ ○ ○ Cleaning Chart -- continued ○ Parts Cleaning Procedure Metal Finishes - Trim parts • Wash with soap and water, a glass cleaner, or mild liquid sprays. • To prevent scratching or dulling of the finish, do not use mildly abrasive, abrasive, harsh or caustic cleaners such as oven cleaners.
Maintenance ○ ○ ○ ○ ○ ○ ○ ○ ○ ○ ○ ○ ○ ○ ○ ○ ○ ○ ○ ○ ○ ○ ○ ○ ○ ○ ○ ○ ○ ○ ○ ○ ○ ○ ○ ○ ○ ○ ○ ○ ○ ○ Oven Door Oven Light CAUTIONS: CAUTION: Do not place excessive weight on or stand on an open oven door. This could cause the range to tip over, break the door, or injure the user. • Disconnect power to range before replacing light bulb. • Do not attempt to open or close door or operate oven until door is properly replaced. • Be sure bulb is cool before touching bulb.
Maintenance (continued) ○ ○ ○ ○ ○ ○ ○ ○ ○ ○ ○ ○ ○ ○ ○ ○ ○ ○ ○ ○ ○ ○ ○ ○ ○ ○ ○ ○ ○ ○ ○ ○ ○ ○ ○ How to Remove Range for Cleaning and Servicing Proportional Valve Adjustment for Surface Burners Follow these procedures to remove appliance for cleaning or servicing: The WARM setting should produce a stable flame when turning the knob from HIGH to WARM. The flame should be 1 /8 inch or lower and must be stable on all ports on WARM setting. 1. Shut off gas supply to appliance. 2.
Check these points if . . . • Check the oven temperature selected. Make sure oven is preheated when recipe or directions recommend preheat. • Check rack positions. See page 9. • Use correct pan. Dark pans produce dark browning. Shiny pans produce light browning. See “Cooking Made Simple” booklet for more information on bakeware. • Check the use of foil in the oven. Never use foil to cover an entire oven rack. Place a small piece of foil on the rack below the pan to catch spillovers. • Check pan placement.
W Y T RRAN A Maytag Range Warranty ○ ○ ○ ○ ○ ○ ○ ○ ○ ○ ○ ○ ○ ○ ○ ○ ○ ○ ○ ○ ○ ○ ○ ○ ○ ○ ○ ○ ○ ○ Full One Year Warranty - Parts and Labor For one (1) year from the original retail purchase date, any part which fails in normal home use will be repaired or replaced free of charge.