Welcome ................................................................. 1 Safety Instructions ............................................... 1-4 Controls at a Glance ............................................ 5-7 Surface Cooking ................................................. 8-9 SUrface Controls ...... ..................................... 8 Cooktop ............................................................ 9 Oven Operation ................................................
1 Models: MGR5710 ° MGR5720 • MGR5729 • MGR5730 • MGR5745 • MGR5750 J Welcome..................... Important Safety CongratulationsonyourchoiceofaMaytaggasrange. Your Instructions................ complete satisfaction is very important to us. Read and follow all instructions before using this appliance to prevent the potential risk of fire, electric shock, personal injury or damage to the appliance as a result of improper usage of the appliance. Read this user's guide carefully.
General Instructions i ' _,_i _ (_ _ ? _ • ALL RANGESCAN TIP AND CAUSE INJURIESTO ,_WA R NIN G PERSONS • INSTALL ANTI-TIPDEVICE • aers, unit. If storage is provided, should be limited items cabinet storage should notitbe provided directlytoabove which are used and which To eliminate the infrequently hazard of reaching over are hot safely surfacestored burnin an area subjected to heat from an appliance. Temperatares may be unsafe for some items, such as volatile liqsprays.
Safety Instructions (continued)................................, About YourAppliance NEVER heat an unopened container on the surface burner or in the oven. Pressure build-up may cause container to burst resulting in serious personal injury or damage to the appliance. NEVER use appliance as a space heater to heat or warm a room to prevent potential hazard to the user and damage to the appliance. Also, do not use the cooktop or oven as a storage area for food or cooking utensils. ....
, __!_•_i_j(_i' .i__i,' .__ ,,_ij i:i__i_ii' i__!_i ! , i'i_i_ _ 7 i i !i Be sure utensil is large enough to properly Contain food and avoid believers. Pan size is particularly important in deep fat Clean appliance with caution. Use care to avoid steam burns if a wet sponge or cloth is used to wipe spills on a hot frying. is to be Be added sureas pan well willasaccommodate the bubble action the volume of fat. of food that plied surface. to aSome hot surface.
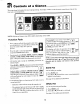
Controls at a Glance.............................. The control panel is designed for ease in programming. The display window on the electronic control shows time of day, timer and oven temperatures. BROIL CLEAN COOK TIME YVY STOP TIME NOTE: Styling and features may differ slightly depending on the model. i : Function Pads For example: If you set the oven to bake • Press, or press and hold, these pads to enter time, oven temperature or to select HI or LO broil.
CLEAN Pad Setting the Timer Use to set self-clean cycle. The timer can be set from one minute (0:01) up to 9 hours and 50 minutes (9:50). For models with a manual door lock: 1. Close and lock oven door. 2. Press CLEAN pad. "3:00" will appear in the display, 3. Oven will automatically clean for 3 hours or press • or • pad to select 2 to 4 hours of cleaning. For models with an automatic door lock: 1. Press CLEAN pad. " : -" will appear in the display. 2. Press • or • pad.
Controls at a Glance (continued)....................... Cancel Clock Display Option Oven Temperature Adjustment If you prefer that the time of day not be displayed: You may adjust the oven temperature if you think the oven is not baking correctly. To decide how much to change the temperature, set the oven temperature 25 degrees higher or lower than your recipe recommends, then bake.
CLEAN Pad Setting the Timer Use to set self-clean cycle. The timer can be set from one minute (0:01) up to 9 hours and 50 minutes (9:50). For models with a manual door lock: The timer can be used independently of any other oven activity and it can be set while another oven function is operating. THE TIMER DOES NOT CONTROL THE OVEN. 1. Close and lock oven door. 2. Press CLEAN pad. "3:00" will appear in the display, 3.
Surface Cooking (continued)....,,.,........,,..,.....,.,. Cooktop Burner Grates To prevent the cooktop from discoloring or staining: The grates must be prop- E',,_) _.--.-../AIIr-."..-_ f_¢'/_"_ erly positioned before /__ ff _J[ 1{_%_ "_ ___-'_\ cooking. Improperin- /_ r_ _[ [_ n _-_\ stallationofthegrates L__.___ [__1 may result in chip- '_:'_ ping of the cooktop, depending onmodel. • Clean cooktop after each use.
Oven Operation .................................... NOTES... • During some extended oven cooking operations, you may hear a "popping" sound when the oven burner • You may find that the cooking times and temperatures vary slightly from your old oven. This is normal. Every oven has its own characteristics, cycles. This is normal. • See roasting chart in "Cooking Made Simple" for recommended roasting temperatures and times and baking and roasting tips.
Oven Operation (continued)............................... Oven Vent RACK 1: Used for roasting large cuts of meat and poultry, frozen pies, dessert souffles or angel food cake. ROASTING POSITION: Used for roasting taller cuts of meat or turkey. Place both oven racks, one above the other, on the raised sides of the oven bottom. When the oven is in use, never block the vent opening. Itis located at the base of thebackguard. When theoven is in use, this area may feel warm or hot to the touch.
Broiling • For best results, use a pan designed for broiling. •For additional broiling tips, refer to the "Cooking Made Simple" booklet. Setting the Controls for Broiling 1. Press the BROIL pad. • BROIL indicator on the BROIL pad will light. • 000 will light in the display. • The OVEN ON indicator will light. There will be an eight second delay before the oven turns on. Broil _ Indicator Light _ I m L vvv OVEN ON CDPREHEAT (_ 2.
Oven Operation (continued) ............................. Clock Controlled Oven Cooking A The clock must be functioning and set at the correct time of day for this feature to operate correctly. CAUTION • Highly perishable foods such as dairy products, pork, poultry or seafoodare not recommended for delayedcook operations, Clock Controlled Oven Cooking is used to turn the oven on and off at a preset time of day. This feature can be used with either oven cooking or self-cleaning.
Care and Cleaning ................................... Self-Clean Oven A Self-Clean CAUTIONS: the oven door. Toprevent damage, The gasket do not isclean designed or rubto the sealgasket in heataround during the clean cycle. • It is normal for parts of the range to become hot during a clean cycle. • Avoid touching cooktop, door, window, or oven vent area during a clean cycle. ' To prevent damage to oven door, do not attempt to open the door when the LOCK indicator light is lit.
Care and Cleaning Setting the Contnfls (continued)........................... tbr Sell" Clean NOTE: These instructions cover automatic lock and manual lock models. 1, Close oven door. 2. Move door lock lever right to the locked position (select models). 3. Press CLEAN pad. • CLEAN indicator on the CLEAN pad will flash. • LOCK indicator will light on models with automatic lock. • "- : - -" or 3:00 will light in display depending on _ • If door is not closed or locked, "dr" will appear in your model.
Cleaning CAUTIONS: • Be sure appliance is off and all parts are cool before handling or cleaning• This is to avoid damage and possible burns• • To prevent staining or discoloration, clean appliance after each use. • If a part is removed, be sure it is correctly replaced. ' CleaningChart Parts Cleaning Procedure Broiler Pan and Insert Never cover insert with aluminum foil as this prevents the fat from draining to the pan below. • Place soapy cloth over insert and pan; let soak to loosen soil.
Care and Cleaning (continued)......................... Cleaning Chart -- continued • Parts m Enamel, painted • When cool, wash with warm soapy water, rinse and dry. Never wipe a warm or hot surface with - Side panels - Storage drawer or lower panel - Oven door (select models) • a damp cloth as this may damage the surface and may cause a steam burn. For stubborn soil, use mildly abrasive cleaning agents such as baking soda paste or Bon Ami.
Mo;n_=n=nr-,., ......,.... v..................................-.. Cleaning Products 9ven Door Because of the many new cleaning products introduced in the marketplace each year, it is not possible to list all products that can be safely used to clean this appliance. Listed below are just ACAUTIONS: •.. •••• • Do not place excessive weight on or stand on an open oven door. This could cause the range to tip over, break the door, or injure the user.
Maintenance (continued)................................ Oven Light Storage Drawer ACAUTIONS: ACAUTION: • Disconnect power to range before replacing light bulb. • Do not storeplastic, paper products, food or flammable materials in this drawer. The drawer may become too warm for these items when the oven is in use. • Use a dry potholder to prevent possible harm to hands when replacing bulb. • Be sure bulb is cool before touching bulb.
Oven Bottom s. Reverse procedure to reinstall. If gas line has been disconnected, check for gas leaks after reconnection NOTE: A qualified servicer should disconnect and reconnect the gas supply. Protect oven bottom against spillovers, especially acid or sugary spills, as they may discolor the porcelain enamel. Use the correct pan size to avoid spillovers and boilovers. Do not place aluminum foil directly on the oven bottom. 6.
Before You Call for Service............................. ,'heck these )oints if... • • • • • • Part or all of the appliance does not work• • • • • • • • • • • • • • . p • fails to light• • • • • • • • • • • • • • * • • • • • • • • • • • • • • • • • , • • • a i • • • • • • • • • • • * • • - • ° • • • • • • • • • • • • • • • . • • , • • • • • • • • , • • • . • • • • • • • • • • • • • • .
Check these )oints if... Oven will not self-clean• • • • • • • • • . • • • • Check to make sure controls are set properly. • Check to make sure the cycle is not set for a delayed star[. • Check if door is closed. • • • . • * • • * • • • • • • • • , • • • • • • • • • • • • • • • • • • • • • • • . • • • • , • • . • • Longer cleaning time may be needed.
Maytag Range Warranty ............................. Full One Year Warranty - Parts and Labor For one (1) year from the original retail purchase date, any part which fails in normal home use will be repaired or replaced free of charge.