
Product Datasheet/Brochure


5
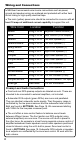
Can-Am X3 Source Unit Mounting Instructions
3
4
3) Take note of the four
(4) holes for mounting of
the source unit’s housing
as shown. These must be
carefully drilled. Two (2)
in front and two (2) at the
back.
4) Set source unit housing
in place in center dash area
to locate four (4) mount-
ing holes required for nal
mounting. Using a perma-
nent marker or awl, locate
and mark dimples for veri-
cation of where you'll drill.
Remove housing and set
aside when completed.
Mark Holes
Back
Front
1
1) Remove top center plas-
tic cover above dash pock-
et. Push up on the front
pocket edge above lighter
socket, then pull toward
you. Remove lighter socket
to facilitate wiring path or
drill a 1" hole on the side of
the pocket near the lighter
socket for wire access.
2
2) Connect and route all wir-
ing (as described on page
3 and 4) to source unit area
as shown. Connect source
unit wiring pigtail using the
wiring diagram. Remember
to include any RCA audio
or USB cables if the apply
in your system. Do not yet
connect to source unit.
Route and
Connect
Wiring Here