INSTRUCTION MANUAL McGregor 21.6V 32cm Cordless Lawn Mower MCR2132 Important - Please read these instructions fully before starting assembly These instructions contain important information that will help you get the best from your mower, ensuring it is assembled correctly and safely.
Table Of Contents Symbols..................................................................................................................................................... 3 Safety Information General Safety........................................................................................................................................ 5 Battery Safety Information......................................................................................................................
Symbols Important - Please read these instructions fully before starting assembly Warnings Symbols The following warning symbols appear throughout this manual and indicate the appropriate safety measures you should take when operating and maintaining the appliance. Take extra care, beware of hazards. Caution Read instruction manual. Keep bystanders away. Beware of sharp blades. Blades may continue to rotate after the motor is switched off. Beware of injury to toes or fingers.
Symbols Important - Please read these instructions fully before starting assembly Warnings Symbols (continued) T/3.15A Fuse Electrical appliances must not be disposed of with the domestic waste. li-ion Batteries contain Lithium-ion. Do not dispose of batteries in household waste. Do not dispose of battery packs in rivers or immerse in water. Do not dispose of battery packs in fire. Do not subject the battery to direct sunlight over long periods and do not leave it on or near a heat source (max. 60°C).
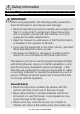
Safety Information Important - Please read these instructions fully before starting assembly General Safety IMPORTANT! When using equipment, the following safety precautions must be followed to avoid injuries and damage: • Read all operating instructions carefully and comply with them. It is important to understand these instructions and to acquaint yourself with the machine, its correct usage and all safety requirements.
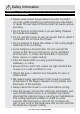
Safety Information Important - Please read these instructions fully before starting assembly General Safety (continued) • Never operate the machine while people, especially children, or pets are nearby. • Use extreme care when approaching blind corners, doorways, shrubs, trees, or other objects that may obscure your view of a child or animal that may run into the path of the mower. • Keep in mind that the operator or user is responsible for accidents or hazards occurring to other people or their property.
Safety Information Important - Please read these instructions fully before starting assembly General Safety (continued) • Walk, never run. • Mow across the face of slopes, never up and down. • Exercise extreme caution when changing direction on slopes. • Use extreme caution when reversing or pulling the mower towards you. • Stay Alert: Do not operate the mower when you are tired. Pay attention to what you are doing. • Do not operate the mower while under the influence of alcohol or drugs.
Safety Information Important - Please read these instructions fully before starting assembly General Safety (continued) • Never pick up or carry the machine while the motor is running. • Do not carry the machine with your finger on the switch. • Do not overreach. Keep proper footing and balance at all times. • Do not use a machine if the switch does not turn it on and off. Any machine that cannot be controlled with the switch is dangerous and must be repaired.
Safety Information Important - Please read these instructions fully before starting assembly General Safety (continued) • Always wear proper eye protection in order to protect your eyes while operating or performing any adjustment or repair. Thrown objects that ricochet can cause serious eye injury. • Do not hold on to the mower if you are falling. Release the handle immediately. • Do not use the mower for any job except that for which it is intended. Do not force the mower.
Safety Information Important - Please read these instructions fully before starting assembly General Safety (continued) • Never operate mower without correct safety devices in place and in working order. Do not operate the mower with damaged safety devices. Doing so can result in injury. • Ensure that the safety key is not installed when the mower is not in use. This prevents accidental starting of the machine. • Replace worn or damaged parts for safety. Use only genuine replacement parts and accessories.
Safety Information Important - Please read these instructions fully before starting assembly General Safety (continued) • WARNING! This machine produces an electromagnetic field during operation! This field may under some circumstances interfere with active or passive medical implants! To reduce the risk of serious or fatal injury, we recommend persons with medical implants to consult their doctor and medical implant manufacturer before operating this product! • Store the mower, the charger and the battery
Safety Information Important - Please read these instructions fully before starting assembly Battery Safety Information (continued) • Do not charge battery in a damp or wet location. Following this rule will reduce the risk of electric shock. • For best results, your battery tool should be charged in a location where the temperature is more than 4°C but less than 40°C. • Under extreme usage or temperature conditions, battery leakage may occur.
Safety Information Important - Please read these instructions fully before starting assembly Charger Safety Information • Ensure the battery pack is charged indoors only, in a dry, cool and well-ventilated environment. • Do not use non-rechargeable batteries! • Do not operate the charger with a damaged cord or plug, which could cause shorting and electric shock. If damaged, immediately discontinue use. Replace the charger with the identical unit as listed in the Product Specifications in this manual.
Safety Information Important - Please read these instructions fully before starting assembly Intended Use This lawnmower is designed for domestic use only: • This cordless lawnmower is intended for mowing lawns in domestic and hobby gardens. • This product is not to be used in wet weather conditions and may not be used to mow wet or unusually high grass. • This product is intended for private domestic use only, not for any commercial trade use.
In the Box Parts 1 Top Handle 8 Deck 14 Safety Button 2 Switch Lever 9 Front Wheel 15 Cable Clip (x2) 3 Left Lower Handle 16 Wing Nut (x2) 4 Deflector Guard Battery Compartment Cover 17 Bolt (x2) 5 Grass Collection Box 18 Grass Collection Box Handle 19 Top Half of the Grass Collection Box 6 7 Cutting Height Adjustment Lever Rear Wheel 10 11 Isolator Key 12 Grass Box Full Indicator 13 Right Lower Handle 20 Bottom Half of the Grass Collection Box 21 Tongue 22 Battery
In the Box Parts (continued) 1 19 16 3 20 13 15 21 16 22 23 17 24 18 25
Assembly Step 1 - Assembling Handles 1 • Insert the left and right lower handles into the slots of the housing. Ensure the locking pin button ( 1 ) is secured into place. NOTE! After assembly of the left and right lower handles, check that they are secure and cannot be pulled out of the mower deck. • Fix the top curved handle section to the lower handle bars. Use the bolts and wing nuts provided. There are two possible height positions. Choose the one most suitable to the operator’s height.
Assembly Step 2 - Assembling the Grass Collection Box 18
Assembly Step 2 - Assembling the Grass Collection Box (continued) • Clip the grass collection box handle into the top half of the grass collection box. • Align the front ends of the top and bottom pieces of the grass collection box. Clip the two pieces together starting at the front. • Once the front clips are secure, work back on either side to secure each clip. This method will help to keep the two pieces of the box aligned.
Preparation Step 1 - Check Battery Capacity NOTE! The battery is stored under the safety flap during delivery. Take out the battery before fitting it. Push the power indicator to show the remaining battery capacity. The battery is equipped with a charge-level indicator panel which indicates its charge condition. This charge-level indicator panel consists of 4 LEDs on the battery. Press and hold the charge indicator button on the battery to view the charge level indicator.
Preparation Step 2 - Battery Charging • Plug the charger into an appropriate AC power outlet. • Insert the battery pack along the support rails of the charger. The indicator lights on the charger show the charging status: Symbol Indicator lights Status red, flashing red, continuous green, flashing green, continuous charging paused, see instructions below.
Preparation Step 3 - Fitting/Removing the Battery Fitting the battery Lift the battery compartment cover and slide the battery into the battery chamber. Ensure it slides smoothly along the support rails and locks into position. Close the battery cover. Removing the battery Stop the machine. Pull out the isolator key. Lift the battery compartment cover, activate the release button on the battery and slide the battery out. Close the battery cover.
Preparation Step 4 - Setting the Cutting Heights 2 1 3 IMPORTANT! Set the cutting height only when the motor is switched off and the isolator key has been removed. WARNING! Stop the machine, release the switch lever and wait until the blade stops before adjusting the cutting height. Remember, the blade may continue to rotate after the machine is switched off. A rotating blade can cause injury. CAUTION! Do not touch rotating blades.
Operation Step 1 - On/Off Operation 2 1 • To switch on, press the safety lock-off button on the handle, then activate the start/stop switch lever. Release the lock-off button. • To switch off, release the start/stop switch lever. WARNING! After switching off the mower, the blade may continue to turn for several seconds. Do not touch the moving blade. There is a risk of serious injury. Step 2 - Grass Collector Box Full Indicator • Your mower may be fitted with a grass box full indicator.
Operation Step 3 - Mowing Advice WARNING! When mowing, do not allow the motor to labour, particularly in heavy conditions. When the motor labours, the speed of the motor drops and you will hear a change in the motor sound. If the problem persists, set the cutting height to a higher setting. Protect the battery from heat, from continuous exposure to sun and keep away from radiation or other heat sources. Do not leave the battery in the mower in direct sunlight over long periods.
Maintenance General Maintenance Always wear safety gloves when handling or working near sharp blades. WARNING! Switch off, and remove the isolator key, battery and grass collection box before adjusting or cleaning. NOTE! To ensure long and reliable product life, carry out the following maintenance regularly: • Check for obvious defects such as loose, dislodged or damaged blade, loose fixings, and worn or damaged components. • Check that covers and guards are undamaged and correctly fitted.
Maintenance Blade Maintenance 1 2 Turn the machine carefully onto its right side and inspect the blade. If blunt or damaged, replace it. Use the following procedure to remove and replace the blade: Wear thick gardening gloves. Hold the blade and using a spanner (not provided) loosen the blade bolt ( 1 ) and remove the blade ( 2 ). Fit the new blade and the blade bolt. Ensure that the blade is the correct way up (so that the blade number can be seen) and tighten the bolt securely.
Technical Data Technical Data Table Model MCR2132 Voltage 21.6V No load speed 3700/min Cutting width 32cm Height of cut 25/35/45/55/65/mm Net weight 8.56kg Grass collector capacity Sound Pressure Level (LPA) Sound Power Level (LWA) Guaranteed Sound Power Level (LWA) Measured Vibration (ah) 30 L 84 dB(A) K= 3 dB(A) 96 dB(A) 86.8 dB(A) K= 1.8 dB(A) 2.5 m/s2 K= 1.5 m/s2 Charger Model no.
Technical Data Part List Part number 211056107 211002134 211002121 211034113 211059107 111227107 Accessories Blade Battery Charger Isolator Key Grass Collection Bag Wing Nuts Recycling and Disposal This marking indicates that this product should not be disposed with other household wastes throughout the EU. The machine must be delivered in rigid packaging to avoid damage during transportation.
Troubleshooting General Troubleshooting The following table provides solutions to common problems encountered with the mower. Problem Mower fails to operate. Possible Cause Possible clogging. The battery is not fully charged. The battery is not inserted (properly). The grass is too long. Motor starts and stops immediately. Mower functions intermittently. Lawnmower leaves ragged cut. Poor cutting or motor labours. Area of cut (battery duration) is not large enough. The battery is too hot/cold.
Troubleshooting General Troubleshooting (continued) The following table provides solutions to common problems encountered with the mower. Problem The cutting blade is not rotating while the garden product is switched on. Possible Cause The cutting blade is obstructed. The blade nut/bolt is loose. Excessive vibrations/noise The blade nut/bolt is loose. No charging procedure possible Cutting blade is damaged. The battery contacts are contaminated.
Getting Help After Sales Support Our dedicated UK based customer helpline can assist you with assembly, parts queries and technical support. Our experts are here to get you back enjoying your garden in no time. Calling our service does not affect your statutory rights. After sales helpline number: 0345 605 2063 Guarantee Dear Customer, In the unlikely event that your device develops a fault, please contact our Customer service department on the telephone number shown below. 1.