OWNERS MANUAL C42 Audio Control Center C42 McIntosh Laboratory, Inc.
Thank You, Please Take A Moment, Customer Service and Table of Contents Thank You Your decision to own this McIntosh C42 Audio Control Center ranks you at the very top among discriminating music listeners. You now have The Best. The McIntosh dedication to Quality, is assurance that you will receive many years of musical enjoyment from this unit. Please take a short time to read the information in this manual.
Safety Instructions IMPORTANT SAFETY INSTRUCTIONS! PLEASE READ THEM BEFORE OPERATING THIS EQUIPMENT. WARNING SHOCK HAZARD DO NOT OPEN. The lightning flash with arrowhead, within an equilateral triangle, is intended to alert the user to the presence of uninsulated dangerous voltage within the products enclosure that may be of sufficient magnitude to constitute a risk of electric shock to persons. AVIS RISQUE DE CHOC NE PAS OUVRIR.
Safety Instructions cont, Introduction and Performance Features 17. Do not overload wall outlets, extension cords or integral convenience receptacles as this can result in a risk of fire or electric shock. Care of Equipment: 18. Clean the instrument by dusting with a dry cloth. Unplug this equipment from the wall outlet and clean the panel with a cloth moistened with a window cleaner. Do not use liquid cleaners or aerosol cleaners. 19.
Installation Installation The C42 can be placed upright on a table or shelf, standing on its four feet. It also can be custom installed in a piece of furniture or cabinet of your choice. The required panel cutout, ventilation cutout and unit dimensions are shown. Always provide adequate ventilation for your C42. Cool operation ensures the longest possible operating life for any electronic instrument. Do not install the C42 directly above a heat generating component such as a high powered amplifier.
C42 Rear Panel Connections and Switch C42 Rear Panel Connections and Switch Connect the C42 power cord to a live AC outlet.
How to Connect the C42 How to Connect the C42 1. Plug the C42 AC power cord into a live AC outlet. 2. Connect balanced cables from the balanced MAIN OUTPUTS to balanced power amplifier inputs. 3. Connect cables from the C42 LISTEN PROCESSOR FROM jacks to the outputs of a signal processor. Connect cables from the C42 LISTEN PROCESSOR TO jacks to the signal processor inputs. Note: Connect a signal processor to the RECORD PROCESSOR jacks in a similar manner. 4.
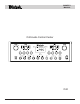
C42 Front Panel Controls, Displays, Push-Buttons, and Switch C42 Front Panel Controls, Displays, PushButtons, and Switch BALANCE control allows you to adjust the relative volume levels of each channel signal in 1dB steps RECORD switch selects the program signals that are fed to the TAPE Outputs DISPLAY indicates the volume level in dB with 0.5dB or 1.0dB steps, or percentage of maximum volume from 1 to 100.
How to Trim Input Volume Levels How to Trim Input Volume Levels Optional Trim Procedure 1. Switch the RECORD selector to TUNER. 2. Switch the LISTEN selector to a different input source such as CD. 3. Press the REC MONITOR push-button and adjust the volume control to the desired listening level. 4. Press the INPUT TRIM push-button. The VOLUME display will read 00 and the Red LED above the push-button will turn ON. 5. Press the REC MONITOR a second time to return to the LISTEN mode.
How to Operate the C42 How to Operate the C42 Power On Press the POWER switch to ON. The Red LED, above the STANDBY/ON Pushbutton, lights to indicate the C42 is in Standby Mode. To turn on the C42 press the STANDBY/ ON push-button. Refer to Figure 2. NOTE: You may also turn on the C42 using the remote control. Figure 2 Source Selection Select the desired listening source with the LISTEN Switch. Volume Control Adjust the VOLUME control for the desired listening level.
How to Operate the C42 cont controls. Both left and right channels are affected. At the center detent or flat position of the controls, all equalizer circuit components are removed from the signal path. Mono Press the MONO push-button to combine left and right stereo signals to mono at all MAIN, OUTPUT 1&2 and HEADPHONES Outputs. Mute Press the MUTE pushbutton to mute audio in all Listen outputs. How to change dB volume Steps The Volume Control can adjust volume level in either 1dB or 0.5dB steps.
Remote Control Push-Buttons Remote Control Push-Buttons Selects transport functions of a CD player, CD changer or tape recorder Select any of the eight high level, (or phono), inputs Selects FM or AM tuner Functions Selects tuner presets, track selection or any numbered operation Selects tuner stations presets Selects discs or tracks of a CD/LV/DVD player or changer Turn LISTEN or RECORD PROCESSOR circuits ON or OFF Use together with the number keys to select track numbers above 10 Selects the input
How to Operate the Remote Control How to Operate the Remote Control Mute Press the MUTE push-button to mute audio in all LISTEN outputs. Record Monitor Press the REC (Record) Monitor push-button to listen to the signals being fed to the RECORD OUTPUTS. Mono Press the MONO push-button to combine left and right stereo signals to mono at all MAIN, AMPLIFIER, LISTEN and HEADPHONES Outputs. Volume Press the Up or Down VOLUME push-button to raise or lower the listening volume level.
Specifications and Performance Chart Specifications Maximum Input Signal Phono: 50mV High Level: 5V Frequency Response +0, -0.5dB from 20Hz to 20,000Hz Total Harmonic Distortion 0.002% maximum from 20Hz to 20,000Hz Voltage Gain Phono to Tape Out: 40dB High Level to Tape Out: 0dB High Level to Main Out: 15dB Signal To Noise Ratio Phono: 86dB (A Weighted) High Level: 97dB (A Weighted) Rated Output Voltage Main and Outputs 1 and 2: 2.
Packing Instructions Packing Instructions In the event it is necessary to repack the equipment for shipment, the equipment must be packed exactly as shown below. It is very important that the four plastic feet are attached to the bottom of the equipment. This will ensure the proper equipment location on the bottom pad. Failure to do this will result in shipping damage. Use the original shipping carton and interior parts only if they are all in good serviceable condition.
McIntosh Laboratory, Inc. 2 Chambers Street Binghamton, NY 13903 McIntosh Part No.