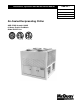
Installation, Operation and Maintenance Manual IOMM AGR-1 Group: Chiller Part Number: 330145704 Effective: August 2001 Supersedes: IOMM AGR Air-Cooled Reciprocating Chiller AGR 070AS through 100AS 60 Hertz, English and Metric Global Chiller Line
Table of Contents Introduction ....................................... 3 General Description..................................... 3 Inspection .................................................... 3 Installation ......................................... 4 Handling ...................................................... 4 Location....................................................... 5 Service Access and Clearances .................... 5 Vibration Isolators .......................................
Introduction General Description McQuay Air-Cooled Global water chillers are complete, self-contained automatic refrigerating units. Every unit is completely assembled, factory wired, charged, and tested. Each unit consists of twin Air-Cooled condensers with integral subcooler sections, two reciprocating compressors, replaceable tube dual circuit shell-and-tube evaporator, and complete refrigerant piping.
Installation Note: Installation is to be performed by qualified personnel who are familiar with local codes and regulations. WARNING Sharp edges and coil surfaces are a potential hazard. Avoid contact with them. Handling Be careful to avoid rough handling of the unit. Do not push or pull the unit from anything other than the base. Block the pushing vehicle away from the unit to prevent damage to the sheet metal cabinet and end frame (see Figure 1).
Location Unit Placement AGR units are for outdoor applications and can be mounted on a roof or ground level. Set units on a solid and level foundation. For roof mounted applications, install the unit on a steel channel or Ibeam frame to support the unit above the roof. For ground level applications, install the unit on a substantial base that will not settle. A one piece concrete slab with footings extended below the frost line is recommended.
Figure 3, Clearance Requirements AIR DISCHARGE AIR DISCHARGE AIR FLOW AIR FLOW AIR FLOW 10 FT. The recommended minimum side clearance between two units is 10 feet (3048mm). Distance less than 10 feet (3048mm) can result in air recirculation.
Vibration Isolators Vibration isolators are recommended for all roof mounted installations or wherever vibration transmission is a consideration. See Dimensional Data for dimensions required to secure each isolator to the mounting surface. The spring flex isolators are white type CP2-32, McQuay kit number 350014821, includes four spring isolators assemblies.
Water Piping Local authorities can supply the installer with the proper building and safety codes required for safe and proper installation. Install piping with minimum bends and changes in elevation to minimize pressure drop. Consider the following when installing water piping: 1. Vibration eliminators to reduce vibration and noise transmission to the building. 2. Shutoff valves to isolate the unit from the piping system during unit servicing. 3.
Figure 5, Typical field evaporator water piping Flow Switch Mount a water flow switch in either the entering or leaving (recommended) water line to shut down the unit when water flow is interrupted. A flow switch is available from McQuay (part number 0017503300). It is a “paddle” type switch and adaptable to any pipe size from 3” (76mm) to 8” (203mm) nominal. Certain minimum flow rates are required to close the switch and are listed in Table 3. Installation should be as shown in Figure 6.
Figure 7, Refrigerant Piping (Some Components Are Optional) Glycol Solutions The system glycol capacity, glycol solution flow rate in GPM, and pressure drop through the cooler may be calculated using the following formulas and data from Table 4 or Table 5. Note: The procedure does not specify the type of glycol. Use the derate factors found in Table 4 for corrections when using ethylene glycol and those in Table 5 for propylene glycol. 1.
CAUTION Do not use an automotive grade antifreeze. Industrial grade glycols must be used. Automotive antifreeze contains inhibitors which will cause plating on the copper tubes within the chiller evaporator. The type and handling of glycol used must be consistent with local codes. Table 4, Ethylene Glycol % E.G. 10 20 30 40 50 Freeze Point °F °C 26 -3 18 -8 7 -14 -7 -22 -28 -33 Cap. kW Flow PD 0.991 0.982 0.972 0.961 0.946 0.996 0.992 0.986 0.976 0.966 1.013 1.040 1.074 1.121 1.178 1.070 1.129 1.
Evaporator Water Flow/Pressure Drop Evaporator flow rate must fall between the minimum and maximum values shown in the evaporator pressure drop table on page 12. Varying chilled water flow through the evaporator while the compressor(s) are operating is not recommended. Figure 8, Pressure Drop Curve 090 - 100 070 075 - 085 NOMINAL MAXIMUM MINIMUM PD Flow PD Flow PD Flow (ft) of Water (gpm) (lps) (ft) of Water (gpm) (lps) (ft) of Water (gpm) (lps) 070AS 11.2 162 10.22 28.1 270 17.03 4.8 101 6.39 075AS 8.
Physical Data Table 7, AGR 070AS – AGR 085AS AGR MODEL NUMBER PHYSICAL DATA STANDARD EFFICIENCY 070AS 075AS 080AS BASIC DATA Ckt.1 Ckt.2 Ckt.1 Ckt.2 Ckt.1 Ckt.2 Unit Capacity @ ARI Conditions (1), Tons (kW) 67.5 (237.6) 70.1 (246.7) 77.9 (273.9) Number Of Refrigerant Circuits 2 2 2 Unit Operating Charge, R-22, lbs. (kg) 60 (27.2) 84 (38.1) 84 (38.1) 86 (39.9) 86 (39.9) 86 (39.9) Unit Operating Charge, R-134a, , lbs. (kg) 63 (28.6) 88 (40.0) 88 (40.0) 90 (41.9) 90 (41.9) 90 (41.
Table 8, AGR 090A – AGR 100A PHYSICAL DATA AGR MODEL NUMBER STANDARD EFFICIENCY 090AS 095AS 100AS BASIC DATA Ckt.1 Ckt.2 Ckt.1 Ckt.2 Ckt.1 Ckt.2 Unit Capacity @ ARI Conditions (1), Tons (kW) 86.5 (304.1) 93.4 (328.4) 99.3 (349.1) Number Of Refrigerant Circuits 2 2 2 Unit Operating Charge, R-22, lb. 90 90 90 90 92 92 Unit Operating Charge, R-22, (kg) (40.8) (40.8) (40.8) (40.8) (41.7) (41.7) Cabinet Dimensions, LxWxH, In. 136.4 x 88.2 x 96.2 136.4 x 88.2 x 96.2 136.4 x 88.2 x 96.
Electrical Data Field Wiring CAUTION Internal power wiring to the compressors for single and multiple point option are different. Field wiring must be installed according to unit wiring diagram. Wiring must comply with all applicable codes and ordinances. Warranty is void if wiring is not in accordance with specifications. Copper wire is required for all power lead terminations at the unit. Aluminum or copper can be used for all other wiring.
Table 9, 60 Hz, Single Point Power Electrical Data POWER SUPPLY Field Wire Conduit Hub Minimum Circuit Ampacity (MCA) Quantity Wire Gauge Quantity Nominal Size Max. Fuse or HACR Breaker Size 070AS 070AM 208 230 380 460 575 322 300 190 153 114 3 3 3 3 3 400 350 3/0 2/0 #2 1 1 1 1 1 2.50 2.50 2.00 1.50 1.25 450 400 250 200 150 075AS 075AM 208 230 380 460 575 351 329 220 163 126 3 3 3 3 3 500 400 4/0 2/0 #1 1 1 1 1 1 3.00 2.50 2.00 1.50 1.
Table 10, 60 Hz, Compressor and Condenser Fan Motor Amp Draw AGR Unit Size Volts Rated Load Amps Compressors Fan Motors (Each) No. Of Fan Motors Fan Motors (Each) Locked Rotor Amps Compressors Across-The-Line Part Winding (1) No. 1 No. 2 No. 1 No. 2 No. 1 No. 2 070AS 070AM 208 230 380 460 575 122 112 65 60 42 135 127 87 63 48 7.8 7.2 4.1 3.6 3.0 4 4 4 4 4 30.5 27.6 20.0 13.8 11.0 N.A. N.A. 365 315 245 N.A. N.A.
Table 11, 60 Hz Single Point Power, Field Wiring Data Wiring to Standard Power Block AGR Unit Size Volts Wiring to Optional Non-Fused Disconnect Switch Terminal Amps Connector Wire Range (Copper Wire Only) Terminal Amps Connector Wire Range (Copper Wire Only) 070AS 070AM 208 230 380 460 575 335 335 335 335 335 # 4 - 400 MCM # 4 - 400 MCM # 4 - 400 MCM # 4 - 400 MCM # 4 - 400 MCM 400 400 250 250 150 250 - 500 MCM 250 - 500 MCM #4 - 350 MCM #4 - 350 MCM #2 - 3/0 075AS 075AM 208 230 380 460 575
Notes for “Electrical Data Single Point” Power: 1. Unit wire size ampacity (MCA) is equal to 125% of the largest compressor-motor RLA plus 100% of RLA of all other loads in the circuit including the control transformer. 2. If the control transformer option is furnished, a separate 115v power is not required. 3. If a separate 115V power supply is used for the control circuit, then the wire sizing amps is 10 amps for all unit sizes. 4.
Figure 9, Typical Field Wiring with Global UNT Controller 20 AGR 070A through 100A IOMM AGR-1
Figure 10, Typical Field Wiring Diagram with MicroTech Controller IOMM AGR-1 AGR 070A through 100A 21
Figure 11, Standard Single-Point Connection with FanTrol 22 AGR 070A through 100A IOMM AGR-1
Figure 12, Standard Single-Point Connection with Optional SpeedTrol IOMM AGR-1 AGR 070A through 100A 23
Figure 13, Unit Control Schematic (2 compressor UNT) 24 AGR 070A through 100A IOMM AGR-1
Figure 14, Staging Schematic (2 compressor 4-stage UNT) IOMM AGR-1 AGR 070A through 100A 25
Figure 15, Staging Schematic (2 compressor 6-stage UNT) 26 AGR 070A through 100A IOMM AGR-1
Figure 16, MicroTech Controller Schematic IOMM AGR-1 AGR 070A through 100A 27
Figure 17, Unit Control Schematic (MicroTech) 28 AGR 070A through 100A IOMM AGR-1
Figure 18, Staging Schematic (4-stage MicroTech) IOMM AGR-1 AGR 070A through 100A 29
Figure 19, Staging Schematic (6-stage MicroTech) 30 AGR 070A through 100A IOMM AGR-1
Figure 20, Unit Control Schematic (2 compressor MicroTech) IOMM AGR-1 AGR 070A through 100A 31
Figure 21, UNT Instrument Layout See legend on page 34.
Figure 22, MicroTech Instrument Layout See legend on page 34.
Figure 23, AGR Power Side Component Layout See legend on page 34.
Figure 25, MicroTech Sensor Layout IOMM AGR-1 AGR 070A through 100A 35
Dimensional Data Figure 26, Dimensions AGR 070AS 4” (107mm) (AGR055-060) 5” (127mm) (AGR065-070) VICTAULIC CONNECTIONS FURNISHED WITH GROOVES FOR VICTAULIC COUPLINGS BY OTHERS C OUTLET D INLET NOTE: 1. ALL DIMENSIONS IN INCHES (mm) 2.
Figure 27, Dimensions AGR 075AS through 100AS 5” (127mm) (AGR075-100) VICTAULIC CONNECTIONS FURNISHED WITH GROOVES FOR VICTAULIC COUPLINGS BY OTHERS C NOTE: 1. ALL DIMENSIONS IN INCUES (mm) 2.
AGR Unit Start-Up Pre start-up The chiller must be inspected to ensure no components became loose or damaged during shipping or installation or during extended shut down periods. Water piping checkout 1. Check the pump operation and vent all air from the system. 2. Circulate evaporator water checking for proper system pressure and pressure drop across the chiller barrel. Compare the pressure drop to the Evaporator water pressure drop curve. 3.
Start-Up There should be adequate building load (25% of unit capacity minimum) to properly check the operation of the chiller refrigerant circuits. Be prepared to record all operating parameters required by the “Compressorized Equipment Warranty Form”. Return this information within 10 working days to McQuay International as instructed on the form to obtain full warranty benefits. 1. Verify chilled water flow. 2. Verify remote start / stop or time clock has requested the chiller to start. 3.
AGR Unit Operation Sequence of Operation Starting With control power on, 115Vac power is applied through F1 to the compressor crankcase heaters and control transformer T2. T2 supplies 24Vac to the Global UNT controller. The green light on the Global UNT controller will begin to flash. The panel Alarm Light will illuminate. Put the System Switch S1 into the AUTO position. This applies power to the control circuit and a digital input to the Global UNT controller.
Software Description (Global UNT Interface Kit required to read or change variables) Variable Name LPSS SLPT Description Default Value Range Low Pressure Starting Setpoint Starting Low Pressure Time 10 psi 260 sec MLPS Minimum Low Pressure Setpoint 5 psi LPSD LPFS LPHL LPLL FSTP PDTD Low Pressure Starting Differential Low Pressure Freezestat setpoint Low Pressure High Limit Low Pressure Low Limit Freezestat Time Period Pumpdown Delay Time Period 5 psi 54 psi 57 psi 55 psi 60 sec 60 sec 5 to 15 p
System Adjustment To maintain peak performance at full load operation, the system superheat and liquid subcooling may require adjustment. Read the following subsections closely to determine if adjustment is required. Liquid Sightglass and Moisture Indicator The moisture indicator color is an indication of the dryness of the system and is extremely important when the system has been serviced. Immediately after the system has been opened for service, the element may indicate a wet condition.
UNT Controller Operation This section provides setup and troubleshooting information for the Global UNT controller. All operational descriptions are based on the Global UNT software SURE4-2A. Operational characteristics may vary with other versions of software. General Description The Global UNT is a microprocessor based leaving water controller designed for multiple stage operation. The Global UNT’s operation is based on an adjustable setpoint and control band.
The “setpoint” control knob adjusts the leaving water setpoint. The “Control Band” knob adjusts the controller temperature control band. To set, divide the chilled water temperature range by the number of capacity steps and add 0.5°F for the minimum setting. Example: Evaporator water temperature range = 10°F from 54°F to 44°F Capacity steps = 6 Control band = 10÷6 = 1.66 +0.5 = 2.2°F minimum Optional Sensors Optional sensor kits, available from the factory, can be installed in the field.
Chilled Water Flow Switch The chilled water flow switch is connected to field wiring terminals #142 and #143 on TB-7. When the chilled water pump is enabled, the Global UNT controller checks for proof-of-flow through the flow switch digital input. Digital Outputs The digital outputs are controlled by the Global UNT controller. The outputs are double pole double throw plug-in type relays, with a 24Vac holding coil and 120Vac - 7.0 amp rated contacts. These relays are field replaceable.
Digital Inputs Note: All Digital Inputs are 24 VAC supplied by transformer T2 in the control panel. Do not use inputs from another power supply external to the unit. This can cause failure of the Global UNT controller.
Figure 28, Outside Air Reset LWRB LWSP OALL OAHL OARB (OALL=OAHL - OARB) As the OAT increases above the Outdoor Air Low Limit (OALL), the Actual Leaving Water Setpoint is decreased from its Leaving High Limit (Leaving Water Setpoint plus Leaving Reset Band) to the Leaving Water Setpoint. When OAT reaches the OAHL, the Actual Leaving Water Setpoint equals the Leaving Water Setpoint (AI4).
When Return Water Reset is chosen, a Fail Smart Logic option is also available. This option works as follows. If the Leaving Water Sensor (AI-1) becomes unreliable, the controller switches from Leaving Water control to Return Water control. Actual Return Water Setpoint equals Leaving Water Setpoint (AI-4) plus an adjustable Leaving Water Setpoint Offset. This value takes into account the temperature differential between Leaving and Return water temperatures, which is typically about 10oF.
Additional UNT Controller Features Remote Stop/Start When the remote stop/start switch is open, the controller will be in the unoccupied mode. The unit will be enabled when the remote start / stop switch is closed and will control at the leaving water temperature setpoint. Unoccupied Mode When the remote start / stop input is opened, the unoccupied mode is initiated. The chiller will maintain a higher leaving water temperature setpoint (default 70°F) if the chilled water circulation is maintained.
energized, the operating compressor on that refrigerant circuit will operate until the low pressure switch opens and stops that compressor. The compressor will cycle on if the evaporator pressure exceeds the low pressure cut-in value. After a two hour time delay, the compressor will start again to pump down the circuit (limited recycling pumpdown). After a two hour time delay, the compressor will start if the Global UNT controller calls for cooling.
Head Pressure Control There are two or three condenser fans per refrigerant circuit. These fans are cycled on and off according to the circuit’s condenser pressure. Fan #1 of a refrigerant circuit will start when the compressor of that refrigerant circuit has started. This fan will not cycle off until the circuit is stopped. The second fan on a refrigerant circuit will cycle on and off according to its head pressure controller (PC12 or PC22).
ZONE TERMINAL (optional) The Zone Terminal (ZT) is a hand-held or unit mounted device that monitors and adjusts your McQuay Global Reciprocating Chiller information. A standard telephone-style jack directly connects the ZT to the McQuay Global UNT controller.
You can simultaneously monitor the chiller in three ways: • Monitor up to three settings/sensed values. A maximum of six items are accessible in each of the three displays. • Read the symbols to the right of the display numbers to learn the on/off status of various inputs, outputs, or modes (| = On status; m = Off status). This provides continuous monitoring of 18 different status (on/off).
1. With the ZT on a flat surface, press the white tab with your index finger Figure 32. 2. Pull the front cover of the ZT away from the back and slide the Insert into position. 3. Press the ZT together. With the Insert in place and the ZT connected, the l in top position of each display lines up with the first word. Figure 32, Installing the Insert CONNECTING THE ZONE TERMINAL You can unit mount the ZT, or use it as a portable tool for convenient access to any chiller information.
MAKING ZONE TERMINAL ADJUSTMENTS Adjusting Control Settings 1. You can adjust only a flashing number with the ZT. If the number does not flash, that item is a monitor only item. Adjust Control Settings in Display 1, 2, or 3 as follows: 2. Press the Mode Selector Button until the green Mode Indicator Light moves next to the word Adjust. 3. Press either Display Button 1, 2, or 3 to locate adjustable items, which are indicated by flashing numbers.
Lvg Low Lim SP - Adjustable from 20°F - 40°F (default is 20°F). This safety that will shut the chiller off based on the leaving water temperature going below this setpoint. SoftSta Capcty - Adjusts the ramping of steps from 0% - 100% (default is 50%). SoftStart Time - Adjustable ramping time from 0 - 20 minutes (default is 2 minutes). Cir #1 Starts - Counts the number of starts for circuit #1. Cir #2 Starts - Counts the number of starts for circuit #2.
UNT Controller Troubleshooting Chart PROBLEM Compressor Will Not Run POSSIBLE CAUSES CORRECTIVE ACTIONS 1. 2. Main switch, circuit breakers open. Fuse blown. 3. 4. 5. Thermal overloads tripped or fuses blown. Defective contactor or coil. System shut down by safety devices. 4. 5. 6. 7. 8. No cooling required. Liquid line solenoid will not open. Motor electrical trouble. 6. 7. 8. 9. Loose wiring. 9. 1. 2. Dirty condenser coils. Fan not operating. 1. 2. 3. 4. 5. 6. 7. High Ambient conditions.
MicroTech Controller Installation and Operation All operational descriptions are based on the MicroTech controller software versions AGR2E01A. Operating characteristics and menu selections may vary with other versions of software. Contact McQuay Technical Support for software update information. General Description The MicroTech control panel contains a model 250-6 microprocessor based controller which provides all control functions.
Interlock wiring All interlock wiring to field devices (such as flow switches and pump starters) is provided by the installing contractor. See unit wiring diagrams and field wiring diagram. Unit set points and calibration The control software is installed and tested by the factory before shipping. Calibration of the controller is not necessary. All control and safety set points must be checked by the installing contractor and adjusted as necessary before starting the unit.
Power Wiring The installing contractor provides the unit voltage power source, disconnect, fuses and necessary wiring for these circuits. All wiring must conform to the National Electrical Code and applicable local building codes. If the control power source (120Vac) or the evaporator heater power source (120Vac) or both are supplied from a separate external supply, remove wires 540 and 545 as indicated on the field wiring diagram.
External Alarm Annunciator Circuitry An audible alarm can be connected to the Alarm Output terminals #19 and #28 of TB-3 of the control panel and is highly recommended to make certain the operator is alerted to any alarm condition. This output can also be used to alert a building automation system or other controls as required. This circuit is a 24Vac 1.8 amp maximum load output but can be used as a dry contact or another voltage by rewiring the circuit. Refer to the unit schematic.
Digital Inputs All Digital Inputs are 24 Vac. At 7.5 Vac to 24 Vac the digital input contacts are considered closed. Below 7.5 Vac, the contracts are considered open. See Table 19 for details and operating characteristics.
4 - 20 mA (remote reset signal) When selecting “4-20mA” as the reset mode, the controller will reset the leaving water temperature to a higher value based on a percentage of the “Maximum Chilled Water Reset”. At 4mA or less, the leaving water temperature is not reset. At 20mA the leaving water temperature is reset to the maximum. Between 4 and 20 mA, the leaving water temperature is reset proportionally to the reset input signal.
Soft Loading Soft loading limits the number of available stages when the unit is started to prevent excessive power consumption and possible overshoot of the leaving water temperature set point. Soft loading is in effect whenever the unit is started from an “off” cycle. On initial start-up, the chiller will turn on the chilled water pump and sample the loop water temperature for a time equal to the Load Delay set point (“LoadDelay”).
Head Pressure Control There are two or three condenser fans per refrigerant circuit. These fans are cycled on and off according to the circuit’s condenser pressure. Fan #1 of circuit will start when a compressor in the circuit has started and the condenser pressure exceeds fan on setpoint (230psig R-22). This fan will not cycle off until the circuit is stopped. The second fan will cycle on and off to maintain minimum lift pressure.
Circuit Alarm Conditions The “Circuit Alarm Conditions” are those alarms which only affect one circuit and can stop the compressors of that circuit. These alarms are: • Compressor Motor Protection • High Condenser Pressure • Mechanical High Pressure Switch • Low Evaporator Pressure • Refrigerant Freeze Protection • Bad Pressure Transducer The chiller must have the manual reset system alarm conditions cleared before normal operation can resume.
Assuming none of the above “OFF” conditions are true, the controller will examine the internal time clock schedule to determine if the chiller should start. The operating mode will be OFF:TimeClock if the time schedule indicates an “OFF” time period. Start - Up If none of the “OFF” conditions are true, the controller will initiate a start sequence.
Start-Up and Shutdown Pre-Start Checkout Configuration default set points are entered at the factory and all values must be checked and reset for each installation. Make sure the field wiring for all flow switches, interlocks or jumpers matches the connections detailed on the field wiring drawing. Setting of the HEX Address Switches The controller HEX address switches for each unit determine its logical address in a MicroTech network or in an Open Protocol network.
above the LPCutIn value, a compressor on the lead circuit will start. Refer to the unit staging schematic to determine which LED is associate to a compressor. The controller will stage up and down to maintain the desired leaving water temperature. Temporary Shutdown Close both pumpdown switches. After pumpdown is completed, turn off the system switch. Open the remote start / stop input and the evaporator pump will stop. Perform the reverse to start up after a temporary shutdown.
Menu Structure (general description) The information stored in the MicroTech controller can be accessed through the keypad using a treelike structure. This tree structure is divided into Categories, Menus and Menu Items. There are three categories that make up the tree structure: STATUS, CONTROL, and ALARM. Each category is divided into Menus and each Menu into Menu Items.
Keypad Key Functions The MicroTech keypad consists of twelve pressure sensitive membrane switches (Figure 34). These keys are used to step through, access, and manipulate the information in the MicroTech controller tree structure. The keypad keys are divided into four groups with two or four keys in each. These groups of keys and their functions are described below. Category Group The keys in this group provide quick access to strategic menus throughout the menu tree-structure.
Decr. - When changing the value of a menu item entry, pressing “DECR. -” shifts the menu item display line to the next lower value or previous available selection. Enter - Once a change has been made to a desired value, pressing “ENTER” locks in the new value. Clear - Pressing “ALARMS” followed by “CLEAR” clears the current alarm. Also, when a change is made to a menu item pressing “CLEAR” returns the display to the original value as long as “ENTER” has not been pressed.
Menu #6: Circuit 62 Pressures—The circuit #2 evaporator and condenser refrigerant pressure readings are displayed under this menu. The calculated minimum and maximum condenser pressure values are also shown. Menu #7: Circuit #l Temperatures—The circuit #I refrigerant temperatures are calculated from their corresponding pressure sensors and displayed here. If the optional Sensors are not present, the line item will flash “Open”.
If the 4-20 milliamp reset option is enabled, the controller will reset the leaving chilled water temperature to a higher value based on a percentage of the Maximum Chilled Water Reset set point ("MaxChWRst"). At 4mA or less, no reset will occur. At 20mA, the chilled water set point will be reset to a value equaling the Leaving Evaporator Water Set Point ("Lvg Evap") plus the value stored in the "MaxChWRst".
Figure 35, Delta-T Setpoints for Chillers Menu #15: Softload Set Points—The controller can limit the number of available stages when the unit is initially started to prevent excessive power consumption and help control overshoot of the water temperature set point. The maximum number of stages will equal the Soft Load Maximum Stages for the time period defined in the softload timer set point. If the softload timer is set to zero, no soft loading will take place.
Press the Next Item key. The display will show the current Day, Hour, Minute and Second. If this information needs to be changed, follow the same procedure used to set the Date in the previous section. Menu #20: Daily Schedule—This section will help you to set the Daily Start/Stop time for automatic operation of the chiller. Pressing the Next Menu key and the Next item key will advance the display to the Daily Time Schedule.
Menus for the AGR MicroTech Controller Table 22, MENU 1 Chiller Status Table 25, MENU 4 Water Temp's Screen Screen 1 2 Display OFF: Manual Mode OFF: System Sw OFF: Remote Comm OFF: Remote Sw OFF: Time Clock OFF: Alarm OFF: PumpDnSw's Starting WaitForFlow WaitForLoad StageUp StageDn Stage Manual InterStg=xxx sec 1 2 3 Display Lvg Evap= xxx.x °F (°C) Short °F (°C) Open °F (°C) Ent Evap= xxx.
Table 28, MENU 7 Circ #1 Temp's Table 30, MENU 9 Chiller Amps Screen Screen 1 1 2 3 4 5 6 7 Display Satur Evap=xxx°F (°C) N/A **°F (°C) SuctLine = xxx.x°F (°C) Open °F (°C) Short °F (°C) Super Ht =xxx.x°F (°C) N/A ** °F (°C) Satur Cond = xxx°F (°C) N/A **°F (°C) Liquid Ln = xxx.x°F (°C) N/A ** °F (°C) SubCoolg= xxx.
Table 34, MENU 13 Control Mode Screen Display Factory Setpoint 1 Manual Unit Off Automatic Manual Staging Manual Unit Off 2 Manual Stage=xx 0 Range 1-8 Table 35, MENU 14 Lvg Evap Spts Values for R-22 refrigerant, ( ) indicates Centigrade values Screen Display Factory Setpoint 1 Actv Spt=xxx.x °F (°C) 2 Lvg Evap=xxx.x °F (°C) 44 (6.7) 3 CntrlBand x.x °F (°C) 3.0 (1.6) 4 StartUpD-T= x.x °F (°C) 3.0 (1.6) 5 ShutDn D-T= x.x °F (°C) 1.5 (0.8) 6 MaxPullDn= x.x °F (°C) 0.5 (0.
Table 37, MENU 15 SoftLoad Spts Screen 1 2 3 4 Display Time Left= xxmin SoftLoad= xx min SoftLdMaxStg= x LoadDelay= xxsec Factory Setpoint Range 20 4 15 0 - 254 1-4 0 - 254 Range 1234 1432 2143 2341 3214 3412 4123 4321 Table 38, MENU 16 CompressorSpt Screen Display Factory Setpoint 1 Sequence=Auto Auto 2 3 4 5 StageUp= xxx sec StageDn= xxx sec MinST-ST=xx min MinSP-ST xx min Comp #1 Comp #2 15 5 5 - 40 3 - 30 Disable / Enable Disable / Enable Table 39, MENU 17 Head Pres Spt Values for R-22
Table 43, MENU 20 Schedule Screen 1 2 3 4 5 6 7 8 9 10 Display Override= xx.xx hr NMPSchedule= N/A Sun 00:00-23:59 Mon 00:00-23:59 Tue 00:00-23:59 Wed 00:00-23:59 Thu 00:00-23:59 Fri 00:00-23:59 Sat 00:00-23:59 Hol 00:00-23:59 Factory Setpoint 0.00 Hr N/A 00:00 - 23:59 00:00 - 23:59 00:00 - 23:59 00:00 - 23:59 00:00 - 23:59 00:00 - 23:59 00:00 - 23:59 00:00 - 23:59 Range 00:00 - 63.
Table 47, MENU 23 Misc Setup Screen Display Unit Type= Air Cooled Factory Setpoint Range 2 Units = English English English - Metric 4 5 6 SpeedTrol = No Power = 60 hz Port A Baud=xxxx Pre-Alarm=Blink Open Closed Alarm=Closed Blink(N/O) Blink(N/C) OAT Select=None Lcl Rmt LvgEvpAdj= 0.0 °F(°C) EntEvpAdj= 0.0 °F(°C) #1EvpAdj= 0.0psi (kPa) #2EvpAdj= 0.0psi (kPa) #1CndAdj= 0.0psi (kPa) #2CndAdj= 0.
Trouble Analysis for the AGR MicroTech Controller Microprocessor Control Board The Microprocessor Control Board (MCB) is shown in Figure 36. It contains a microprocessor that is preprogrammed with the software required to monitor and control the chiller. The various MCB connections and components are described below.
1. The red (“Reset”) LED turns on and remains on for approximately 5 seconds. During this period the MCB performs a self-test. 2. The red LED turns off and the green (“Running”) LED turns on. This indicates that the microprocessor has passed the self-test and is functioning properly. 3. The amber (“Active”) LED remains off continually if no alarm conditions exist in the network. If alarm conditions exist, the amber LED will flash as shown in Table 53.
Communication Ports The MCB has two communication ports: port A and port B. Each port has six terminals and is set up for both the RS-232C and RS-485 data transmission interface standards. The male and female connectors for these ports are manufactured by AMP. Therefore, they are referred to as “AMP plugs” or “AMP connectors” throughout this manual. Socket fuses located next to the ports protect the communications drivers from voltage in excess of ±12 Vdc.
Test Procedures Status LED Diagnostics The MCB status LED indications can aid in controller diagnostics. If the status LEDs do not operate normally there is a problem with the MCB. Following are troubleshooting procedures for the various symptoms. Red LED Remains On If the red LED remains on after the 5-second self-test period, it is likely that the MCB is defective. However, this can also occur in some instances if there is a power supply problem. Refer to “Troubleshooting Power Problems” below.
6. Reconnect the analog input ribbon cable. Cycle power to the controller and check the power fuses. If both fuses are intact, go to step 7. If either fuse blows, check the ADI board, the connecting ribbon cable, and the field wiring for shorts. Any of these may be defective. Try repeating this step after removing or swapping the ADI board. 7. Reconnect the digital input ribbon cable. Cycle power to the controller and check the power fuses. If both fuses are intact, go to step 8.
Figure 38, MCB Power Supply Terminals POWER IN [18-24 VCT] AC AC GND GND POWER FUSES [BUSSMAN GDC-T2A] 4 3 Fuse F1 Fuse F2 2 1 9 8 7 6 5 4 3 2 1 AUX/OUT Troubleshooting the Keypad/Display Interface The Keypad/Display Interface is connected to the MCB via a ribbon cable and discrete wiring for the backlight. The MCB provides operating voltages, control signal outputs for the display, and input conditioning for the keypad inputs.
Troubleshooting Analog Inputs An analog input, such as a temperature sensor, is connected to the ADI board. The ADI board then conditions the analog input. The conditioned input is transferred to the MCB via a ribbon cable. Analog Input not Read by the MCB If the MCB appears to be functioning properly and the analog input is not being read by the MCB, perform the following procedure: 1. Try cycling power to the controller by opening and then closing circuit breaker CB1. 2.
Figure 39, Output Board Relay Socket 1 Fuse 2 *250V ~ 50/60 Hz *120V ~ 50/60 Hz 3 Test Resistor 330-680 Ohm 4 5 LED WARNING Electric shock hazard. Can cause severe injury or death. Even when power to the panel is off, solid-state relay socket terminals 1 and 2 on the output board could be connected to high voltage. Avoid them. One LED Out If one of the Output Board LEDs fails to illuminate when the MCB is commanding the associated output to energize, perform the following procedure: 1.
2. Remove power from the controller by placing CB1 to the OFF position. Disconnect at least one wire from the power input terminals of the Output Board. The resistance should not be less than 3000 ohms. If the resistance is greater than the acceptable value, go to step 3. If the resistance is less than the acceptable value, the Output Board is defective. 3. Check the discrete wiring and connections between the Output board and the Controller. Aux/Out terminal strip and the field wiring terminal strip.
3. Remove power from the controller by opening CB1. Try to improve the connections in the Aux/Out plug insulation displacement terminals by pressing down on the wires with a small screwdriver. 4. Check all other wiring and connectors for bent pins or mis-wires. If the chatter does not stop, the electromechanical relay or contactor is probably defective. Troubleshooting Solid-State Relays As shown on the unit wiring diagrams, the Solid-State relays on the Output Boards all have normally open “contacts.
Unit Maintenance General On initial start-up and periodically during operation, it will be necessary to perform certain routine service checks. Among these are checking the liquid line sightglasses, taking condensing and suction pressure readings, and checking to see that the unit has normal superheat and subcooling readings. A recommended maintenance schedule is located at the end of this section. A Periodic Maintenance Log is located at the end of this manual.
clogged filter-drier or a restriction elsewhere in the liquid line See Table 54 for maximum allowable pressure drops. If subcooling is low add charge to clear the sightglass. If subcooling is normal (10°15°F) and flashing is visible in the sightglass check the pressure drop across the filter-drier. Subcooling should be checked at full load with 70°F (21.1°C) outdoor air temperature and all fans running. An element inside the sightglass indicates the moisture condition corresponding to a given element color.
Unit Service CAUTION 1. Service on this equipment is to be performed by qualified refrigeration personnel familiar with equipment operation, maintenance, correct servicing procedures, and the safety hazards inherent in this work. Causes for repeated tripping of safety controls must be investigated and corrected. 2. Disconnect all power before doing any service inside the unit. 3.
Evaporator The evaporator is the direct expansion, shell-and-tube type with refrigerant flowing through the tubes and water flowing through the shell over the tubes. The tubes are internally finned to provide extended surface as well as turbulent flow of refrigeration through the tubes. Normally no service work is required on the evaporator.
3. The charge can be added at any load condition between 25-100% load per circuit but at least two fans should be operating per refrigerant circuit if possible. The suction superheat should be in the 6°F-12°F (3.3°C-6.6°C) range. 4. Add sufficient charge to clear the liquid line sightglass and until all flashing stops in the sightglass. Add an extra 15-20 lbs. of reserve to fill the subcooler if the compressor is operating at 50-100% load. 5.
AGR Troubleshooting Chart PROBLEM 1. 2. POSSIBLE CAUSES Main Switch. Fuse Blown. Circuit breakers open 1. 2. 3. Thermal overloads tripped 3. 4. 5. Defective contactor or coil. System Shutdown by safety devices 4. 5. 6. 7. 8. 9. No cooling required Liquid line solenoid will not open Motor electrical trouble Loose wiring 6. 7. 8. 9. POSSIBLE CORRECTIVE STEPS Close Switch. Check electrical circuits and motor windings for shorts or grounds. Investigate for possible overloading.
Notes IOMM AGR-1 AGR 070A through 100A 99
Post Office Box 2510, Staunton, Virginia 24402 USA • (800) 432-1342 • www.mcquay.