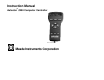
Instruction Manual ® Autostar #494 Computer Controller Meade Instruments Corporation
QUICK START GUIDE COMPUTER CONTROL HBX WARNING: Never use Autostar to move a telescope to look at the Sun! Looking at or near the Sun will cause instant and irreversible damage to your eye. Eye damage is often painless, so there is no warning to the observer that damage has occurred until it is too late. Do not point a telescope or its viewfinder at or near the Sun. Do not look through a telescope or its viewfinder as it is moving. Children should always have adult supervision while observing.
TABLE OF CONTENTS Quick Start Guide Autostar Features Getting Started Assembly Instructions Manual Observation Using Arrow Keys Using Autostar's GO TO Capability Moving through Autostar's Menus Initializing Autostar Autostar Navigation Training the Drive Alignment Easy Two-Star Alignment Which One's the Alignment Star Two-Star ALT/AZ Alignment One-Star ALT/AZ Alignment Go To Saturn Using the Guided Tour Slew Speeds Autostar Menus Object Menu To Observe a Satellite Event Menu Glossary Menu Utilities Menu Set
Key to Fig. 3 Liquid Crystal Display (LCD) Screen (2-lines, 16 characters each line) ENTER Key MODE Key GO TO Key Arrow Keys (Up, Down, Left, and Right) Scroll Up Key Scroll Down Key 1 4 2 5 3 Speed/? (Speed/Help) Key Coil Cord 8 6 7 9 Fig. 3: Autostar #494 Features.
MODE Key: Returns to the previous menu or data level AUTOSTAR FEATURES Control of nearly every telescope function is accomplished with just a few pushes of Autostar's keys. Autostar has softtouch keys designed to have a positive feel. The LCD (Liquid Crystal Display) is backlit with a red LED (Light Emitting Diode) for easy viewing in the dark. The backlit display, key arrangement, and sequential database make Autostar extremely user-friendly.
Arrow keys are used to move the blinking cursor left and right across the LCD display. Alt/Az alignment: Use the Up and Down Arrow keys to move the telescope vertically up and down. The Left Arrow key rotates the telescope horizontally counterclockwise, while the Right Arrow key rotates it clockwise. NOTE: Throughout this manual, you will notice the term "Alt/Az." Alt/Az is frequently used to refer to Altitude or vertical and Azimuth or horizontal.
GETTING STARTED Control of your DS telescope is through the operation of the standard-equipment #494 Autostar. Nearly all functions of the telescope are accomplished with just a few pushes of Autostar’s buttons. Some of the major features of Autostar are: Autostar #494 handbox Instruction manual ASSEMBLY INSTRUCTIONS Power for Autostar is supplied through the telescope. No internal batteries are required. See the telescope instruction manual for details. To attach Autostar to a telescope: 1.
4. Use the Scroll keys (6 and 7, Fig. 3) to cycle through the list of countries, states, and provinces (listed alphabetically). Press ENTER when the desired location displays. USING AUTOSTAR'S GO TO CAPABILITY This section describes how to make observations using various Autostar features and menus. But before you can use Autostar's GO TO capabilities, you must first: Initialize Autostar Align the telescope Press ENTER (2, Fig. 3) to go deeper into Autostar's menu levels. Press MODE (3, Fig.
first time you use Autostar or after performing a Reset. Fig. 4 depicts an example of an Autostar Initialization procedure. (00) Meade (1.0) AUTOSTAR Initializing. . . ENTER ENTER Enter Time: 08:00:00PM (default) Country/State AFGHANISTAN Multiple Presses 1 (1X) WARNING LOOKING AT . . . Press the appropriate key Getting Started For a Detailed...
7. Autostar then prompts you to enter the current date. a. To enter numbers, press either the Up or Down Arrow key (5, Fig. 3) to scroll through numbers 0 through 9. After the desired number is displayed, use the Right Arrow key (5, Fig. 3) to move the cursor from one number to the next in the day display (or use to Left Arrow key to move in the other direction across the display, if necessary). b. Use the Right Arrow key (5, Fig. 3) to move the cursor to the month. Use the Scroll keys (6 and 7, Fig.
c. Autostar then prompts you to choose your telescope model number. Use the Scroll keys to cycle through the list of telescope models. Press ENTER when your telescope model number displays. OBJECT Select from over 1400 database objects and press GO TO to move the telescope automatically to the object and place it in the telescopic field of view. SETUP Quick, easy alignment permits all telescope operations with only a 2-minute setup.
Example: To navigate to the "Select Item: Setup" menu option when the "Select Item: Object" menu is displayed: NOTE: To perform an accurate calculation, Autostar must be properly initialized with the current date, time, and location of the observing site. 1. Press the Scroll Down key four times or the Scroll Up key once. If you have not yet entered the current date, time and/or location information of your observing site, see “INITIALIZING AUTOSTAR,” page 8, before proceeding with this exercise.
1 2 Verify that AUTOSTAR INITIALIZATION is complete. Telescope 7 1 Telescope Model Multiple presses. Press MODE until Select Item is displayed. Select Item Object 3 Press the Scroll Up key once. Select Item Setup 4 Access the Setup ENTER menu. Telescope Train Drive Choose the Train 9 5 Multiple presses. Setup Telescope 6 Access the ENTER Telescope menu. 12 Scope slews left. Bring target back to center using ENTER the Right Arrow key. Press < until it is centered 13 Scope slews right.
ALIGNMENT As the Earth rotates beneath the night sky, the stars appear to move from East to West. The speed at which the stars move is called the sidereal rate. If the telescope is aligned, the motor drive is designed to move the telescope at the sidereal rate so that it automatically tracks the stars. Tracking keeps an object centered in the telescope’s eyepiece and makes it easier to locate other objects. Autostar offers three methods of alignment: Easy Two-Star, One-Star Alt/AZ, and Two-Star Alt/AZ.
6. Select Alignment: “Align: Easy” displays. Press ENTER. 7. Set Home Position: Autostar then prompts you to set the telescope in the "Alt/Az" Alignment home position (Altitude-Azimuth or vertical-horizontal). To set your telescope in the "Alt/Az" home position: Level the optical tube and the tripod base so that they are parallel (horizontal) to the ground. See Fig. 8a. Tighten the horizontal and vertical locks to a "firm feel" only. Physically move the telescope so that it points North.
WHICH ONE’S THE ALIGNMENT STAR? If Autostar has chosen an alignment star that you are unfamiliar with, how can you be sure if the star in your eyepiece is really the alignment star? 4. Press ENTER. Repeat procedure for the second alignment star. The telescope is aligned and you are now ready to use Autostar's GO TO capabilities for a night of observing. The rule of thumb is that an alignment star is usually the brightest star in that area of the sky.
IMPORTANT NOTE: Once aligned, only use the GO TO or Arrow keys to move the telescope. Do not loosen the horizontal and vertical locks of the telescope, or move the tripod manually, or alignment will be lost. This exercise demonstrates how to select an object for viewing from Autostar’s database. This example demonstrates how to select Saturn.
5. Press MODE to return to the Tour list. Press the Scroll keys to scroll through the list. Press ENTER when you find the next object you wish to observe. 6. Press MODE and hold for two seconds to leave the Guided Tour menu. SLEW SPEEDS Autostar has nine slew speeds that are directly proportional to the sidereal rate and have been calculated to accomplish specific functions. Pressing the Speed/? key briefly changes the slew speed, which is shown for about two seconds on Autostar’s display.
AUTOSTAR MENUS Select Item: Object Solar System Mercury Etc. Moon Asteroids Comets Constellations Andromeda Etc. Deep Sky Named Object Galaxies Nebulae Planetary Neb. Etc. Star Named SAO Catalog Double Etc.
OBJECT MENU Almost all observing with Autostar is performed using the Object menu category. (NOTE: Exceptions include Guided Tour and Landmark Survey.) See “GO TO SATURN,” page 16, for an example of observing using the Object menu. Also see “USING THE GUIDED TOUR,” page 17. Many Autostar menu categories contain databases. An Autostar database is a list of viewable objects, such as stars, planets, comets, nebulae and so forth.
tree, or hill), press ENTER and Autostar starts to move the telescope along the expected satellite track. When the track clears the obstruction, press ENTER again to pause the telescope, then continue with this procedure. 6. With about 20 seconds left on the countdown timer, start watching through the telescope viewfinder (or eyepiece if your telescope does not have an viewfinder) for the satellite to enter the field of view. 7. When the satellite enters the viewfinder field of view, press ENTER.
has been properly aligned, use the Autostar Arrow keys to move about in the sky. Then follow this procedure: IMPORTANT NOTE: Only use the Arrow keys to move the telescope during the Identify procedure. Do not loosen the telescope locks or move the base or alignment is lost. Moonrise and Moonset calculates the time that the Moon rises or sets on the current date. Find rise and set times for other dates by entering a new date into the “Setup: Date” menu. See "DATE," page 24.
the other. The combined magnitude of the two stars thus dips from +2.1 to a minimum of +3.4 halfway through the eclipse as the second star is hidden. Autostar calculates minimum magnitude time at mid-eclipse. Timer selects a countdown timer. This feature is useful for functions such as astrophotography and tracking satellites. See “TO OBSERVE A SATELLITE,” page 20. To use the Timer, press ENTER, then choose “Set” or “Start/Stop”.
Magnification: Scroll through a list of available eyepieces. When an eyepiece is selected, the magnification is calculated. Suggest: Autostar calculates and suggests the best eyepiece for viewing, based on the telescope and the object being viewed. Display Options enables or disables Autostar’s two initial displays. If both displays are disabled, Autostar begins with the Date display. Sun Warning: Turns the “Sun Warning” message on or off.
a. Sidereal: The default setting for Autostar; sidereal rate is the standard rate at which stars move from East to West across the sky due to the rotation of the Earth. b. Lunar: Choose this option to properly track the Moon over long observing sessions. c. Custom: Allows entry of user-defined tracking rates. Time changes the time entered into Autostar. Setting the correct time is critical for Autostar to properly calculate locations and events.
Targets switches between Astronomical targets and Terrestrial targets. If "Astronomical" is selected, the telescope tracking motor is activated and any object you observe will remain centered in the eyepiece. If "Terrestrial "is selected, the tracking motor is turned off.
Statistics provides basic statistical data about Autostar, including: Characters Free: Shows how much room is available in user-defined object memory. Version: Shows the current version of the Autostar software. Reset completely resets Autostar. Autostar requires initialization again after a Reset before proceeding with observations. See “INITIALIZING AUTOSTAR,” page 8. You also need to perform “TRAINING THE DRIVE,” page 13.
MEADE CUSTOMER SERVICE If you have a question concerning Autostar, contact the Meade Instruments Customer Service Department at: OPTIONAL ACCESSORIES See your telescope manual for a complete listing of all accessories.
APPENDIX A: ENTERING R.A. AND DEC COORDINATES Although Autostar's database contains more than 1400 objects (stars, nebulae, planets, etc.) that you can observe, you may eventually want to view objects that are not part of the database. Autostar provides a feature that allows you to enter an object's R.A and Dec coordinates in the "User: Objects" option of Autostar's Object menu and then automatically slews the telescope to the user-entered coordinates. 2.
9. Autostar then prompts you to enter the Magnitude of the object. This step is also optional. Use the Arrow keys to enter this information, if so desired, and press ENTER to go to the next display. "User Object: Add" displays again. To GO TO a user-entered object: 1. With "User Object: Add" displayed, press the Scroll Up key once. "User Object: Select" displays. Press ENTER. 2. Use the Scroll keys (if necessary) to scroll to the desired object. Press ENTER. 3.
MEADE LIMITED WARRANTY Every Meade telescope, spotting scope, and telescope accessory is warranted by Meade Instruments Corporation (“Meade”) to be free of defects in materials and workmanship for a period of ONE YEAR from the date of original purchase in the U.S.A. and Canada. Meade will repair or replace a product, or part thereof, found by Meade to be defective, provided the defective part is returned to Meade, freight-prepaid, with proof of purchase.