Instruction Manual 8”, 10", 12", 16" LightBridge™ Truss Tube Dobsonian Telescopes MEADE.
WARNING! Never use a Meade® to look at the Sun! Looking at or near the Sun will cause instant and irreversible damage to your eye. Eye damage is often painless, so there is no warning to the observer that damage has occurred until it is too late. Do not point the telescope at or near the Sun. Do not look through the telescope or SmartFinder™ as it is moving. Children should always have adult supervision while observing.
CONTENTS Telescope Features ...................................................... 8 Assembly ........................................................................ 5 Assemble the Base .................................................. 5 Assemble the Tube .................................................. 6 Insert Eyepiece, Attach Red Dot Finder .................. 7 Collimating the Optical System ................................ 8 Align the deluxe Red Dot Finder ..............................
Fig. 1 Telescope features. D C 1% 1# 4 A 1& B Inset A: Focuser assembly. H I F J 1( Inset A 13. a) Focus knob b) Fine focus knob (16" models only) 14. Focus lock & tension adjustment knobs 15. 1.25" & 2"eyepiece holder 16. Draw tube 17. Thumbscrew 2) 1$ 1# F G Tube Assembly 1. Eyepiece 2. Focuser assembly 3. Front OTA (optical tube assembly) 4. Top truss lock knobs (3) 5. Trusses (3) 6. Bottom truss lock knobs (3) 7. Altitude bearing 8. Rear OTA Inset B 18. Fan 19. Fan battery pack (inset) 20.
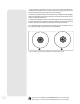
ASSEMBLY ASSEMBLE THE BASE Note: You will need to supply a phillips screwdriver and a onequarter inch or adjustable wrench to assemble the telescope. Note: Numbers in parentheses. e.g., (9), refer to Fig.1 and Fig. 1 insets. STEP 1: The base supports the telescope and allows you to move the telescope from side to side. Line up one of the base side panels (9) with the base front panel (10) as shown here. Thread in the two black attachment bolts to secure the panels together.
STEP 6: Move the circular panels. They should move easily about, without any stiffness. If not, tighten or loosen them using a screwdriver while holding the attachment nut in place (with your fingers or a wrench) on the other end of the bolt. ASSEMBLE THE TUBE dust cover STEP 7: Turn the base so that it is now resting on the feet. Place the rear OTA (8) into the base. Make sure that the altitude bearings fit snugly into the openings on the side panels of the base.
INSERT EYEPIECE AND ATTACH RED DOT FINDER STEP 10: The entire assembly should move easily up and down and from side to side. STEP 11: If you wish to insert the deluxe 2 inch eyepiece, remove the 1.25" eyepiece holder (15) from the focuser assembly by loosening holder thumbscrew (as shown in photo to the left). Slide the 2 inch eyepiece into the focuser and tighten with the eyepiece locking screw. To focus the eyepiece, turn the focuser wheels (13) in or out.
Precise collimation, or alignment, of your telescope’s optical system is essential for good performance. All Meade telescopes are accurately collimated at the factory prior to shipment. You may want to collimate after the telescope has been shipped or if it has endured rough handling or a bumpy car journey—usually, though, just a small touch up is all that's required.
-9- 2 1 3 6 4 5 Fig. A: Newtonian Reflecting Telescope. (1) Spider Vanes; (2) Secondary Mirror; (3) Parabolic Primary Mirror; (4) Primary Mirror Hex Screws; (5) Focuser Drawtube; (6) Focused Image. Face-on view 2! Edge-on view 1 2) 3 2 e f g e f 2) Fig. C: Underside of rear mirror tube (primary mirror housing): (20) Collimation Adjustment Screw; (21) Collimation Lock Screw b c d d 2! 2! Fig. B: Secondary Mirror Assembly. (1) Spider Vanes; (2) Tilt Screws; (3) Secondary Mirror Holder.
5. Bring the star's image slowly in and out of focus until you see several disks surrounding the star's center. If steps 1 through 3 were done correctly, you will see concentric (centered with respect to each other) circles (1, Fig. F). An improperly collimated instrument will reveal oblong or elongated circles (2, Fig.F). Adjust the 3 collimating screws on the primary mirror housing until the circles are concentric on either side of the focus.
See step #12, page 7 to find out how th attach the finder to the telescope. ALIGN THE DELUXE RED DOT FINDER Intensity Dial Hex screws The deluxe red dot finder. It is recommended that you perform steps 1 and 2 of this procedure during the daytime and step 3 at night. 1. If you have not already done so, place the low-power 26mm) eyepiece in the eyepiece holder (15) and point the telescope at an easy-to-find land object (e.g., the top of a telephone pole).
The magnification, or power of a telescope is determined by two factors: the focal length of the eyepiece and the focal length of the telescope. Your telescope is supplied with one eyepiece. The focal length of the eyepiece, 26mm, is printed on its side. CALCULATE MAGNIFICATION Telescope focal length is the distance that light travels inside the telescope before reaching a focus. The focal length of the Dobsonian 8" = 1219mm.
Look for different features on the Moon: The most obvious features are craters. In fact you can see craters within craters. Some craters have bright lines about them. These are called rays and are the result of material thrown out of the crater when it was struck by a colliding object. The dark areas on the Moon are called maria and are composed of lava from the period when the Moon still had volcanic activity. You can also see mountain ranges and fault lines on the Moon.
Probably the most memorable sight you will see in your telescope is Saturn. Although you may not see many features on the surface of Saturn, its ring structure will steal your breath away. You will probably be able to see a black opening in the rings, known as the Cassini division. Saturn is not the only planet that has rings, but it is the only set of rings that can be seen with a small telescope.
SOME TIPS By the way, you might have noticed something strange when you looked through your eyepiece. The image is upside down, and it is also reversed. That means reading words can be a problem or viewing objects on the ground can be a problem. But it has no affect on astronomical objects. Objects move in the eyepiece: If you are observing an astronomical object (the Moon, a planet, star, etc.) you will notice that the object will begin to move slowly through the telescopic field of view.
b. c. d. e. g. When absolutely necessary, dust on the mirror should be blown off with an ear syringe (available at any pharmacy). DO NOT use a commercial photographic lens cleaner. Organic materials (e.g., fingerprints) on the front lens may be removed with a solution of 3 parts distilled water to 1 part isopropyl alcohol. You may also add 1 drop of biodegradable dishwashing soap per pint of solution. Use soft, white facial tissues and make short, gentle strokes. Change tissues often.
SPECIFICATIONS 8" Deluxe Model OTA Truss tubes Secondary Mirror Support Mirror Focal length Focal ratio Resolving Power Limiting visual magnitude Focuser Attach eyepiece tray to side or back base panels.
Computer Software CD-ROM of Autostar Suite Astronomer's Edition software Assembled OTA weight 38 lbs. 27 lbs. Assembled Mount weight Total Assembled telescope wt. 65 lbs. 12" Standard Model OTA Truss tubes Secondary Mirror Support Mirror Focal length Focal ratio Resolving Power Limiting visual magnitude Focuser Mount Base bearings Eyepiece tray Counterweight Eyepiece Dust Cover Finder Computer Software Assembled OTA weight Assembled Mount weight Total Assembled telescope 18 Open truss design.
16" Deluxe Model OTA Truss tubes Secondary Mirror Support Mirror Focal length Focal ratio Resolving Power Limiting visual magnitude Focuser Mount Eyepiece tray Counterweight Eyepiece Dust Cover Finder Computer Software Assembled OTA weight Assembled Mount weight Total Assembled telescope Open truss design. Upper cage metal tube containing spider and secondary mirror holder, focuser with attachment points for truss tubes.
A wide assortment of professional Meade accessories is available for the LightBridge telescope models. The premium quality of these accessories is well-suited to the quality of the instrument itself. Consult the Meade General Catalog or meade.com for complete details on these and other accessories. OPTIONAL ACCESSORIES Meade Series 4000™ Eyepieces: You want to select an eyepiece that not only gives you the magnification that you want, but also give you the eye relief you need.
Appendix A: Altitude Adjustment Knob The Altitude Adjustment Knob allows you to add larger eyepieces, cameras or other accessories to the Meade LightBridge telescope without causing the tube to slip or drift. Assembly Slide the brake over the tension adjustment bolt (Fig. 16). Note the protrusion at the bottom of the tension plate. The protrusion fits into the indent at the bottom of the brake. Thread the tension adjustment bolt into the tension plate on the side panel of the base assembly (Fig. 17).
MEADE LIMITED WARRANTY Every Meade telescope and telescope accessory is warranted by Meade Instruments Corporation (“Meade”) to be free of defects in materials and workmanship for a period of ONE YEAR from the date of original purchase in the U.S.A. and Canada. Meade will repair or replace a product, or part thereof, found by Meade to be defective, provided the defective part is returned to Meade, freight-prepaid, with proof of purchase.