
Installation Guide


KSPO:1525-10
NIL TE278NLE & TS03C MANUAL (ENG)
SIZE:W105 X H148(mm)
BY Lai HZ 26/11/10
TE278W-M
Wireless Indoor/
Outdoor Thermometer
with Atomic Clock
INTRODUCTION
Thank you for selecting a Meade Instruments Wireless Indoor/ Outdoor Thermometer with
Atomic Clock. This device combines precise time keeping, monitoring and displaying of
current temperature data from up to three remote locations.
Meade Instruments is the world’s leading designer and manufacturer of telescopes for
professional and amateur astronomers – famous for its innovative, high performance telescopes
at affordable prices. Meade Instruments now brings that same passion for innovation and high
performance to its own line of precision, feature rich weather stations.
Please read this instruction manual so that you can get the most enjoyment out of your Meade
Instruments weather station.
In this package you will find:
• One (1) main unit (receiver)
• One (1) remote sensor (transmitter)
• One (1) User Manual
Please keep this manual handy as it contains practical instructions, technical specifications
and precautions.
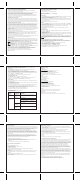
PRODUCT OVERVIEW
MAIN UNIT
FEATURES
• Time automatically sets to the US Atomic Clock
• 12 or 24 hours time format
• Dual crescendo time alarm with snooze
• Day of the week displayed in English, Spanish, French, German and Italian
• Wireless reception of the temperature from the remote sensor to the main unit from up to
160 feet (50 meters) away
• Multi-channel capability to monitor temperature in up to 3 remote locations
• Minimum and maximum memory for indoor and remote temperature
• Programmable Ice Warning Alarm
• Low battery indicator
FRONT/REAR VIEW
D. MODE button
• Toggles between time modes - time with seconds and time with the day of the week
• Activates clock’s manual programming mode
E. DOWN ( ? ) button
• Decreases the parameters
• Activates manual remote channels search
• Disables time alarms (W) and (S) and Ice Warning Alarm
F. ALARM button
• Allows toggling between the calendar display and three time alarm modes
• Allows programming available alarms
G. MEM button
• Toggles between current, minimum, maximum readings of the indoor and remote temperature
• Clears the temperature memory
H. WALL- MOUNT RECESSED HOLE
• Keeps the unit on the wall
I. BATTERY COMPARTMENT
• Requires 2 (two) UM-3 or AAA 1.5V alkaline batteries
J. BUILT-IN TABLE STAND
• Holds unit in upright position on a flat surface
REMOTE SENSOR
FEATURES
• Remote temperature transmission to the main unit via 433 MHz frequency
• Case can be wall mounted using built-in hanger
• Three channel selection
A. TEMPERATURE AND CLOCK window
B. CHANNEL button
• Recalls a different remote sensor reading – 1,2 or 3
C. UP ( ? ) button
• Increases the parameters
• Activates US Time Zone selection mode
• Activates manual search for atomic time signal
• Enables time alarms (W) and (S) and Ice Warning Alarm
A. LED INDICATOR
• Flashes once when the remote sensor transmits a reading to the main unit.
• Flashes twice when battery power is low.
B. BATTERY COMPARTMENT
• Requires two AA-size batteries
C. RESET
• Resets all previous settings
D. CHANNEL SWITCH
• Selects the desired channel -1, 2 or 3
E. WALL-MOUNT RECESSED OPENING
• Keeps the remote sensor on the wall
BEFORE YOU BEGIN
• We recommend using alkaline batteries for the remote sensor and the main unit. If outdoor
temperatures regularly fall below 32°F (0°C), we recommend using lithium batteries.
• Avoid using rechargeable batteries. (Rechargeable batteries cannot maintain correct
power requirements).
• ALWAYS install batteries in the remote sensor before the main unit.
• Insert batteries before first use, matching the polarity as shown in the battery compartment.
• Press RESET after each battery change with a paper clip or similar tool.
• During an initial setup, place the main unit close to the remote sensor.
• After reception is established (the remote temperature will appear on the main unit’s display),
position the remote sensor and the main unit within the effective transmission range of
160 feet (50 meters).
• The remote sensor can be placed indoors or outdoors, depending on the area where the
temperature is intended to be measured. If you intend measuring outdoor elements, place
remote sensor outdoors
• The main unit must be placed indoors.
NOTE:
1. Avoid pressing any buttons on the main unit before the remote readings are displayed.
2. The effective operating range may be influenced by the surrounding building materials and
how the receiver and transmitter are positioned.
3. Place the remote sensor so that it faces the main unit (receiver), minimizing obstructions
such as doors, walls, and furniture.
4. Though the remote sensors are weather-resistant, they should be placed away from direct
sunlight, rain or snow. The best suggested location for the remote sensor for outdoors is
under the eave on the north side of the building.
NOTE: When the temperature falls below freezing point 32°F (0°C), battery voltage will
drop which may result in reduced the transmission range. For optimum performance in
cold conditions, we recommend using lithium batteries.
BATTERY INSTALLATION
REMOTE SENSOR
NOTE: Install the batteries and select the channel before mounting the remote sensor.
• Remove the screws from the battery compartment with a small Phillips screwdriver
(not included).
• Set the channel 1 through 3. The switch is located in the battery compartment. Channel 1 is
typically selected if only one remote sensor is being used.
• Install two (2) AA size batteries (not included) matching polarity as shown in the
battery compartment.
• Replace the battery compartment door and secure the screws.
• Secure the remote sensor in the desired location.
MAIN UNIT
• Remove the battery door located at the back of the main unit.
• Insert two (2) AAA size batteries according to the polarities shown and replace the battery
compartment door.
• When placing the main unit on the table or other horizontal surface, unfold and adjust the
table stand for the desired viewing angle.
LOW BATTERY WARNING
REMOTE SENSOR
A low-battery indicator [ ] will appear next to the outdoor temperature reading of the main
unit warning that the corresponding batteries need replacement.
MAIN UNIT
A low-battery indicator [ ] will appear next to the time display of the main unit warning that
the corresponding batteries need replacement.
PLACEMENT
REMOTE SENSOR
• The remote sensor should be placed under eaves or a similar location with free air circulation,
sheltered from direct sunlight and extreme weather.
• Ideally, place the remote sensor over soil, rather than asphalt, which would cause
false readings.
• Avoid placing the remote sensor near sources of heat, such as chimneys and heating elements.
• Avoid areas that collect heat from the sun and radiate heat, such as metal, brick or concrete
structures, paving, and patios.
• The international standard for the valid air temperature measurements is 4 feet (1.25 meters)
above the ground.
MAIN UNIT
• Make sure that the main unit is locating within the operating range of all remote sensors.
• Ideally the main unit should be placed within line of sight of remote sensors. Avoid placing
the main unit where surfaces emitting and radiating heat (e.g. heating ducts or air conditioners)
and areas with interference from wireless devices (e.g. cordless phones, radio headsets, baby
monitoring devices and other electronics).
GETTING STARTED
After batteries are installed; remote sensor will transmit temperature data at 45 second intervals.
The main unit may take up to two minutes to receive the initial readings. Upon successful
reception, remote temperature will appear on the top line of the main unit’s display (the default
remote channel is channel one). The main unit will automatically update readings at
45-second intervals.
After communication between the main unit and remote sensor has been established,
secure the remote sensor in the desired location.
If no signal is received from the remote sensor within two minutes, dashes [- - -] will be
displayed. Press and hold the DOWN (? ) button on the main unit for two seconds to initiate
another signal search.
REMOTE AND INDOOR TEMPERATURE
The remote temperature information line is located on the top line of the main unit’s display.
The wave icon is located above the remote channel number indicates the reception status from
the corresponding remote sensor.
There are three following types of the reception status may be displayed:
The indoor temperature with the icon IN is located below the remote temperature
information line.
NOTE: If the indoor or remote temperature goes above or below operating range stated
in specifications, the main unit’s display ( weather) will show dashes “- - -” on the
corresponding line.
MAXIMUM AND MINIMUM READINGS
The maximum and minimum record of the indoor and remote temperature will be automatically
stored in the memory of the main unit (receiver).
To display the minimum, maximum or the current reading press MEM button.
If no button is pressed for the next 15 seconds, the unit will return to the current temperature
and humidity display.
To clear the memory, press and hold MEM button for two seconds and all previously stored
readings will be erased.
LOST COMMUNICATION
If the main unit display line for the remote sensor reading goes blank, press and hold
DOWN (? ) button for 2 seconds to begin a new signal search. If the signal still isn’t received,
please make sure that:
• The remote sensor is in its proper location.
• The distance between main unit and remote sensor(s) is not over 160 feet (50 meters)
• The path between units is clear of obstacles. Shorten the distance if necessary.
• Fresh batteries are installed correctly in both remote sensor and main unit.
The unit is in a searching mode.
Temperature reading is securely registered.
No signals detected.
C
F
B
E
G
A
H
I
J
D
2 3
4 5
6 7