
User Instructions


4
Tab le 4-1: LED I ndication of Output Voltage / Frequency Combinat ion
50Hz
60Hz
100Vac
Output
Voltage
Frequency
110Vac 115Vac 120Va c
(2 00Vac)
●
Status
Status
●
●
●
●
●
●
●
Light
●
○
Dark
●●
●
●
○
Battery
Battery
○
○
Load
Load
○
★
★
Flashing
★★★
○ ○
○ ○
(22 0Vac) (230Vac) (240Vac)
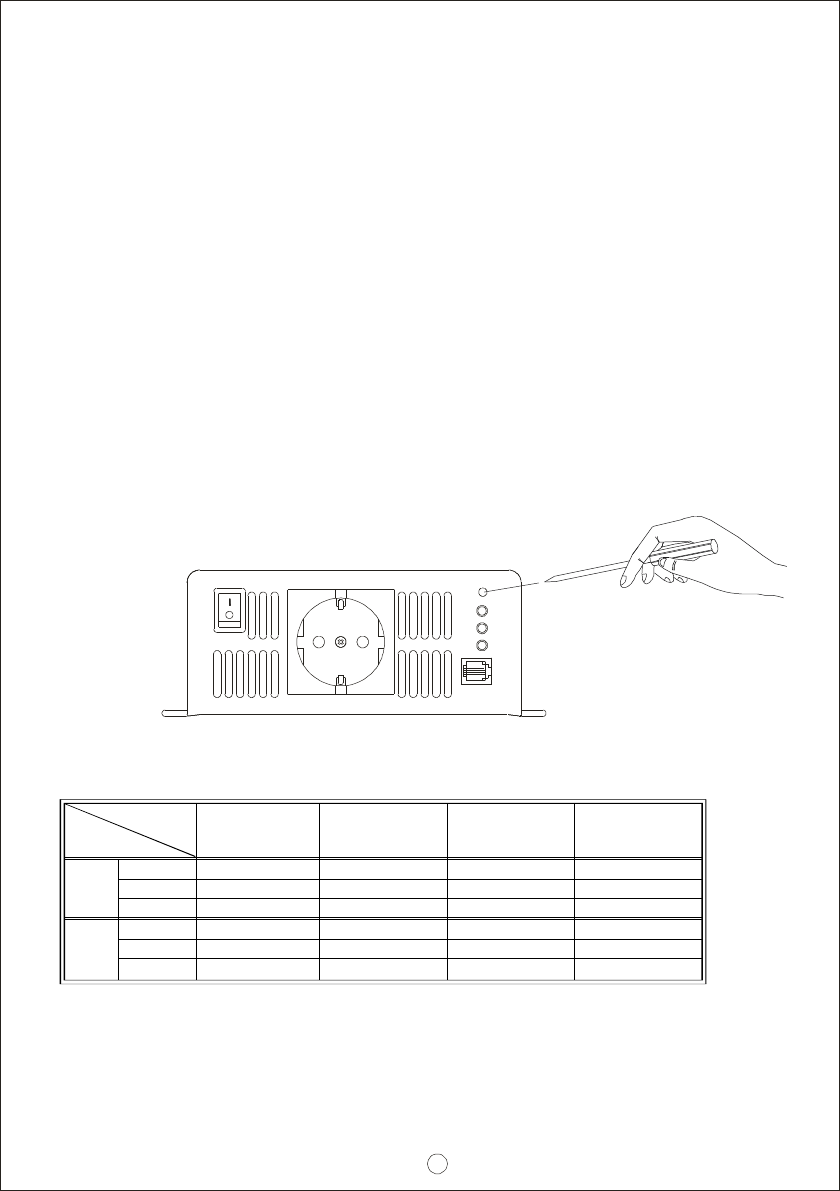
Figure 4.1: Adjustment of Output Voltage, Frequency, and Saving Mod e
Use an insulat ed sti ck to
pr ess this set ti ng butt on
Load
Bat tery
St a tus
AC Ou tput
Setting
OFF
ON
Remot e port
4.Se tup (Output Voltage, Frequency, and Saving Mode)
4.1 Initial State
4.2 Procedure of Setting up Output Voltage, Frequency, and Saving Mode
ST EP 1: Th e in verter shou ld be turned off w hil e res etti ng. Inpu t ba tt eries
STEP 2: Us e an insulat ed s tick to p ress the setting button and then turn on
STEP 3: Please refer to Table 4-1 and check whether the com bination of
should be connected and the loads should be re moved.
the power swi tch. Orange led indication will flash ON an d OFF.
af ter pressing for 5 secon ds, the inve rter will send out a "Beep"
sound. U sers can re le ase the b ut to n and go i nto t he setti ng
pr ocedure.
output vol tage and frequency is the one you need. If yes, please
jump to STEP 5. If not, start from STEP 4.
The initial state is set to110Vac/60Hz or 230Vac/50Hz and di sabled "Saving
Mode" is a ct iva ted . If user s ne ed to revise i t fo r certain application , it c an
be don e the se tting but ton on t he front panel (Pleas e refer to section 4.2).
The un it w ill st art u p a utom atic ally afte r th e se tting pro ced ure is f inish ed
and the new settings will be executed. These new setting s w ill be kept even
if the unit is power off/on fo r any re ason.