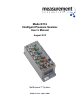
Model 9116 Intelligent Pressure Scanner User’s Manual August 2012 NetScanner™ System www.meas-spec.
Measurement Specialties, Inc. REVISION Model 9116 User’s Manual REVISION HISTORY PRINT DATE 1 Updated manual terminology and deleted all references to UDP Query and to O-ring part numbers. April 2004 2 Update terminology November 2004 3 Update commands August 2007 4 Update to MEAS information August 2012 ©This User’s Manual is a copyright product of Measurement Specialties Inc.
Measurement Specialties, Inc. Model 9116 User’s Manual Table of Contents Chapter 1: General Information.......................................................................................... 1 1.1 Introduction ............................................................................................................ 1 1.2 Description of the Instrument ...................................................................................... 2 1.2.1 Differences Between Models 9016 and 9116 ............
Measurement Specialties, Inc. Model 9116 User’s Manual Table of Contents (continued) 3.1.3 3.1.4 3.2 Page iii Responses ...................................................................................................... 22 3.1.3.1 Interpreting Offset Values (Re-zero Calibration Adjustment) ............. 23 3.1.3.2 Interpreting Gain Values (Span Calibration Adjustment) ................... 23 3.1.3.3 Interpreting Engineering Units Output ...............................................
Measurement Specialties, Inc. Page iv Model 9116 User’s Manual www.meas-spec.
Measurement Specialties, Inc. Model 9116 User’s Manual Table of Contents (continued) Chapter 4: Calibration ......................................................................................................... 91 4.1 Introduction ................................................................................................................ 91 4.2 Re-Zero Calibration .................................................................................................... 93 4.2.
Measurement Specialties, Inc. Model 9116 User’s Manual Table of Contents (continued) Chapter 6: Troubleshooting Guide .................................................................................... 118 6.1 Ethernet Module Troubleshooting ............................................................................... 118 6.1.1 Checking Module Power-Up Sequence........................................................... 118 6.1.2 Checking Module TCP/IP Communications....................................
Measurement Specialties, Inc. Model 9116 User’s Manual Preface This manual describes the NetScanner™ System Intelligent Pressure Scanner module (Model 9116). It does not cover the pressure scanner Models 9016, 9021, 9022, the 98RK Scanner Interface Rack, Model 9816 Intelligent Pressure Scanner, nor Models 903x (Pressure Standards/Controllers. These products are covered in their individual User’s Manuals. This manual is divided into six (6) chapters and several appendices, each covering a specific topic.
Measurement Specialties, Inc. Model 9116 User’s Manual Our Company Measurement Specialties Incorporated, (MEAS) develops, manufactures, and services level and pressure measuring instruments where the highest level of traceable accuracy is required for aerospace, industrial, municipal, and environmental applications. Our products have become the world standard for electronic level and pressure measurement and scanning.
Measurement Specialties, Inc. Model 9116 User’s Manual MEAS will return warranty items prepaid via UPS GROUND. If the customer desires another method of return shipment, MEAS will prepay and add the shipping charges to the repair bill. Incoming freight charges are the customer’s responsibility. The customer is also responsible for paying shipping charges to and from MEAS for any equipment not under warranty. All products covered under the MEAS warranty policy will be repaired at no charge.
© This User’s Manual is a copyright product of Measurement Specialties, Inc. 2012 Permission is hereby granted to make copies and distribute verbatim copies of this manual, provided the copyright notice and this permission notice are preserved on all copies.
Headquarters/Factory: Measurement Specialties Inc. 1000 Lucas Way Hampton, VA 23666 USA Phone: (757) 766-1500 Toll Free: (800) 745-8008 Fax: (757) 766-4297 E-mail: sales@meas-spec.
Measurement Specialties Inc. Model 9116 User’s Manual Chapter 1 General Information 1.1 Introduction This User’s Manual will: ! Explain the electrical and pneumatic pressure connections for the Model 9116 Intelligent Pressure Scanner. ! Provide computer set-up instructions to make a proper Ethernet connection on most Windows® 95/98/XP/NT-based personal computers. ! Instruct you on using the start-up software to manipulate and acquire data from each module.
Measurement Specialties Inc. Model 9116 User’s Manual Figure 1.1 Model 9116 Intelligent Pressure Scanner 1.2 Description of the Instrument The Model 9116 is available with16 channels, each with individual pneumatic transducers per channel. The most distinctive features are highlighted below: ● Pre-calibrated Transducer - a memory chip containing full calibration data is embedded within each internal transducer.
Measurement Specialties Inc. ● 1.2.1 Model 9116 User’s Manual High accuracy - Model 9116 pressure scanners are capable of accuracies up to ±0.05%. Accuracy is maintained through use of built-in re-zero, span, or multi-point calibration capabilities. Accuracies are maintained for six (6) months after calibration. ● Low thermal errors - each internal transducer contains an individual temperature sensor and thermal calibration data for internal use by software correction algorithms.
Measurement Specialties Inc. Model 9116 User’s Manual Consolidated below are the new commands added to the Model 9016 command set, as well as differences in existing commands, command parameters, or command responses: Set Module type alias: w3200 xxxx See the ‘SET/DO OPTION/FUNCTIONS’ (command ‘w’)’ in Section 3.2. Configures the Model 9116 to report its model type as Model 9116 or as a Model 9016 for compatibility with model type sensitive system software.
Measurement Specialties Inc. Model 9116 User’s Manual Additional enhancements to the Model 9116 Software Scan List Speeds: Software Scan lists can be run as fast as hardware trigger scan lists on the Model 9116 (~500 Hz. See specification sheet). The Model 9016 was limited to 100 Hz maximum software trigger scan lists. Firmware Updates/Boot Loader: The firmware in the Model 9116 may be updated in situ, over its Ethernet connection.
Measurement Specialties Inc. 1.3.3 Model 9116 User’s Manual Communication Interfaces All standard NetScanner™ System Intelligent Pressure Scanners provide temperature compensated and linearized pressure data in engineering units via digital methods. They have a 10BaseT Ethernet host communications interface using industry standard TCP/IP or UDP/IP protocol. This interface provides high data transfer rates and system connectivity.
Measurement Specialties Inc. Model 9116 User’s Manual Chapter 2 Installation and Set Up 2.1 Unpacking and Inspection The NetScanner™ System product family has many components which may be purchased either as an entire system, or as individual pieces of equipment. Before assembling the system, use the shipping bill as a reference to ensure that all parts have arrived. Measurement Specialties takes no responsibility for equipment that is damaged during shipment.
Model 9116 User’s Manual Measurement Specialties Inc. WARNING: Exceeding the specified storage or operating temperatures may result in permanent damage to the Model 9116 electronics. 2.3.2 Power The Model 9116 Intelligent Pressure Scanner needs only a single unregulated power supply. See the Model 9116 Data Sheet for actual power requirements. Model 9116 has a single round, ruggedized connector through which all power and input/output signals pass as shown in Figure 2.1.
Model 9116 User’s Manual Measurement Specialties Inc. 2.3.3 Mounting and Module Dimensions See the Model 9116 Data Sheet for exact dimensions of the module. A detailed mechanical drawing is also included in Appendix E. 2.3.4 Network Communications Hookup Every NetScanner™ System Intelligent Pressure Scanner contains a Host Port, allowing it to be interconnected in a network with other modules and a host computer. Model 9116 has an Ethernet Host Port using TCP/IP and UDP/IP transmission protocols. 2.
Measurement Specialties Inc. Model 9116 User’s Manual The host and each module must have a unique Ethernet Hardware Address (a.k.a. MAC Address) and a unique IP Address. The Ethernet Hardware address is generally fixed (at manufacturing time of the Ethernet microprocessor board inside the module). The Ethernet Hardware address is shown on each module’s label.
Measurement Specialties Inc. Model 9116 User’s Manual Use of Static or Dynamic IP settings may be selected through the Set Operating Options ('w') command. If you are unsure how your module is configured, check the Tx LED during module power-up. If it begins to blink periodically after the module power-up, your instrument is configured for the Dynamic IP assignment protocol. (Tx LED remains OFF in static IP configuration.
Model 9116 User’s Manual Measurement Specialties Inc. Figure 2.3 Ethernet Network Topology Page 12 www.MEAS-SPEC.
Model 9116 User’s Manual Measurement Specialties Inc. 2.3.5 Diagnostic Port Hookup Each NetScanner™ System module contains a Diagnostic Port that supports diagnostic and operational functions. The Diagnostic Port has only a simple RS-232 asynchronous serial interface. The connections are made via certain pins of its common circular connector. Cable connection should be made according to Table 2.1. Table 2.
Measurement Specialties Inc. Model 9116 User’s Manual The following guidelines should be used when installing pressure connections to the Model 9116 Intelligent Pressure Scanner modules. ● Always wear safety glasses when working with pressurized lines. ● Ensure that user input pressure will not exceed the proof pressure ratings of the corresponding instrument transducer. Applying excessive pressure to measurement inputs can permanently damage the pressure transducers.
Measurement Specialties Inc. 2.3.6.2 Model 9116 User’s Manual CAL Mode Inputs The Model 9116 tubing plates contain inputs labeled CAL and CAL REF. When the module’s internal calibration valve is placed in the CAL/RE-ZERO position, all DH200 transducer pressure inputs are pneumatically connected to the CAL input port. All DH200 reference inputs are pneumatically connected to the CAL REF input port. The CAL input may be used to perform on-line zero adjustment of the transducers.
Measurement Specialties Inc. 2.3.6.4 Model 9116 User’s Manual LEAK Mode Inputs The purge/leak charge valve design includes a leak check feature capable of testing the integrity of user pneumatic connections as well as those within the Model 9116 module. For the leak mode to be used, all RUN mode pressure inputs must be dead ended (closed) by the user. When the Model 9116 is commanded into the LEAK-CHARGE position, the CAL input port will be pneumatically connected to module run side inputs.
Measurement Specialties Inc. 2.3.7 Model 9116 User’s Manual Case Grounding The Model 9116 module contains a case bypass capacitor which allows the module case to be mounted on hardware with a small common mode line voltage (less than 20 Volts). 2.3.8 Trigger Input Signal Model 9116 supports the use of a data acquisition synchronization signal, sometimes called “Hardware Trigger.
Measurement Specialties Inc. Model 9116 User’s Manual Chapter 3 Programming and Operation 3.1 Commands & Responses 3.1.1 Introduction This chapter describes all commands a host computer program may send to a Model 9116 Intelligent Pressure Scanner module, as well as the data or status responses returned by the module. Most applications require a working knowledge of only a small number of these commands.
Measurement Specialties Inc. Model 9116 User’s Manual directed to “well-known” port 9000 (default). After the connection is made, a socket is established as a logical handle to this connection. The host and module may then communicate, via this socket, until it is closed or is lost at either module or host end, due to power failure or reboot). The host and module may also communicate in a limited fashion without a connection, using the middle-level UDP/IP protocols.
Model 9116 User’s Manual Measurement Specialties Inc. A typical UDP/IP command (contained in the data field following a UDP packet header) is also a variable length character string, but has a simpler format. Generally, it has a variable length command string (cccccc), followed by one optional datum ( dddd) field (preceded by one space character): “cccccc[ dddd]” Since there are only a few simple UDP/IP commands, all references to commands below should assume TCP/IP commands, unless otherwise indicated.
Measurement Specialties Inc. 3.1.2.4 Model 9116 User’s Manual Datum Fields Any datum fields in a command generally contain data to be sent to the module, usually specified by a position field bit map. In some commands (when data are received from a module instead) no datum fields are required in the command itself but the position field bit map is still used to specify the order that data are returned in the command’s response.
Model 9116 User’s Manual Measurement Specialties Inc. 3.1.3 Responses Four (4) types of responses can be returned from a Model 9116 Intelligent Pressure Scanner module: an Error response, an Acknowledge response, an Acknowledge with Data response, or a Network Query response. The first three may be returned by TCP/IP commands, the latter from a UDP/IP command. The error response consists of the letter ‘N’ (for NAK, or negative acknowledge), followed by a 2-digit hexadecimal error code.
Measurement Specialties Inc. 3.1.3.1 Model 9116 User’s Manual Interpreting Offset Values (Re-zero Calibration Adjustment) When a module is instructed to execute the command Calculate and Set Offsets (‘h’), a datum corresponding to the calculated offset correction term (or coefficient) is returned for each affected channel. Each such coefficient value is stored internally, and will be subtracted in all subsequently calculated data conversions, to correct for zero drift effects.
Measurement Specialties Inc. 3.1.4.1 Model 9116 User’s Manual Startup Initialization Since power supplies may be distributed widely across a network of modules and host computer(s), it is not uncommon for modules (singly or together) and the host to lose power independently. Thus, their power may be restored at different times.
Measurement Specialties Inc. Model 9116 User’s Manual All modules effectively defer the host computer’s decision of “which channels of data do I want” until that time when the host chooses to send read commands to actually retrieve the desired data from the latest “buffered copy” of the continuously scanned, averaged, and engineeringunit-converted data. See Section 3.1.4.4 (Delivery of Acquired Data to Host) for more information. While scanning, all modules take multiple samples and average each channel.
Measurement Specialties Inc. Model 9116 User’s Manual The Configure/Control Multi-Point Calibration (‘C’) command, actually 4 sub-commands, is an improvement over the single calibration commands (‘h’ and ‘Z’) described above. Though ‘C’ provides for the adjustment of the same offset and gain correction coefficients already described above, it does so with two or more applied pressure calibration points. The final linear fit (i.e.
Measurement Specialties Inc. 3.1.4.5 Model 9116 User’s Manual Network Query and Control Functions A special subset of three (3) UDP/IP commands may be sent to a module at any time power is applied to it (i.e., neither a host socket connection nor a unique IP Address assignment is required). Each such command is broadcast to all modules (i.e., sent to IP Address 255.255.255.255) via Port 7000, and any module wishing to respond will return a UDP/IP broadcast response via Port 7001.
Model 9116 User’s Manual Measurement Specialties Inc. 3.2 Detailed Command Description Reference All commands applicable to the Model 9116 Intelligent Pressure Scanner modules are described on the following pages. They are summarized in the following table. For convenience, this table is also repeated in Appendix B.
Measurement Specialties Inc. Model 9116 User’s Manual POWER UP CLEAR (Command ‘A’) Purpose: Command This command has no internal module affect. It is used as a simple method to verify proper communications to the Model 9116 module. “A” ‘A’ is the command letter. Response “A” ‘A’ is the acknowledge letter. Description: This command is generally used as a simple ‘NOP’ mechanism to verify proper communications with a module.
Measurement Specialties Inc. Model 9116 User’s Manual RESET (Command ‘B’) Purpose: Command Instructs the module to reset internal operating parameters, and to set all internal control variables to their default “reset” state (see description below). The current TCP/IP socket connection will remain open. Execution after a power off/on cycle is optional (unnecessary). “B” ‘B’ is the command letter. Response “A” ‘A’ is the acknowledge letter.
Measurement Specialties Inc. Model 9116 User’s Manual CONFIGURE/CONTROL MULTI-POINT CALIBRATION (Command ‘C’) Purpose: This command is actually four (4) sub-commands. The first configures and starts a Multi-Point Calibration adjustment function for selected channels in the module. Another is repeated multiple times to collect data for each defined calibration point. Another ends the calibration function normally by calculating new offset and gain adjustment coefficients from the collected data.
Measurement Specialties Inc. Model 9116 User’s Manual Command ‘C’— Sub-command Index 00: Configure & Start Multi-Point Calibration This sub-command has four (4) additional required parameters used to configure and start the Multi-Point Calibration function. Command “C 00 pppp npts ord avg” ‘C’ is the command letter. ‘ 00’ is the sub-command index (ii) for Configure & Start.
Measurement Specialties Inc. Model 9116 User’s Manual Example: ● Configure and start the Multi-Point Calibration function so that it affects only the first four (4) channels of the module. Three (3) pressure calibration points will by supplied when we continue this function later (see example for ‘01’ sub-command below). A linear (1st order) fit will be used to obtain a new set of offset and gain correction coefficients for these four (4) channels.
Measurement Specialties Inc. Model 9116 User’s Manual necessary. Use a Model 903x Calibrator or some other suitable precision pressure source to generate the pressure. It is not necessary to enter the two or more calibration points in strict numerical order (i.e., 1, 2, ... npts). Any convenient entry order is allowed, though each point’s actual pressure value must be correctly stated (with the pppp.pppp parameter) when executed.
Measurement Specialties Inc. Model 9116 User’s Manual Example: ● Supply each of the previously-specified three (3) pressure calibration points to the MultiPoint Calibration function, as was stated in the previous example of the Configure and Start (‘00’) sub-command. Assume that all the affected four (4) channels have differential transducers with the same -5 to +5 psi range. Include at least one pressure point in the negative range of these transducers “C 01 1 -2.5” “C 01 2 0.0” “C 01 3 5.
Measurement Specialties Inc. Model 9116 User’s Manual Command ‘C’- Sub-command Index 02: Calculate & Apply Correction Coefficients This sub-command has no additional parameters. Command “C 02” ‘C’ is the command letter. ‘02’ is the sub-command index (ii) for Calculate & Apply NOTE: all parameters are separated by a space.
Measurement Specialties Inc. Model 9116 User’s Manual Example: ● Finish the Multi-Point Calibration function previously started (as indicated by the previous examples of ‘C’ sub-commands ‘00’ and ‘01’). Calculate new adjustment coefficients, and save them in the non-volatile memory of the module’s transducers. These new coefficients will then be used for all subsequently calculated EU data acquired by the module, until another calibration function is performed in the future.
Measurement Specialties Inc. Model 9116 User’s Manual Command ‘C’— Sub-command Index 03: Abort Multi-Point Calibration This sub-command has no additional parameters. “C 03” Command ‘C’ is the command letter. ‘03’ is the sub-command index (ii) for Abort. NOTE: all parameters are separated by a space. “A” Response ‘A’ is the acknowledge letter Description: Aborts the Multi-Point Calibration function, if it is currently in progress.
Model 9116 User’s Manual Measurement Specialties Inc. READ TRANSDUCER VOLTAGES (Command ‘V’) Purpose: Command Returns for the specified channels, the most recently acquired raw pressure data, converted to volts directly from the averaged A/D counts. This simple engineering-unit conversion bypasses any usage of the transducer’s factorycalculated coefficients or the final calibration process’s correction coefficients (offset and gain).
Measurement Specialties Inc. Model 9116 User’s Manual Example: ● Send TCP/IP command to a Model 9116 module (via its connected socket) that returns ASCII decimal fixed-point voltage data for channels 1, 5, 9, and 13: “V11110” Response contains data for channels 13, 9, 5, and 1 (left to right): “ 4.999999 -4.989500 0.005390 2.500001” Page 40 www.MEAS-SPEC.
Measurement Specialties Inc. Model 9116 User’s Manual CALCULATE AND SET GAINS (Command ‘Z’) Purpose: Command Instructs a module to calculate new gain coefficients, with either full-scale pressure (or a specified pressure) applied to the specified channels. These new coefficients update part of the module’s internal calibration coefficient database, used to convert any subsequent raw data (from any of the specified channels) into engineering units data.
Measurement Specialties Inc. Model 9116 User’s Manual Internal firmware limits calculated gains to values are software limited to values between 0.0 and 100.0. Any calculated value outside of this range will result in the gain coefficient being set to 1.00. Note The calculated gain values from the latest ‘Z’ command will be lost when the module is powered off. To save these gain terms to each transducer’s non-volatile memory, refer to the Set Operating Options (‘w’) command (index 09).
Model 9116 User’s Manual Measurement Specialties Inc. READ TRANSDUCER A/D COUNTS (Command ‘a’) Purpose: Command Returns the most recently acquired raw pressure data for the specified channels in averaged signed A/D counts (in the range -32768 to +32767). This simple data bypasses any usage of the transducer’s factory-calculated coefficients or the final calibration process’s adjustment coefficients (offset and gain).
Measurement Specialties Inc. Model 9116 User’s Manual Example: ● Send TCP/IP command to Model 9116 module (via its connected socket) that returns decimal raw “pressure” A/D counts data for channels 1, 5, 9, and 13: “a11110” Response contains data for channels 13, 9, 5, and 1 (left to right): “ 32767.000000 -32700.000000 10.000000 16385.000000” Please note that channel 13 is saturated at +full scale and channel 9 is almost saturated at -full scale.
Measurement Specialties Inc. Model 9116 User’s Manual READ HIGH-SPEED DATA (Command ‘b’) Purpose: Returns the most recent scanned/averaged data from all channels of the module as fast as possible. Data is returned directly in its internal (IEEE single-precision float) binary form (as per implied format 7).
Measurement Specialties Inc. Model 9116 User’s Manual DEFINE/CONTROL AUTONOMOUS HOST STREAMS (Command ‘c’) Purpose: Defines and controls the autonomous delivery of any of up to three concurrent high-speed autonomous data streams to the host computer. Such data streams may be delivered “continuously” without bound (i.e., until a command explicitly stops them), or be delivered in a “limited” amount (until a pre-specified fixed number of data packets have been sent).
Measurement Specialties Inc. Model 9116 User’s Manual Special augments of this command, called sub-commands (distinguished by the first parameter ii) can configure each data stream with the particular channels whose data are delivered, the datum format, the delivery rate, and other characteristics. It can also start, stop, or undefine a single stream or all defined streams.
Measurement Specialties Inc. Model 9116 User’s Manual Command ‘c’— Sub-command Index 00: Configure A Host Delivery Stream This sub-command is used to configure the principal parameters of each of the three possible concurrent host delivery streams, one at a time. Following this configuration phase, the stream (1, 2, or 3) or all streams may be started and stopped with other sub-commands.
Model 9116 User’s Manual Measurement Specialties Inc. channels. Following completion of the acquisition and EU conversion cycle, the module will also deliver the requested data channels to the host. In this manner, users are provided with highly synchronized data acquisition and delivery from one or more modules.
Measurement Specialties Inc. Note Model 9116 User’s Manual With the exception of binary formats 7 and 8, all other formats include a leading space in each datum delivered in each stream packet. The number of stream packets (‘num’) parameter is a positive integer count (from 0 to 2147483647, specified with 1 to 10 numeric digits as needed). It sets a finite limit on the number of packets delivered in the host data stream.
Measurement Specialties Inc. Model 9116 User’s Manual Example: ● Configure three (3) separate autonomous host delivery streams, and divide the module’s channels between them. Channels (1-4) must be delivered to host as fast as possible, channels 5-8 may be delivered at half that rate, while the remaining channels 9-16 are delivered at half the previous rate. All streams are generated continuously and synchronized with the internal clock at 100 msec., 200 msec., and 400 msec. periods, respectively.
Measurement Specialties Inc. Model 9116 User’s Manual Command ‘c’— Sub-command Index 01: Start Stream(s) This sub-command is used to start the delivery of any previously configured host stream in a module. If the stream started is of “continuous” duration, then it will be necessary to use the Stop Stream sub-command later. Otherwise, the stream will end automatically if a finite number of packets has been specified for it.
Model 9116 User’s Manual Measurement Specialties Inc. For periodic hardware-triggered streams, that are never suspended and resumed after being initially enabled, the sequence number may also serve as a “relative” time stamp if the period (in milliseconds) of the hardware trigger is known. If a special sub-command (ii=05) is used to select the content of a stream, other binary status data may immediately follow the binary stream header and precede the default Pressure EU Data (if selected).
Model 9116 User’s Manual Measurement Specialties Inc. Command ‘c’— Sub-command Index 02: Stop Stream(s) This sub-command is used to stop (or temporarily suspend) the delivery of any previously started host stream in a module, one at a time or all together, whether the stream was “continuous” or “limited.
Measurement Specialties Inc. Model 9116 User’s Manual Command ‘c’— Sub-command Index 03: Clear Stream(s) This sub-command is used to “undefine” any previously configured host stream in a module, one at a time, or all together. The sub-command’s format is: “c 03 st” Command ‘c’ is the command letter ‘03’ is the sub-command index (‘ii’) for configuration ‘st’ is the stream identifier character (1, 2, or 3 or 0=all streams) NOTE: all parameters are separated by a space character.
Measurement Specialties Inc. Model 9116 User’s Manual Command ‘c’ — Sub-command Index 04: Return Stream Information This sub-command returns current stream configuration information in its response. Its format is: Command “c 04 st” ‘c’ is the command letter ‘04’ is the sub-command index (‘ii’) for configuration ‘st’ is the stream identifier character (1, 2, or 3 only) NOTE: all parameters are separated by a space character.
Measurement Specialties Inc. Model 9116 User’s Manual Example: ● Return configuration information for stream l “c 04 1” Read response: “1 FFFF 0 20 7 32000 1 7002 200.200.200.1” The above example shows all 16 (sixteen) channels. Data is acquired using hardware trigger with one (1) data packet acquired for every trigger events. Data is returned in format 7. (In the above example, 32000 packets have been returned so far.) Data is sent using UDP protocol to port 7002 at IP address 200.200.200.1.
Measurement Specialties Inc. Model 9116 User’s Manual Command ‘c’ — Sub-command Index 05: Select Data in a Stream This sub-command sets options that cause a specified stream to deliver specific kinds of information to host. By default, only Pressure EU data are delivered for the channels already specified by the “00” command. “c 05 st bbbb” Command ‘c’ is the command letter ‘05’ is the sub-command index (‘ii’) for Select Data.
Model 9116 User’s Manual Measurement Specialties Inc.
Measurement Specialties Inc. Model 9116 User’s Manual Example: ● Configure stream l to return temperature status field, and all Pressure EU data “c 05 1 0012” Read response: “A” If or when stream 1 is subsequently enabled, data groups in that stream with the lowest-bit-numbers (table positions) selected are delivered first.
Measurement Specialties Inc. Model 9116 User’s Manual Command ‘c’ — Sub-command Index 06: Select Protocol For Stream Delivery “c 06 st pro [remport [ipaddr]]” Command ‘c’ is the command letter. ‘ 06’ is the sub-command index (ii) for Select Protocol. ‘ st’ is the stream id digit (0=the ONLY acceptable entry). ‘ pro’ is the protocol id digit (1=UDP/IP, 0=TCP/IP) ‘ remport’ is an optional remote port number to which each UDP stream is directed in the host (port 9000 is the default if unspecified).
Measurement Specialties Inc. Model 9116 User’s Manual The optional ipaddr parameter is normally unspecified, causing it to default to use the IP address of the current TCP/IP connection. That way the host need not have to be aware of its own IP address. This parameter is provided in case a special host has multiple network interfaces and wants to use more than one. When used, ipaddr requires four dotted numeric fields (d.d.d.d). Each d is a 1-3 digit decimal number in the range 0-255. The ipaddr = 255.
Measurement Specialties Inc. Model 9116 User’s Manual CALCULATE AND SET OFFSETS (Command ‘h’) Purpose: Instructs a module to calculate new offset coefficients with zero differential pressure (or a specified “generated” pressure) applied to the specified channels. These new coefficients update part of the module’s internal calibration coefficient database, used to convert any subsequent raw data into engineering units data. The new offset values are also returned in the response.
Measurement Specialties Inc. Model 9116 User’s Manual Example: ● Send TCP/IP command to a Model 9116 module (via its open socket) to calculate and set new offset coefficients for channels 16 through 13. “hF000” Read response, containing all new offset values (also stored in the module’s volatile main memory): “0.0010 0.0020 0.0015 0.0025” Actual offset values are returned in the above response as decimal fixed-point ASCII strings, each preceded by a space character.
Model 9116 User’s Manual Measurement Specialties Inc. READ TEMPERATURE COUNTS (Command ‘m’) Purpose: Command Returns the most recently acquired raw temperature data for the specified channels in averaged A/D counts (in the range -32768 to +32767). This command is similar to command ‘a,’ except that the raw data reflects a channel’s temperature signal instead of its pressure signal.
Measurement Specialties Inc. Model 9116 User’s Manual Example: ● Send TCP/IP command to Model 9116 module (via its connected socket) that returns decimal raw “temperature” A/D counts data for channels 1, 5, 9, and 13: “m11110” Response contains data for channels 13, 9, 5, and 1 (left to right): “20692.000000 19783.000000 19204.000000 20432.000000” Page 66 www.MEAS-SPEC.
Model 9116 User’s Manual Measurement Specialties Inc. READ TEMPERATURE VOLTAGES (Command ‘n’) Purpose: Command Returns the most recently acquired raw temperature data for the specified channels converted to engineering-unit Volts directly from the averaged A/D counts. It is similar to command ‘V,’ except that the raw data reflects a channel’s temperature signal instead of its pressure signals. Each datum returned in the response will be in the specified high-precision data format.
Measurement Specialties Inc. Model 9116 User’s Manual Example: ● Send TCP/IP command to Model 9116 module (via its connected socket) that returns decimal voltage data (of the raw temperature signal) for channels 1, 5, 9, and 13: “n11110” Response contains data for channels 13, 9, 5, and 1 (left to right): “ 0.53013 0.541698 0.503633 0.000000” In this example channels 13, 9, and 5 return normal temperature voltage signals in the range of 0.5 to 0.6 volts. Note that channel 1 returns a value of 0.
Model 9116 User’s Manual Measurement Specialties Inc. READ MODULE STATUS (Command ‘q’) Purpose: Returns requested module status information. Command “qii” ‘q’ is the command letter ‘ii’ is the status index field Response “hhhh” ‘hhhh’ is a 4-digit hex datum (or other (**) decimal datum Description: The 2-digit hex index field (ii) chooses a particular status field to be returned.
Measurement Specialties Inc. 06 07 08 09 0A 0C 0D 0E 11 31 32 3c (+) NOTE: Page 70 Model 9116 User’s Manual IP Address Resolution Method, as hex state: (default = 0000) 0000 = Use Static IP Address stored in module’s non-volatile memory 0001 = Get Dynamic IP Address from external RARP/BOOTP server Host Response/Stream Back-Off Delay, as hex value (or FFFF). FFFF means use low-order byte of module’s Ethernet Address as value instead.
Measurement Specialties Inc. Model 9116 User’s Manual Example: ● Request model number from a Model 9116 module: “q00” Read response indicating it is a Model 9116: “9116” ● Request TCP back-off delay for a Model 9116 module: “Q07" Read hex (16-bit binary) response: “001F” (31 decimal, or 31 x 20=620 µsec.) Page 71 www.MEAS-SPEC.
Model 9116 User’s Manual Measurement Specialties Inc. READ HIGH-PRECISION DATA (Command ‘r’) Purpose: Command Returns the most recently acquired engineering-unit pressure data for the specified channels. Each datum returned in the response will be in the specified high-precision data format. “rppppf” ‘r’ is the command letter ‘pppp’ is the position field ‘f’ is the format field Response “ dddd.. dddd” ‘ dddd’ are datum fields, each with leading space (except f= 7 or 8).
Measurement Specialties Inc. Model 9116 User’s Manual Example: ● Send TCP/IP command to Model 9116 module (via its connected socket), that returns decimal pressure data for channels 1, 5, 9, and 13 in ASCII fixed point format: “r11110” Response contains data for channels 13, 9, 5, and 1 (left to right): “1.234000 0.989500 1.005390 0.899602” Page 73 www.MEAS-SPEC.
Model 9116 User’s Manual Measurement Specialties Inc. READ TRANSDUCER TEMPERATURE (Command ‘t’) Purpose: Command Returns the most recently acquired engineering-unit temperature data (in ºC) for the specified channels. Each datum returned in the response will be in the specified high-precision data format. “tppppf” ‘t’ is the command letter ‘pppp’ is the position field ‘f’ is the format field Response “ dddd.. dddd” ‘ dddd’ are the datum fields, each with leading space (except f =7 or 8).
Measurement Specialties Inc. Model 9116 User’s Manual Example: ● Send TCP/IP command to Model 9116 module (via its connected socket) that returns decimal temperature data for channels 1, 5, 9, and 13: “t11110” Response contains data (in ºC) for channels 13, 9, 5, and 1 (left to right): “ 21.234000 20.989500 21.005390 20.899602” Page 75 www.MEAS-SPEC.
Model 9116 User’s Manual Measurement Specialties Inc. READ INTERNAL COEFFICIENTS (Command ‘u’) Purpose: Command Returns one (or more contiguous) requested internal coefficient(s) in a specified internal coefficient array, and in the specified response data format. “ufaacc[-cc]” ‘u’ is the command letter. ‘f’ is the format field. ‘aa’ is the array index field. ‘cc[-cc]’ is coefficient index [or contiguous range]. Response “ dddd.. dddd” ‘dddd’ are the datum fields, each with leading space character.
Measurement Specialties Inc. Note cc Model 9116 User’s Manual Coefficients used for typical applications are shown in BOLD type. All other coefficients are typically not used outside of advanced diagnostic functions.
Model 9116 User’s Manual Measurement Specialties Inc.
Measurement Specialties Inc. Model 9116 User’s Manual Example: ● Send TCP/IP command to module (via its connected socket) requesting the most recent calibration adjustment’s offset and gain terms (cc=00-01), and the adjacent factory-determined transducer coefficients C0 through C4 (cc=02-06) for transducer 1: Data requested in ASCII-hex format representing the internal binary floating point format. “u10100-06” Response returned is: “ 3B200A6E . .
Model 9116 User’s Manual Measurement Specialties Inc. DOWNLOAD INTERNAL COEFFICIENTS (Command ‘v’) Purpose: Command Downloads one or more internal coefficients to the module. ““vfaacc[-cc]dddd..dddd” ‘v’ is the command letter. ‘f’ is the format field. ‘aa’ is the array index field. ‘cc[-cc]’ is coefficient index [or contiguous range]. ‘dddd’ are the datum field(s) each with a leading space.
Model 9116 User’s Manual Measurement Specialties Inc.
Measurement Specialties Inc. Model 9116 User’s Manual Example: ● Send TCP/IP command to module (i.e., via its connected socket): with replacement values for the channel’s offset and gain correction terms loaded into the module’s volatile memory (cc=00-01). Load these into channel # 8's Transducer Coefficient array (aa=08). “v00800-01 0.000 1.000” Response returned is: “A” ● Send command to Model 9116 module (via its connected socket) to change its default EU output from psi to kPa.
Model 9116 User’s Manual Measurement Specialties Inc. SET/DO OPERATING OPTIONS/FUNCTIONS (Command ‘w’) Change a module’s default operating option settings, or invoke special internal operations or functions. Purpose: “wii[dd[ eeee]]” Command ‘w’ is the command letter. ‘ii’ is the option index field. ‘dd’ is an [optional] hex datum field. ‘eeee’ is an [optional] extra datum with a leading space character.
Model 9116 User’s Manual Measurement Specialties Inc. ii dd 00 0C 0D-0E 0F 01 -00 01 01-20 10 11 12 13 Set Cal Valves to RUN or CAL/RE-ZERO Position (default) — choice made by ii=0C. Set Cal Valves to PURGE or LEAK Position — choice made by ii=0C. Use Static IP Address Resolution (default) Use Dynamic IP Address Resolution (RARP/BOOTP) (Results in immediately becoming the module’s new power-on default) Disable Host Response/Stream Back-Off Delay (default).
Model 9116 User’s Manual Measurement Specialties Inc. ii dd 31 00 dd 32 3c 00 06 07 ‘q’ read index Description Set module type alias. 1 eeee=9116 (default) or 9016 2 Set hardware trigger mode.
Model 9116 User’s Manual Measurement Specialties Inc. The Valve Position indexes (ii=12 and ii=0C) each have two states (00/01) that when combined provide four (4) possible states of the C1/C2/C3/C4 internal valves.
Model 9116 User’s Manual Measurement Specialties Inc. NETWORK QUERY (UDP/IP Command ‘psi9000’) Purpose: To determine how many (and which) modules are powered-up and operational on the network.
Measurement Specialties Inc. Model 9116 User’s Manual This uniform network query response allows a client host program to identify, configure, and use any suitable group of modules (for the task at hand) by simply opening a TCP/IP connection between itself and each available module needed. Example: ● Query all module(s) on the network. “psi9000” Response(s): 200.201.7.207, 0-e0-8d-1-7-cf, 1999, 9116, 2.32, 0, 1, 9000, 192.0.0.0, 0, 1, 0x0 Page 88 www.MEAS-SPEC.
Measurement Specialties Inc. Model 9116 User’s Manual RE-BOOT MODULE (UDP/IP Command ‘psireboot’) Purpose: To unconditionally “reboot” a specified module. Command “psireboot ethadr” where ethadr is the Ethernet address of the specified module in the following special hex-digit format ‘xx-xx-xx-xx-xx-xx’ Response none (module reboots) Description: When a Model 9116 module receives this broadcast command, (by continuously monitoring port 7000) it responds by immediately restarting its firmware.
Measurement Specialties Inc. Model 9116 User’s Manual CHANGE MODULE’S IP ADDRESS RESOLUTION METHOD & RE-BOOT (UDP/IP Command ‘psirarp’) Purpose: Command Response To change (toggle) the current IP address resolution state (ipaarpst) of a specified module, and then unconditionally “re-boot” it.
Model 9116 User’s Manual Measurement Specialties Inc. Chapter 4 Calibration 4.1 Introduction Each internal DH200 transducer in a Model 9116 Intelligent Pressure Scanner contains nonvolatile read/write memory capable of storing the transducer's full thermal and pressure calibration data. The Model 9116 Intelligent Pressure Scanner module uses a third-order polynomial to convert transducer output voltage to pressure. All calculations are carried out internally using high precision math.
Measurement Specialties Inc. Model 9116 User’s Manual For reference when operating the Model 9116 calibration manifold, Figures 4.1 through 4.4 show simplified pneumatic diagrams of the calibration manifold in its various positions. Note Periodic zero and span calibration should be the only calibration required to maintain specified performance throughout the life of the scanner. Figures 4.1 – 4.4 Pneumatic Diagrams of the Calibration Manifold Page 92 www.MEAS-SPEC.
Measurement Specialties Inc. Model 9116 User’s Manual 4.2 Re-zero Calibration All Model 9116 Intelligent Pressure Scanners are capable of independently performing a transducer calibration adjustment function, referred to as Re-zero adjustment (or simply Re-zero Cal). The Re-zero calibration will result in a recalculated “offset” coefficient for each channel being calibrated, which automatically compensates for any transducer offset drift errors.
Measurement Specialties Inc. 4.2.2 Model 9116 User’s Manual Re-zero Calibration Summary Following is a simple, step-by-step procedure for executing a Re-zero calibration of a Model 9116 Intelligent Pressure Scanner. Optional commands are shown within brackets [ ]. Description Disable automatic valve shifting after module power up. Ensure valves in RUN/CAL mode (default) Model 9116 Command [w0B01] [w1200] … normal data acquisition Apply 0.0 psi differential to the module CAL and CAL REF inputs.
Measurement Specialties Inc. Model 9116 User’s Manual For Model 9116, with integral DH200 transducers, internal manifolds and valves allow a Span adjustment pneumatic calibration to be accomplished easily and automatically. It is recommended that a Span adjustment be performed whenever new transducers are installed in the instrument. In such cases, the new gain coefficients that result should always be stored back into the transducer’s non-volatile memory.
Measurement Specialties Inc. 4.3.2. Model 9116 User’s Manual Span Calibration Summary Following is a simple, step-by-step procedure for executing a “full scale” span calibration of a 9116 Intelligent Pressure Scanner. It is assumed that all channels in the unit are of the same full scale pressure range. Optional commands are shown within brackets [ ].
Measurement Specialties Inc. Model 9116 User’s Manual Following is a simple, step-by-step procedure for executing a specified-value span calibration of a Model 9116 Intelligent Pressure Scanner. For the purposes of this example, it will be assumed that an upscale pressure of 14.9800 psi is available from a dead weight tester for the calibration of 15 psi internal transducers. All sixteen channels are 15 psi full scale.
Measurement Specialties Inc. 4.4 Model 9116 User’s Manual Integrated Multi-Point Calibration Adjustment Model 9116 Intelligent Pressure Scanners may have their accuracy enhanced by regular application of one or both of the individual Re-zero and Span calibration adjustment functions already described in Sections 4.2 and 4.3. An integrated and more comprehensive Multi-Point Calibration function may be used instead to adjust the same offset and gain coefficients for a module’s channels.
Model 9116 User’s Manual Measurement Specialties Inc. command (‘C’) has a channel selection bit map parameter allowing it to calibrate only the desired pressure channels, the RUN port is a viable option for supplying the calibration pressures. 4.4.2 Multi-Point Calibration Summary Following is a simple step-by-step procedure for executing a “multi-point” calibration of a Model 9116 Intelligent Pressure Scanner. It is assumed that all channels in the unit have the same fullscale pressure range.
Measurement Specialties Inc. Verify that pressure reads correctly. When the data are stable, enter another Collect Data (‘01’) sub-command of ‘C’ specifying this second calibration point (2) with 5.0 psi pressure. Model 9116 User’s Manual [rFFFF0] C 01 2 5.0 Apply 3rd calibration pressure to the module’s CAL or RUN inputs. A mid-scale negative (-2.5 psi) point is assumed in this case. A vacuum pump is normally required to achieve such a pressure with 903x calibrators.
Measurement Specialties Inc. Model 9116 User’s Manual Alternately, they may be verified and stored on the host computer’s secondary storage, and later restored (if necessary) with the Download Internal Coefficients (‘v’) command (same array/coefficient indexes as ‘u’). 4.6 Line Pressure Precautions When operating Model 9116 pressure scanners at elevated line or reference pressures, care must be taken when any command is issued that may result in shifting of the calibration valve.
Model 9116 User’s Manual Measurement Specialties Inc. Chapter 5 Service 5.1 Maintenance This section provides a detailed step-by-step guide for performing repair and maintenance of Model 9116 Intelligent Pressure Scanners. The method for upgrading module firmware is also presented in Section 5.2. Figure 5.1 is an exploded view of the Model 9116. Please refer to this drawing for an understanding of the construction of Intelligent Pressure Scanners models. Figure 5.1a depicts the 9116 top plate.
Model 9116 User’s Manual Measurement Specialties Inc. Note It must be emphasized that printed circuit boards in Model 9116 module are field replaceable, but are NOT field repairable. Figure 5.1a Model 9116 Top Plate Page 103 www.MEAS-SPEC.
Model 9116 User’s Manual Measurement Specialties Inc. Table 5.1 provides a convenient cross reference summary of the components found in your Model 9116 Intelligent Pressure Scanner. This may be used as a guide to identify the appropriate component replacement sections in this chapter. Table 5.1 Component Cross Reference Component 5.1.1 Section PC-322 Main Board PCB Assembly 5.1.3.3 PC-323 PowerPC daughterboard PCB Assembly 5.1.3.1 PC-327 Analog PCB Assembly 5.1.3.
Model 9116 User’s Manual Measurement Specialties Inc. In the process of performing general maintenance on a module and in printed-circuit board replacement, the following tools may be required: ● ● ● ● ● 3/32" and 5/64" Allen-head screwdrivers, a 3/16" hex wrench, a needle nose tweezers, a Phillips-head screwdriver, and a small adjustable wrench. 5.1.2 Module Disassembly The following procedure should be used to disassemble any model prior to any maintenance.
Measurement Specialties Inc. 5.1.3.1 Model 9116 User’s Manual PC-327 Analog Board The following procedures should be used for replacement of the PC-327 Analog Board. Use the tools and follow the general precautions described in Section 5.1.1. (1) Disassemble the module as described in Section 5.1.2. Carefully remove the wiring harness from connector P1 of the PC-327 board. Note the orientation of the PC-327 relative to the rest of the module to ensure the new PC-327 is installed in the same position.
Model 9116 User’s Manual Measurement Specialties Inc. (3) Remove the three (3) 2-56 Phillips head screws securing the PC-322/323 assembly mounting brackets to the top plate. These screws will be in line with the PC-322/323 LEDs that protrude through the top plate. Carefully lift the board out of the top panel. Remove the wiring harness from P1. See Figure 5.3. Figure Figure 5.
Measurement Specialties Inc. 5.1.3.3 (1) Model 9116 User’s Manual Remove and Replace PC-323 (Daughter board) on PC-322 (Main PCB) Remove the two (2) Phillips-head screws that hold the PC-323 onto the PC-322 board. (Figure 5.3a) Remove Phillips-head screws Remove Phillips-head screws (screw already removed) Figure 5.3a Figure 5.3a Removing PC-323 Daughter Removing PC-323 DaughterBoard Board (2) Gently rock the PC-323 board back and forth to loosen it and then lift straight up to remove it.
Model 9116 User’s Manual Measurement Specialties Inc. Secure the PC-323 board in place using the long screw through the mounting bar and the short screw into the hex standoff. Figure 5.3c Figure PC-322 Board PC-322 (4) Turn the assembly over. Replace the nylon washer and secure the nut to the back of the long screw going through the mounting bar as depicted in Figure 5.3c. (5) Reassemble the scanner as previously described and test for proper operation. 5.1.
Measurement Specialties Inc. Model 9116 User’s Manual (1) Disassemble the module as described in Section 5.1.2. (2) Remove the PC-327 Analog board as described in Section 5.1.3.1. Lay the circuit board aside on an anti-static surface. (3) Remove the retaining screw from the desired DH200 transducer. Lift the transducer straight up to remove it. Make sure that the two (2) O-rings remain with the transducer as it is removed from the adapter plate.
Model 9116 User’s Manual Measurement Specialties Inc. Solenoids Figure 5.5 Figure Solenoids in Module Module Solenoids in (4) Ensure the three (3) solenoid manifold O-rings are present and free of contaminants. Replace the solenoid with the new one by carefully aligning and gently tightening the screws. (5) Attach the wiring harness to the solenoid and connector P6 of the PC-322 Main Board Assembly. (6) Reassemble the module. (7) Test your scanner to enusre proper operation. 5.1.
Model 9116 User’s Manual Measurement Specialties Inc. 5.1.6.1 DH200 Pressure Transducer O-Ring Replacement Please note that the DH200 O-rings are used for static seals only. They will typically not require replacement unless exposed to improper liquid media (which will also damage other 9116 components). Following is a step-by-step procedure to replace a DH200 O-Ring should it be required: (1) Disassemble the module as described in Section 5.1.2.
Model 9116 User’s Manual Measurement Specialties Inc. 5.1.6.2 Tubing Plate O-Ring Replacement The following is a step-by-step procedure to replace Tubing Plate O-rings in a Model 9116 Intelligent Pressure Scanner. (1) Disassemble the module as described in Section 5.1.2. (2) Place the scanner with the tubing plate on a clean, lint free surface. (3) Hold the top plate/calibration valve assembly with one hand, supporting the bottom assembly to prevent dropping when all screws are removed.
Measurement Specialties Inc. 5.1.6.3 Model 9116 User’s Manual Adapter Plate O-Ring Replacement Following is a step-by-step procedure to replace Adapter plate O-rings in a Model 9116 Intelligent Pressure Scanner. The adapter plate is located opposite of the tubing plate on the calibration manifold. All DH200 transducers are attached to the adapter plate. (1) Disassemble the module as described in Section 5.1.2. (2) Remove the PC-327 Analog board as described in Section 5.1.3.1.
Measurement Specialties Inc. 5.1.6.4 Model 9116 User’s Manual Calibration Manifold Piston O-Ring Replacement Following is a step-by-step procedure to replace Calibration Manifold O-rings in a Model 9116 Intelligent Pressure Scanner. There are eight (8) pistons, each with an O-ring, inside the calibration valve housing; one (1) on each end of the housing, and three (3) on each side of the calibration valve itself. (1) Disassemble the module as described in Section 5.1.2.
Model 9116 User’s Manual Measurement Specialties Inc. 5.1.6.5 Solenoid Valve O-Ring Replacement Following is a step-by-step procedure to replace the internal solenoid valve O-rings in a Model 9116 Intelligent Pressure Scanner. The module contains two internal solenoid valves. (1) Disassemble the module as described in Section 5.1.2. (2) Remove the solenoid valve by unscrewing the two (2) Phillips-head screws on top of the solenoid. Gently lift it out of the module.
Measurement Specialties Inc. 5.2 Model 9116 User’s Manual Upgrading Module Firmware All Model 9116 Intelligent Pressure Scanner modules contain electronically re-programmable memory devices that store the module firmware. MEAS will provide new releases of module firmware for enhanced instrument performance whenever updates or modifications are made. All scanner modules may have their firmware downloaded via their Ethernet Host Port.
Measurement Specialties Inc. Model 9116 User’s Manual Chapter 6 Troubleshooting Guide 6.1 Ethernet Module Troubleshooting 6.1.1 Checking Module Power-Up Sequence (1) Proper power to the module should first be verified. If possible, verify that the output of the module power supply is set within the range of 18-36 VDC. This should be nominally set for 24 VDC. Ensure the power supply setting is high enough to compensate for cable voltage drops if long interface cable lengths are used.
Measurement Specialties Inc. Model 9116 User’s Manual CAL LED should remain OFF PRG LED should remain OFF Busy (BSY) LED will illuminate upon power-up. This LED will remain illuminated, only briefly blinking during the boot and self-check sequence. This sequence will last approximately 30 seconds, after which, the LED will be OFF. Subsequent activity of this LED indicates response of the unit to commands.
Measurement Specialties Inc. Model 9116 User’s Manual If the user wishes to manually change the factory set IP address in a module, it may be done with the NUSS application program (described more fully in Section 6.1.2.2). To use it for this purpose, select the desired module on the application’s screen map (left window), then press (click) the right-mouse button to get the module’s pop-up context menu. From the NUSS menu, select Configure, Network Options.
Measurement Specialties Inc. Model 9116 User’s Manual Activate the Windows® control bar (left click the START icon). Select the SETTINGS line followed by the CONTROL PANEL folder. In the CONTROL PANEL folder, select the NETWORK icon. Once in the NETWORK setup, select the tab labeled CONFIGURATION. Scroll through the list of installed configuration protocols. Select the one labeled ‘TCP/IP>xxxx’ where xxxx will typically identify your Ethernet adapter card.
Measurement Specialties Inc. Model 9116 User’s Manual If the ping test of the host computer’s IP passed, while the ping of the Model 9116 module failed, check the following possible sources for error: ● Ensure the Model 9116 module’s IP has been assigned (as explained in Section 6.1.2.1) and that the correct IP was used for the ping test. ● Ensure the IP address of the host computer and the Model 9116 module are not duplicated on the network.
Measurement Specialties Inc. Model 9116 User’s Manual ● The Re-Zero calibration command (Calculate & Set Offsets) will automatically shift the calibration valve unless the option is disabled with the Set Operating Options (‘w’) command. The valve will be placed in the CAL position (with a small delay) before taking Re-zero data. Afterwards, the valve will be placed in the RUN position. ● Zero (offset) and Span (gain) correction terms are not automatically saved in transducer nonvolatile memory.
Measurement Specialties Inc. Model 9116 User’s Manual Chapter 7 Start-up Software 7.1 Introduction The NetScanner™ System Unified Startup Software (NUSS) allows you to operate, from a Windows®-based host PC, a diverse network of pressure scanner modules and/or standard/calibrator modules of the NetScanner™ System type. The NetScanner™ System, for which NUSS was designed, is a distributed Ethernet network (using TCP/UDP/IP protocols) that functions as a precision pressure data acquisition system.
Model 9116 User’s Manual Measurement Specialties Inc.
Model 9116 User’s Manual Measurement Specialties Inc. Appendix B Model 9116 Response Error Codes CODE Page 126 MEANING 00 (Unused) 01 Undefined Command Received 02 Unused (by TCP/IP) 03 Input Buffer Overrun 04 Invalid ASCII Character Received 05 Data Field Error 06 Unused (by TCP/IP) 07 Specified Limits Invalid 08 NetScanner™ System error - Invalid Parameter 09 Insufficient source air to shift calibration valve 0A Calibration valve not in requested position www.MEAS-SPEC.
Measurement Specialties Inc. Model 9116 User’s Manual Appendix C Cable Diagrams Page 127 www.MEAS-SPEC.
Measurement Specialties Inc. Page 128 Model 9116 User’s Manual www.MEAS-SPEC.
Measurement Specialties Inc. Model 9116 User’s Manual Appendix D 9116 Mounting Dimensions Page 129 www.MEAS-SPEC.
Model 9116 User’s Manual Measurement Specialties Inc. Appendix E Model 9116 Range Codes The following range codes are stored in each DH200 pressure transducer. The range code of each transducer can be read through the Read Internal Coefficient (‘u’) command. Standard Range Codes are shown in Bold and Italics. Page 130 Range Code Full Scale Pressure Minimum Calibration Pressure 1 0.360 psi (10" Water Column) -0.360 psig 2 0.720 psi (20" Water Column) -0.720 psig 3 1 psid -1.0 psig 4 2.
Measurement Specialties Inc. Page 131 Model 9116 User’s Manual www.MEAS-SPEC.
Model 9116 User’s Manual Measurement Specialties Inc. Page 132 Range Code Full Scale Pressure Minimum Calibration Pressure 23 15 psid -10 psig 24 5 psia 0 psig 25 10 psia 0 psig 26 30 psia 0 psig 27 50 psia 0 psig 28 100 psia 0 psig 29 100 psia 2.5 psia 30 250 psia 25 psia 31 50 psia 2.5 psia 32 500 psia 25 psia 33 750 psia 25 psia 34 30 psia 2.5 psia 35 15 psia 2.
Measurement Specialties Inc. Model 9116 User’s Manual Appendix F NetScanner™ System Products Model Purpose 9116 9022 16-channel Intelligent Pressure Scanner with Ethernet TCP/IP Host Port. 12-channel splash-proof, ruggedized Media-Isolated Intelligent Pressure Scanner with Ethernet Host Port. Pressure Standard Unit with Ethernet TCP/IP Host Port. Pressure Calibrator Unit with Ethernet TCP/IP Host Port.
Model 9116 User’s Manual Measurement Specialties Inc.