User Manual Firmware V2
INDEX page 1 Index page 2 Introduction page 3 Unpacking / Contents / General Overview page 4 Installing a Hard Drive page 5 Connections page 6 Connections continued / Power Up & Standby page 7 TV Output / Screen Calibration page 8 Formatting the Hard Drive page 9 Audio Settings / USB Connection to PC / Windows 8 page10 Remote Functionality page11 USB Keyboard / Wired Network page12 My Shortcuts (Password protected shares) page13 USB WiFi Dongle / PCIE WiFi page14 Wireless Setup
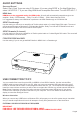
Thank you for purchasing the Mede8er Multimedia Player. The Mede8er has some very unique features so we suggest you read this guide and visit the Mede8er forum for additional help and information. The firmware is always “work in progress” so we suggest you regularly check the Mede8er forum for updated firmware releases and updated User Manuals. Please check the Mede8er forum for the latest user guide. www.mede8erforum.
UNPACKING / CONTENTS Contents: - MED800X3D, Black X3D Remote, AC/ DC Adapter 2 Pin Euro, USB3.0 Cable, HDMI 1.4 Cable, AV Cable, Spare X3D remote side buttons.
Make sure that the DC cable is unplugged. Turn the Mede8er upside down and unscrew the hard drive cover screws x and y. Lift the hard drive cover and remove it, place it on a flat surface with the mounting tabs facing upright. Fit a compatible SATA hard drive into place with the label facing upwards and the connectors facing the side with the air vents. Secure the hard drive with the four screws provided.
CONNECTIONS Analogue Audio and Composite Video connection to TV. Composite Video offers the most basic picture quality connection and should only be used if your TV does not have a HDMI or Component input. Use RCA analogue audio outputs in the absence of HDMI or Digital Audio inputs on your TV or Home Theatre system. RCA analogue outputs will output a downmix from mutlichannel to stereo.
CONNECTIONS CONTINUED Component Video Connection to Amp or TV Component Video offers the next best picture quality to HDMI so if your system does not have a HDMI input we suggest you use the Component Video Connection. Pr Pb Y POWER UP AND STANDBY Plug the AC/DC adapter into the mains outlet and plug the DC Jack into the DC IN at the rear of the MED800X3D. DO NOT USE ANY AC/DC ADAPTER AND ONLY USE THE ONE SUPPLIED otherwise you may cause damage to the unit.
TV OUTPUT SETTINGS If you do not get to see the X3D GUI on your TV you will need to toggle the X3D TV output until you get a picture. TV SYS Toggle Procedure The X3D has three video output options ie Composite Video (yellow RCA connector, Component Video (Red - Green- Blue connectors) and HDMI. Each output option offers different screen resolution settings and these will need to be adjusted to match the type of TV used. It is suggested to use the Setup Menu to change the TV Out resolution.
FORMATTING THE HARD DRIVE The X3D has a built in Hard Drive format feature that formats the internal hard drive. Once the Hard Drive is formatted in the X3D it will have one main NTFS partition. (Firmware V2) The Hard Drive should be formatted in the X3D for best sector alignment. A pre formatted NTFS or MAC HFS+ Hard Drive can be used. To Format the internal Hard Drive select Setup Menu and then HDD Format. The Hard Drive format function can be protected by the built in “Pin Code Lock” function.
AUDIO SETTINGS Surround Sound Select “Don’t Care” if you are using 2 CH stereo. If you are using SPDIF or Co-Axial Digital then select “AC3/DTS 5.1". If you are using HDMI Audio to amplifier then select “True HD DTS-HD 7.1” HDMI Auto HDMI Auto is the suggested setting for HDMI Audio. All audio will automatically passed through to the amplifier - Dolby / DTS Bitstream - Dolby True HD / DTSMA - PCM / Multi-Channel LPCM.
REMOTE FUNCTIONALITY Audio Mute Favourites Shortcut button A-B Setup DVD Angle LED On / Off TV System θ Media Library ‘Devices Page’ Shortcut Numbers Repeat Shuffle Fast Forward / Rewind Video Slow Volume Up/Down Learn Function Button Play / Pause Home Page Active Backlight Stop Return Navigation Up Navigation Right - Search Bar - Video File Navigation Enter Navigation Down Info Screen / Movie Sheet (about.
USB Keyboard Function Keys (based on MEDX2KEY) Optional Extra TM Back Light Play/ Pause Return Enter Info/ About ESC: RETURN SPACE: PLAY ENTER: SELECT(ENTER) '0': 0 '1': 1 '2': 2 '3': 3 '4': 4 '5': 5 '6': 6 '7': 7 '8': 8 '9': 9 '-': VOL_DOWN '+': VOL_UP 'P' + 'SHIFT' : POWER OFF 'R(r)': REPEAT 'T(t)': SUBTITLE 'I(i)': INFO 'A(a)': AUDIO 'G(g)': GOTO 'H(h)': HOME 'Z(z)': ZOOM '/(?)': Info / About ‘’Ctrl’ : ZOOM YouTube, Internet Browser ',(<)': FRWD '.
SAMBA (Network Setup) If your PC or NAS has Share’s setup to specific users then you will need to setup a shortcut on the X3D to each User Share and specify the IP, Username and Password Setting up Samba shortcuts on the X3D Select ‘Network’ and then select the ‘My_Shortcuts’ icon. Now press the ‘Menu’ button and select ‘Add New Shortcut’.
WIRELESS NETWORK SETUP (basic) The Mede8er MED800X3D is only compatible with the Mede8er Wireless Dongle MED10WFB USB WiFI Dongle / MED20PCIe PCIe WiFi Kit. (Other brands will not work) Refer to User Instructions supplied with the Mede8er dongle for detailed wireless connection setup. Only use model MED10WFB WiFi Dongle as it is supplied together with the USB extension cable base. WIRELESS NETWORK CONNECTION Plug the MED10WFB into the USB extension base that was supplied with your Mede8er.
WIRELESS SETUP Open Setup Menu then ‘Wireless Setup’ and you should see a list of available SSID’s with signal strength info. Press the ‘Zoom button to refresh the list. Select the SSID you want to connect to and press ‘Enter’ If the WiFi Router has password protection enabled then you will be required to enter the security key of your WiFi router. Enter the key int the virtual keyboard. Select DHCP IP (AUTO) if you want your router to assign a dynamic IP address to the X3D.
FIRMWARE UPDATE Download the latest X3D Firmware from www.mede8erforum.com. UnZIP or UnRAR or join with HJ Split and will find a file named install.img. Copy this file to the root directory of a Flash Drive. Plug the USB Flash drive into one of the USB Host Ports on the X3D. DO NOT REMOVE POWER DURING THE EMERGENCY RECOVERY PROCEDURE. Setup Menu Update with Auto Configuration Restore Open the Setup Menu and select the “Misc” tab. Now select USB upgrade option.
HOME NETWORK SAMBA SERVER The X3D has NAS (Network Attached Storage) functionality built in. And although it is limited in transfer speed compared to standalone NAS servers it performs well if speed is not your major requirement. You can also use the X3D as a Media Server and stream content to other Mede8er’s on your home network. The Samba function is enabled or disabled in the ‘Network’ menu under ‘Samba Process’.
HOME PAGE The X3 Home Page is the central point where you can launch all the user applications. Press the Right/Left/Up/Down Navigation buttons on the remote to navigate the Home Page and press “Enter” to launch the selected page. FAVOURITES Create, manage, apply Genre cover art to local and network folder shortcuts.
MEDIA LIBRARY CONTINUED To change the View of the Media Library press the “View” button on the remote and the View Icons will show. Press the ‘View’ button again and the focus will change to the next View Icon. Repeat pressing the ‘View’ button until the icon you require is selected and then after a short pause the on-screen View will be updated.
Page19
ADDING CUSTOM BACKDROPS AND SKINS You can customise your X3D by adding your own backdrop image. Prepare the jpg image to size 1280 x 720 pixels with max size 500KB. In the X3D Media Library navigate to the image and press the ‘Menu’ button. Select the option ‘Set to Background’ and the X3D will load your new backdrop into flash memory and use it as its default background.
Page21
MOVIE JUKEBOX - XML SEARCH FUNCTION The X3D has a built in XML Search facility that will allow you to sort and arrange your Movie Collection by pre defined xml filters. The XML Search can be used with content on the internal Hard Drive, external USB Hard Drives, Samba and NFS Network shares. Library Preparation for XML Search operation The Media Library must conform to the Mede8er standard with all the relevant movie file information in it’s own folder. A typical folder will contain - Video File - Folder.
JukeBox View In the Setup menu under ‘Misc Options’ you can select JukeBox View -- on/off JukeBox View ‘off’ - Favourite Links to a Jukebox will be presented in a normal structure and you can navigate the scanned Folders and Sub Folders folder as you normally would in the Media Library. JukeBox View ‘on’ - Favourite Links to Jukebox will be presented in JukeBox View ie 16 Covers in a flat display. The internal folder structure of the folders will be ignored.
MEDIA LIBRARY - MUSIC PLAYER Select any supported music file and the Music Player Screen will launch. If the music file has embedded information tags and images then these will be displayed on the right hand side in the preview window area. If you do not want to use embedded mp3 art or you are using .m4a, ape or flac files you can save the Album Cover as a jpg file named ‘folder.jpg’ to the Music Album Folder. The X3D will use the ‘folder.jpg’ it if it does not find any embedded art in the music files.
MUSIC JUKEBOX The X3D Jukebox relies on the embedded Music files 'Tag' information and correct image sizing for its functionality, so it is critical that you spend the time to correctly Tag your music collection. Music Jukebox Features Direct MP3 Scan * Supports Mp3, OGG, Monkey's Audio, Flac, AAC, wma, m4a -- when scanned with Tagscanner * Works on local drives and Network shares * Displays Tag information in the Music Player Screensaver with Album Artwork * Supports .
MUSIC JUKEBOX - Continued Root of Collection The 'Root' of the music collection is the folder that will be scanned and linked to the Favourites Page The music collection 'Root' will contain the Tracklist.xml (if used), Music.db and m3u files eg Music Collection <------------------ Root Folder Music Collection/Music Folder1 Music Collection/Music Folder2 Music Collection/Music Folder3 etc Music Collection/TrackList.xml Music Collection/Music.db Music Collection/Playlist1.m3u Music Collection/Playlist2.
MUSIC JUKEBOX - Continued Arranging your collection Your collection can be located on your local Hard Drive, USB Drive or Network Share. The advantage of using a Network share is that you can access one central collection with multiple Mede8er's thus making it ideal for a Multi-Room setup. If you have a big music collection it makes sense to split it up into main categories.
MUSIC JUKEBOX - Continued Saved Playlists 'Saved Play List' is a easy way to make a Playlist via the GUI and save it so that it can be played at any time. Focus on a Album or Track in the order you want them saved and press the 'Green' button on the Remote Control and the QPL icon will be added to the Album or Track. To remove a QPL just focus on the Album or Track and press the 'Green' button and the QPL icon will be removed.
COVER ART PREVIEW IN MEDIA LIBRARY The X3D has a built in facility to preview cover art and display it in the Thumbnail or Preview View. To use this functionality you need to arrange your collection with each video in its own folder and copy a jpeg image named ‘folder.jpg’ size 160 x 237 pixels to each folder. You can download Movie / DVD cover art directly from the Internet or can use a free program like YAMJ to Mede8er. Y2M will additionally make the movie sheet image named ‘about.
PLAY FOLDER X3D allows you to play a video file within a folder without the need to open the folder. Just focus on the folder and press the ‘Play’ button. The first video file found in the folder will be played. The folder play will only work with video files. PLAY VIDEO FROM COVER ART With the X3D you can play the video directly from the cover art. Zoom the about.jpg by pressing the ‘Info’ button and then press ‘Play’ or ‘Enter’ to play the video.
LOCK FACILITY X3 has a built in Lock facility designed to restrict access. Pin Protection - Hard Drive Format / File Manager. Folder Protection - User Folders You can enable or disable these options in the Setup menu CHANGE PIN CODE - The default 4 digit Pin Code is 0000 To change the Pin Code go to Setup -- Misc -- Password -- You will be prompted to enter the existing pin code. For first time use you must enter the default factory pin ‘0000' and then the Pin Code change screen will open.
FAVOURITES MANAGER The X3D is equipped with a desktop function called Favourites. The Favourite screen is a list of ‘Shortcuts’ created by the user. The Favourite Link will work as a shortcut link to shared folders on the internal Hard Drive, USB Drives, Samba and NFS Network Shares. The X3D will show all the shortcut links on the Favourite screen. You can add or remove a Favourite Link at any time.
ADDING GENRE ARTWORK TO FAVOURITES Genre thumbnail artwork can be applied to a Favourite link. To add the cover artwork, focus on the Favourite thumbnail and press the “Menu” button on the remote control. The menu dialogue screen will open and select the “Genre” option. A new screen will open with a thumbnail view of Genre cover options. Navigate to the cover you require and press the “Enter” button to make your selection. You can also use the Alpha Jump facility to jump to covers.
JUKEBOX + (Aggregated JukeBox) JukeBox + allows you to Aggregate your Movie JukeBoxe’s across different sources such as internal Hard Drive, USB Drives and Network shares both Samba and NFS. There is no limitation to the amount of Movie JukeBox's that can be added to JukeBox Plus and just remember that the source shares must have the required Mede8er folder structure with the correct images and xml files.
VIDEO INFO SEARCH The Info Search allows you to easily jump to any part of the video. While viewing a Video File press the Left/Right Navigation button and the Info Screen will appear on the top of the screen. Now press the Left/Right Nav and a red bar will move left or right and with the corresponding Time position displayed in number text on the left side. Once you have reached the time search you require juts press the “Enter” button and the X3D will jump to the time you selected in the Video.
3D MENUS The X3D supports 3D BSISO, Side by Side, Top & Bottom, Frame Sequential, Frame Packing (3D BDISO Menus are not supported). Enable 3D playback on your TV. Select a 3D Video and Play it and then press the Menu button on the X3D remote for more 3D setting options. You can force the X3D to play a 3D file automatically in 3D by adding some extra characters to the file name. eg file_name.TB.mkv or file_name.SBS.mkv In this case the X3D will open the file and select ‘TB’ or ‘SBS’ automatically.
SUBTITLES X3 supports various types of subtitle files. If the subtitle is embedded into the video file it will automatically be available on the Subtitle Dialogue Screen. External Subtitles must be placed into the same folder as the video file and must be named to be exactly the same name as the video file eg Cloudy.With.A.Chance.Of.Meatballs.2009.720p.mkv Cloudy.With.A.Chance.Of.Meatballs.2009.720p.srt Cloudy.With.A.Chance.Of.Meatballs.2009.720p - NL.srt Cloudy.With.A.Chance.Of.Meatballs.2009.720p - ENG.
MUSIC PLAYLISTS To make music .M3u playlists on your X3D follow the steps in FILE MANAGER - MULTIPLE FILES section and select the playlists option. Only individual tracks can be added to a music playlist. FILE MANAGER NTFS Check/Fix - Before you perform any File Manager functions it is suggested to use the built in NTFS check/ fix functionality. Open the ‘Devices’ screen and press ‘F1' button on the remote and select a Drive to check/fix. X3D will scan and fix the NTFS drive.
FILE MANAGER - MULTIPLE FILES To Copy, Delete, Move or Rename multiple files just press the “Edit” button on the remote control while you are in Media Library view. Select “Multiple Select” and a new dialogue screen will open. Navigate to the files or folders on the left screen “A”. Press the “Play/Pause” button to select and add the files to the File List “B”. A A B B Once you have completed selecting the files or folders in ‘A’ then press the “Right Navigation” button. The focus will change to “B”.
PICTURES Press the “View” button on the remote and the Icon strip will light up. Now select the Picture Icon. The page will re-arrange into a image grid that is optimized for image thumbnail viewing. The X3D supports full Slideshow functions and you must enable the ‘Slideshow’ option in the Setup Menu. You can now navigate your pictures as normal and zoom the images to full screen by pressing the “Enter” button on the Remote Control.
‘F2’ = Menu Internet Browser θ TM Back Light Play/ Pause Return Enter Info/ About ‘F3’ = Virtual KeyBoard Internet Browser ‘Ctrl’ = Zoom Internet Browser Page41
NFS (Network File System) By default X3D uses Samba to stream content on a local network and this should be more than sufficient for most users. NFS can be used for higher bittrate streaming from a NAS or PC. On a Windows PC you will require a NFS client to be running on the host PC. The X3D has been tested and verified with HaneWin but other NFS Servers should work equally as well. Download HaneWin at http://www.hanewin.net/nfse.
NET API The Mede8er NET API allows external devices like phones, tablets and pc’s to take control over the X3D for Movies, Music, TV Series and Remote Control functions. The NET API is open to any external developer and you will find Apps for IOS, Andriod and Windows 8 appearing on the App Stores. Check the Mede8er Forum and Website for more information and user guides.
Setup Main Page Menu Language Text Encoding Time DVD Auto-Play Screen Saver MiniKBD Language Keyboard Layout Resume Play Format BD Menu CEC Default Application Reset JukeBox+ Restore Default --------------- Menu Language. Text Encoding for Subtitles. Set the Time / Time Zone and daylight saving. Option for USB DVD drive. If enabled the DVD will Auto Play when inserted. Set the Screen Saver time period and type of Screen Saver. Keyboard Language. Default US English other option for possible future update.
Mede8er_med800x3d_user_30May2013_v0 www.mede8erforum.com www.mede8er.com www.mede8er.eu For more information or support please visit www.mede8er.eu/support/ or call +31(0)10-7142861 during business hours. Europe: IBDL BV. Fermiweg 9-11, 3208KT Spijkenisse, Netherlands. Tel: +31(10)7142861. Trade: sales@mede8er.eu Warranty and support: support@mede8er.eu Sanji Electronics (Pty) Ltd 12 Saddle Drive, Woodmead Office Park, Woodmead, Gauteng, South Africa. Tel: 2711 2028160 Email sales@mede8er.