
User manual


MUSIC JUKEBOX - Continued
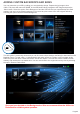
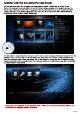
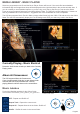
Saved Playlists
'Saved Play List' is a easy way to make a Playlist via the GUI and save it
so that it can be played at any time.
Focus on a Album or Track in the order you want them saved and press
the 'Green' button on the Remote Control and the QPL icon will be added
to the Album or Track. To remove a QPL just focus on the Album or Track
and press the 'Green' button and the QPL icon will be removed.
Once you are happy with your Playlist selection press the 'Menu' button
and the screen will open and you will see a option 'Save Playlist'. Select
this option and a text dialogue screen will open allowing you to rename the
Playlist. The Playlist will be saved to the 'Root' folder of your collection.
To play a saved playlist press the 'Menu' button and select the Playlist
option and all available Playlists will be listed.
Making X3D compatible m3u Playlist with Playlist Creator 3
Download and install Playlist Creator 3 -- Correct Playlist Creator 3 Setup Options
1) Extended Information -- Uncheck the option ' Write extended information’
2) Playlist Details -- Select 'Relative and 'Use Forward Slash instead of back slashes’
3) Make your Playlist and save it to the 'Root' folder of your Music Collection in m3u format.
Album Art on Music Jukebox Screensaver
If you use a folder.jpg image in each folder with max size of 250 x 250 pixel (recommended size is 230 x 230
pixel) it will be used in the Screensaver together with Album Tag information. For normal image manipulation,
correct aspect ratio cropping and resizing of the folder.jpg we suggest a free program called Photoscape.
Add to Jukebox
Mp3 scan only - The Jukebox has a facility that enables you to add Albums to a pre scanned collection. If
you are adding multiple Albums the easiest way would be to make a new folder with a date eg 'new_4July2012'
and copy your new Albums into this folder. Now focus on the new folder 'new_4July2012' and press the 'Menu'
button and select the option 'Add to Jukebox' . The new Albums will be added to the data base.
Tracklist.xml- For Tracklist.xml it is probably a lot easier to just do a re-scan. For those who want the facility
you can follow these instructions. Make a new folder eg 'new' and copy your new Albums into this folder. Open
Tagscanner and browse to this folder 'new' and scan it and then export a Tracklist.xml. Now in the X3D Media
Library navigate to the 'new' folder and focus on it then press the 'Menu' button and select the option 'Add to
Jukebox' . The new Albums will be added to the data base. Now copy the contents of the folder 'new' to the root
folder.
Music Fan Art
Make a Fan Art image 1280 x 720 pixels in jpg format called 'fanart.jpg' and copy it to a Album folder. The image
will then be automatically used as the backdrop when playing the Album.
Shuffle / Random Play
Next/Previous Track function is supported in Shuffle/Random Play mode in the Music Jukebox but you cannot
use Shuffle/Random Play and then try to select some other track to play as it is Data Base driven and the Tag
Info will go out of sequence. If you want to play some other track when in Shuffle/Random Play mode then you
must firstly select the 'All' mode on the Repeat button and then select the Track. Also if you want to change
back to Shuffle/Random Play mode you need to start at Track1 and then select it.
We suggest you visit the Mede8er Website for a more detailed User Guide
Online Version - http://www.mede8er.com/mede8er_music_jukebox_user_guide.html
Page28