
Hardware manual
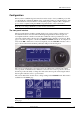
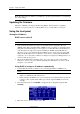

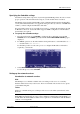
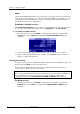
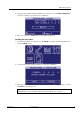
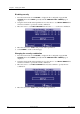


Table Of Contents
- Cover Page
- Contents
- About this guide
- Safety Instructions and safety warnings
- Before you start
- Introduction to NION
- Setting up the NION
- Introduction
- Configuration
- Updating the firmware
- Using the front panel
- Using the web interface
- Using XDAB clusters with VLANs and CobraNet
- Introduction
- Important concepts
- Use cases
- Scenario 1 - Basic network
- Scenario 2 - Network using VLAN
- Scenario 3 - Network with VLAN and analog interconnects
- Scenario 4 - Network with VLAN and digital interconnects
- Scenario 5 - Network with an XDAB cluster
- Scenario 6 - Network with VLAN and XDAB
- Scenario 7 - Network with VLAN and XDAB
- Scenario 8 - Network with VLAN and two XDAB clusters
- Scenario 9 - Network with VLAN and three XDAB clusters
- Setting conductor and XDAB priority in NWare
- Further examples
- Troubleshooting
- Connector ports
- Technical specifications
- Reference Information
- Warranty statement

NION Hardware Manual
May 17, 2011 Version 1.6.2a.0 33
2. Using the wheel and the wheel push button, move the cursor to each NEW COMBO field
and select a number to specify the new combination.
3. Move the selection to APPLY and press the wheel push button.
Locking the front panel
1. From the main menu, move the cursor to the LOCK icon and use the wheel push button to
enter the LOCK screen.
2. Use the wheel and the wheel push button to enter the combination.
3. Move the cursor to LOCK and push the wheel’s push button to engage security, or select
CANCEL to abort the process.
Caution: Once the front panel is locked, it will not be possible to use the functions of the
NION until the correct combination has been entered. There is no back door.