
Hardware manual
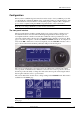


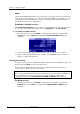
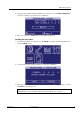
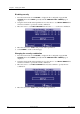


Table Of Contents
- Cover Page
- Contents
- About this guide
- Safety Instructions and safety warnings
- Before you start
- Introduction to NION
- Setting up the NION
- Introduction
- Configuration
- Updating the firmware
- Using the front panel
- Using the web interface
- Using XDAB clusters with VLANs and CobraNet
- Introduction
- Important concepts
- Use cases
- Scenario 1 - Basic network
- Scenario 2 - Network using VLAN
- Scenario 3 - Network with VLAN and analog interconnects
- Scenario 4 - Network with VLAN and digital interconnects
- Scenario 5 - Network with an XDAB cluster
- Scenario 6 - Network with VLAN and XDAB
- Scenario 7 - Network with VLAN and XDAB
- Scenario 8 - Network with VLAN and two XDAB clusters
- Scenario 9 - Network with VLAN and three XDAB clusters
- Setting conductor and XDAB priority in NWare
- Further examples
- Troubleshooting
- Connector ports
- Technical specifications
- Reference Information
- Warranty statement

Chapter 5 - Setting up the NION
36 Version 1.6.2a.0 May 17, 2011
Adjusting the LCD backlight intensity and viewing angle
The LCD CONFIG page allows you to adjust the LCD backlight intensity and the viewing
angle.
The perceived contrast is dependent on the viewing position. For example, a setting that
provides high contrast when viewing the display from the front, may provide an inverted view
when looking at the display from above. Adjust for the best view at the common working
angle.
To adjust the LCD backlight intensity and viewing angle
1. From the main menu, select CONFIG to display the first configuration page, LAN
CONFIG, then select NEXT repeatedly until the LCD CONFIG page is displayed.
2. Use the wheel and push button to select LCD BACKLIGHT.
3. Use the wheel’s rotary control to select the desired value.
The range is 0 (least intense) to 15 (most intense).
4. Use the wheel and push button to select VIEWING ANGLE.
5. Use the wheel’s rotary control to select the desired value.
The range is 10 to 40 with the 20 position providing the highest contrast and color when
viewing the display head on or directly in front.
6. When you are satisfied with the display settings, select NEXT to advance or HOME to
complete the adjustment.