
Operating instructions


21
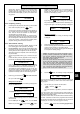
Operating instruction - pages 9 - 23
In this way, you can set the 3 automatic preparation times
one after the other.
The automatic preparation time 2 can be set.
As shown above, the end of an automatic preparation time
can also be before the starting time chronologically. In this
case automatic time period 2 would continue into the follo-
wing day.
If, for example, only one of the three possible automatic pre-
paration times is required, the other periods must be set to
„-- : --” as shown above. This position is reached when
changing from 23:59 to 00:00.
Push and the next menu item 12.12 appears.
Or:
Turn the key back to the „Operator“ position and you will
return to normal machine operation.
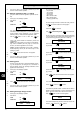
12.12 Setting cleaning time
Set key (9) to the „Manager“ position.
Push for the
c2000 10x
c2000 Plus 11x
Please read the program for daily cleaning 8.2 in section 8.
„Cleaning and care”, page 12.
Values are entered by pushing buttons and
.
The flashing position can be adjusted.
The cursor can be moved to the right with the CC button
and to the left
with the JW button
.
Push for forwards.
Push
while holding down
move backwards.
A time must be set, as the time setting „00:00 h” is also inter-
preted as a cleaning time by the „forced cleaning” function!
Push and the next menu item 12.13 appears.
Or:
Turn the key back to the „Operator“ position and you will
return to normal machine operation.
12.13 Setting current time
Please also see section 9. „Switching off the machine”,
page14.
Set key (9) to the „Manager“ position.
Push for the
c2000 11x
c2000 Plus 12x
Values are entered by pushing buttons and
.
The flashing position can be adjusted.
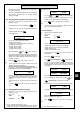
TIME
12:00
h
CLEANING TIME
16:00
h
FAST - TIME 3
fr -- : -- to -- : --
FAST - TIME 2
fr 22 : 00 to 05 : 00
The cursor can be moved to the right with the CC button
and to the left
with the JW button
.
Important: Push in order to store the current set-
ting. The display (1) shows the last position of the main
menu 12.14.
If nothing is to be changed here, turn the key back to the
„Operator“ position to return to normal machine operation.
12.14 Setting current date
Set key (9) to the „Manager“ position.
Push for the
c2000 12x
c2000 Plus 13x
Values are entered by pushing buttons and
.
The flashing position can be adjusted.
The cursor can be moved to the right with the CC button
and to the left
with the JW button
.
After a loss of data the calendar will only start running again
if the current date is set. Otherwise „00.00.0000” will be dis-
played.
Push again in order to store the new setting and you
will return to the beginning of the menu.
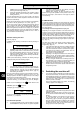
13. Connection and Assembly
All Melitta appliances are supplied ready for connecting. Before in-
stallation, however, the on-site water and electricity supplies should
be made easily accessible within a radius of one metre from the
machine.
These preparations must be carried out by authorized specialists in
accordance with national regulations. The MELITTA Customer
Service Department is not authorized to undertake such work and
cannot accept responsibility for the installation.
The machine may only be installed in places where it can be super-
vised by trained personnel.
The machine must be placed on a solid table top. This table top
may not be cleaned with a water pipe or high-pressure cleaner. An
opening of approx. 160 mm. ø must be provided in the centre below
the machine to allow access to the mains supplies.
DATE
TH. 21.11.2001
DATE
TH. 21.11.2001
GB