
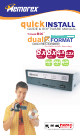
Install guide

Installing your new Memorex DVD Recorder is quite simple. Please follow the instructions
on the next page patiently, step-by-step.
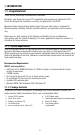
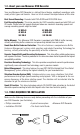
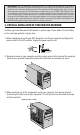
1. Before attempting to install your DVD Recorder, turn off your computer by flipping the
power switch to the OFF position. Unplug the power cord as well.
2. Remove the cover of your computer carefully to allow access to the inside of the computer
(Consult your computer’s operating manual for information on removing the cover.)
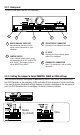
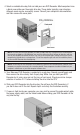
3. Before touching any of the components inside your computer, first ground yourself
by touching the metal case of your computer. This will prevent the unwanted discharge
of static electricity.
PUSH
OFF
11
3. PHYSICAL INSTALLATION OF YOUR NEW DVD RECORDER
Important Note: If you are adding your new Memorex drive to a system already equipped with a DVD-ROM or
high-speed drive that features CS (Check the existing drive’s jumper setting.) You may encounter problems such
as the blue error screen when attempting to record a CD using particular CD recording software. In that case, turn
off the computer, remove the cover, and reposition the jumper switch on your CD-ROM or DVD-ROM drive from
its CS setting to the SLAVE setting. (You may have to reposition the drive to reach the middle SLAVE connector
on the IDE ribbon cable). Leave the Memorex drive’s setting on MASTER and attach the drive to the last (master)
connector on the IDE ribbon cable. If you still encounter problems, try the reverse: change the Memorex drive to
the SLAVE jumper setting attached to the SLAVE IDE connector and make the CD-ROM or DVD-ROM drive the
MASTER with the proper jumper setting and IDE last connector attachment.
Drain any static charge