COMBINATION 13” COLOR TELEVISION AND DVD/CD PLAYER COMBINACION DE 13” TELEVISOR A COLOR CON DVD/DISCOS COMPACTOS MVD2113A ATTENTION ATENCION If you purchase a universal remote control from your local retailer, please contact the remote manufacturer for the required programming code. Si usted a comprado un control remoto universal, por favor comunicace con el fabricante para el codico de programaccion requerido.
ENGLISH CAUTION RISK OF ELECTRIC SHOCK DO NOT OPEN CAUTION: TO REDUCE THE RISK OF ELECTRIC SHOCK, DO NOT REMOVE COVER (OR BACK). NO USER-SERVICEABLE PARTS INSIDE. REFER SERVICING TO QUALIFIED SERVICE PERSONNEL. The lightning flash with arrowhead symbol, within an equilateral triangle is intended to alert the user to the presence of uninsulated dangerous voltage within the product's enclosure that may be of sufficient magnitude to constitute a risk of electric shock.
1. READ INSTRUCTIONS All the safety and operating instructions should be read before the unit is operated. 2. RETAIN INSTRUCTIONS The safety and operating instructions should be retained for future reference. 3. HEED WARNINGS All warnings on the unit and in the operating instructions should be adhered to. 4. FOLLOW INSTRUCTIONS All operating and use instructions should be followed. 5. CLEANING Unplug this unit from the wall outlet before cleaning. Do not use liquid cleaners or aerosol cleaners.
IMPORTANT SAFEGUARDS (Continued) 12. POWER-CORD PROTECTION Power-supply cords should be routed so that they are not likely to be walked on or pinched by items placed upon or against them, paying particular attention to cords at plugs, convenience receptacles, and the point where they exit from the appliance. 13. LIGHTNING To protect your unit from a lightning storm, or when it is left unattended and unused for long periods of time, unplug it from the wall outlet and disconnect the antenna or cable system.
EXAMPLE OF ANTENNA GROUNDING AS PER THE NATIONAL ELECTRICAL CODE ANTENNA LEAD IN WIRE GROUND CLAMP ANTENNA DISCHARGE UNIT (NEC SECTION 810-20) ELECTRIC SERVICE EQUIPMENT GROUNDING CONDUCTORS (NEC SECTION 810-21) GROUND CLAMPS NEC-NATIONAL ELECTRICAL CODE POWER SERVICE GROUNDING ELECTRODE SYSTEM (NEC ART 250, PART H) S2898A CONDENSATION Moisture will form in the operating section of the player if the player is brought from cool surroundings into a warm room or if the temperature of the room rises sudde
Features Color TV With DVD/CD player Unique space saving design combines a 13" color TV and a DVD/CD player. The DVD disc has much more capacity, but is the same size as the audio CD disc. Picture/Audio quality of the DVD exceeds other software. Picture quality is higher than Super VHS. Audio quality is higher than audio CD. The DVD also has special options; audio language selection, subtitle language selection or multi-angle, etc. The DVD PLAYER can play back audio CDs.
Contents IMPORTANT SAFEGUARDS .............................................. 3 Features ............................................................................... 6 Contents ............................................................................... 7 Parts and functions .............................................................. 8 Remote control ..................................................................... 9 Power source ..................................................................
Parts and functions Front Disc tray Power indicator SKIP buttons POWER button Headphones jack AUDIO IN (L/R) jacks Remote sensor VIDEO IN jack OPEN/CLOSE button STOP button VOLUME UP/DOWN buttons PLAY button CHANNEL UP/DOWN buttons Rear RF IN jack UHF/ VHF UHF/ VHF COAXIAL DIGITAL AUDIO OUT jack AC power cord 8 5P20521A [E] P06-11 8 5/12/04, 2:41 PM
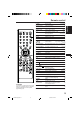
Remote control Page Power On/Off DISPLAY/CALL Call TV information Call DVD information TV/DVD Switch between TV/AV and DVD OPEN/CLOSE Open or Close the tray 0-9 Direct channel selection of TV Input setting Enter a password VOL +/– Adjust volume of TV 14 MUTE Switch off the sound 15 SLEEP Sleep timer CH / Select channel of TV Cursor buttons SELECT/ENTER Enter information in the menu 13,19,20~23,27, 28,30~33,35~43 SETUP/TV MENU TV mode - Display menu of TV 13,17~23 DVD mode - Call up ini
Remote control (Continued) Inserting Batteries 1 2 Open the battery compartment cover in the direction of the arrow. Install two "AAA" batteries (not supplied), paying attention to the polarity diagram in the battery compartment. 3 Replace the compartment cover. Operation • Aim the remote control at the remote sensor and press control buttons to operate. • Operate the remote control within 30° angle on either side of the remote sensor, up to a distance of Approx. 5 meters. Approx.
Antenna connections Combination VHF/UHF antenna (Single 75 ohm cable or 300 ohm twin-lead wire) Connect the 75 ohm cable from the combination VHF/UHF antenna to the antenna jack. If your combination VHF/UHF antenna has a 300 ohm twin-lead wire, the use of the 300-75 ohm matching transformer may be necessary.
Cable TV connections This TV/DVD has an extended tuning range and can tune most cable channels without using a Cable TV converter box. Some cable companies offer “premium pay channels” in which the signal is scrambled. Descrambling these signals for normal viewing requires the use of a descrambler device which is generally provided by the cable company.
Setting the language To turn on the TV/DVD, press POWER. The Power indicator 1 will light. TV MENU in the TV mode. 2 Press The TV menu screen will appear. 3 Press option. or to select CH AB C LANGUAGE/IDIOMA/LANGUE /MENU or to select the 4 Press desired language: English (ENGLISH), Spanish (ESPAÑOL) or French (FRANCAIS), then press ENTER. CH AB C LANGUAGE/IDIOMA/LANGUE / / ENTER/MENU Press TV MENU until the menu 5 screen is cleared.
TV operation turn on the TV/DVD, press 1 To POWER. the volume level by 2 Adjust pressing VOL + or – . The volume level will be indicated on the screen by green bars. As the volume level increases, so do the number of bars. If the volume decreases, the number of green bars also decreases. the TV/CABLE menu 3 Set option to the appropriate position. (See page 17.) VOLUME 32 TV - VHF/UHF channels CABLE - CABLE channels the Direct Channel selection 4 Press buttons to select the channel.
CHANNEL UP/DOWN ENGLISH Press and release CH or . The channel automatically stops at the next channel set into memory. For proper operation, before selecting channels, they should be set into the memory. See pages 17 and 18 “To memorize channels” CALL Press DISPLAY/CALL to display the current information on the screen. Press DISPLAY/CALL again to clear the call display. • Channel number or VIDEO mode • Stereo or SAP (second audio program) audio status • Audio output status STEREO SAP CH 012 SEL.
Closed caption WHAT IS CLOSED CAPTIONING? This television has the capability to decode and display closed captioned television programs. closed captioning will display text on the screen for hearing impaired viewers or it will translate and display text in another language. Captions: This closed caption mode will display text on the screen in English or another language (depending on the setting of the closed captions CH 1/2).
This TV/DVD is equipped with a channel memory feature which allows channels to skip up or down to the next channel set into memory, skipping over unwanted channels. Before selecting channels, they must be programmed into the TV/DVD’s memory. In addition to normal VHF and UHF channels, this TV/DVD can receive up to 113 Cable TV channels. To use this TV/DVD with an antenna, set the TV/CABLE menu option to the TV mode. When shipped from the factory, this menu option is in the CABLE mode.
Memorizing channels (Continued) AUTOMATIC MEMORY TUNING TV MENU in the TV mode. 1 Press The TV menu screen will appear. 2 Press or select option. AB CH CH C CABLE TV/CABLE AUTO CH MEMORY ADD/ DELETE / / / MENU / 3 CH MEMORY”, then press Press or to select the “AUTO . The TV will begin memorizing all the channels available in your area. Press TV MENU until the menu 4 screen is cleared. AB CH C CABLE TV/CABLE AUTO CH MEMORY ADD/ DELETE / / MENU / TO ADD/DELETE CHANNELS TV MENU.
Setting the V-Chip ENGLISH An age limitation can be set to forbid children to see and hear violent scenes or pictures for adults, etc. The unit corresponds to "TV RATING" and "MOVIE RATING". To use the V-Chip function, you must register a password. TO REGISTER PASSWORD Press TV MENU in the TV mode. 1 The TV menu screen will appear. 2 Press or to select option, then press or to select “PASSWORD”.
Setting the V-Chip (continued) TO SET THE V-CHIP SET menu, press 1 In theor V-CHIP to select “ V-CHIP SET”, then press . CH AB C OFF V-CHIP V-CHIP SET CHANGE PASSWORD / Press or to select “TV 2 RATING”, then press or / / MENU CH AB C to display the desired setting.
TO CHANGE PASSWORD 2 Press or to select ENGLISH TV MENU in the TV mode. 1 Press The TV menu screen will appear. option. CH / / / AB C / MENU or to select the Press 3 “PASSWORD”. CH AB C 0-9/ENTER/CANCEL/MENU the Password using Direct 4 Enter Channel Selection (0-9), then press ENTER. If you put a wrong number, press CANCEL. CH AB C V-CHIP SET PASSWORD : 0-9/ENTER/CANCEL/MENU or to select 5 Press “CHANGE PASSWORD”, then press .
Picture control adjustment Picture controls are factory preset but you can adjust them individually as follows: TV MENU in the TV mode. 1 Press The TV menu screen will appear. 2 Press option. or to select CH AB C PICTURE PICTURE PREFERENCE / Press or to select 3 “PICTURE”, then press / / / MENU CH . AB C PICTURE PICTURE PREFERENCE / / MENU / or to select the item 4 Press you want to adjust.
Adjusting the picture preference You can select four picture modes – STANDARD, SPORTS, MOVIE, and MEMORY – as described in the following table: Press 2 option. or ENGLISH TV MENU in the TV mode. 1 Press The TV menu screen will appear. to select CH AB C PICTURE PICTURE PREFERENCE / Press or to select 3 “PICTURE PREFERENCE”, then press . / / MENU CH AB C PICTURE PICTURE PREFERENCE / or to select the 4 Press desired picture mode, then / / MENU CH press ENTER.
Stereo and second audio program (SAP) The TV/DVD is equipped with a feature known as Multi-channel TV Sound or MTS. MTS broadcasts greatly enhance TV viewing by bringing you programs with high fidelity stereo sound. MTS also provides an extra channel called the Second Audio Program or SAP which broadcasters can use to transmit a second language for bilingual transmission or for other purposes.
This unit applies to DVD discs from Region 1 or Region ALL. The loaded Disc (DVD and Audio-CD) will be recognized automatically. The suitable disc formats are: DVD-Video, CD, CD-R/RW and DVD-R/RW (Video format only). Some CD-R/RW discs may be incompatible. Do not play DVD-ROM, DVD-Audio, CDV, CD-G, Video CD or Photo CD to prevent accidental erasure of prerecorded material. This unit does not play MP3/WMA/JPEG files.
Preparation/Status display of disc The following pages describe the setup/operation in DVD mode. Preparation Before DVD/CD operation, please make preparations as follows. the AC cord plug into a standard 120V 60Hz polarized 1 Insert AC outlet. • If the AC cord plug is plugged in for the first time, wait for about 5 seconds before pressing POWER. NOTE: When connecting to other equipment, unplug the unit from the AC outlet. POWER on the unit or on the remote control to turn on 2 Press the unit.
Setting setup language TV/DVD to select 1 Press the DVD mode. No Disc “No Disc” will appear on the screen. (If a DVD disc has already loaded, the playback will start automatically.) SETUP in the stop 2 Press mode. The SETUP MENU ENGLISH You can change the default settings to customize performance to your preference. Language Picture Sound Parental Other of DVD will appear on the screen. Then press to select “Other”. /Enter/Setup/Return or ENTER to 3 Press select “OSD Language”.
Playback procedure TV/DVD to select 1 Press the DVD mode. Press OPEN/CLOSE on the unit or the remote control. The disc tray will open. a disc onto the 2 Place tray. Position it with the printed label side up, align it with the guides, and place it in its proper position. PLAY or OPEN/ 3 Press CLOSE. The disc tray closes automatically. On the screen, changes to “Reading” and then playback will commence.
Special playback Fast Forward Playback Press SEARCH during normal playback. button will increase the speed Each press of the SEARCH of the search (CD: (x 2), (x 2), (x 4), (x 4), (x 8), (x 8), (x 15). (x 20)) • To resume normal playback, press PLAY. Review Playback Press SEARCH during normal playback. Each press of the SEARCH button will increase the speed of the search (x 2), (x 4), (x 8), (x 15). (CD: (x 2), (x 4), (x 8), (x 20)) • To resume normal playback, press PLAY.
Zooming/Locating desired scene Zooming This unit will allow you to zoom in on the frame image. You can then make selections by switching the position of the frame. ZOOM during play1 Press back. 1 The center part of the image will be zoomed in. Each press of ZOOM will 1 change the ZOOM 2 (x 1.5) and (x 1.3), 3 (x 2.0). Press / / / to view a different part of the frame. 2 You may move the frame from the center position to UP, DOWN, LEFT or RIGHT direction.
Repeat playback Title, Chapter, Track Playback DVD ENGLISH 1 Press PLAY MODE during playback or stop mode. CD Repeat : Off /Enter/Play Mode Play Mode : Off Repeat : Off /Enter/Play Mode / or ENTER once or twice to select “Chapter” or “Title”. 2 Press In case of CD, at first press to select “Repeat” and then press / or ENTER once or twice to select “Track” or “All”.
Program playback/Random playback (CD) Program playback You can arrange the order of tracks on the disc. PLAY MODE in the stop 1 Press mode. or to select “Play 2 Press Mode” then press / or Play Mode : Off Repeat : Off /Enter/Play Mode Play Mode Repeat ENTER to select “Program”. 1 2 3 Clear In case you wish to 3 Example: program in order of 7, 3, 11: Enter as 7 ,3 1 7 2 3 3 11 If you input a wrong number, press CANCEL. Clear Press / or / to select 4 “Program Playback” and press ENTER.
Marking desired scenes Marking the Scenes Press MARKER during 1 playback. 2 Select the blank Marker / , then press using ENTER at the desired scene. Marker 1 Marker 2 Marker 3 /Enter/Cancel/Marker ENGLISH The TV/DVD stores the points that you want to watch again. You can resume playback from that scene. Marker 1 00 27 54 Marker 2 Marker 3 /Enter/Cancel/Marker • Up to 3 scenes can be selected. • Repeat this procedure to set the other 2 scenes. 3 Press MARKER to remove this display.
Changing soundtrack language/Subtitles Changing soundtrack language You can select the language when you play a multilingual disc. AUDIO during play1 Press back. 1/8 Eng Dolby Digital The current soundtrack language will appear. AUDIO repeatedly 2 Press until the desired language 2/8 Fra Dolby Digital is selected. The on-screen display will disappear after a few seconds. Subtitles Turning the Subtitles On and Off When playing back a disc recorded with subtitles, you can turn the subtitles on or off.
Changing angles/Title selection/DVD menu When playing back a disc recorded with multi-angle facility, you can change the view angle. ANGLE during play1 Press back. 1/9 The current angle will appear. 2 Press ANGLE repeatedly until the desired angle is selected. Title selection Two or more titles are recorded on some discs. If the title menu is recorded on the disc, you can select the desired title. Press TOP MENU during playback. 1 Title menu appears on the screen.
Setting the aspect ratio of TV screen/Setting on screen display Setting the aspect ratio of TV screen You can select the aspect ratio of the picture. SETUP in the stop mode 1 Press or No Disc. Press or Language Picture Sound Parental Other to select “Picture”. /Enter/Setup/Return 2 Pressor or ENTER, then press to select “Tv Screen”. Language Picture PictureSound Parental Language Parental Other Other Tv Screen Display 4:3 On /Enter/Setup/Return 3 Press Press or ENTER.
Dynamic Range Control TV/DVD to select 1 Press DVD mode. Language Picture Sound Parental Other Press SETUP in the stop mode or No Disc. Press or to select “Sound”. ENGLISH DRC (Dynamic Range Control) enables you to control the dynamic range so as to achieve a suitable sound for your equipment. /Enter/Setup/Return Press or ENTER to se2 lect “DRC”. Language Picture Sound Parental Other DRC On /Enter/Setup/Return 3 Press Press or ENTER. or to select “On” or “Off”.
Parental control setting Some discs are specified not suitable for children. Such discs can be limited not to play back with the unit. 1 Press SETUP in the stop mode or No Disc. or to select Press “Parental”. Then press ENTER. Language Picture Sound Parental Other Password Parental Off or 0 9/Cancel /Enter/Setup/Return or to select 2 Press “Parental”, then press or Language Picture Sound Parental Other Password until the level you require appears.
Changing the parental level SETUP in the stop mode 1 Press or No Disc. Password or Parental 0 ENGLISH Press or to select “Parental”. Then press ENTER. Language Picture Sound Parental Other 3 9/Cancel /Enter/Setup/Return 2 Press Direct channel Language Picture Sound Parental Other selection (0-9) to enter the password you have stored. • If you input a wrong number, press CANCEL. Password 1234 Parental 3 0 9/Cancel /Enter/Setup/Return Press ENTER. 3 The rating is now unlocked.
Temporary disabling of rating level by DVD disc Depending on the DVD disc, the disc may try to temporarily cancel the rating level that you have set. It is up to you to decide whether to cancel the rating level or not. a DVD disc and press PLAY 1 Load or OPEN/CLOSE (see page 28). the DVD disc has been designed to temporarily cancel the 2 IfRating level, the screen which follows the “Reading” screen will change, depending on which disc is played.
Setting menu language SETUP in the stop mode. 1 Press or to select Press Language Picture Sound Parental Other ENGLISH You can select the language of the disc menu messages of DVDs. “Language”. /Enter/Setup/Return or ENTER. Press 2 Then or to select press Language Picture Sound Parental Other Menu Subtitle Audio “Menu”. English Automatic English /Enter/Setup/Return 3 Press or ENTER. or to select your Press desired language, then press ENTER.
Setting subtitle language The same subtitle language can always be selected even if you replace the disc or turn the power off. SETUP in the stop mode. 1 Press or to select “LanPress Language Picture Sound Parental Other guage” /Enter/Setup/Return 2 Press or ENTER. or Then press “Subtitle”. Language Picture Sound Parental Other to select Menu English Subtitle Automatic Audio English /Enter/Setup/Return 3 Press or ENTER. or to select your Press desired language, then press ENTER.
Setting audio soundtrack language SETUP in the stop mode. 1 Press Press or to select “Language”. Language Picture Sound Parental Other ENGLISH The same audio soundtrack language can always be selected by your unit even if you replace the disc or turn the power off. /Enter/Setup/Return or ENTER. 2 Press or Then press Language Picture Sound Parental Other to select “Audio”. Menu Subtitle Audio English Automatic English /Enter/Setup/Return 3 Press Press or ENTER.
Language code list Enter the appropriate code number for the initial settings “AUDIO”, “SUBTITLE” and/or “MENU LANGUAGE” (see pages 41~43).
Connections to other equipment Using an AV Amplifier with built-in digital surround If you are using an Amplifier with a built-in digital surround as follows, you can enjoy the various audio systems including Dolby Digital Surround audio that sounds just like the movie. Connect an AV amplifier with built-in Dolby Digital decoder, DTS decoder, MPEG decoder or etc as shown below.
Connections to other equipment (Continued) Using the audio/video inputs If you connect the TV/DVD to VCR, camcorder or TV game, you can select by pressing INPUT SELECT. Press INPUT SELECT repeatedly to select the desired mode. “LINE” or TV channel will display on the screen. LINE NOTE: In the DVD mode this key will not operate. 1. To connect the TV/DVD to a VCR Press the INPUT SELECT to select the desired mode to use the TV as a monitor. Operate your VCR as usual.
Most types of television interference can be remedied by adjusting the height and position of the VHF/UHF antenna. Outdoor antennas are recommended for best results. The most common types of television interference are shown below. If one of these symptoms appear when the TV/DVD is connected to a Cable TV system, the disturbance may be caused by the local Cable TV company broadcast. IGNITION Black spots or horizontal streaks may appear, the picture may flutter or drift.
Problems and troubleshooting Use the following check list for troubleshooting when you have problems with your unit. Consult your local dealer or service outlet if problems persist. Be sure all connections are properly made when using with other units. SYMPTOMS POSSIBLE SOLUTIONS PAGE POWER • Make sure the power cord is plugged in. • Try another AC outlet. • Power is off, check fuse or circuit breaker. • Unplug unit, then plug it back in. 10 Poor sound or No sound.
SYMPTOMS POSSIBLE SOLUTIONS PAGE Playback doesn’t start. • No disc is inserted. • The disc may be dirty. Clean up the disc. • The unit cannot play CD-ROMs, etc. 28 25 – No picture. • TV/DVD selector is not set correctly. 26 No sound. • Check the input selector of the amplifier is set properly. • The unit is in the Special playback mode. • Select the correct Audio Output position on AV amplifier. – 29 45 Picture is distorted during CUE or REVIEW. • The picture will be distorted occasionally.
Specifications GENERAL Power supply: Power consumption: Weight: Dimensions: Operating temperature: Operating humidity: TELEVISION Picture tube: Tuner type: Receiving channels: Antenna input: Speaker: Audio output power: DVD/CD player Signal system: Applicable disc: Wow and flutter: Input: Digital audio out: Pickup: ACCESSORIES: AC 120 V 60 Hz Operation: 75 W Stand by: 5 W 24.
Memo ○ ○ ○ ○ ○ ○ ○ ○ ○ ○ ○ ○ ○ ○ ○ ○ ○ ○ ○ ○ ○ ○ ○ ○ ○ ○ ○ ○ ○ ○ ○ ○ ○ ○ ○ ○ ○ ○ ○ ○ ○ ○ ○ ○ ○ ○ ○ ○ ○ ○ ○ ○ ○ ○ ○ ○ ○ ○ ○ ○ ○ ○ ○ ○ ○ ○ ○ ○ ○ ○ ○ ○ ○ ○ ○ ○ ○ ○ ○ ○ ○ ○ ○ ○ ○ ○ ○ ○ ○ ○ ○ ○ ○ ○ ○ ○ ○ ○ ○ ○ ○ ○ ○ ○ ○ ○ ○ ○ ○ ○ ○ ○ ○ ○ ○ ○ ○ ○ ○ ○ ○ ○ ○ ○ ○ ○ ○ ○ ○ ○ ○ ○ ○ ○ ○ ○ ○ ○ ○ ○ ○ ○ ○ ○ ○ ○ ○ ○ ○ ○ ○ ○ ○ ○ ○ ○ ○ ○ ○ ○ ○ ○ ○ ○ ○ ○ ○ ○ ○
Memo ○ ○ ○ ○ ○ ○ ○ ○ ○ ○ ○ ○ ○ ○ ○ ○ ○ ○ ○ ○ ○ ○ ○ ○ ○ ○ ○ ○ ○ ○ ○ ○ ○ ○ ○ ○ ○ ○ ○ ○ ○ ○ ○ ○ ○ ○ ○ ○ ○ ○ ○ ○ ○ ○ ○ ○ ○ ○ ○ ○ ○ ○ ○ ○ ○ ○ ○ ○ ○ ○ ○ ○ ○ ○ ○ ○ ○ ○ ○ ○ ○ ○ ○ ○ ○ ○ ○ ○ ○ ○ ○ ○ ○ ○ ○ ○ ○ ○ ○ ○ ○ ○ ○ ○ ○ ○ ○ ○ ○ ○ ○ ○ ○ ○ ○ ○ ○ ○ ○ ○ ○ ○ ○ ○ ○ ○ ○ ○ ○ ○ ○ ○ ○ ○ ○ ○ ○ ○ ○ ○ ○ ○ ○ ○ ○ ○ ○ ○ ○ ○ ○ ○ ○ ○ ○ ○ ○ ○ ○ ○ ○ ○ ○ ○ ○ ○ ○ ○ ○
from the date of purchase, return it to your nearest Sears Parts & Repair Center, and Sears will repair it free of charge. After 90 days and until one (1) year from the date of purchase, Sears will replace defective parts free of charge. You pay for labor. After 90 days and until two (2) years from the date of purchase, Sears will replace the Picture Tube if it is defective. You pay for labor. This warranty applies only if this (product) is used for private household purposes.
ESPAÑOL PRECAUCION RIESGO DE DESCARGA ELECTRICA NO ABRIR AVISO: PARA REDUCIR EL RIESGO DE DESCARGA ELECTRICA, NO RETIRE LA CUBIERTA (O POSTERIOR). EN EL INTERIOR DEL APARATO NO HAY COMPONENTE ALGUNO QUE PRECISE SERVICIO DE MANTENIMIENTO A CARGO DEL USUARIO. SOLICITE CUALQUIER OPERACION DE MANTENIMIENTO A PERSONAL DE SERVICIO CALIFICADO.
3 5P20521A [S] (02-05) 3 5/12/04, 2:58 PM ESPAÑOL 1. LEA LAS INSTRUCCIONES Antes de usar la unidad, lea detenidamente todas las instrucciones de seguridad y operación. 2. CONSERVE ESTE MANUAL DE INSTRUCCIONES Conserve las instrucciones de seguridad y operación para consultas futuras. 3. RESPETE LAS ADVERTENCIAS Observe estrictamente todas las advertencias impresas en la unidad y las incluidas en el manual de instrucciones. 4. SIGA LAS INSTRUCCIONES Siga todas las instrucciones de operación y uso. 5.
PARA SU SEGURIDAD (CONTINUACION) 12. PROTECCION DEL CABLE DE ALIMENTACION Los cables de alimentación deberán ser tendidos de manera tal que la probabilidad de que sean pisados o aplastados por otros objetos sea mínima. Preste especial atención a las clavijas de los cables, a los receptáculos, y al punto por donde salen del aparato. 13.
EJEMPLO DE CONEXION A TIERRA DE LA ANTENA SEGUN EL CODIGO NACIONAL DE ELECTRICIDAD ALAMBRE DE ENTRADA DE LA ANTENA ABRAZADERA DE TIERRA UNIDAD DE DESCARGA DE LA ANTENA (NEC, SECCION 810-20) EQUIPO DE SERVICIO ELECTRICO CONDUCTORES DE PUESTA A TIERRA (NEC, SECCION 810-21) ABRAZADERAS DE TIERRA NEC - CODIGO NACIONAL DE ELECTRICIDAD S2898A SERVICIO DE ALIMENTACION DE SISTEMA ELECTRODO DE PUESTA A TIERRA (NEC ART 250, PARTE H) CONDENSACION Se condensará humedad en la sección de funcionamiento del tocadis
Caracteristicas TV a Color con Tocadiscos de DVD/CD Diseño único ahorra-espacio que combina un TV a color de 13" con un tocadiscos DVD/CD. El disco DVD tiene mucha más capacidad, pero es del mismo tamaño que los discos compactos de audio. Lacalidad de imagen/audio del DVD supera la calidad de los otros software. La calidad de imagen es mayor quela del Super VHS. La calidad el audio es mayor que la de los discos compactos de audio.
Indice PARA SU SEGURIDAD ....................................................... 3 Caracteristicas ..................................................................... 6 Indice .................................................................................... 7 Partes y sus funciones ......................................................... 8 Control remoto ..................................................................... 9 Fuente de alimentación ......................................................
Partes y sus funciones Delantera Bandeja del disco Indicador POWER Botones de salto (SKIP) Interruptor de alimentación (POWER) Toma de auriculares Tomas AUDIO IN (L/R) Sensor de control remoto Botón de apertura/cierr (OPEN/CLOSE) Toma VIDEO IN Botón parada (STOP) Botones de volumen (VOLUME ▲/▼) Botón reproducción (PLAY) Botones selectores de canal (CHANNEL ▲/▼) Trasera Toma RF IN UHF/ VHF UHF/ VHF Toma COAXIAL DIGITAL AUDIO OUT Cordón de CA 8 5P20521A [S] (06-10) 8 5/12/04, 2:58 PM
Control Remoto Página ATENCIÓN Si adquiere un mando a distancia universal en su distribuidor local, póngase en contacto con el fabricante del mismo para solicitar el código de programación requerido.
Control remoto (Continuacion) Coloque las pilas 1 dos pilas “AAA”, 2 Coloque (on suministradas) prestando Abrir la tapa del compartimento de las pilas siguiendo la dirección de la flecha. 3 Recoloque la tapa del compartimiento. atención a las marcas de polaridad en el compartimiento de las pilas. Funcionamiento • Apunte el mando a distancia al sensor remoto y presione los botones de control para hacer funcionar.
Conexiones de la antena Si usted está utilizando una antena para interiores o exteriores, siga las instrucciones de abajo que correspondan a su sistema de antena. Si está utilizando el servicio de TV cable (CABLE), vea la página 12 para las conexiones de TV cable.
Conexiones de TV cable Este TV/DVD posee amplios límites de sintonización y puede ser sintonizado a la mayoría de los canales de cable sin utilizar una caja convertidora de TV cable. Algunas de las compañías de TV cable ofrecen “canales pagados premiados” en los cuales la señal ha sido codificada. La decodificación de estas señales para la recepción normal requiere el uso de un mecanismo decodificador que lo suministra generalmente la compañía de cable.
Seleccion de idioma en pantalla Puede escoger entre tres idiomas diferentes (inglés, francés y español) para los despliegues en pantalla. encenber el TV/DVD, presione POWER se encenderá el 1 Para indicador Power. Presione ó 3 seleccionar . ESPAÑOL TV MENU en el mode de TV. 2 Presione Aparece la pantalla del menú de la TV. para CH AB C LANGUAGE/IDIOMA/LANGUE /MENU ó para 4 Presione seleccionar el idioma deseada: inglés (ENGLISH), español (ESPAÑOL) o francés (FRANCAIS), luego presione el botón ENTER.
Operacion del TV encender el TV/DVD, 1 Para presione el botón POWER. el nivel de volumen 2 Ajuste presionando el botón + ó – de VOL. El nivel de volumen será indicado en la pantalla por medio de barras verdes y una indicación de número. A medida que el volumen aumenta, se incrementan el número de barras y la indicación de número. Si se reduce el volumen, el número de barras verdes y la indicación de número decrecen. el modo TV/CABLE 3 Ajuste a la posición apropiada. (Ver página 17.
CANNAL / ESPAÑOL Presione y libere CH ó La unidad se detendrá automáticamente en el siguiente canal almacenado en la memoria. Antes de seleccionar canales, éstos deberán ser almacenados en la memoria del televisor. Consulte la sección “Para memorizar canales” en las páginas 17 y 18. LLAMADA Presionar DISPLAY/CALL para ver la información actual en la pantalla. Presionar DISPLAY/CALL nuevamente para que desaparezca esta información.
Subtítulo cerrado ¿QUE ES LA RECEPCION DE TEXTO? Este televisor tiene capacidad para descodificar y mostrar los programas de televisión con emisión de texto. Esta función mostrará el texto en pantalla para los usuarios con problemas de audición o traducirá y mostrará el texto que se encuentre en otra lengua. Leyendas: Este modo de recepción de texto mostrará el texto en pantalla en inglés u otra lengua (dependiendo de la programación CH. 1 ó 2 de recepción de texto).
Para memorizar canales Este TV/DVD está equipado con una función de memorización de canales que permite avanzar o retroceder al siguiente canal almacenado en la memoria, pasando por alto los canales no deseados. Antes de seleccionar canales, éstos deberán ser programados en la memoria del TV/DVD. Además de los canales normales de VHF y UHF, este TV/DVD puede recibir hasta 113 canales de TV cable. Para usar el TV/DVD con una antena, ajuste la opción de menú TV/CABLE al modo “CABLE”.
Para memorizar canales (Continuacion) SINTONIZACION DE MEMORIA AUTOMATICA DE CANAL TV MENU en el mode de TV. 1 Presione Aparece la pantalla del menú de la TV. ó para seleccionar 2 Presione . AB CH CH C CABLE TV/CABLE AUTO CH MEMORY ADD/ DELETE / / / MENU / ó para seleccionar 3 Presione “AUTO CH MEMORY”, a C CABLE TV/CABLE AUTO CH MEMORY ADD/ DELETE / 4 AB CH continuación presione . El TV comenzará a memorizar todos los canales disponibles en su área.
Seleccion Chip-V Puede establecerse una limitación de edad para impedir que los niños vean o escuchen escenas violentas o contenidos para adultos, etc. La unidad se corresponde con "TV RATING" y "MOVIE RATING". Para usar la función V-Chip debe registrar una contraseña. PARA REGISTRE CONTRASEÑA Presionar 2 seleccionar para , luego presione ó para seleccionar “PASSWORD”. ESPAÑOL TV MENU en el mode de TV. 1 Presione Aparece la pantalla del menú de la TV.
Seleccion Chip-V (Continuacion) PARA AJUSTAR EL V-CHIP En el menú V-CHIP SET, 1 presione ó para CH seleccionar “V-CHIP SET”, . a continuación presione NOTAS: • La función V-Chip se activa sólo en los programas y cintas que tienen señal de prohibición. • Si está cambiando los canales utilizando una caja de cable mientras que el TV/DVD está sintonizando en el canal 3 ó 4, el V- Chip funciona de forma diferente.
PARA CAMBIAR LA CONTRASEÑA TV MENU en el mode de TV. 1 Presione Aparece la pantalla del menú de la TV. para CH / 3 / / AB C ESPAÑOL ó 2 Presione . seleccionar / MENU ó para Presione seleccionar “PASSWORD”. CH AB C 0-9/ENTER/CANCEL/MENU la contraseña con los 4 Entre botones de selección directa de canal (0-9) y presione ENTER. Si entra un número de contraseña equivocado, presione CANCEL.
Ajustes de control de imagen Los controles de imagen han sido preajustados en fábrica, pero usted puede reajustarlos individualmente como sigue: TV MENU en el mode de TV. 1 Presione Aparece la pantalla del menú de la TV. 2 Presione ó seleccionar para CH . AB C PICTURE PICTURE PREFERENCE / 3 Presione ó para seleccionar “PICTURE”, a continuación presione / / CH . CH desea ajustar.
Ajuste de la preferencia de imagen Puede elegir entre los cuatro modos de imagen [ STANDARD (Normal), SPORTS (Deportes), MOVIE (Película) y MEMORY (Memoria) ] que se describen en la siguiente tabla: TV MENU en el mode de TV. 1 Presione Aparece la pantalla del menú de la TV. 2 Presione . ó para seleccionar CH AB C / ó para seleccionar Presione 3 “PICTURE PREFERENCE”, a continuación presione .
Segundo programa de sonido (SAP) y estereo El aparato de TV/DVD está equipado con una función conocida como sonido de TV multicanal o MTS. Las transmisiones MTS permiten disfrutar mejor de la TV ya que sus programas tienen un sonido en estéreo de alta fidelidad. MTS también tiene un canal adicional llamado segundo programa de sonido o SAP que los canales de TV pueden utilizar para transmitir un segundo idioma en las transmisiones bilingües o para otros propósitos.
Disco Este aparato sólo funciona con discos DVD de la región 1 ó región ALL. El disco cargado (DVD-Video y CD de audio) se reconocerá automáticamente. Los formatos de disco apropiados son: DVD-Video, CD de audio, CD-R/RW y DVD-R/RW (solo formato vídeo DVD). Algunos discos CD-R/RW pueden ser incompatibles. Título DISCO DVD Cuando hay dos o más películas grabados en un disco, el disco se divide en dos o más secciones. Cada sección se denomina un “TITULO”.
Preparación / Estado del disco En las siguientes páginas se describe la instalación y la operación en modo DVD. Preparación Antes de poner en funcionamiento el DVD/CD, efectúe las siguientes preparaciones. 1 Introduzca el cable de CA en una toma de corriente estándar de CA polarizada de 120 V y 60 Hz. • Si el cable de CA se enchufa por vez primera, espere unos 5 segundos antes de presionar POWER. NOTA: Al conectar a otros equipos, desenchufe la unidad de la toma de CA.
Selección del idioma TV/DVD para 1 Presione seleccionar el modo DVD. No Disc “No Disc” aparecerá en pantalla. (Si el disco DVD ya fue introducido, empezará a correrlo inmediatamente.) SETUP en el 2 Presione modo de parada. El MENÚ Language Picture Sound Parental Other DE AJUSTE de DVD aparecerá en pantalla. Presione para seleccionar “Other”. Presione o ENTER para 3 seleccionar “OSD Language”.
Procedimiento de reproducción TV/DVD para 1 Presione seleccionar el modo DVD. Presione OPEN/CLOSE en el aparato o en el mando a distancia. Se abrirá la bandeja del disco. un disco en la 2 Coloque bandeja. Sujete el disco, colóquelo con el lado de etiqueta impresa hacia arriba, alinee en las guía y coloque el disco en su posición correcta. OPEN/CLOSE 3 Presione o PLAY. La bandeja del disco se cierra automáticamente. En la pantalla del TV la indicación “ ” cambia a “Reading” y empieza la reproducción.
Reproducción especial NOTA: Puede ocurrir una leve demora entre el momento en que presiona el botón y que se active la función. Reproducción con avance rápido Presione SEARCH durante la reproducción normal. , aumentará Cada vez que presione el botón de SEARCH (x2), (x4), (x8), la velocidad de la búsqueda (x15). (CD: (x 2), (x 4), (x 8), (x 20)) Reproducción con retroceso rápido Presione SEARCH durante la reproducción normal.
Zoom / Búsqueda de la escena deseada Zooming (acercamiento) Esta unidad le permitirá hacer acercamientos de la imagen del marco y podrá efectuar selecciones cambiando la posición del marco. ZOOM durante 1 Presione la reproducción. 1 La parte central de la imagen se agranda. Cada vez que presione el ZOOM cambiará el ZOOM 1 (x1,3), 2 (x1,5) y 3 (x2,0). Presione el botón / / / para ver una parte diferente 2 del marco.
Reproducción repetida Reproducción de título, capítulo, canción PLAY MODE durante el modo de reproducción o el 1 Presione parada. DVD Repeat : Off /Enter/Play Mode Play Mode : Off Repeat : Off /Enter/Play Mode / ó ENTER una ó dos veces para seleccionar 2 Presione “Chapter” ó “Title”. primero para seleccionar Si se trata de un CD, presione / ó ENTER una o dos veces “Repeat”, luego presione para seleccionar “Track” ó “All”.
Programacion de reproduccion/Reproducción aleatoria (disco compacto) Programación de reproducción Se puede cambiar el orden de las canciones en el disco. PLAY MODE en el 1 Presione modo de parada. Play Mode : Off Repeat : Off /Enter/Play Mode Presione ó para 2 seleccionar “Play Mode”, luego presione / ó ENTER para seleccionar “Program”. Play Mode Repeat 1 2 3 Clear Si desea programar 3 Ejemplo: en orden 7, 3, 11: Entre como 7 ,3 , 11. Si pone un número equivocado, pulse CANCEL.
Marcación de escenas deseadas Marcación de escenas MARKER 1 Presione durante la reproducción. 2 Seleccionar el Marker en blanco utilizando el botón de / , después presione el botón de ENTER en la escena deseada. • Se pueden seleccionar hasta 3 escenas. • Repita este procedimiento para ajustar las otras 2 escenas. Marker 1 Marker 2 Marker 3 /Enter/Cancel/Marker Marker 1 00 27 54 Marker 2 Marker 3 /Enter/Cancel/Marker ESPAÑOL El aparato memoriza los puntos que desea ver nuevamente.
Cambio del idioma de la pista de sonido / Subtítulos Cambio del idioma de la pista de sonido Se puede seleccionar el idioma cuando reproduce un disco en múltiples idiomas. AUDIO durante 1 Presione la reproducción. 1/8 Eng Dolby Digital Aparecerá el idioma actual de la pista de sonido. AUDIO hasta 2 Presione que quede seleccionado 2/8 Fra Dolby Digital el idioma deseado. El despliegue en pantalla desaparecerá después de unos cuantos segundos.
Cambio de ángulos / Selección de título / Menú DVD Cambio de ángulos Cuando reproduce un disco grabado en múltiples ángulos, puede cambiar el ángulo de visión de la escena. ANGLE durante 1 Presione la reproducción. 1/9 ESPAÑOL Aparecerá el angle actual. ANGLE varias veces hasta que seleccione el 2 Presione angle deseado. Selección de título Hay dos o más títulos grabados en algunos discos. Si se ha grabado el menú de título en el disco, puede seleccionar el título deseado.
Ajuste del formato (relación de aspecto) de la pantalla de la TV / Ajuste de la visualización en pantalla Ajuste del formato (relación de aspecto) de la pantalla de la TV Puede seleccionar el formato de su TV. 1 Presione SETUP en el modo de parada o No Disc. ó para Presione seleccionar “Picture”. Language Picture Sound Parental Other /Enter/Setup/Return 2 Presione ó ENTER, a continuación Presione ó para seleccionar “Tv Screen”.
Control de Gama Dinámica El DRC (Control de Gama Dinámica) le permite controlar la gama dinámica para lograr un sonido conveniente para su equipo. Presione TV/DVD para 1 seleccionar mode de TV. Language Picture Sound Parental Other Presione SETUP en el modo de parada. Presione ó para seleccionar “Sound”. Presione ó ENTER para 2 seleccionar “DRC”. Language Picture Sound Parental Other DRC On /Enter/Setup/Return Presione 3 Presione ó ENTER. ó para seleccionar “On” ó “Off”.
Ajuste de restricciones para menores Algunos discos no son apropiados para los niños. Estos discos pueden limitarse para no reproducirse con la unidad. SETUP en el 1 Presione modo de parada. Language Picture Sound Parental Other Password Presione ó para seleccionar “Parental” y ó ENTER. presione Parental 0 Off 9/Cancel /Enter/Setup/Return Presione ó para 2 seleccionar “Parental” Language Picture Sound Parental Other Password a continuación presione ó hasta que aparezca el nivel que requiera.
Cambio del nivel de restricciones para menores SETUP en el 1 Presione modo de parada o no hay disco. ó para Presione seleccionar Parental y ó ENTER. presione Language Picture Sound Parental Other Password Parental 0 3 9/Cancel los botones de 2 Presionar los números (0-9) para introducir la contraseña que haya almacenado. • Si introduce un número incorrecto, presione CANCEL. ENTER.
Deshabilitación temporal del nivel de rating (clasificación) del disco DVD Dependiendo del disco DVD, el disco puede tratar de cancelar temporalmente el nivel de rating que haya ajustado. Depende de usted si decide cancelar el nivel de la rating o no. el disco DVD y 1 Introduzca presione PLAY o OPEN/CLOSE en la unidad (ver pág. 28).
Selección del idioma del menú Se puede seleccionar el idioma de los mensajes del menú de disco de los DVD. Presione SETUP en el modo de 1 parada o no hay disco. Presione ó “Language”. Language Picture Sound Parental Other para seleccinar ó ENTER y presione 2 Presione ó para seleccionar “Menu”. Language Picture Sound Parental Other Menu Subtitle Audio English Automatic English /Enter/Setup/Return Presione 3 Presione ó ENTER. ó para seleccionar su idioma deseado y presione ENTER.
Selección del idioma de los subtítulos Se puede seleccionar siempre el mismo idioma de subtítulos aunque cambie de disco o desconecte el aparato. SETUP en el modo de 1 Presione parada o no hay disco. Language Picture Sound Parental Other Presione ó para seleccionar “Language”. /Enter/Setup/Return 2 Presione ó ENTER y presione ó para seleccionar “Subtitle”. Language Picture Sound Parental Other Menu English Subtitle Automatic Audio English /Enter/Setup/Return 3 Presione ó ENTER.
Selección del idioma de la pista de sonido de audio Se puede seleccionar el mismo idioma de la pista de sonido de audio incluso aunque cambie de disco o desconecte el aparato. SETUP en el modo de 1 Presione parada o no hay disco. Presione ó “Language”. Language Picture Sound Parental Other para seleccionar /Enter/Setup/Return Language Picture Sound Parental Other Menu Subtitle Audio ESPAÑOL ó ENTER y presione 2 Presione ó para seleccionar “Audio”.
Lista de códigos de idiomas Entre el número de código apropiado para los ajustes iniciales “AUDIO”, “SUBTITLE” y/o “MENU LANGUAGE” (consulte las páginas 41~43).
Conexiones de toma Audio/Video La instalación exacta a utilizar para hacer las conexiones de los distintos componentes de video y audio en el TV depende del modelo y funciones de cada componente. Confirme en el manual de instrucciones de cada componente para la posición de las entradas y salidas de video y de audio.
Conexiones de toma Audio/Video (Continuacion) Cómo utilizar las entradas de audio/video Si conecta el TV/DVD a la videograbadora, cámara de video o juego de video, puede seleccionar presionando INPUT SELECT. Presione repetidamente el botón INPUT SELECT para seleccionar el modo deseado. Aparecerá "LINE" o TV en la pantalla durante 4 segundos. LINE NOTA: Esta botón no funcionará en el modo DVD. 1.
Disturbios de recepcion La mayoría de los tipos de interferencia de televisión pueden ser solucionados ajustando la altura y la posición de la antena de VHF/UHF. Para obtener los mejores resultados se recomiendan las antenas exteriores. Los tipos más comunes de interferencia de televisión están mostrados abajo. Si aparece uno de estos síntomas cuando el TV/DVD está conectado a un sistema de TV cable, el disturbio puede ser causado por la compañía local emisora de TV cable.
Problemas y localización de averías Utilice la siguiente lista de verificación de localización de averías cuando tiene problemas con este aparato. Consulte con su concesionario local o tienda de servicio si continúan los problemas. Compruebe que se han hecho correctamente todas las conexiones cuando utilice con otros aparatos. SINTOMA POSIBLE SOLUCION Página • Verifique que el cable de alimentación está conectado. • Pruebe con otra toma de corriente de CA.
SINTOMA POSIBLE SOLUCION Página No empieza la reproducción. • No hay disco colocado. • El disco puede estar sucio. Limpie el disco. • El aparato no puede reproducir CD-ROM, etc. 28 25 – No hay imagen. • El selector TV/DVD no está ajustado correctamente. 26 – No hay sonido. • Compruebe que el selector de entrada del amplificador está en la posición correcta. • El aparato está en un modo de reproducción especial. • Seleccionar la posición correcta de la Salida de Audio en el amplificador AV.
Especificaciones GENERALIDADES Fuente de alimentación: Consumo de energía: Peso: Dimensiones: Temperatura de operación: Humedad de funcionamiento: TELEVISOR Tubo de imagen: Tipo de sintonizador: Canales de recepción: Entrada de antena: Altavoz: Potencia de salida de audio: Tocadiscos de DVD/Discos compactos Señal de Sistema: Disco utilizable: Variaciones de velocidad: Entradas: Salida de audio digital: Captor: Accesorios: 120V CA, 60 Hz Operation: 75 Vatios Stand by: 5 Vatios 24,3 libras (11 kg) Anchura
Memo ○ ○ ○ ○ ○ ○ ○ ○ ○ ○ ○ ○ ○ ○ ○ ○ ○ ○ ○ ○ ○ ○ ○ ○ ○ ○ ○ ○ ○ ○ ○ ○ ○ ○ ○ ○ ○ ○ ○ ○ ○ ○ ○ ○ ○ ○ ○ ○ ○ ○ ○ ○ ○ ○ ○ ○ ○ ○ ○ ○ ○ ○ ○ ○ ○ ○ ○ ○ ○ ○ ○ ○ ○ ○ ○ ○ ○ ○ ○ ○ ○ ○ ○ ○ ○ ○ ○ ○ ○ ○ ○ ○ ○ ○ ○ ○ ○ ○ ○ ○ ○ ○ ○ ○ ○ ○ ○ ○ ○ ○ ○ ○ ○ ○ ○ ○ ○ ○ ○ ○ ○ ○ ○ ○ ○ ○ ○ ○ ○ ○ ○ ○ ○ ○ ○ ○ ○ ○ ○ ○ ○ ○ ○ ○ ○ ○ ○ ○ ○ ○ ○ ○ ○ ○ ○ ○ ○ ○ ○ ○ ○ ○ ○ ○ ○ ○ ○ ○ ○
Get it fixed, at your home or ours! Your Home For repair - in your home - of all major brand appliances, lawn and garden equipment, or heating and cooling systems, no matter who made it, no matter who sold it! For the replacement parts, accessories and owner s manuals that you need to do-it-yourse l f . For Sears professional installation of home appliances and items like garage door openers and water heaters. 1-800-4-MY-HOME® (1-800-469-4663) Call anytime, day or night (U.S.A. and Canada) www.sears.