INCA 3 TOUCH 4551 G MANUAL DE USO Y MANTENIMIENTO ENCIMERAS ENCASTRABLES OPERATING AND MAINTENANCE INSTRUCTION FOR HOBS LIB30355 ELECTRIC HOBS -1-
DATOS TÉCNICOS MODELOS Tensión Corriente Placa Hi-light 1200 W Placa Hi-light 1700/700 W Potencia máxima (W) Cable de alimentación INCA 3 TOUCH 4551 G 230V 18A 2 1 4100 3x2,5 mm2 1. Montaje (Fig1) La instalación es a cargo del comprador. El Fabricante no tiene la obligación de efectuar dicho servicio. Los servicios requeridos al Fabricante, si derivaran de una instalación incorrecta, no están incluidos en la garantía.
INSTRUCCIONES PARA EL USO Importante: limpiar la encimera antes de cocinar por primera vez. Después, hay que encender todas las placas una a una en vacío, sin ninguna olla apoyada, durante 5 minutos a temperatura máxima. De esta manera se eliminará el olor a nuevo y se evaporará la humedad acumulada en las placas. Esto también es necesario para que los dispositivos electrónicos funcionen perfectamente. ENCIMERA DE VITROCERÁMICA CON MANDOS TÁCTILES (TOUCH CONTROL) 1. Descripción de los mandos (Fig 5) 1.
3. Zonas de cocción de doble circuito (Fig 10) Alguna zona de cocción puede estar dotadas de un segundo circuito: por ejemplo, la zona está compuesta de un disco central y una corona exterior. Es posible encender la zona central sola (fig. A) o ambas zonas (fig. B), lo cual permite adaptar la zona de cocción a la olla utilizada.
LIMPIEZA Y MANTENIMIENTO Algunos consejos para cocinar Use sólo sartenes y ollas con fondo robusto y, a ser posible, grueso, principalmente para las preparaciones con altas temperaturas de cocción, tales como los fritos. Los fondos que cóncavos prolongan el tiempo de preparación y malgastan energía. La mejor transmisión del calor se obtiene cuando la olla y la zona de cocción tienen las mismas dimensiones.
TECHNICAL DATA MODELS Voltage Current Hi-light plate 1200W Hi-light plate 1700/700W Max power (W) Electrical cable INCA 3 TOUCH 4551 G 230V 18A 2 1 4100 3x2,5 mm2 1.Installation (Fig 1) Installation is the buyer’s responsibility. The manufacturer accepts no liability for this service. Any action that the manufacturer has to take due to an erroneous installation will not be covered by the guarantee.
INSTRUCTIONS FOR USE Important: Before cooking with the appliance for the first time, it is important to clean the cook top. Then turn on all the heating elements, one as a time, with no pan on top, for 5 minutes on the maximum temperature setting. This will eliminate to the "new smell" and make any humidity that had accumulated on the heating elements evaporate. This is also essential to ensure that the electronic devices function properly. CERAMIC GLASS COOK TOP WITH TOUCH CONTROLS 1.
3. Dual-circuit burners (fig.10) Two burners can be equipped with a second circuit: for instance, the burner is composed of a central disk and an outer ring. You can turn on both elements (fig. 5) or the central disk alone (fig. 4). This enables you to adapt the heated area to the size of the saucepan you are using. 1.Select the required power setting (from 1 to 9) with the keys “+” e “-“ (5/4).
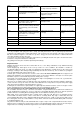
ER22 Key evaluation defective; control unit cuts off after 3.5 – 7.5 sec Short-circuit or discontinuation in the range of the key evaluation Er47 None or faulty communication! Ensure that connection cable is plugged on correctly. Communication error between TC and induction Er31 Configuration data incorrect ER36 NTC value is not within its specification (value < 200mV or > 4.9V; control unit cuts off Secondary operational voltage is min.
This appliance is marked according to the European directive 2002/96/EC on Waste Electrical and Electronic Equipment (WEEE). By ensuring this product is disposed of correctly, you will help prevent potential negative consequences for the environment and human health, which could otherwise be caused by inappropriate waste handling of this product. The symbol on the product indicates that this product may not be treated as household waste.
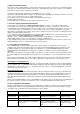
Fig.1 ……………………………………………………………………………………………………………………………… Fig.2 A (ES)Fijación al mueble (GB) Fixing the cook top to the unit B placas a introducir en el fondo de la placa empotrable plates for inserting on the bottom of the cook top estribo de fijación fixing bracket C tornillo screw ……………………………………………………………………………………………………………………………… Fig.3 (ES)Aplicación de la junta (GB)Applying the seal ……………………………………………………………………………………………………………………………… Fig.
……………………………………………………………………………………………………………………………… Fig.5 (ES) Descripción de los mandos (GB) Description of the controls ……………………………………………………………………………………………………………………………… Fig.6 (ES) Encendido y apagado (GB) Turning on and off ……………………………………………………………………………………………………………………………… Fig.7 (ES) Encendido de la zona de cocción (GB) Turning on the burner …………………………………………………………………………………………………………………………… Fig.
……………………………………………………………………………………………………………………………… Fig.10 (ES) Zonas de cocción de doble circuito (GB) Dual-circuit burners ……………………………………………………………………………………………………………………………… Fig.
Franke España S.A.U Poligono Can Magarola C/ Molí de Can Bassa, 2-10 08100 MOLLET del VALLES Barcelona – España Tel: 902 499 498 www.mepamsa.